


Have you ever felt you needed to record a webinar to share with your coworkers? Or do you have your own webinar to record?
Whether you want to learn how to record a webinar for your reference later or share your own webinar with others, this tutorial will show you how it’s done. We’ll go through how to use Snagit and Camtasia so you can record any webinar you want.
This process allows you to record a webinar on a Mac or Windows machine.
So join us, and let’s record!
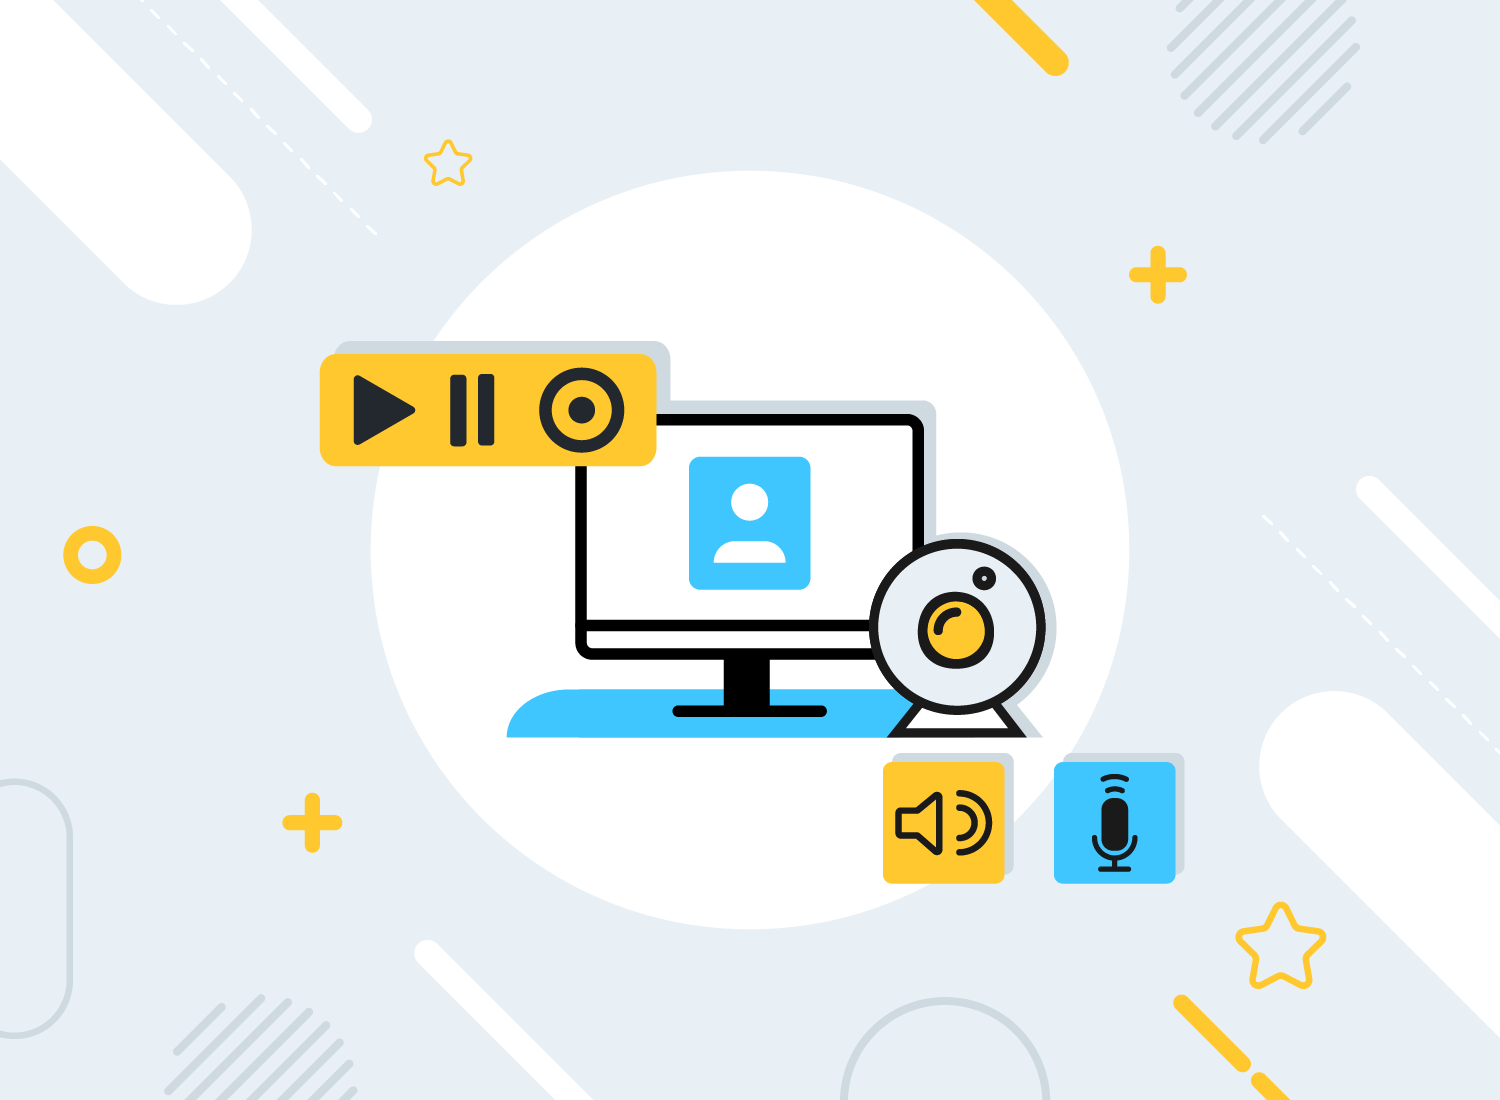
Record your webinar with Snagit
Snagit is a fantastic screen recording tool with easy-to-use features for every skill level. The low learning curve for this tool makes it a winner for every screen recording journey!
Step 1. Download Snagit
Snagit is our favorite screen recorder because of its versatility as an image and video capture software. Plus, basic editing like making cuts, combining videos, and adding effects can come in handy.
Record a Webinar with Snagit
It’s easy to record a webinar with Snagit’s screen recording options.
Download Now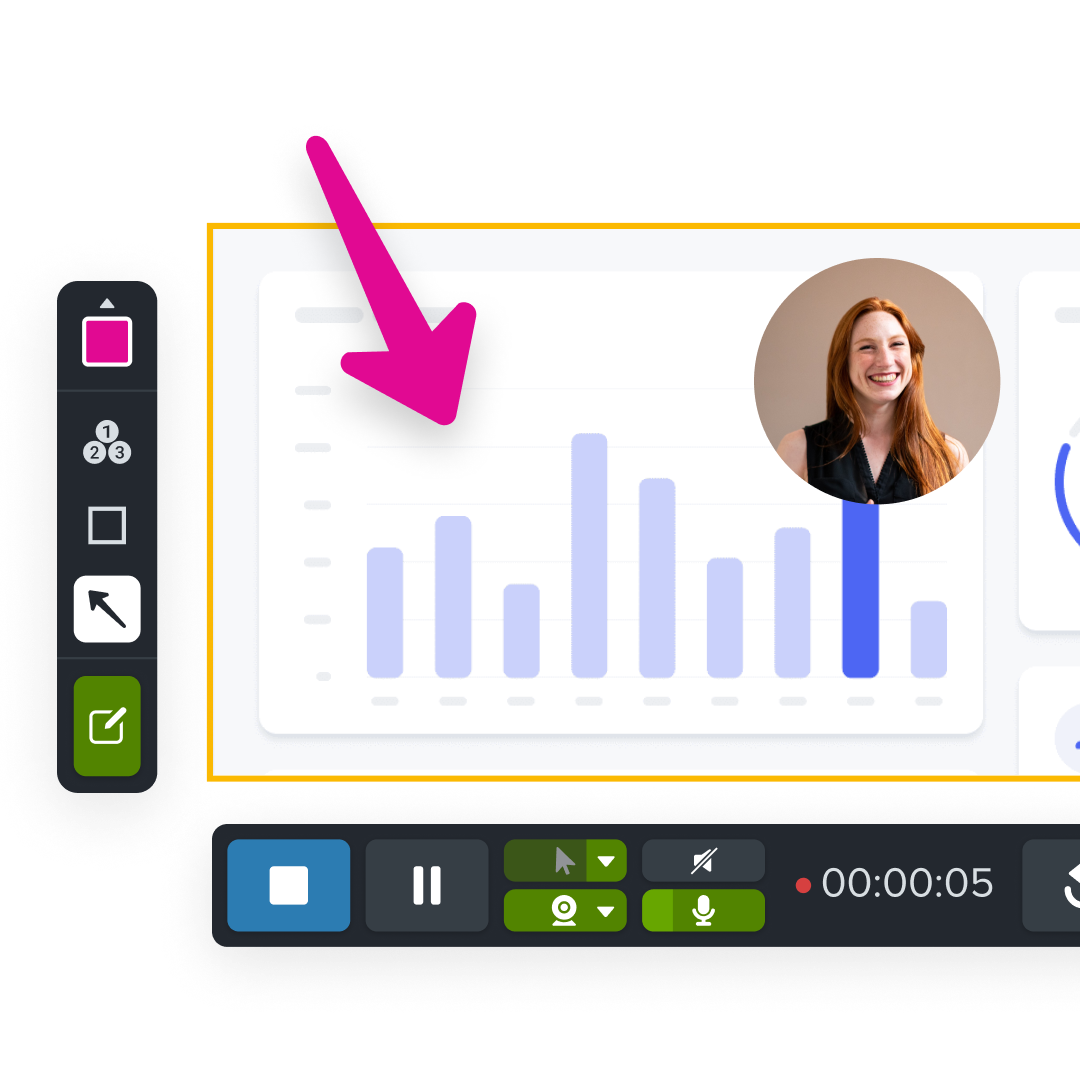
However, if you’re looking for more video editing power, you can also use Camtasia. Then you can make more substantial edits after you’re done recording your webinar.
This guide will help you no matter which tool you choose to use. The recording process is super easy, so let’s dive in!
Step 2. Set up your recording
When you’re ready to start recording, open a browser and navigate to the webinar you’d like to record. Then, in Snagit, select the Video tab.
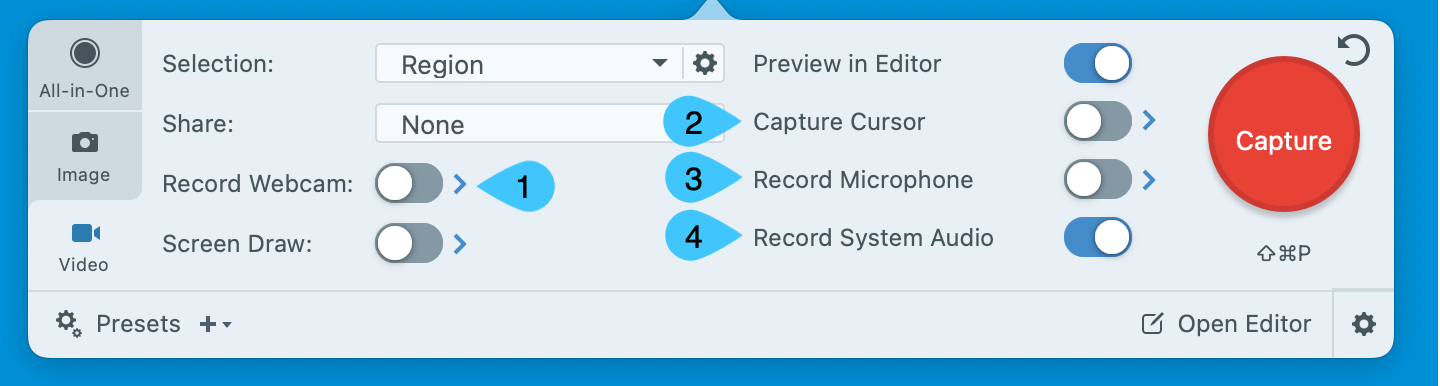
Next, press the red Capture button and use the crosshairs to select the area of your screen you want to record. You can adjust the capture area after drawing your selection using the handles on the edge of the selected area.
Make sure you select everything you want your audience to see. Anything outside the crosshairs will not be visible once you start recording.
To launch the webinar full screen, select your entire screen!
In the video toolbar, make sure that the system audio icon is green, as this means the video will capture the sound from your computer. If it is not green, click the icon to turn the system audio on. (You can also hover your cursor over the button and the tooltip will tell you if system audio is on or off.)
In case you also want to record your voice, make sure the microphone icon is green (enabled) as well. Once both buttons are green, you’re good to go!
Step 3. Record your webinar
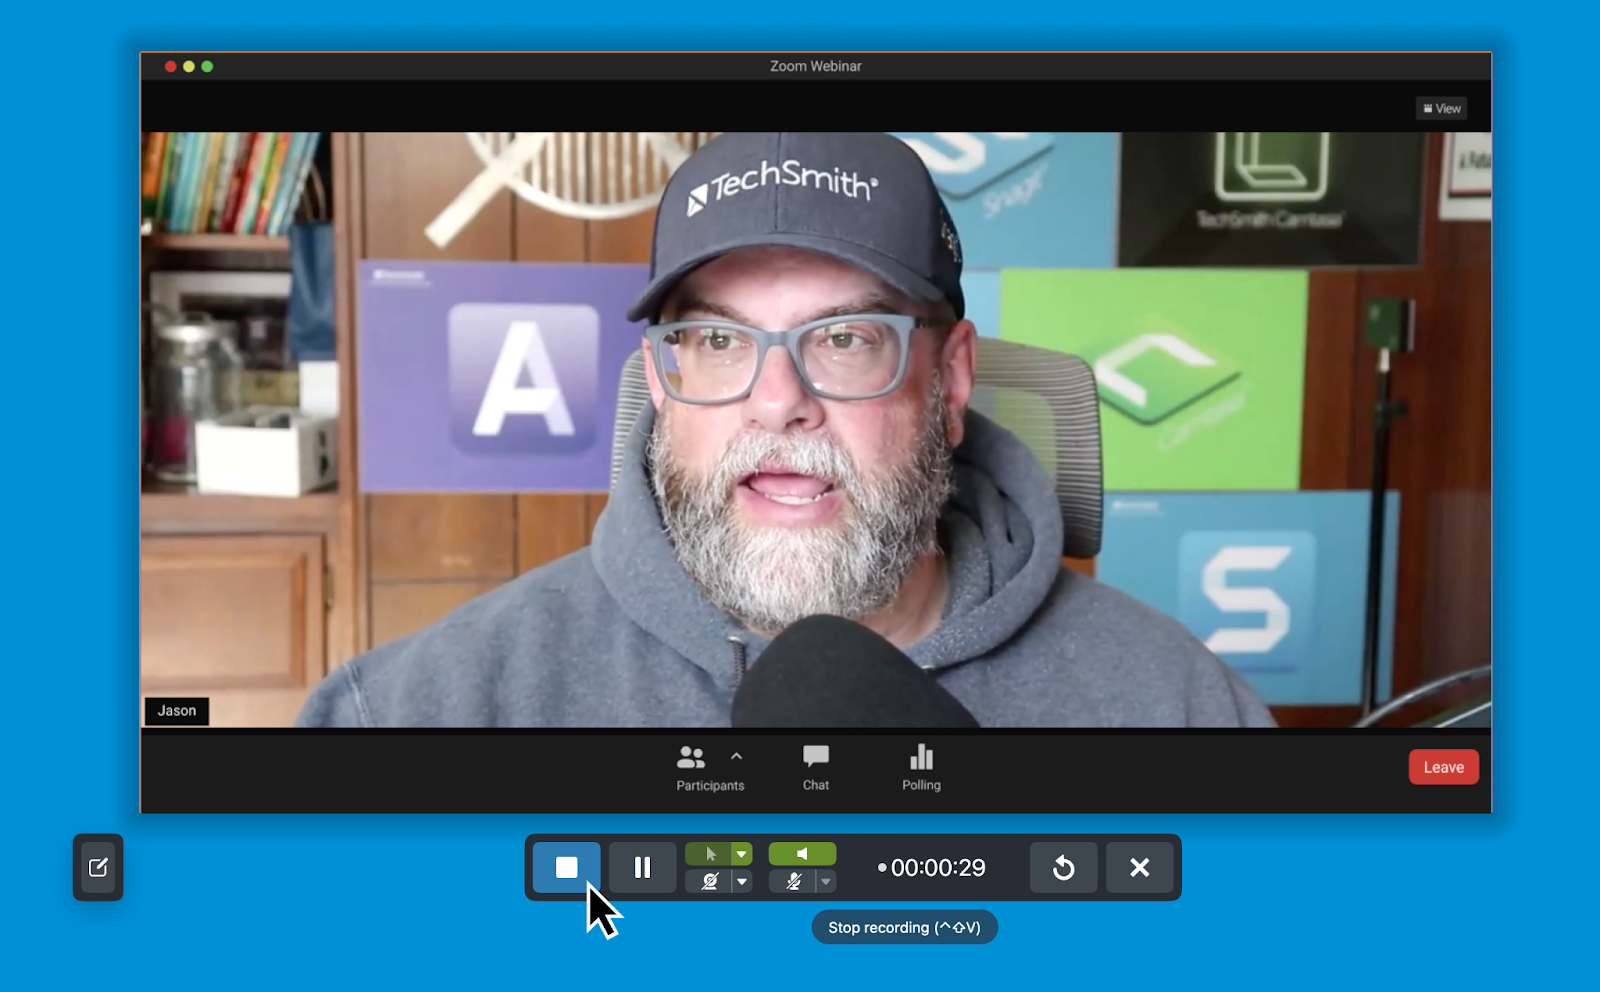
When the webinar starts, click the Record button and Snagit will start recording after a three second countdown. While the webinar is running, be careful not to move your browser window or tab between applications. Snagit is recording everything that happens inside the selected area, no matter what is on your screen.
To finish recording when the webinar ends, hit Stop. You can also use hotkeys to control the recorder.
- If you’re a Windows user, press Shift + F10 to stop the recording, and Shift + F9 to pause/resume.
- If you’re a Mac user, press Control-Shift-V to stop the recording and Control-Shift-space to pause/resume.
When you end your recording, it will open in Snagit Editor.
Step 4. Edit and Save
From Snagit Editor, you can preview your entire video recording, cut out unwanted sections, and pull screenshots from the recording.
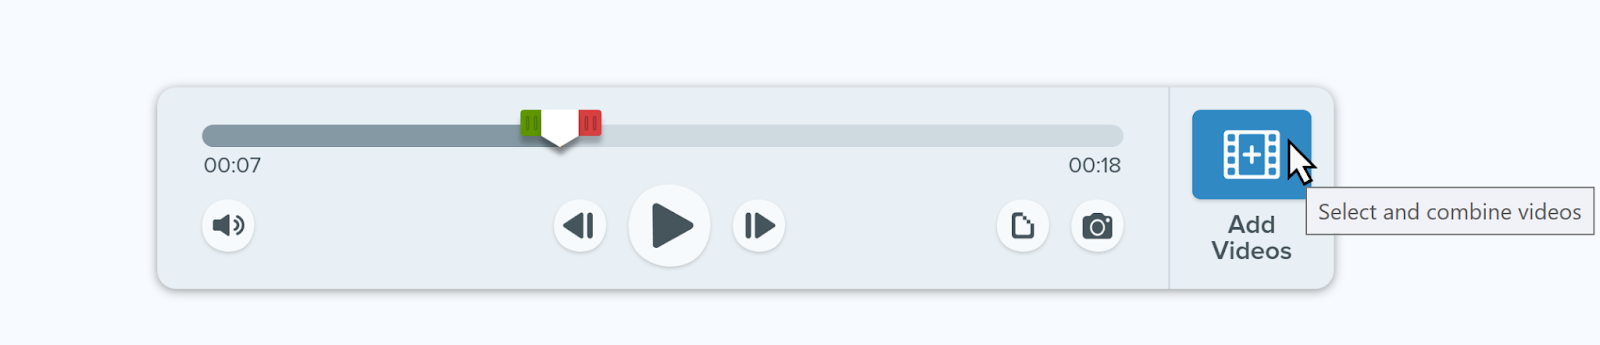
If you recorded your video in a few separate clips, you can stitch those together using the Combine Videos feature to make a full-length video of all the content.
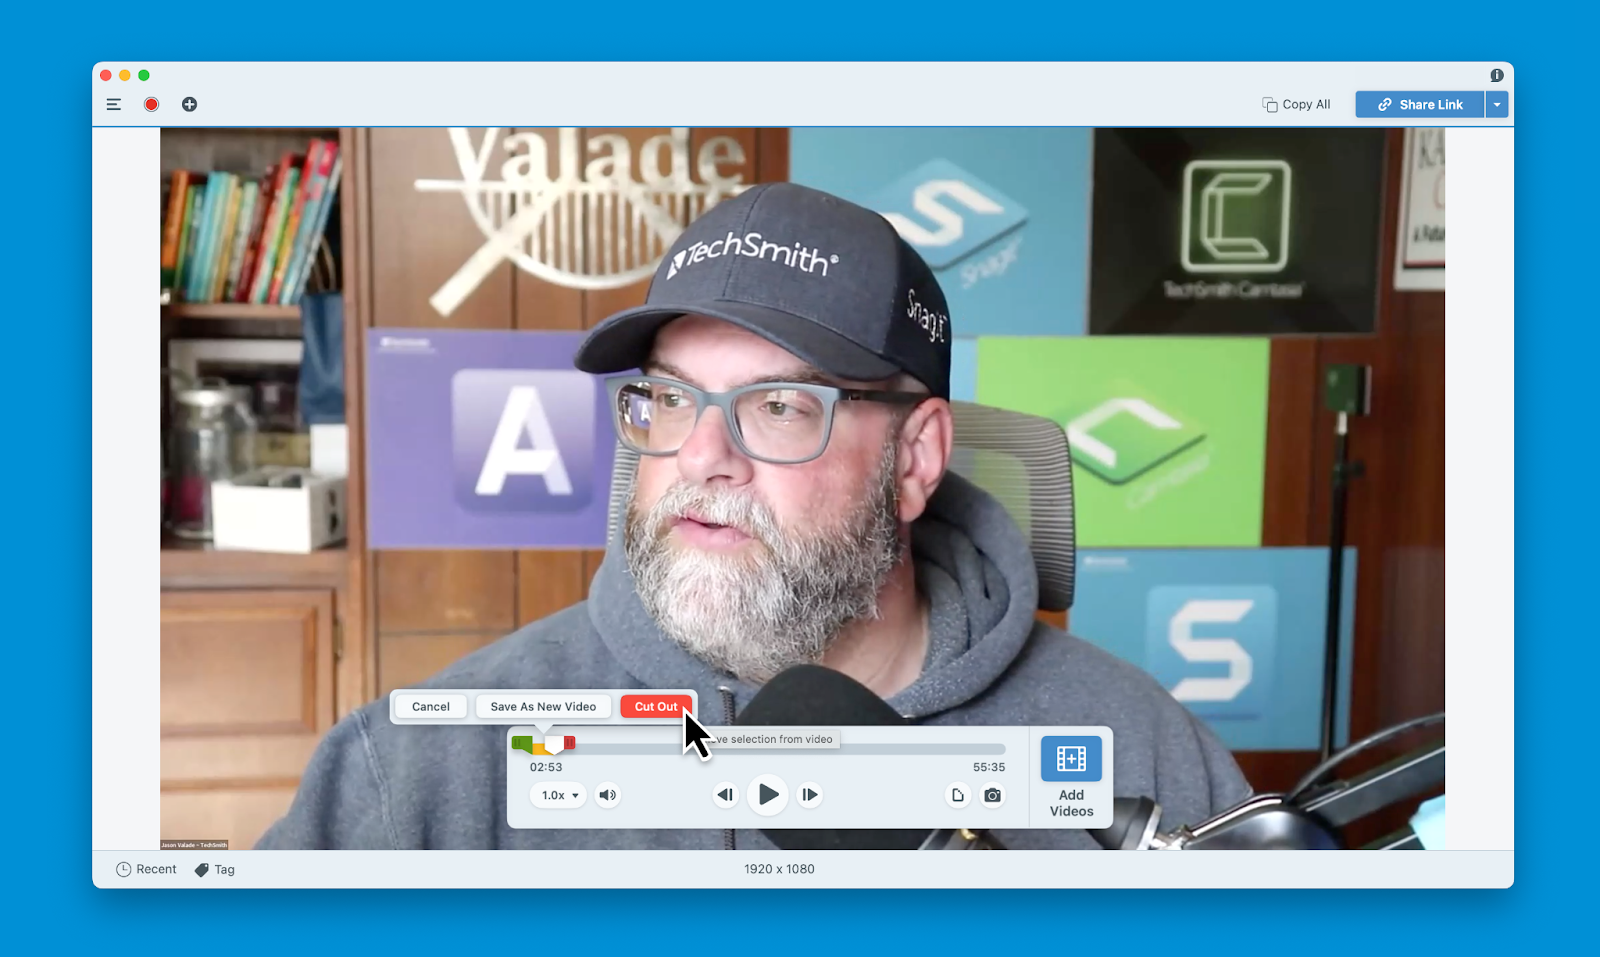
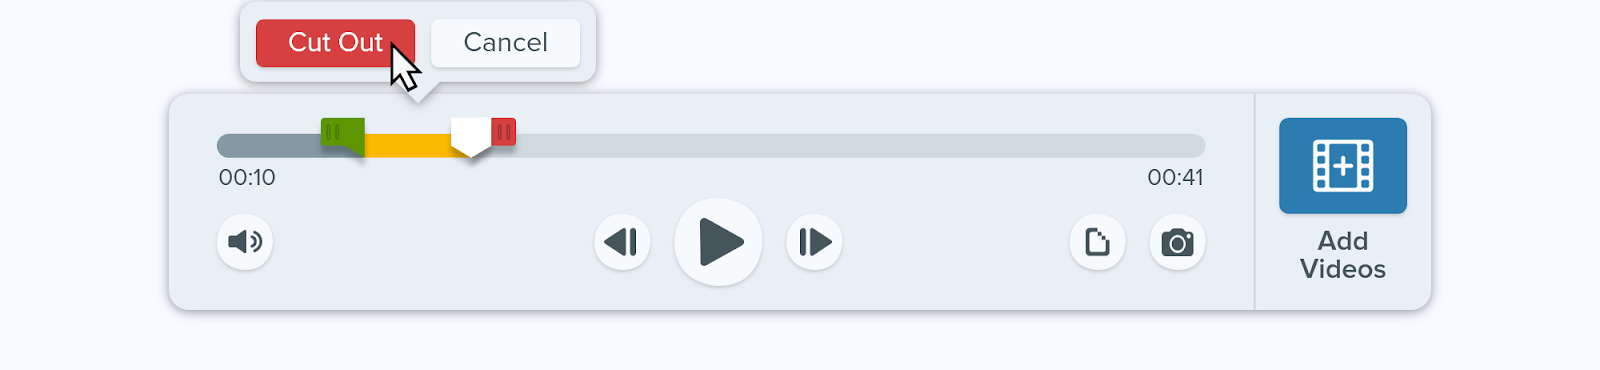
- To cut out unwanted sections, move the playhead to the beginning of section you want to remove, then move the red handle to the end of the unwanted section and click Cut.
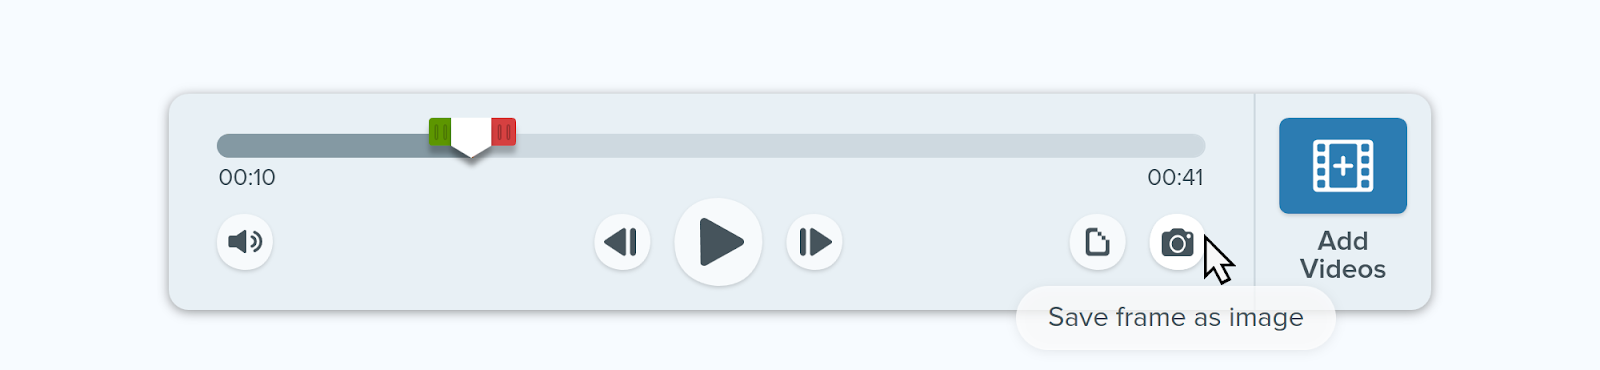
- To save a frame from your video recording, move the playhead to the frame you want to capture, and then click the PNG button. The image will appear in your Recent Captures Tray.
With this feature, you can save interesting information or anecdotes to keep for later. Saving a frame is super convenient when you’re shown large amounts of data at once.
- To combine multiple videos into one, click the Add Videos button and select your clips from your library. You can then reorder your clips to fit the narrative.
Then, edit your video like any other Snagit video. You can trim and edit until it’s perfect for you!
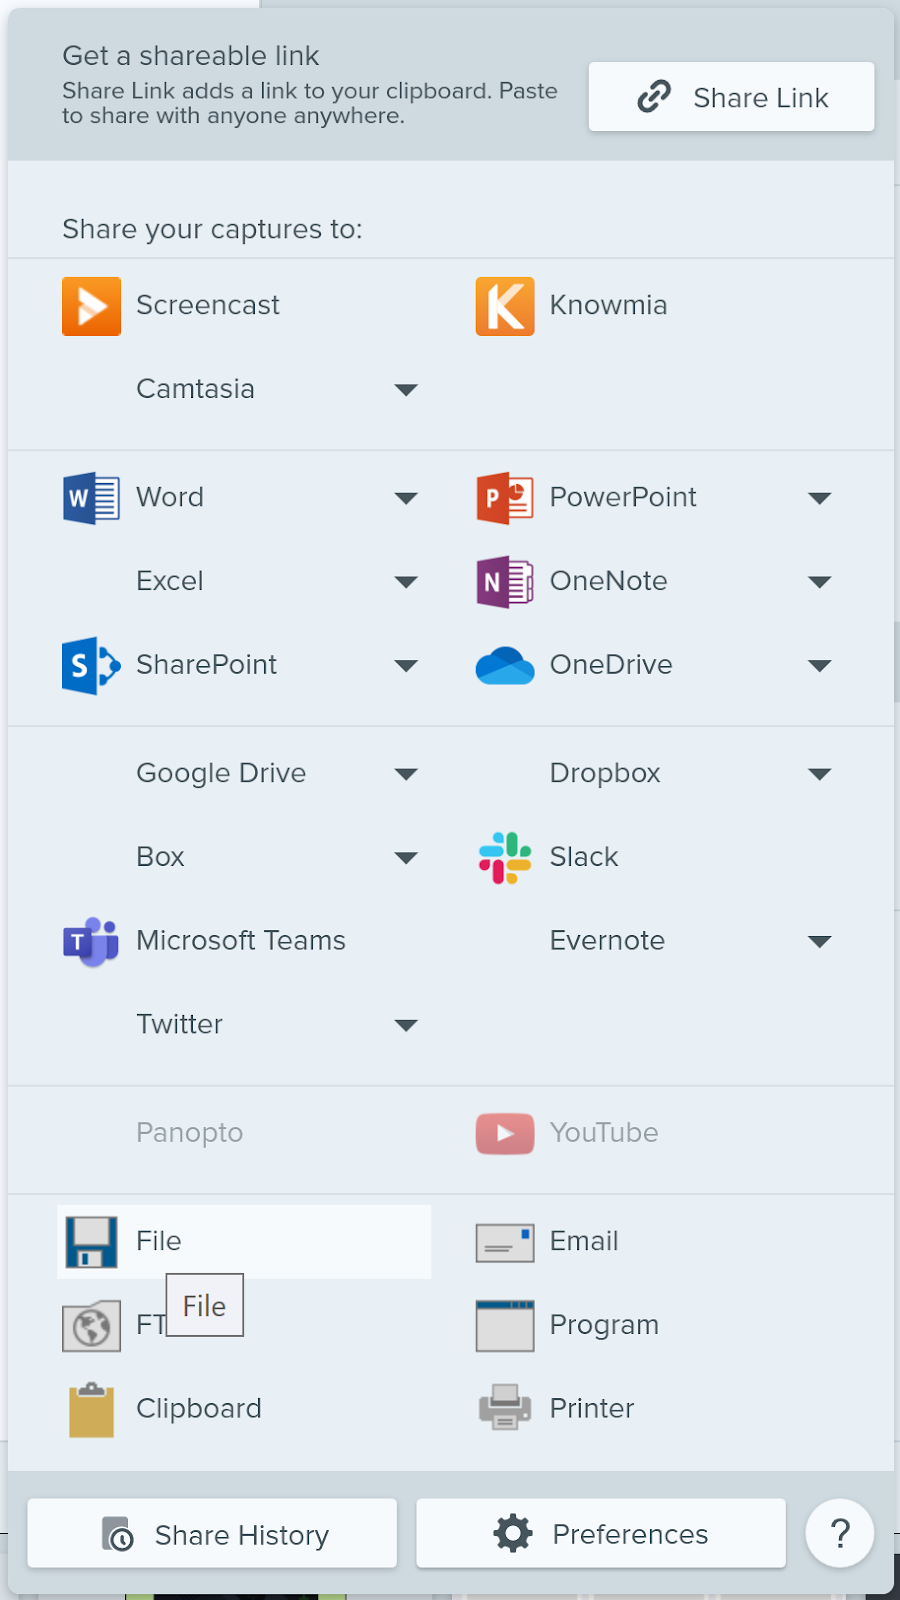
To save your webinar recording, click Share and then choose from popular social media and sharing destinations like YouTube, Dropbox, and Google Drive.
You can share your recording with anyone by using Screencast. Screencast makes it easy to share long-form videos without clogging up inboxes or taking up any space on your computer.
To save your video files as MP4s to your computer, choose the Share to File option. Then select where you’d like to save the video, and you’re done!
Of course, you can also use Snagit to record a high-quality pre-recorded webinar. Just follow the same steps above after you press play on your video.
Record a webinar with Camtasia
For more substantial webinar recordings, Camtasia is a great tool. Although similar to Snagit, Camtasia has more features and boasts more video-editing capabilities.
This makes it a perfect tool to record a webinar you’re putting on. You can easily source clips for websites and social media, make edits, and repurpose the content for other use.
Plus, Audiate is Camtasia’s perfect partner for text-based editing, which is 40% faster than regular video editing, and for adding captions to social media clips.
We’ll also cover how to set up your zoom to record your webinar so you can import the file directly into Camtasia for quick edits.
Let’s see how you can use Camtasia and Audiate to record and edit your webinar so your audience gets the most out of your hard work!
Step 1: Download Camtasia
Just like Snagit, Camtasia offers a free trial for users who’d like to try it out first.
Record your webinar with Camtasia
Record a great webinar with Camtasia’s easy-to-use screen recording features!
Download NowOnce you’ve downloaded Camtasia, you’re ready to start recording.
Step 2: Set up your recording
Open Camtasia and enable the Screen Record option. To present your webinar, enable the Microphone and System Audio options. This way, your viewers can hear you talk and hear any sounds from your computer.
Then, decide whether or not you’d like to record your camera. This is optional and depends on whether or not you want your face to be recorded.
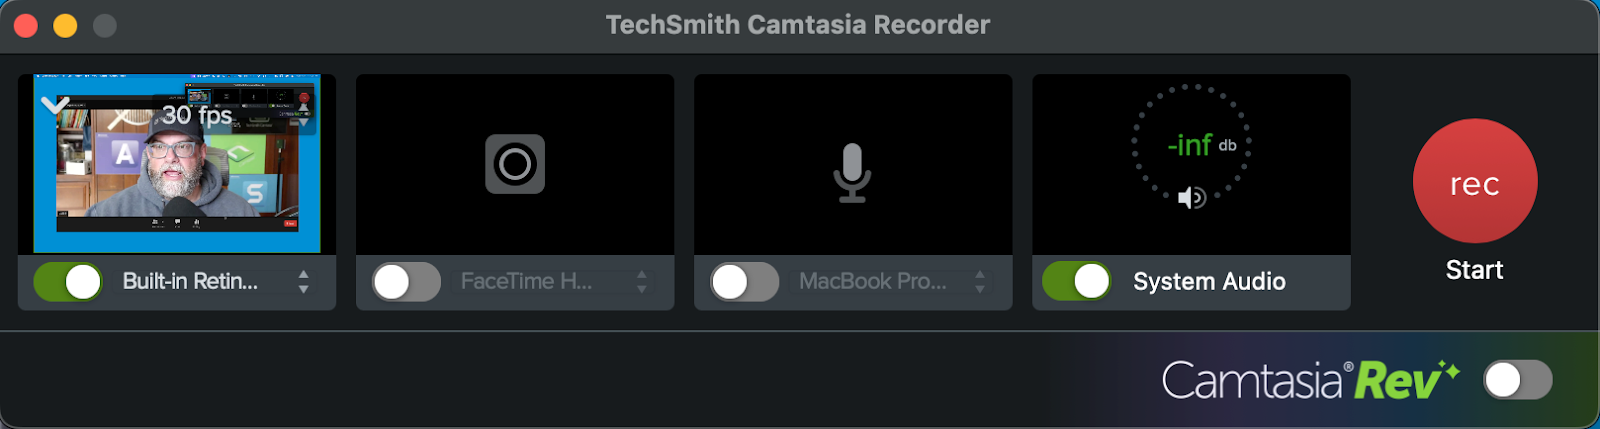
Keep in mind that Camtasia records your entire screen, so it is worthwhile to adjust your display to only show what you want your audience to see. However, it’s also super easy to edit and crop out any unwanted portions of your recording, so don’t sweat it too much.
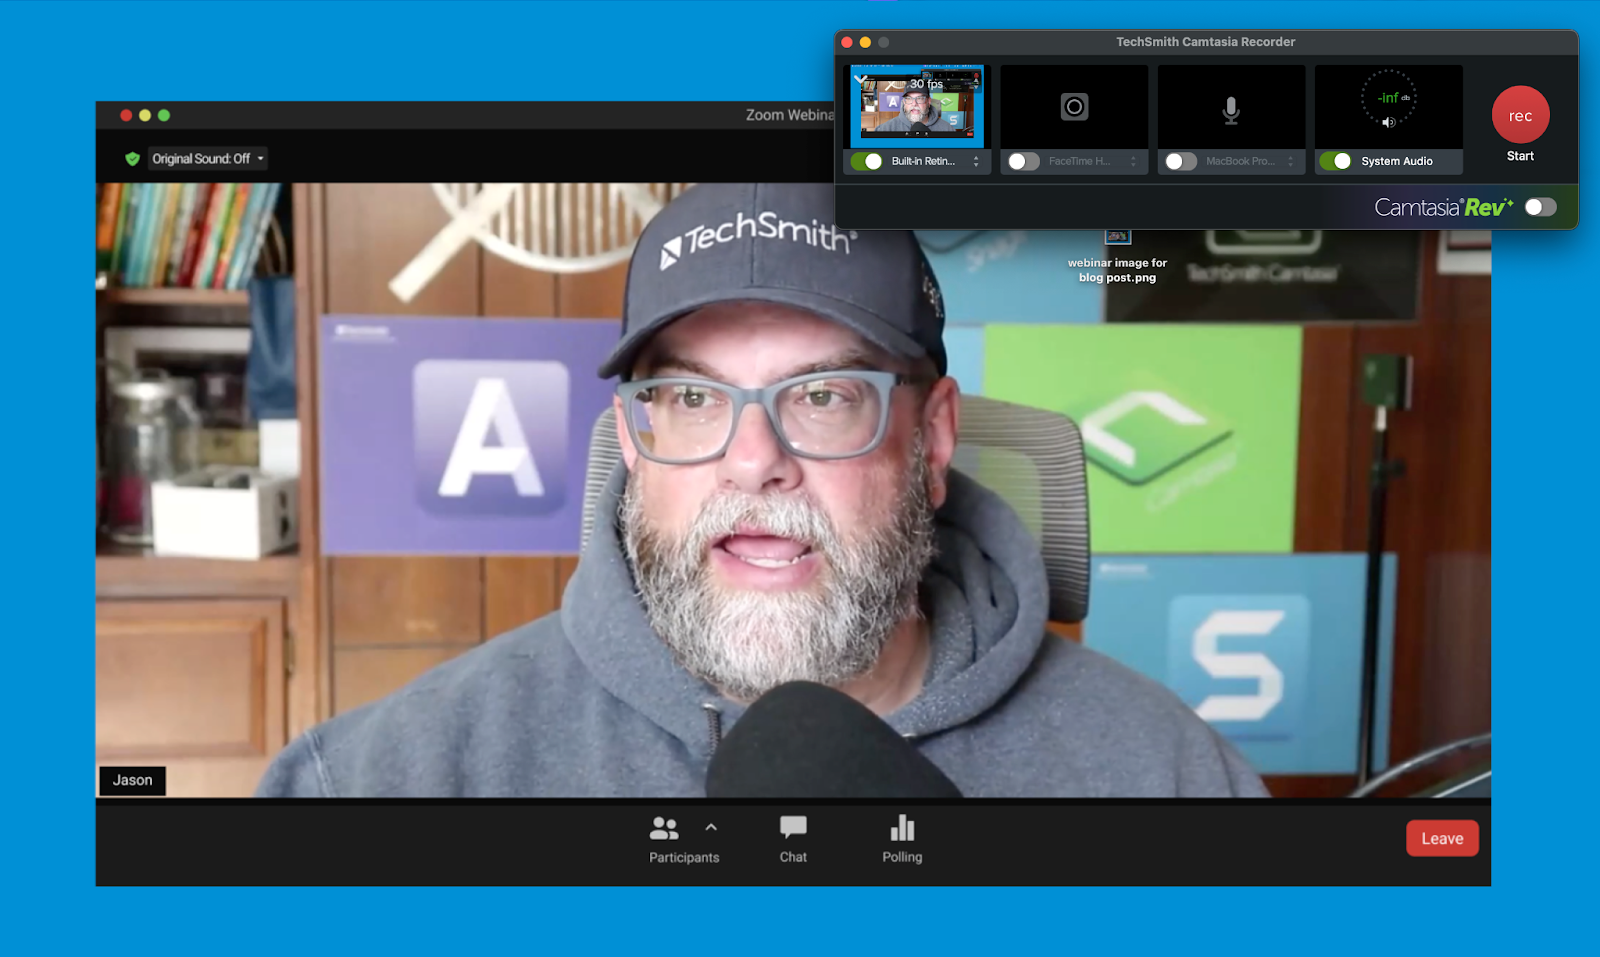
Step 3: Record your webinar
Press the red rec button to start your recording. A pop-up bar will show up allowing you to pause, restart, and end your recording at any time. This gives you the flexibility to pause your webinar for a second and readjust so you get the perfect recording every time.
When you’re done recording, your webinar will open in Camtasia Rev. From there choose your favorite layout, background, and effects. The possibilities are truly endless.
Bonus: Uploading your Zoom recording to Camtasia
Now, you’re ready for any additional edits. This is especially important if you upload a pre-recorded zoom webinar into Camtasia. Let’s go over that process.
First, make sure you turn on the zoom recording option while you go through your webinar. To do that, press the record button on the toolbar

Press the buttons to pause or stop the recording once you’re done.

From there, just save your recording to your preferred location and import to Camtasia to start your editing process.
Step 4: Edit and save
Editing a video with Camtasia will enhance your video however you need it to. Especially when you use Audiate with it. Audiate offers text-based editing functionalities that let you edit out any unwanted parts of your video simply by deleting words!
GRAPHIC
This will ensure that your video only includes the exact information that you need and minimizes the amount of cutting and trimming of actual video footage. Plus, you can edit out any hesitations and awkward “ums and ahs” that you don’t want your audience to hear with a simple press of your backspace key.
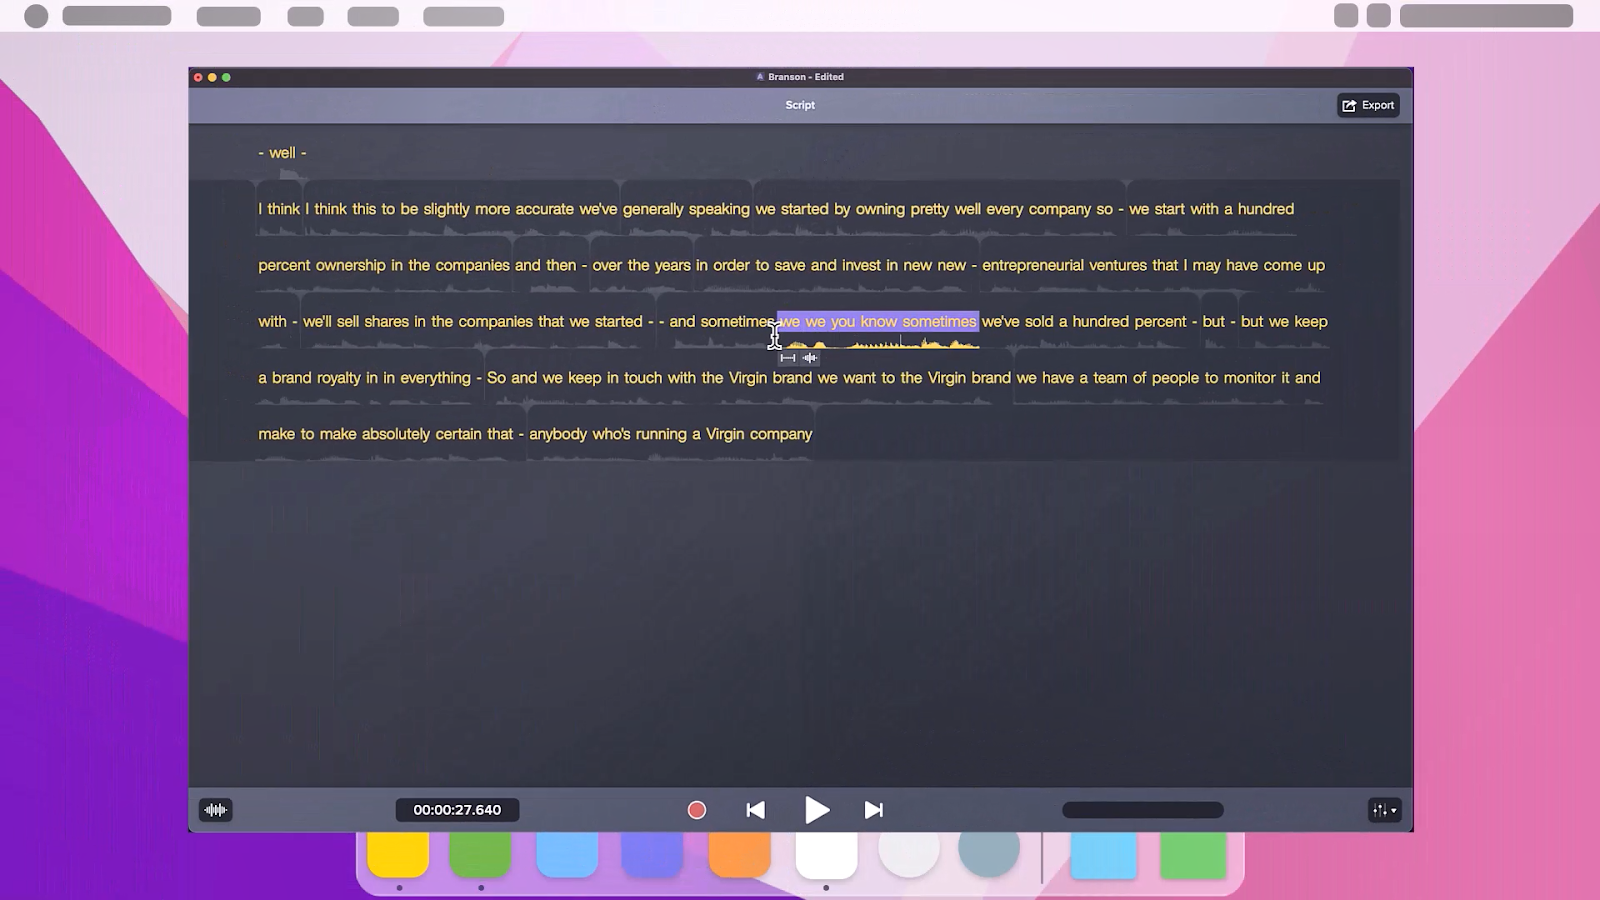
Once your recording is completely edited to your liking, sync the text-based edits with Camtasia and watch as any unwanted video clips disappear! It’s a convenient way to edit videos without wasting time on small details.
To save your webinar recording, click the Export button and choose to download as an MP4 file or to share via Screencast.
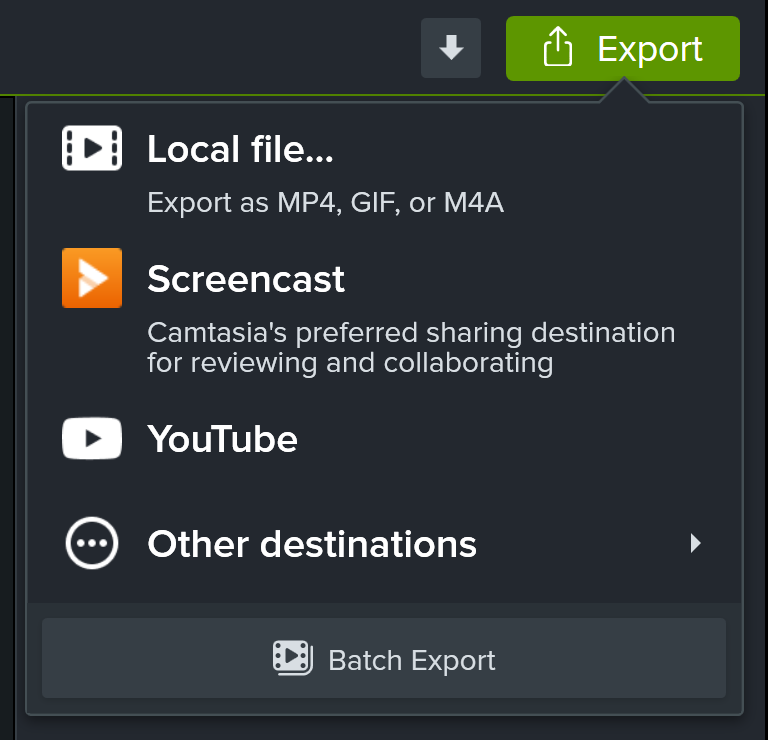
Screencast allows your viewers to not only watch your video whenever, but also comment and react to it with others. Your viewers can exchange their ideas and collaborate on the information from your webinar!
Screencast is an easy sharing option for a collaborative audience. Plus, anyone can watch your video even if they do not have a Screencast account themselves.
And you’re done! Using Camtasia and Audiate, you can record, edit, and share your webinar with anyone you need.
Final Tips
Recording your screen can reduce the performance of your computer. To reduce the possibility of screen lag or jumpy video, close applications you’re not using and consider lowering the resolution of your computer screen temporarily.
Double-check your audio and camera settings before you record! It’s easy to miss and can make a huge difference. You don’t want to present a webinar and afterward realize you weren’t capturing your audio the whole time!
