Provide Context with Device Frames
Add a device frame around an image or video clip to provide context and a professional look to your video.
Add a device frame around an image or video clip to provide context and a professional look to your video.
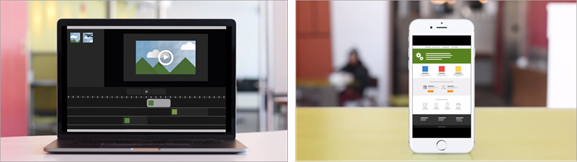
Device frames are great for:
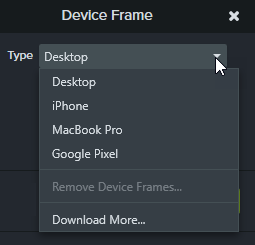
Note: To download more device frames, select the Download More option in the Type dropdown or go to https://library.techsmith.com/Camtasia.
In the properties, click the X icon.