Make Long Videos Easy to Navigate
Help students navigate through video content by providing a Table of Contents within the video.
Help students navigate through video content by providing a Table of Contents within the video.
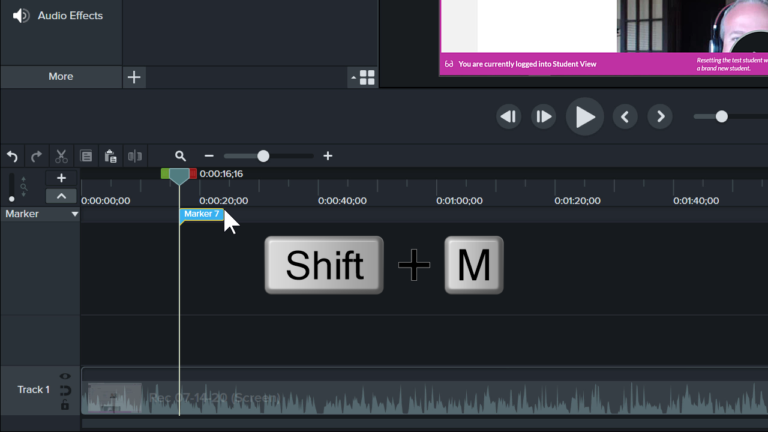
Markers are required in order to create a Table of Contents for the video.
To add a Marker, position the playhead at the start of a new topic or section.
Use the hotkeys Shift + M to add a Marker.
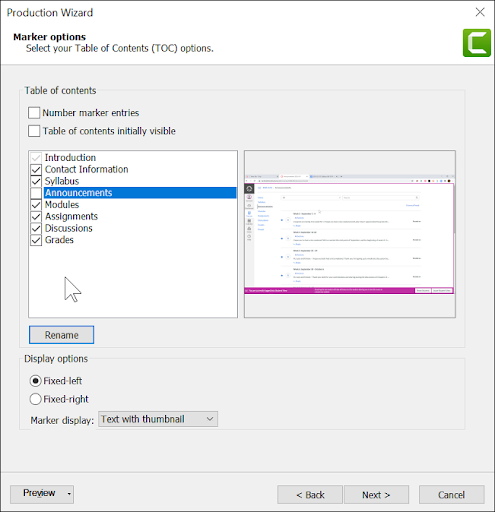
The Marker Options page allows you to customize the Table of Contents during production.
Rename Markers, check spelling, and deselect any that you changed your mind about using.
Choose to display the TOC on the left or right-side of the video.
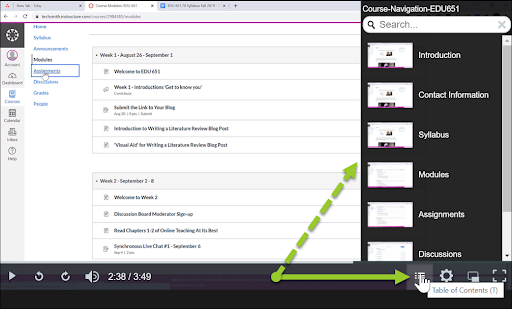
Once the video has finished rendering, it will open in a web browser window to preview.
Click this Table of Contents button to show and hide the TOC.
Since I selected Fixed-Right for the display option, it opens above this toggle button and makes it easier to click on each Marker to jump to that part of the video.
The Fixed-Left option would display the TOC on the left-side of the video window.
Remember, that this video needs to playback in the TechSmith Smart Player in order for the Table of Contents feature to work
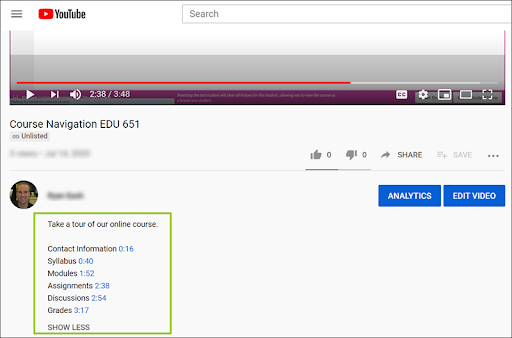
1. When you upload your video to YouTube, you can build your own Table of Contents in the Description area on the Video Details page.
2. Either before or after each topic, just add the time in the video where that section begins.
3. & 4. When finished adding each of the times, just save the changes and visit the video page to admire your work.
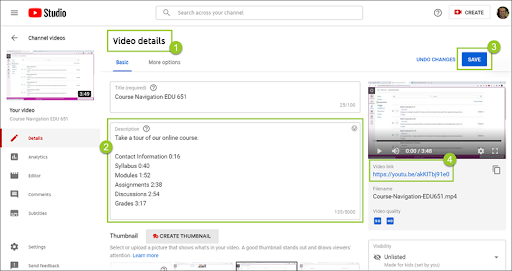
The time stamps are now clickable links, and your viewers can easily navigate to any section they want to review.