In this tutorial:
Snagit provides templates based on industry-standard documentation best practices. Combine a set of images in a template to:
- Show a side-by-side comparison of changes.
- Explain a process or concept.
- Provide a timeline of events.
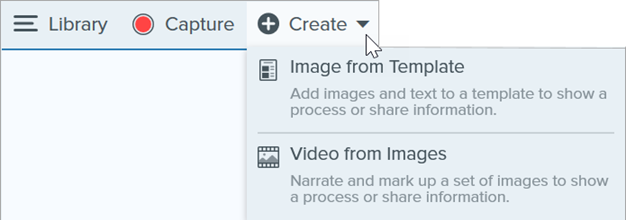
Create Image from Template
Open a template and add images and text to the template.
- Select Create button > Image from Template or File > Create Image from Template.
- The Create Image from Template dialog appears. Click to select a template.

- Click the Settings button.
- The Template Settings dialog appears. Select an Image Scale option to set how Snagit scales images added to the image areas in the template:
- Fill entire drop zone: Snagit scales the image to fill the entire image area. If the original image is larger than the image area, some of the original image may not be visible. If the original image is smaller than the image area, Snagit increases the image size so that the entire image area is filled.
- Fit entire image: Snagit scales the entire image to fit within the image area. Some of the image area may be empty.
- Select a Footer Author Name option (Windows) or Created By option (Mac) to customize the text that displays at the bottom of the template.
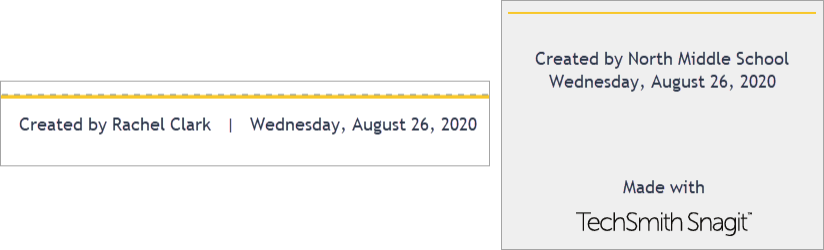
- System: The computer display name shown in parentheses.
- Custom: Enter your own text, such as your name or company name.
- Click Save.
- Click Create.
The template opens on the canvas. Add images, text, and other annotations. See Edit Image Created from Template.
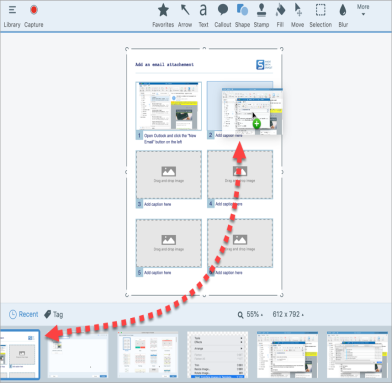
Combine Images from Tray or Library
Select a set of images in the tray or library to combine into a template.
- In the tray or library, Control+click (Windows) or Command+click (Mac).
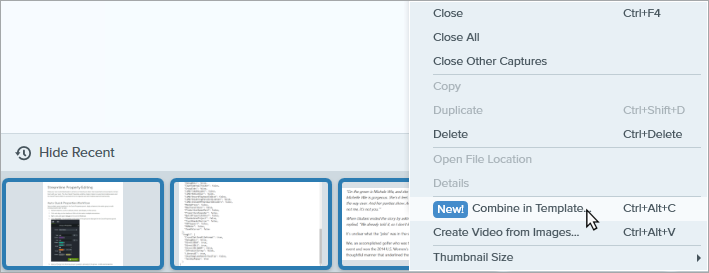
- Right-click an image in the tray or library and select Combine in Template (for multiple images) or Apply Template (for one image).
- The Combine Images in Template dialog appears. Select a template and edit the following options:
- Enable Filter based on the number of selected images to view templates that include the same number of images selected.
- If you select a template with more image areas than selected in the tray, the additional image areas are empty in the final image. Drag additional images onto the empty image area.
- Click the Settings button to customize the “Created by” text that displays at the bottom of the template.
- Click Next.
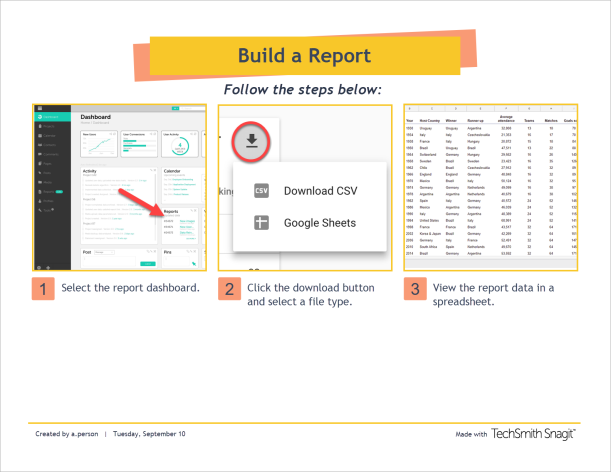
- Edit the content in the template (optional):
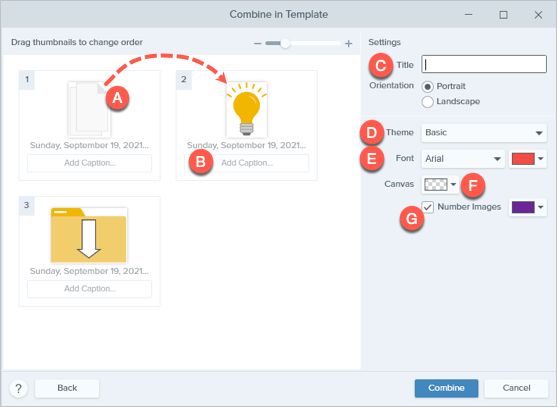
- A. To change the image order, drag the thumbnail to the desired location.
- B. Enter a caption for each image.
- C. Enter a title.
- D. Select a theme to automatically apply a set of styles and colors to your template.
- E. Select the font and color for the template text.
- F. Select the canvas background color.
- G. Enable the Number Images option to add step annotations to each image. Click the dropdown to change the color of the step annotations.
- Click Combine.
Snagit opens the image on the canvas and scales the images to fit based on the template. To delete an empty image or caption on the canvas, right-click the image or caption and select Delete.
Tip: Save the file to edit later.
Save the file as a SNAGX to edit the image at a later time.
Edit Image Created from Template
After creating the image from template, complete the following to edit images and text:
- Add or Change an Image: Drag an image from the tray onto an image area or existing image.
- Position the Image: Double-click to select an image. Click and drag to move within the image area.
- Swap Image and Caption: To quickly move an image with its caption to another step, click and the drag the Drag to Swap to another image area.
To modify image areas or sections of the template, see Edit a Template.
Note: This tutorial is for Snagit version 2024. Previous versions may look or function differently.