


Online course videos are a great tool to help students learn anytime, anywhere.
However, they aren’t without their challenges. It can be difficult to make the online learning experience interactive for students and make videos accessible for students of all abilities.
Don’t worry. We’ve got your back!
Here are five great tips that are sure to make your course videos more interactive and accessible for your students.
1. Use a tool that’s compatible with your hosting site
If you add interactive elements to your course videos, it’s important that you check to make sure those features will function the way you want them to in your video hosting platform.
Some video sites, like YouTube, do not support interactivity natively, and many video platforms come with their own sets of requirements and workflows for enabling interactive features. If you intend to follow along step-by-step, ensure that your final export destination will play any interactive videos made with this product the way you intended.
This walkthrough will focus on TechSmith Camtasia, as it provides flexible options for creating interactive content that can be used on numerous platforms. Here’s a few different ways that Camtasia’s interactive elements will function externally:
- Host the video on your own web server using the TechSmith Smart Player
- Upload video to Screencast.com or Knowmia Pro.
- Export the interactive video as a SCORM file and upload it to most Learning Management Systems (LMS), which allows you to leverage any interactive features you created and even use tracking and scoring.
Regardless of the option you choose, ensure that your video software and final hosting destination are compatible. It’s always better to check now and adapt than spend hours on a video only to realize that it won’t function the way you want it to.
2. Use interactive quizzing
Adding interactive quizzes to your course videos can help hold students’ attention and keep them engaged with your content. Quizzes appear at specific points in the video. Students will need to respond in order to continue, and they can receive instant feedback on their answers.
When you place small quizzes throughout your videos, students must pay attention to make sure they don’t miss information. Plus, you can see statistics about students’ comprehension levels and their understanding of key course concepts.
Here’s how to incorporate interactive quizzes into your course videos with Camtasia.
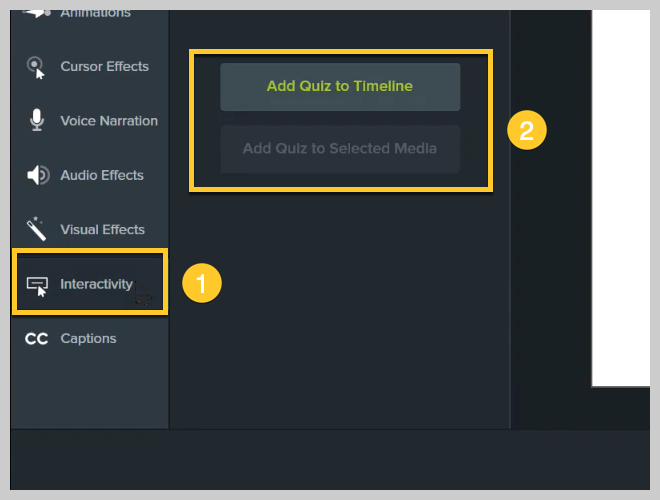
With Camtasia open, choose Interactivity from the tools panel. Then, select either Add Quiz to Timeline or Add Quiz to Selected Media. The first option can be moved freely to any point in the video, while the second option is locked in with the piece of media you attach it to.
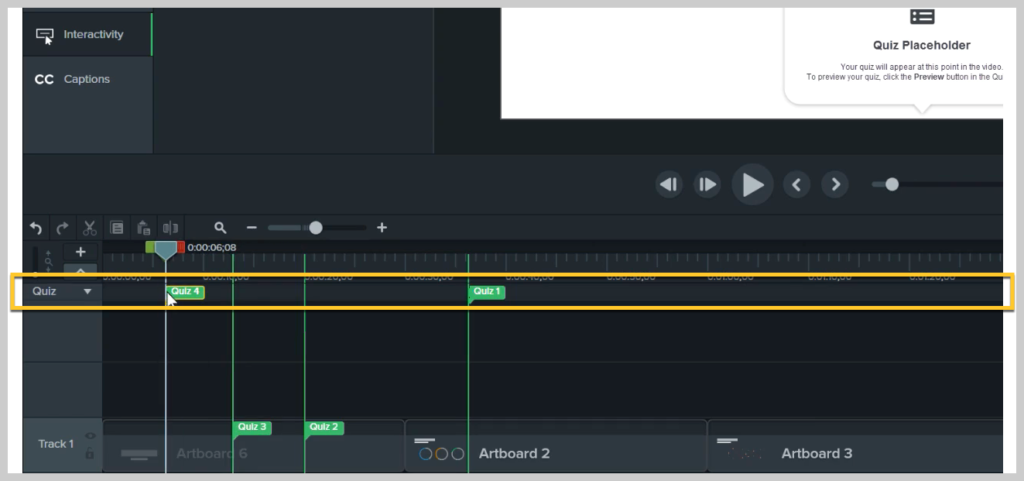
Adding one quiz to your video will turn on quizzing mode, which makes it easier for you to add more quizzes by clicking on the quiz track above the media or the timeline.
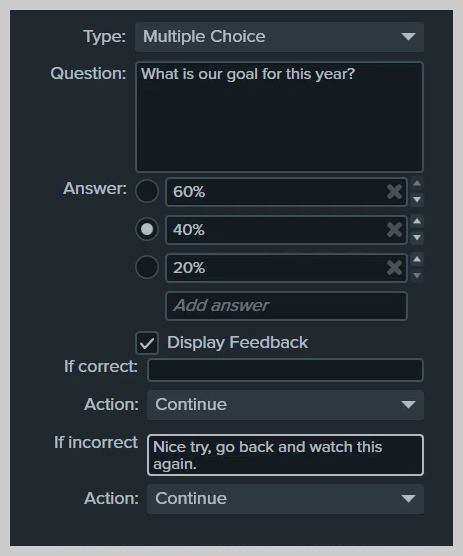
To modify a quiz, click on the one you’d like to edit and look at the properties panel in the top right of your screen. You can choose the question type (multiple choice, fill in the blank, short answer, true/false), change the question text and answers, and more.
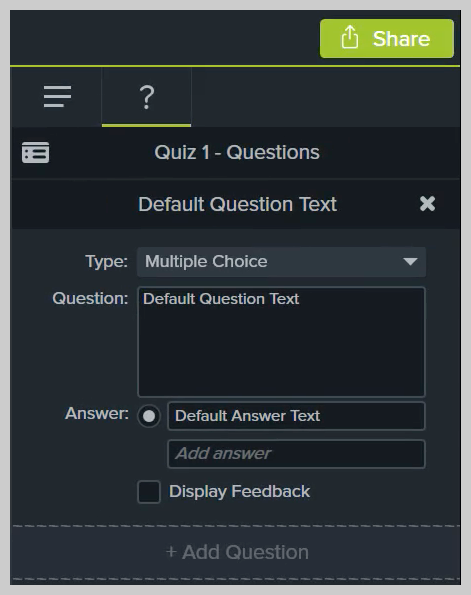
You can also decide whether or not you’d like to show the correct answers directly after the quiz is submitted. If a student answers incorrectly, you can even send them to a specific point in the video so they can review missed material.
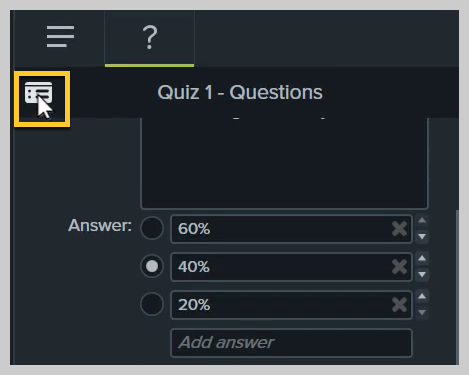
When you’re finished, you can preview the quiz by clicking the preview button shown below.
When everything looks right, you can share your video with interactive quizzes to the platform of your choice.
For a detailed video walkthrough of adding interactive quizzing to a video with Camtasia, check out the video below.
3. Use captions
One of the most important elements of an accessible course video is clear captions. Students who are deaf or hard of hearing aren’t the only ones who benefit from captions — others may work in a noisy environment or are unable to have sound on while watching. Remember that not all students have access to quality equipment or a quiet, private workspace.
Captions are text at the bottom of a video that transcribe the spoken words in the video. They also should describe any other noises in the video that wouldn’t be heard by students who can’t access the audio for one reason or another, such as sound effects.
There are two types of captions — open and closed. Open captions show up automatically, while closed captions give students the choice to toggle them on or off. Closed captions are generally preferred so that students can select the option that will help them learn best.
Additionally, captions are essential to comply with legal accessibility standards, such as Section 508 and WCAG 2.0. Without captions, viewers who are deaf or hard of hearing will not be able to access your course video content.
Tip: Captions created with TechSmith Camtasia can also be exported as a .SRT caption file for easy upload to other video platforms.
We can walk you through the process of adding captions to a video in this blog.
Or, if you prefer a visual walkthrough, watch the video tutorial below.
4. Use a table of contents
A table of contents gives students a fast way to find specific information or topics in your course videos. They are particularly useful for longer videos with more content.
While shorter videos often engage students better, you may still need to create longer videos for various reasons. For these situations, providing students with a table of contents gives them the power to jump to and interact with the content that they are specifically looking for.
Creating a table of contents for course videos can be especially helpful for when students are trying to review for tests and quizzes and want to go over specific topics.
Here’s how to add a table of contents to your videos in Camtasia:
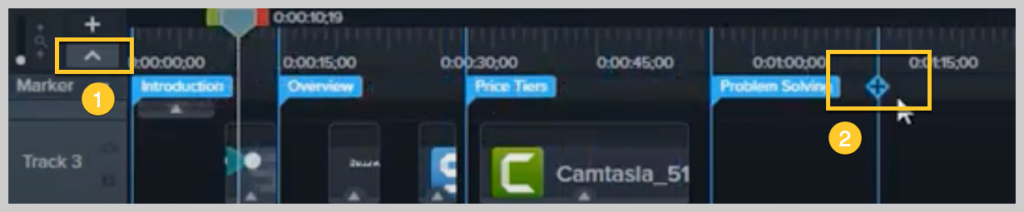
Tables of contents are created on the basis of markers that need to be placed at the desired points in time in your video project in Camtasia. If you record a PowerPoint or Keynote presentation, Camtasia will automatically generate markers at the beginning of each slide.
To edit or add new markers, turn on the Markers track above the timeline by selecting Ctrl+M / ^+M, or by clicking on the markers option within the timeline tools. Then, to add a marker, simply click on the blue plus button along the timeline where you’d like to add the next chapter to appear. Just like quizzes, markers can be added to your timeline or to specific clips.
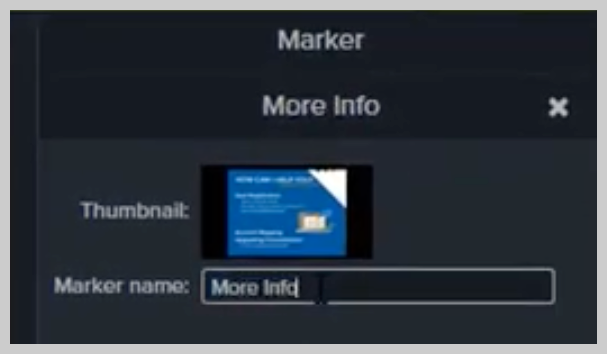
Then, you can easily customize the name of each marker using the properties pane. The marker name will serve as the name of the entry in your table of contents.
As always, you will need to export your video as a SCORM package or host it on a server that supports the TechSmith Smartplayer to ensure that the TOC displays and works as desired. You can further adjust its appearance and behavior using Custom Production settings.
We have a great video walkthrough of this process with some extra tips here:
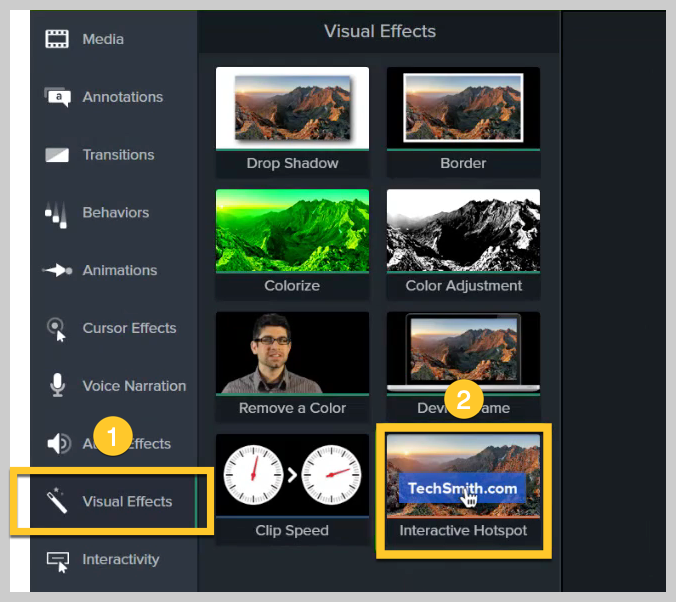
5. Use interactive hotspots
A hotspot turns a graphic, region, or annotation in your video into an interactive, clickable region or button that is embedded directly within the video. It provides additional information or resources about topics being covered. Think of it like a hyperlink in a document or a website.
A hotspot can link to other websites, downloadable documents, or even another video series. You can also use a hotspot to jump the user to different sections of that same video, allowing you to create non-linear learning paths within the video.
To add a hotspot to a video in Camtasia, select Visual Effects and then Interactive Hotspot.
Then, drag the hotspot over the object on your timeline you’d like students to interact with, like a simple annotation or imported graphic. After you add the hotspot effect, the Properties panel will open, allowing you to customize the action.
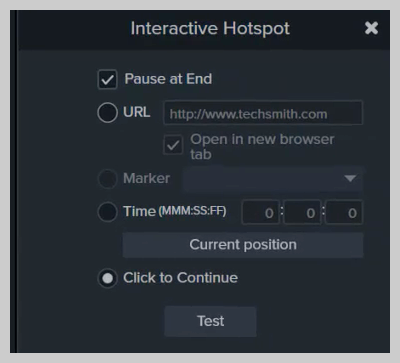
The default settings are for the video to pause at the end of a hotspot and require students to click continue in order to move on. You can adjust them to open a link or send students to a specific marker or time in a video.
Watch a more detailed walkthrough of adding hotspots to a course video here:
Better course videos help create better outcomes
Anyone can create interactive and accessible visuals for online education.
What’s most important is that you take students’ needs into account and ensure that your content will really help them dive deeper into the material you’re teaching.
Now that you know what to focus on, you don’t have to be intimidated by making videos for your online courses.
Go out there and educate!
Read more on How to Shift to Online Teaching.
Create interactive and accessible course videos with Camtasia
Ready to start making great course videos that are interactive and accessible for all students?
Frequently asked questions
In addition to the tips listed above, consider adding motion graphics or pops of color. These will catch your students’ eyes and keep them focused on your content.
If your video is made with Camtasia, interactive elements like quizzing and hotspots will not work if you upload it to YouTube. Instead, refer to the suggestions in tip 1 for ways you can make sure these elements function properly for students.
Yes, absolutely. Not only is it the right thing to do so students of all abilities can consume your course content, it is also a legal requirement. Don’t worry, captioning videos is easy with Camtasia. Refer to tip 2 for more information.
