
When you make a video, you are constantly competing for people’s attention. Trimming the beginning or end of a video can help your video get the attention it deserves.
Once you get people interested, the next goal is to keep them watching. Keeping the attention of your viewers is vital, and you can do this by cutting unnecessary content with the trimming tool.
Trimming is a fundamental part of editing videos and usually refers to taking off either part of the beginning or end of a video clip. Sometimes this is referred to as trimming the top or tail (beginning or end).
What is video trimming?
If you think back to the days when people shot with actual film, filmmakers would have to physically cut out parts of the film and reconnect the sections they wanted to keep. In today’s digital age, video trimming refers to the same concept — but without the scissors.
This process is important for a number of reasons:
- Conciseness: Nobody enjoys watching long, drawn-out videos. By trimming your content, you’re ensuring the audience will stay engaged with your video.
- Professionalism: A well-trimmed video showcases a higher degree of professionalism. It’s a clear sign that you’ve taken the time to refine and polish your content.
- File Size: Shortening the length of a video can also reduce its file size, making it easier to upload, share, or store.
- Storytelling: Sometimes, a scene or segment may not fit the narrative you’re trying to tell. Trimming allows you to ensure your content flows seamlessly so that the final video makes for one cohesive story.
Video trimming is a fine art (ask any Hollywood director!) that requires discipline, precision, and patience but if you can learn how to trim a video effectively, it will make a big difference to your videos.
Edit your own videos like a Pro
Camtasia is the best screen recorder and video editor on the market. Create content your viewers actually watch.
Download now!
Why Trim Videos?
Trimming is critical to making sure that your video starts quickly and you don’t lose your audience’s attention.
The first five seconds of a video are where you draw your viewers in and convince them to stick around for everything you have to say. Strategic video trimming helps you cut out everything unnecessary, leaving just the content that’s going to keep your audience’s eyes glued to the screen.
If you’re following best practices when recording your video, you probably have the camera running before the action starts, which ensures you don’t miss any part of a shot that you might need later on. It’s also an opportunity to add a sound that allows you to sync your audio and video when editing.

How is trimming different from splitting and cropping?
As we discussed above, trimming usually refers to taking off either part of the beginning or end of a video clip. Of course, there are other ways to edit your video beyond simply trimming the beginning and the end. Splitting and cropping are among the other most common techniques.
Splitting cuts a video clip into two parts. This editing trick comes in handy when you have a long video, need to remove mistakes, or want to place a transition between two sections. Splitting clips and working with them separately often makes editing a large video easier, as you don’t have to work with one huge clip.
On the other hand, cropping a video involves removing excess pixels around the edge of your footage. Crop mode is a non-destructive procedure, which means you can “uncrop” your video if you don’t like the changes you made.
Trimming, cropping, and splitting are all great techniques to have in your video editing tool belt.
Edit your own videos like a Pro
Camtasia is the best screen recorder and video editor on the market. Create content your viewers actually watch.
Download now!
How to trim videos using Snagit
Using TechSmith’s Snagit is one of the easiest ways to trim a video — especially if all you want to remove is the beginning and end of a clip. Don’t believe us? Well, let us show you! Here’s a quick and easy guide that demonstrates the best ways to trim videos in just four steps:
Step 1: Record or open a video in Snagit
If you’re capturing a screen recording, your video will automatically open in the Snagit Editor once you’re finished.
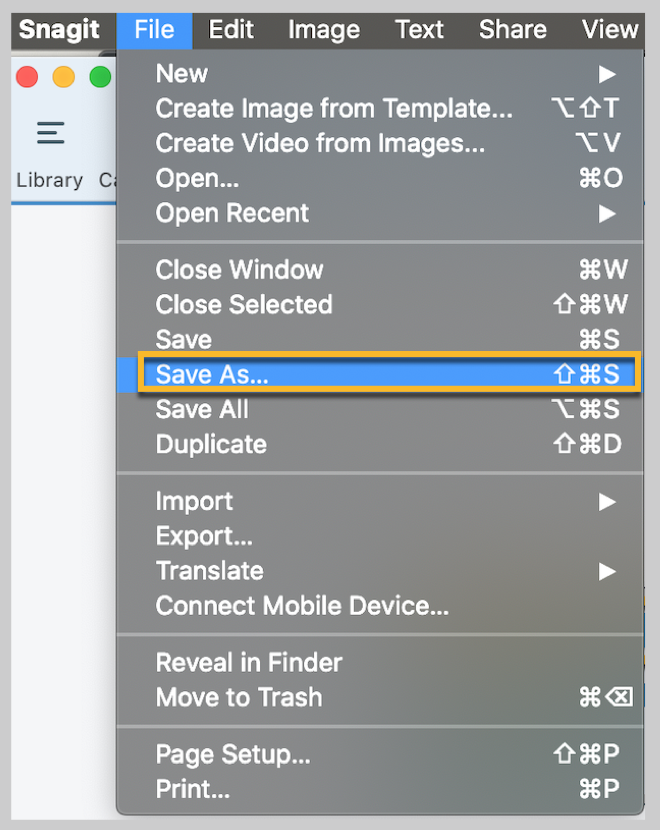
However, if you want to edit an existing recording, you can open the file in the Snagit Editor by going to File in the toolbar, clicking Open File… and choosing the footage you want to trim.
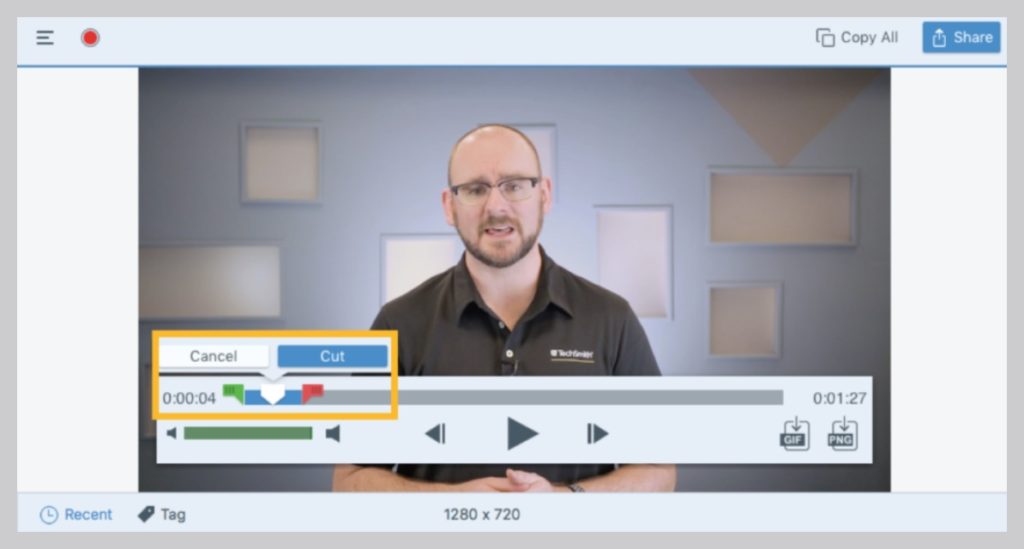
Step 2: Select a portion of video to trim
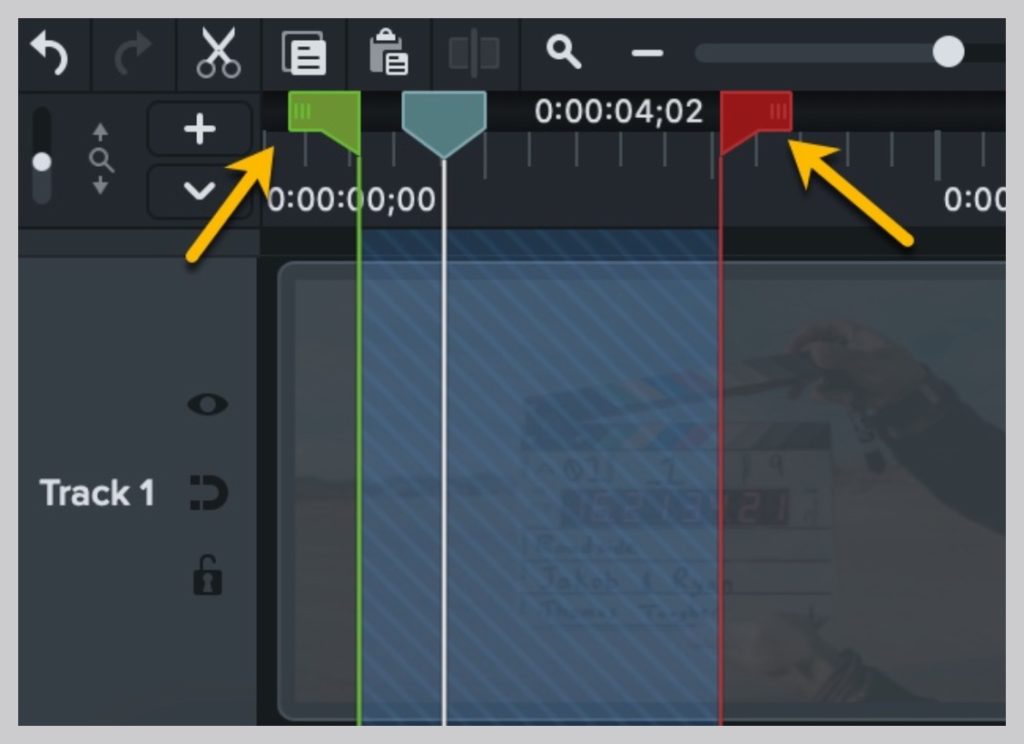
With your video clip open, use the playhead in and out points to select the portion of the clip you’d like to trim.
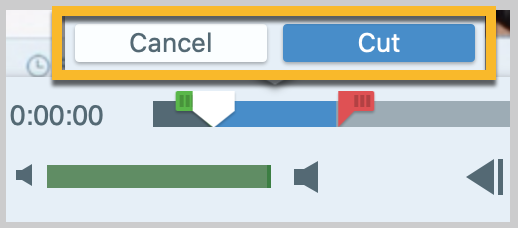
Step 3: Click cut to remove the selected portion
Next, click the Cut (or Trim) button to remove the selected portion of the video. Snagit will add a small yellow mark in the timeline to indicate where a portion of your video was cut.
Continue to select and cut portions of your video until you’re left with only the content you want to keep. If you accidentally trim too much footage, don’t panic! Just head to Edit in your toolbar and click Undo.
Note: In some other programs you can use Delete, which will remove the portion entirely.
Step 4: Save your trimmed video
Finally, save your freshly trimmed clip. If you want to preserve your original clip, use the Save As… option and save the new clip under a file name that is different from the original.
How to trim videos using Camtasia
You can also use a more advanced video editor like TechSmith’s Camtasia to trim videos on your Mac or Windows computer. Camtasia, and some other video editors, make trimming video clips incredibly easy, but come with additional tools for more complex editing.
For example, unlike Snagit, the video cutter in Camtasia allows you to trim the video and audio files separately. With Camtasia, you can also change the speed of a video, add captions to a video, and even make split screen videos!
One of the best ways to trim videos with Camtasia is to hover over the edge of a clip, which will make the trimming cursor appear. But, here’s a more detailed breakdown of the process:
Step 1: Import or record a video and add it to the timeline
First you’ll need to add your video clip to Camtasia, which you can do by going to File > Import > Media. Then, with the clip in Camtasia you can click and drag it to your project timeline.
If you recorded your video in Camtasia, it will be added to the clip bin automatically and you can drag it to the timeline.
The ultimate guide to making amazing videos
Watch our video and get great advice on how to start making videos, promotion, and more.
Watch moreStep 2: Use editing tools to trim your clip
So, there are actually two ways for trimming in Camtasia, which we’ll label Method A and Method B:
Method A: In the editor, use the green and red playhead handles to select the portion of the clip you want to trim (similar to Snagit!).
Then simply click the Cut to remove the selection.
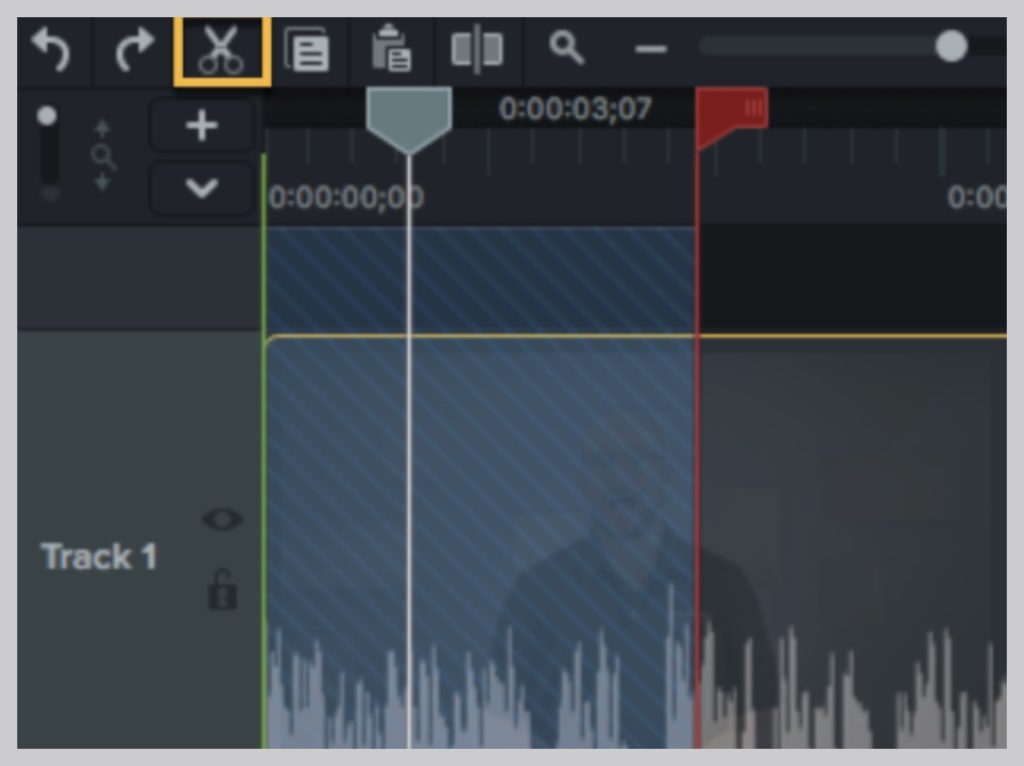
Cut will remove the clip, but save it to your clipboard so you can paste it somewhere else if you wish.
Then click and drag the end of the clip to the point that you want to trim. Don’t worry if you trim too much — editing in Camtasia is non-destructive so you can always click and drag the end of the clip back out.
Method B: The second method is to split and then trim a clip.
To do this, move the playhead to the location from which you want to trim footage. Next, click the Split button to slice the clip in two.
Now you can delete the part you no longer need, or keep the clips and trim each one.
If you’d like to learn more about trimming, splitting, and other video editing techniques check out our Editing In-Depth tutorial video.
Edit your own videos like a Pro
Camtasia is the best screen recorder and video editor on the market. Create content your viewers actually watch.
Download now!
Video trimming, the FAQs
To trim a video on an iPhone, open the Photos app, select the video you want to trim and tap Edit, then drag the sliders at either end to select the footage you want to keep. Once you’ve selected the portion you want, tap Done to save your trimmed video.
To trim a video on Android, open the Gallery or Photos app and select the video you want to trim. Then, tap on the Edit button to open the editing board before tapping Trim (which might be a scissors icon). Next, drag the sliders at the start and end points and click Save when you’re done.
To trim a YouTube video without re-uploading it, sign in to YouTube Studio, select Content, choose the video you want to edit and click Editor. Select the Trim feature, and a blue box will appear; adjust its sides to cover the part of the video you want to keep and click Save.
If you need to remove a specific section, select NEW CUT, and a red box will appear, which you can adjust to select the footage you want removed.
To trim a video on Windows, open the Photos app and select the video you want to trim, before clicking Edit & Create. Next, click Trim and adjust the start and end points using the sliders. For more advanced editing tools, check out TechSmith’s Snagit, which offers a range of features, beyond basic trimming.
To trim a video on a Mac, you can use the built-in QuickTime Player app. First, open the player, select your video, and then click Edit in the toolbar, and then Trim.
Next, drag the yellow handles to select the footage you want to keep, and then click Trim to finalize your edits. For a more advanced editing suite, you might consider using TechSmith’s Camtasia, which has plenty of advanced editing tools and features.
To trim a video on TikTok, start by uploading or recording your video in the app. Once your video is ready, you’ll see a Trim option on the right-hand side, tap it and then slide the beginning and end markers to select the portion of the video you want to keep. Once you’ve adjusted your video, you can upload it to TikTok.
Share