Share Captures
Learn how to quickly copy and paste, send, or share your capture files to a wide variety of applications and destinations.
Learn how to quickly copy and paste, send, or share your capture files to a wide variety of applications and destinations.
In this tutorial:
Copy and paste an image or video, with any added callouts, arrows, or other annotations, into another application.
The Share Link button uploads your image or video to Screencast, our cloud-based solution for collaboration and feedback – free with your TechSmith Account.
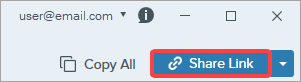
To learn more about Share Link and Screencast, see Share & Engage (Share Link).

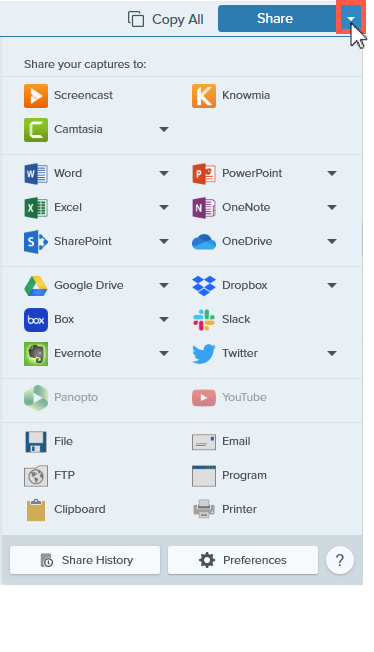
Snagit disables any share destinations in the Share menu that do not support the selected file type.
You may be prompted to sign in and allow Snagit access to your account or application before you can share to a specific destination.
Tip: Save time sharing with capture presets and a customized toolbar.
Create a preset to automatically send an image or video to a share destination after capture. Or add a specific share destination to your Editor toolbar. See Save Capture Settings as Presets and Customize the Snagit Toolbar.
Note: If a share destination is missing, see Add a Share Destination.
For many destinations, you will be prompted to sign in and allow Snagit permission to share.
| Share Destination | Image | Video |
|---|---|---|
| Screencast Click the Share Link button or select Screencast from the Share dropdown. Snagit uploads an image or video to Screencast, TechSmith’s free online content hosting service, and copies a link to your clipboard to share with anyone, anywhere. To learn more, see Share & Engage (Share Link). Note: If you are not currently logged into your TechSmith account, sign in or set up an account. See About TechSmith Accounts. | ||
| TechSmith Knowmia Upload an image or video to TechSmith Knowmia. | ||
| TechSmith Camtasia Use Camtasia to:
| ||
| Microsoft Word Insert an image or video into a Microsoft Word document. | ||
| Microsoft PowerPoint Insert an image or video into a Microsoft PowerPoint presentaiton slide. | ||
| Microsoft Outlook (Mac) Attach an image or video to a new Outlook email message. | ||
| Microsoft Excel Insert an image into a Microsoft Excel workbook. | ||
| Microsoft OneNote Insert an image into a Microsoft OneNote page. | ||
| Microsoft SharePoint (Windows) Upload an image or video to host on SharePoint. Snagit sends the share link to the Clipboard. | ||
| Microsoft OneDrive (Windows) Upload an image or video to Microsoft OneDrive. | ||
| Google Drive Upload an image or video to Google Drive for image or video hosting. Snagit sends a share link to the Clipboard.
| ||
| Dropbox Upload an image or video to Dropbox for image or video hosting. Snagit sends the share link to the Clipboard. | ||
| Box Upload an image or video to Box for image or video hosting. Snagit sends the share link to the Clipboard. Box is not a default share destination on Mac. To add this share destination, see Add a Share Destination. | ||
| Slack Share an image, video, or animated GIF to a specific Slack channel or direct message. Install the Snagit App for Slack to preview and play Snagit content directly in the Slack message. To learn more, see Connect and Collaborate with Snagit + Slack. | ||
| Microsoft Teams Share an image or video to a Microsoft Teams Channel or Chat. To learn more, see Share to Microsoft Teams. | ||
| Evernote (Windows) Upload an image as a note to Evernote. | ||
| Twitter (Windows) Author a tweet that includes an image or video. | ||
| Panopto Upload a video to a Panopto account. | ||
| YouTube Upload a video to a YouTube account. Snagit sends the share link to the Clipboard. YouTube also provides an embed code for embedding the capture on a website or blog. YouTube resizes the video to fit within their standard dimensions. For best results, record at YouTube’s recommended dimensions. See Record a Video with Snagit. | ||
| File Save an image or video to a file location. | ||
| Email Insert an image into a new email message. | ||
| FTP Send an image or video to an FTP server using file transfer protocol. | ||
| Program (Windows) Send an image or video to another program. Select from a list of programs that support the selected file format. To add a program to the list:
| ||
| Application (Mac) Send an image or video to another application. Select from a list of applications that support the selected file format. To add an application to the list:
| ||
| Clipboard (Windows) Copy an image to the Windows Clipboard for quick pasting into other locations or applications. | ||
| Printer (Windows) Send an image to a printer. | ||
| Pages (Mac) Insert an image or video into a Pages document. Snagit opens a new Pages document if one is not already open. | ||
| Keynote (Mac) Insert an image or video to a Keynote presentation. | ||
| Numbers (Mac) Insert an image or video to a Numbers document. |
You can add additional share destinations to Snagit.
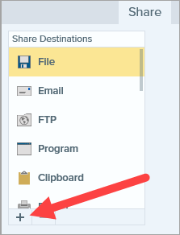
Customize share destinations to:
To customize a share destination:
Note: This tutorial is for Snagit version 2024. Previous versions may look or function differently.