Go from text to studio-quality audio in seconds! Type, paste, or import text into the Scripting mode in Audiate, and then generate audio in a variety of customizable AI voices in different languages and styles.
Try generating audio from text when you want:
- Professional audio quality but are located in a poor environment for recording.
- Consistent audio across your project or do not like the sound of your own voice.
- To adjust the tone or language to reuse the content to serve different locales or purposes.
- To mimic a conversation or use multiple speakers.
Generate Audio from a Script
- Open Audiate.
- Enter text by completing any of the following:

- Click Generate and enter a prompt to have Audiate generate a script with AI. See Generate a Script with AI.
- Type or paste text into the Script field.
- Drag a text file into Audiate.
- Click the Import a file button to import a script.
- Click the Generate button next to the text section.

- On the Generate Audio tab, complete any of the following:

- Click the
 preview icon to preview a voice.
- For premium voices, hover over a voice to view a description of the style and recommended usage.
- Search by voice name.
- Click the
 filter icon to filter voices by gender, language, accent, category, or age group.
- To edit a voice, click the
 edit icon that appears when you hover over the name and adjust any of the following:
- For Premium Voices:
Note: The Premium Voice collection is only available for eligible subscription plans (Camtasia Audiate, Camtasia Pro, Camtasia Create) purchased directly from the TechSmith online store. Subscriptions purchased through resellers do not qualify for premium voices. All customers have access to the Default Voice collection.
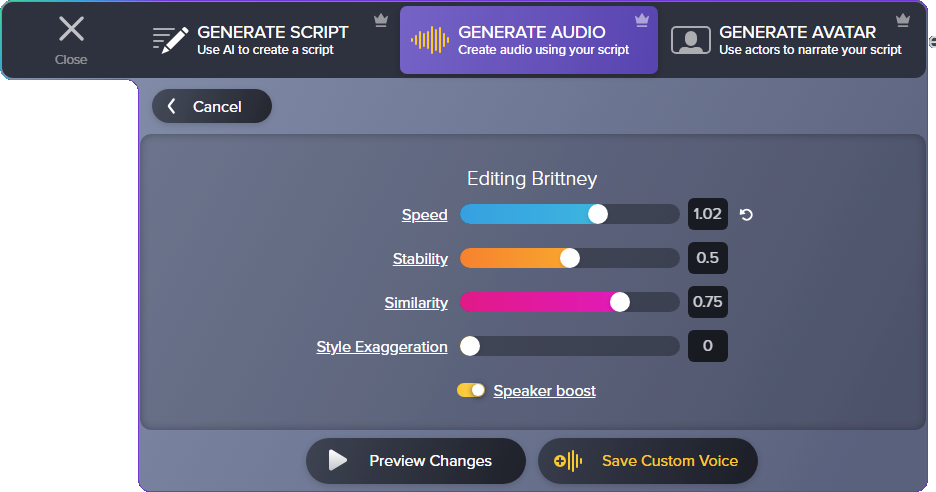
- Speed: Controls the speed of the generated voice. Drag the slider or enter a value between 0.7 and 1.2 to slow down or speed up. Extreme values may affect the quality.
- Stability: Controls the consistency between regenerations. Drag the slider or enter a value between 0.0 and 1.0. Increased stability can make the generated voice sound more monotone. For longer text fragments, we recommend lowering this value.
- Similarity: Controls the similarity to the voice in the training model. Drag the slider or enter a value between 0.0 and 1.0. This property can be highly subjective; we recommend experimenting to find your optimal value.
- Style Exaggeration: Attempts to amplify the style of the original speaker. Drag the slider or enter a value between 0.0 and 1.0. We recommend 0.0 for optimal stability and generation speed. Increase for a more exaggerated style.
- Speaker Boost: Boosts the similarity of the generated speech to the training model.
Note: This option requires more time to generate audio.
- For Default Voices:

- Style: Select from a variety of delivery styles, such as friendly, empathetic, or excited.
- Speed: Controls the speed of the generated voice. Drag the slider or enter a value between 0.5 and 2.0 to slow down or speed up. Extreme values may affect the quality.
- Pitch: Controls the tone of the generated voice. Drag the slider or enter a value between 0.5 and 1.5 to lower or raise the pitch.
- When you are finished editing, click Save Custom Voice, enter a name, and click OK.
The saved voice appears in the Custom Voices section on the Generate Audio tab.
- Click to select a voice.
- To generate audio with this voice for the entire project, enable the Apply to entire project toggle.
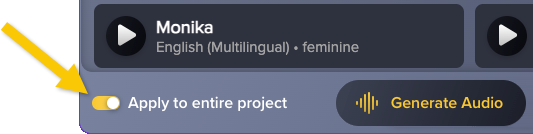
Note: Applying generated audio to the entire project will overwrite all previously recorded and generated audio.
- Click the Generate Audio button.
Note: To generate an AI video avatar synced to your script or audio, click the Add Avatar button. To learn more, see Generate AI Avatars.
Script Updates
Audiate makes it easy to update the audio at any time. If you update the script, complete the following to regenerate the audio to match the script:
- Double-click within any text section to enter Scripting mode.
- Enter the desired text. Any new text or edits appear white until the audio is generated for the section.

- When you’re done editing the script, click the Done Scripting button to regenerate the audio.
Generate Different Audio Styles within a Project
You can apply a different voice, language, or audio style to individual sections of text within an Audiate project. For example, stage a conversation, set the tone by changing speakers between audio sections, or change the language across your audio project.
- To enter Script mode, double-click in a text section.
- You can generate audio and apply different styles to each text section. To create a new text section, press the Enter key twice.

- Click the Generate button and follow the Generate Audio from a Script instructions to generate audio for each text section within your project.
Note: To learn more about how TechSmith leverages AI technology, see TechSmith and AI.
All Camtasia Tutorials