Send Images to Camtasia Editor: Record and edit video in the Camtasia Editor desktop application. Camtasia Editor offers full video editing, including cursor editing and effects, captions, callouts, assets such as titles and background music, and more.
Note: Try Camtasia Editor with all features and functionality for free. Videos exported from the free version have a Camtasia watermark.
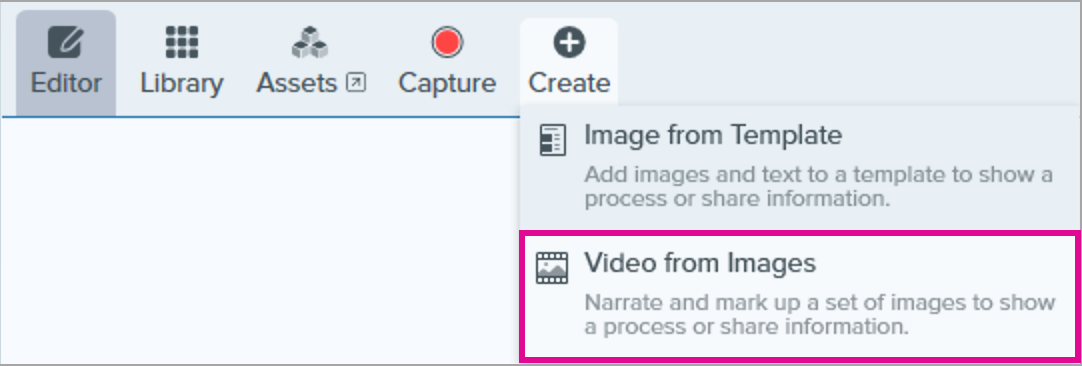
Option 1: Create a Video from Images in Snagit
Video from Images allows you to record voice narration over one or more screenshots or images. Add arrows, shapes, step numbers, or other favorite annotations as you record.
View steps
Tip: Add drawing tools to Favorites before you record.
As you record narration to your images, draw attention to specific parts of the screen with the Arrow, Pen, Step, and other tools. Be sure to add tools to Favorites before you start recording. See Quickly Access Favorite Styles and Tools.
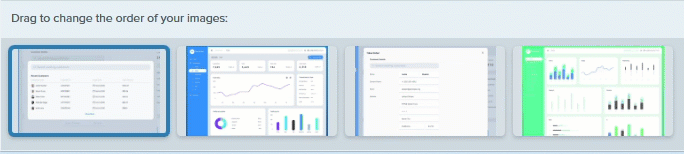
In the tray or library, Control+click (Windows) or Command+click (Mac) to select images to show in the video.
Select Create > Video from Images.
The Recording toolbar appears. Click and drag images to reorder in the tray.
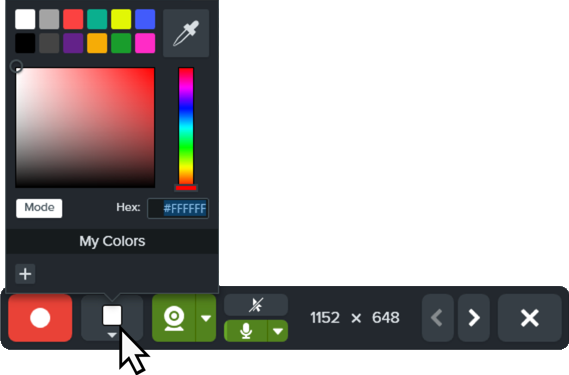
Click to select recording options from the Recording toolbar:
Video Background Color: Select a background color to display in the video. The background appears in the final video. Use dark or light colors such as dark blue, black, or white to improve contrast in the video.
Cursor: Record the cursor.
Microphone Audio: Record the audio from your computer’s built-in microphone or from a connected USB microphone. Click the dropdown to select a device.
Webcam: Record live video from the connected or built-in webcam. Click the Webcam button to toggle the webcam on/off. Click the dropdown to select the camera device and webcam display settings. To learn more about webcam options, see Record a Picture-in-Picture Video.
To begin recording, click the Record button or press Shift+F9 (Windows) or Control+Shift+Space (Mac).
To change the image shown in the video, click the Next Image or Previous Image buttons or press the left or right arrow keys.
To pause recording, click the Pause button or press Shift+F9 (Windows) or Control+Shift+Space (Mac).
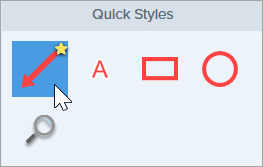
Draw attention to an area by adding arrows, shapes, and other annotations from the Favorites tool while recording or during a pause.
Click to select a Quick Style saved in your Favorites.
Click and drag in the recording area to add the annotation.
Note: Annotations are added to the images in Snagit and can be removed after recording.
Adjust the zoom and/or dimensions of the image on the Canvas if desired (Windows only).
To stop the recording, click the Stop button or press Shift+F10 (Windows) or Control+Shift+V (Mac).
The video appears on the canvas to review, edit, and share.
Record up to 5 minutes of narration for each image, with or without camera video.
Trim unwanted video at the beginning or end of each scene.
Drag and drop to reorder scenes as needed.
Add polish with stylish templates and dynamic backgrounds.
Collaborate – invite others to import images or record scenes.
Export your video to Screencast, download as an MP4, or open in Camtasia Editor for further editing.
View steps
In Snagit Editor, click to select a capture in the recent captures tray. Control+click (Windows) or Command+click (Mac) to select multiple images.
Note: Images on Camtasia online are limited to 6720 x 6720 pixels, or 3360 x 3360 at 2x pixel density on Mac. It is not currently possible to share videos to Camtasia online.
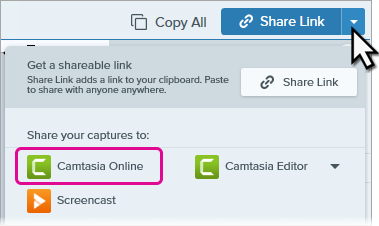
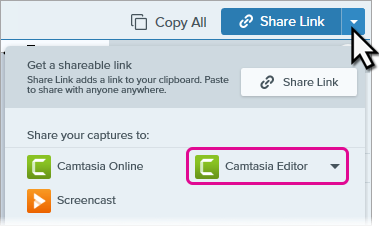
Click the Share Link dropdown or Share dropdown and select Camtasia Online.
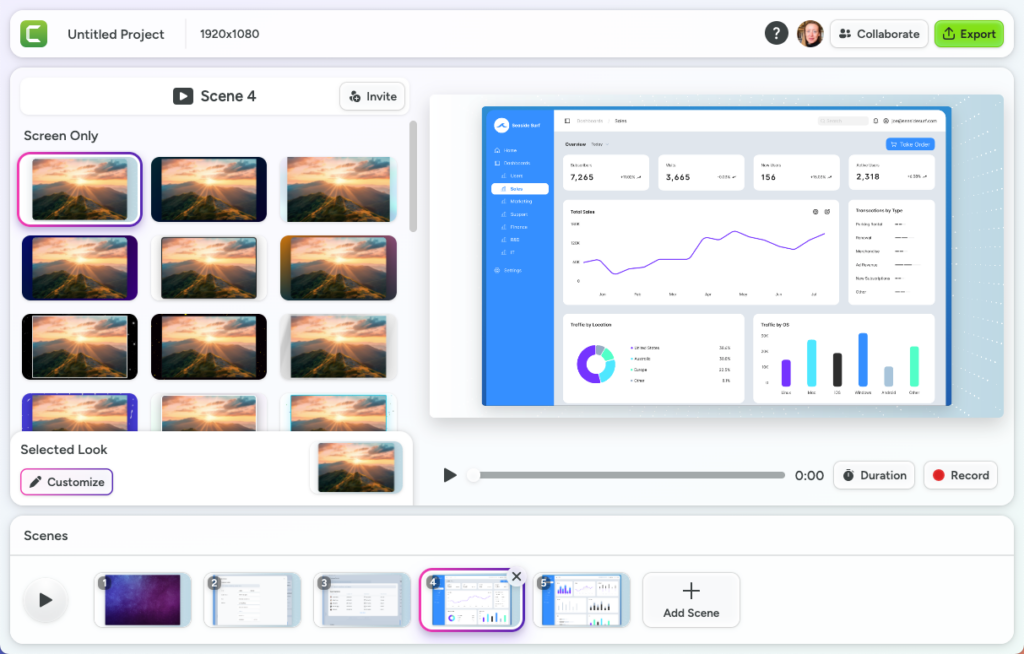
In the Share to Camtasia Online dialog, select a Camtasia online project or select Create New Project. Camtasia online opens in a web browser with a different scene for each image.
Click to select a scene.
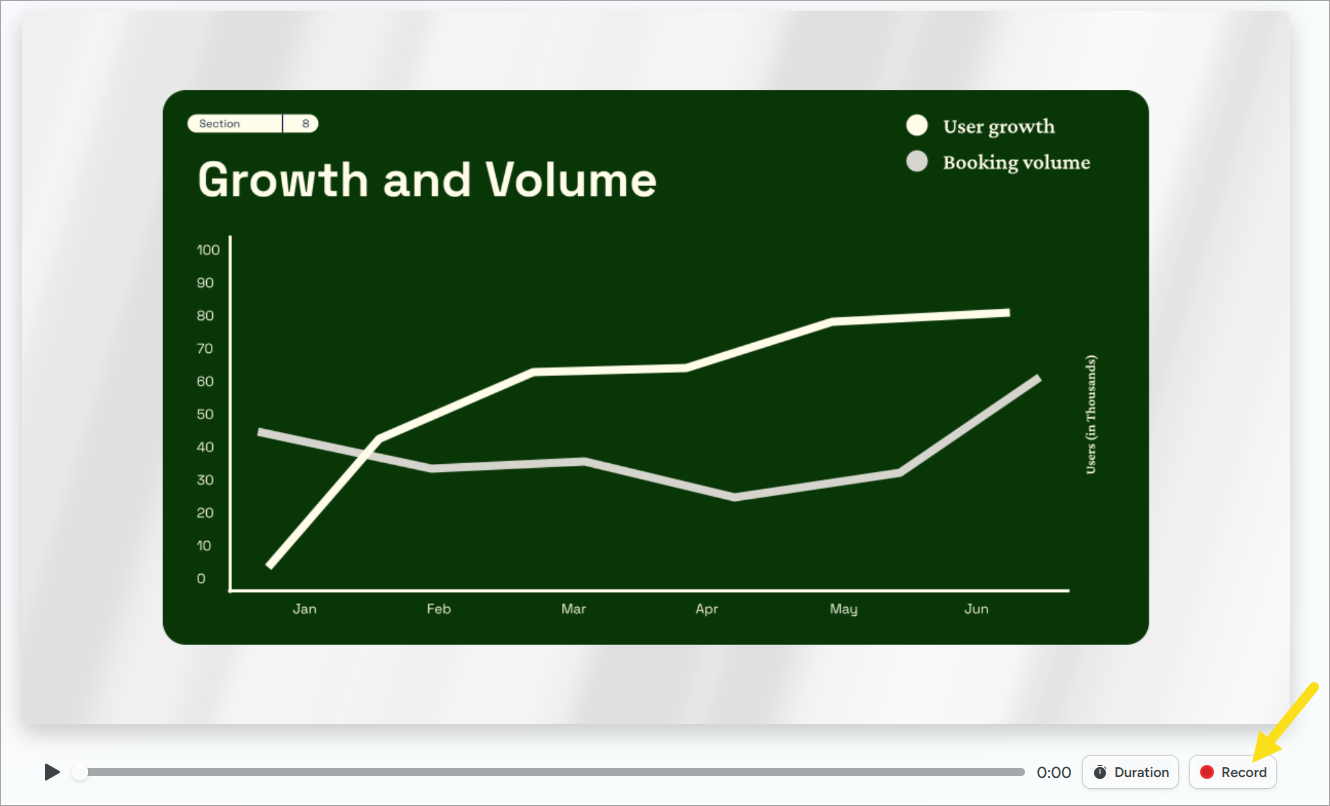
Click the Record button below the image preview.
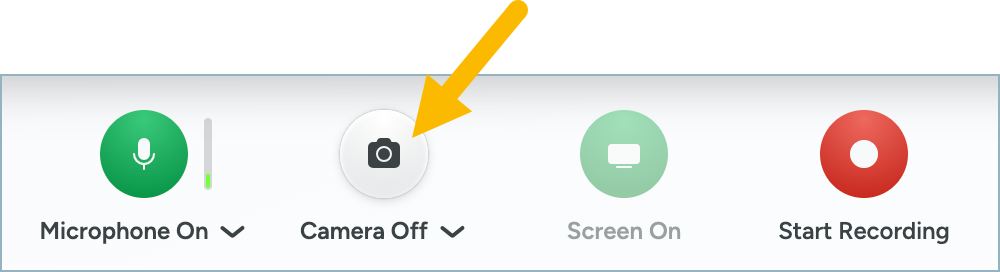
If prompted, allow Camtasia online permission to record your microphone and select the microphone source in the Microphone dropdown.
If you want to include camera recording, click the Camera button below the image preview, select your camera device, and allow Camtasia online permission to record your Camera.
Click the Start Recording button.
A recording countdown begins. Start your voiceover recording. You can record up to 5 minutes for each scene.
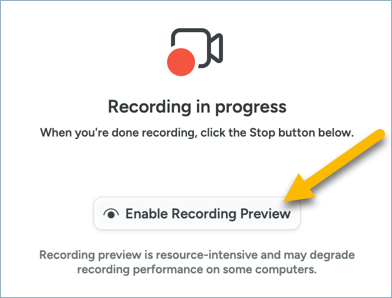
Optionally, click the Enable Recording Preview button to show the image preview while recording your voice over.
When you are finished recording, click the Stop button.
The recorded scene appears in your video project. After recording, you can optionally:
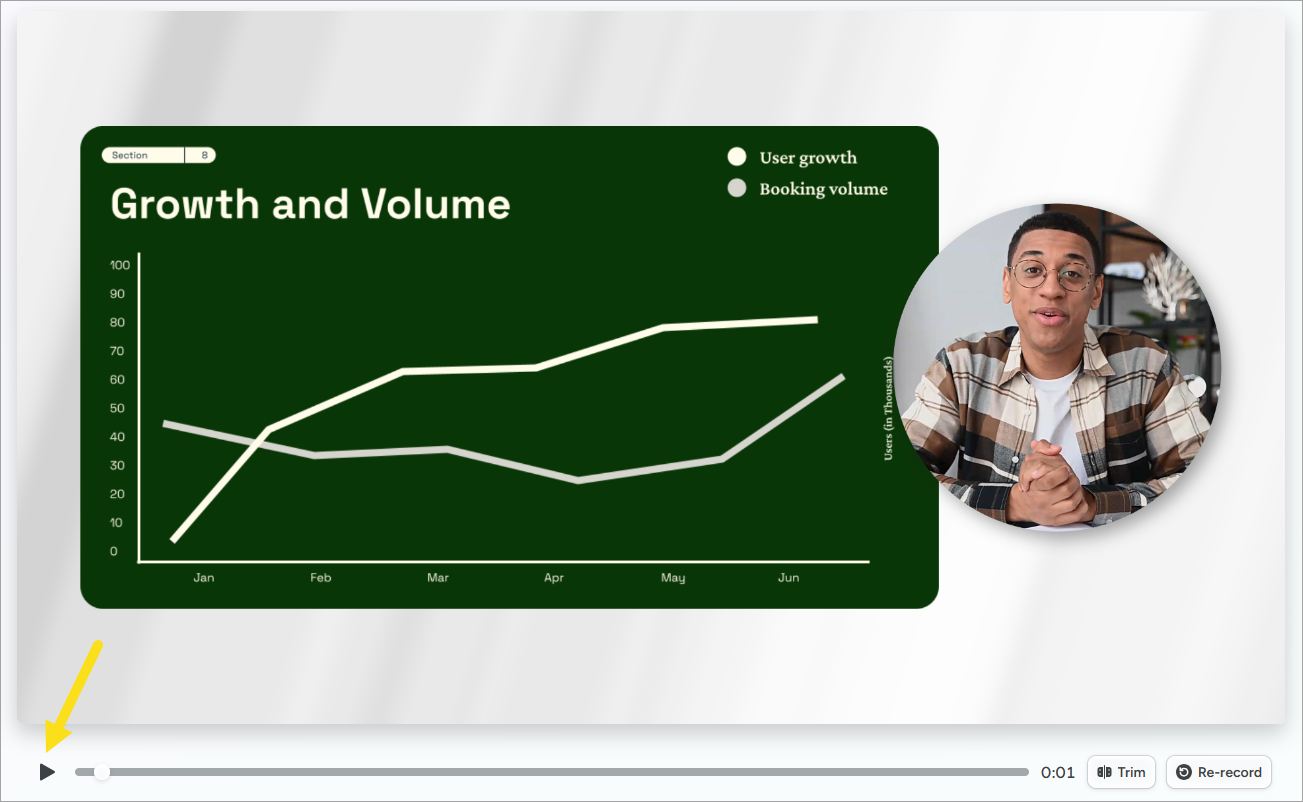
Preview the Recording: Click the Play button to preview the recording. If you are not satisfied with the recording, you can click the Re-record button to delete the current recording and record the scene again.
Customize the Scene: You can customize the look for the scene at any time. See Customize a Scene.
Trim the Scene: You can trim the beginning or end of the recording. Click the Trim button and drag the handle in to trim the recording or out to restore the original recording. Click Done.
In Snagit Editor, click to select a capture in the recent captures tray. Control+click (Windows) or Command+click (Mac) to select multiple images.
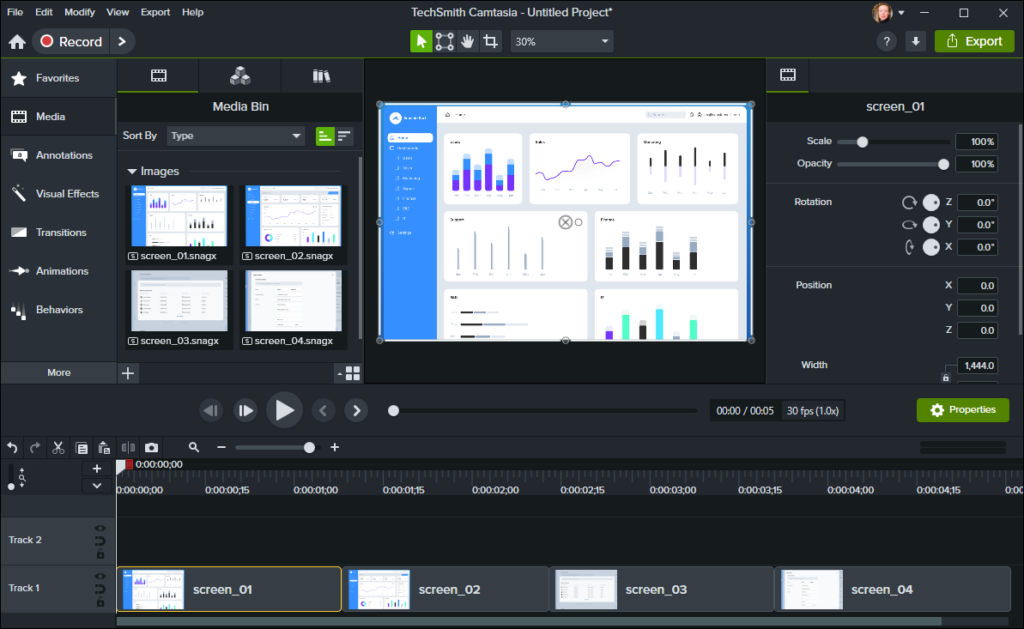
Click the Share Link dropdown or Share dropdown and select Camtasia Editor. Images are added to the Media Bin in an open Camtasia Editor project. If no project is open, Camtasia creates a new project with your images in the Media Bin.
Drag the media from the Media Bin onto the desired location on the timeline or canvas.
To get started with Camtasia, see the following tutorials: