Create professional-quality videos that captivate your audience with Camtasia’s recording capabilities.
Recorder Benefits
Camtasia Recorder can capture the following streams:

Screen
Record part or all of your computer screen, up to 4K at 60 frames per second.
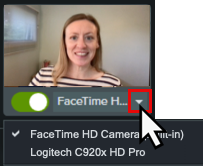
Camera
Record your built-in or external camera.
Mic Audio
Record your built-in or external microphone.
System Audio
Record the audio coming through your computer speakers.
You do not need the perfect recording or recording environment. Camtasia Recorder captures metadata to automate video enhancements, such as:
- Automatically apply Smart Focus animations to direct your viewers’ attention to key parts in your video.
- Change or enhance the cursor to help tell your story or to smooth out jumpy cursor movements.
- Edit out audio mistakes and detect suggested edits, such as hesitations and ums or ahs.
- Speed up the editing process with text-based audio edits.
- Apply AI Noise Removal to use audio recorded in noisy environments.
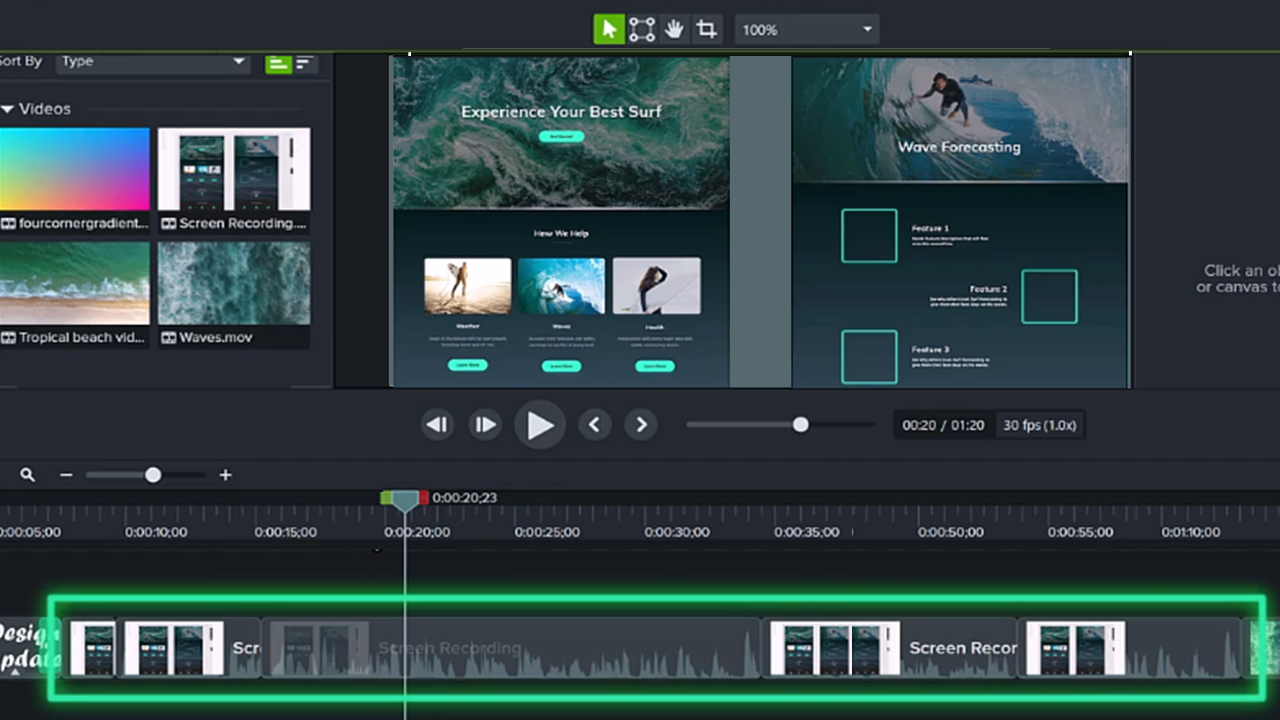
Record Your First Video
Set Up Your Recording
- From the Camtasia Editor Home window, click New Recording, or click Record from an open project.

- In Camtasia Recorder, click the Screen Recording, Camera, Microphone, and System Audio (optional) toggle buttons to turn them on.

- Camtasia highlights the selected recording area on the screen. To edit the recording area:
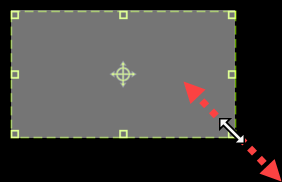
- Drag the handles to adjust the selection.
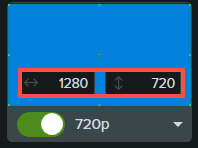
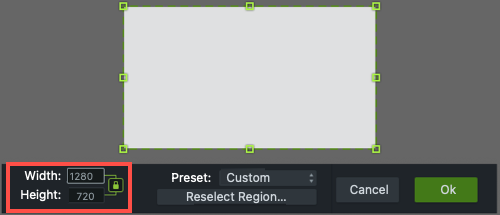
- To enter a specific size, type the dimensions in pixels into the Width and Height fields.
- To move the selected area on the screen, click the center handle (Windows) or within the selected area (Mac) and drag to the desired location.

If your computer is connected to multiple displays, you can drag the selected area from one screen to another.
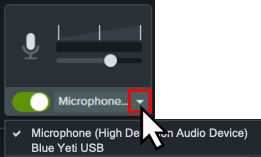
- Click the Camera and Microphone dropdowns to select specific devices.
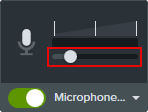
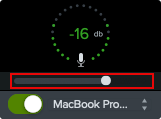
- Drag the microphone slider to increase or decrease the audio level.
- Turn system audio on or off. System audio captures the sound from your computer such as application alerts or audio playing from your computer speakers.
- Click the Camtasia Rev toggle to turn on Camtasia Rev.

- Click the Record button or press the F9 key (Windows) or Command+Shift+2 (Mac).
- When you are finished recording, complete one of the following:
- Click the Stop button
- Press the F10 key (Windows) or Command+Option+2 (Mac).
- On Windows, click the Camtasia Recorder icon in the taskbar and then click the Stop button.

- On Mac, click the Camtasia icon in the menu bar and select Stop Recording.
Record a Single Window
Choose to record a specific application window, eliminating pop ups and other distractions from your video.
Set Up Your Recording
- From the Camtasia Editor Home window, click New Recording, or click Record from an open project.
- In Camtasia Recorder, click the Screen Recording, Camera, Microphone, and System Audio (only from the selected application window) toggle buttons to turn them on.
- Click the Screen dropdown and select the Choose Window option.
- Click to select an application window to record and click OK.
- Click the Camera and Microphone dropdowns to select specific devices.
- Drag the microphone slider to increase or decrease the audio level.
- Turn system audio on or off. System audio captures the sound from your computer such as application alerts or audio playing from your computer speakers.
- Click the Camtasia Rev toggle to turn on Camtasia Rev.
- Click the Record button or press the F9 key (Windows) or Command+Shift+2 (Mac).
- When you are finished recording, complete one of the following:
- Click the Stop button
- Press the F10 key (Windows) or Command+Option+2 (Mac).
- On Windows, click the Camtasia Recorder icon in the taskbar and then click the Stop button.
- On Mac, click the Camtasia icon in the menu bar and select Stop Recording.
Note: If you close the application window during recording, Camtasia stops the recording.
Accelerate Video Creation with Camtasia Rev
Transform your original recording from this…
to this with just a few clicks in Camtasia Rev.

Camtasia Rev makes it easy for creators to deliver on-trend and compelling video content. Implement your own personal style with just a few clicks after recording.
Turn on Camtasia Rev in the recorder to automatically open Rev after you stop recording.

In Rev, apply one of our professionally-designed layouts to best fit your recorded content. Choose from screen focused, camera focused, or balanced layouts.

On the Background tab, choose from a variety of colors, patterns, and animations for the background to make your content more visually engaging.
Accelerate your video creation by selecting from our recommended preset effects on the Screen and Camera tabs, no editing skills required. You can instantly preview these effects to perfect the look of your video with just a few clicks.
- Apply multiple effects to the cursor and screen recording to draw attention.
- Apply effects to the camera recording to set the tone and remove distracting background noise and visuals.
- Apply the AI Noise Removal effect if you recorded in a noisy environment.
See Introduction to Rev Media.
Recording Tips
Recording Tips
- Follow these set up and recording tips to get the best audio.
- Hide desktop icons (Mac only): Before recording your desktop, hide app, folder, and file icons. In the menu bar, select Camtasia icon > Hide Desktop Icons.
- Run a sample recording to test the audio:
- No Microphone Audio: Select an audio device in the dropdown or enable the Microphone option in the recorder.
- No System Audio: Enable the System Audio option in the recorder.
- Low Microphone Audio: Drag the audio slider to increase the audio level and make sure the connected audio device is positioned near the speaker.
- Customize shortcuts: Speed up your workflow with recorder shortcuts. See Customize Shortcuts.
- Record with a connected USB microphone: For greater reliability, use a connected USB rather than Bluetooth microphone.
- Set maximum frame rate (Windows only): To ensure quality video recording, set the maximum capture frame rate. In Camtasia Recorder, select Tools menu > Preferences > Inputs tab > Maximum capture frame rate. See Crisp & Clear Screen Recordings and Camtasia Target Capture Frame Rate.
- Select a recording encoder (Windows only): Consider whether the default TSC2 encoder or H264 encoder is better for your situation. In Camtasia Recorder, select Tools menu > Preferences > Inputs tab > Recording encoder. See When to Use TSC2 vs H264 in Camtasia for Screen Recording.
Get Camtasia
Unleash the world’s most powerful screen recorder and video editor.
All Camtasia Tutorials