Record a Picture-in-Picture Video
Record your screen and webcam at the same time with Snagit's Picture-in-Picture feature.
Record your screen and webcam at the same time with Snagit's Picture-in-Picture feature.
Add a Picture-in-Picture (webcam) video to connect with your viewers. Snagit’s Picture-in-Picture allows you to:

Note: You can also preview and change webcam options before you start recording.


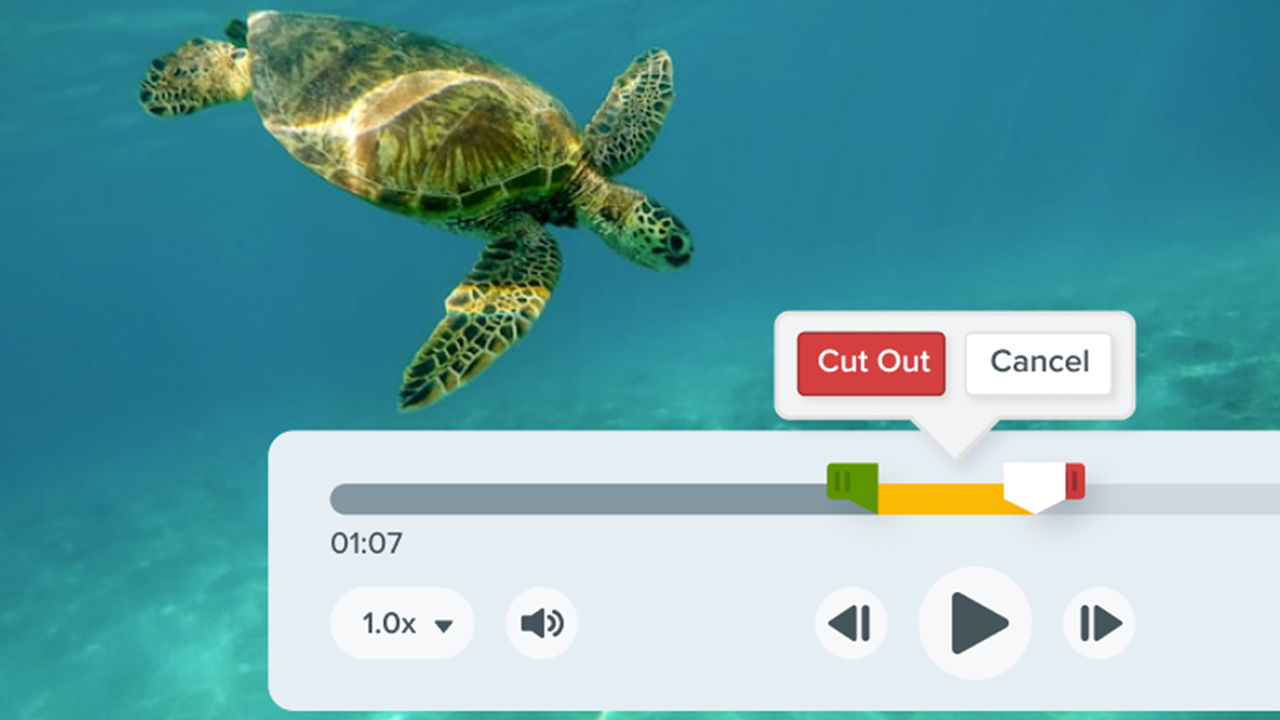
The capture opens in Snagit Editor where you can:
A few adjustments to the webcam options before and during recording can improve the impact and effectiveness of your video.
Select webcam options from the Video tab of the Snagit Capture window or the video recording toolbar.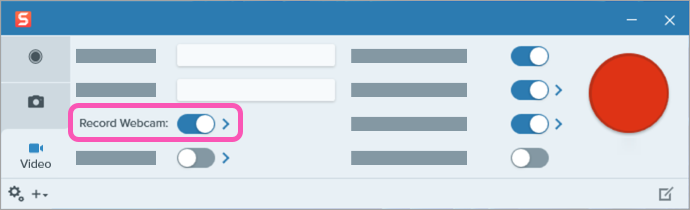

Device
Select a built-in webcam or connected device to record.
Placement
Select the location for the Picture-in-Picture window in your final video: Top-left, Top-right, Bottom-left, or Bottom-right.


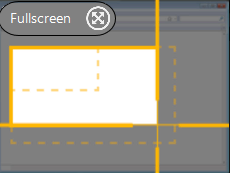
Or select Fullscreen (Windows) or Fullscreen Webcam (Mac) to show only camera video and no screen recording.
Shape
Select Circle, Square, Rounded Square, Rectangle, or Rounded Rectangle for Picture-in-Picture webcam display.


Mirror camera (Mac only)
Flip the webcam video horizontally.
Border (Mac only)
Add a border to your picture-in-picture camera video and select the color.
Backgrounds (Mac only)

In the Camera Settings dialog, click the Backgrounds tab and select one of the following options:


Note: Virtual backgrounds are not supported on Macs with Intel processors. Select from None or Blur background options.
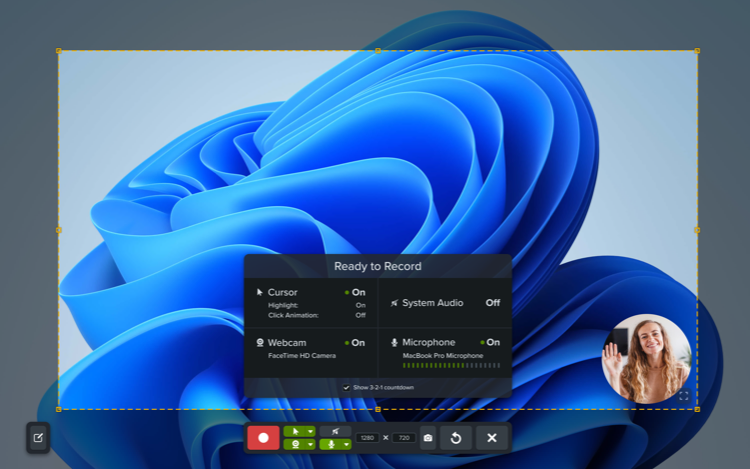
Before you press Record, Snagit shows a preview of your recording area and webcam. You can adjust the size, style, and placement of the webcam in the preview or even while recording.
Change webcam size
To change the size your webcam is displayed in the Picture-in-Picture, drag a corner of the webcam preview in or out.
Change webcam placement
To change the placement of the webcam in the Picture-in-Picture, click and drag the webcam preview to a different corner.
Swap Picture-in-Picture and Fullscreen Webcam
To swap between Picture-in-Picture and fullscreen webcam, click the Fullscreen Webcam ![]() or Picture-in-Picture
or Picture-in-Picture ![]() button, or press Control+Shift+F.
button, or press Control+Shift+F.
Tip: Pause recording to change video settings.
For a polished video, pause the recording before changing video settings, such as changing the Picture-in-Picture placement.
The best screen capture software for professionals
* Have Snagit 2024 or earlier? Check out our previous version help.