Assemble Your Video
Learn how to add media and other assets to assemble the content for your video.
Learn how to add media and other assets to assemble the content for your video.
The Media tab helps you organize and assemble content for your video. You can import media from your computer, manage media in the project, search our royalty-free assets, or use any custom assets saved to your library. 
To add content to your video, continue with the following:
| Add Media to Your Project (Media Bin) | |
| Enhance Your Video with Camtasia Assets | |
| Use Media from Your Personal Library |
The Media Bin contains any media you record or add to your current video project. Select any of the following options to add content into the Media Bin to use in your video:
The imported media appears in the Media Bin.
Send images or videos to Camtasia Editor from your mobile device.
The imported media appears in the Media Bin. See Record an iOS Demo or Tutorial.
See Record Voice Narration (Camtasia Editor) or Record a Voice-Over (Camtasia Audiate).
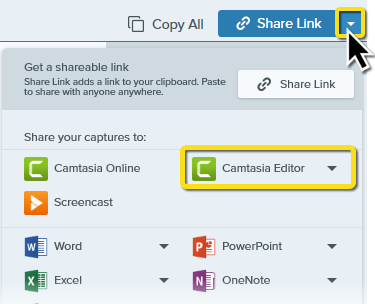
If you use Snagit to take screenshots or record video, share your Snagit captures to Camtasia Editor to include in video projects.
Note: Videos shared from Snagit Editor are sent as .mp4 files. For more editing flexibility, such as cursor editing and applying Rev layouts, see Open Snagit Video in Camtasia Editor below.
Tip: Send images back to Snagit for editing.
To continue editing an image in Snagit, right-click an image in the Media Bin and select the Edit in Snagit option. After editing, click Send (Windows) or Finish (Mac) to udpate the image in your Camtasia project.
Regular users of Snagit may prefer to record with Snagit Capture, then open the video in Camtasia Editor for more flexible editing.

The recording is added as a .trec to the Media Bin and as Rev media on the timeline.
To include the media in your video, select Media tab > Media Bin subtab. Drag the media onto the desired location on the timeline or canvas.
To learn more about managing your project media in the Media Bin, see Import & Manage Project Media (Media Bin).
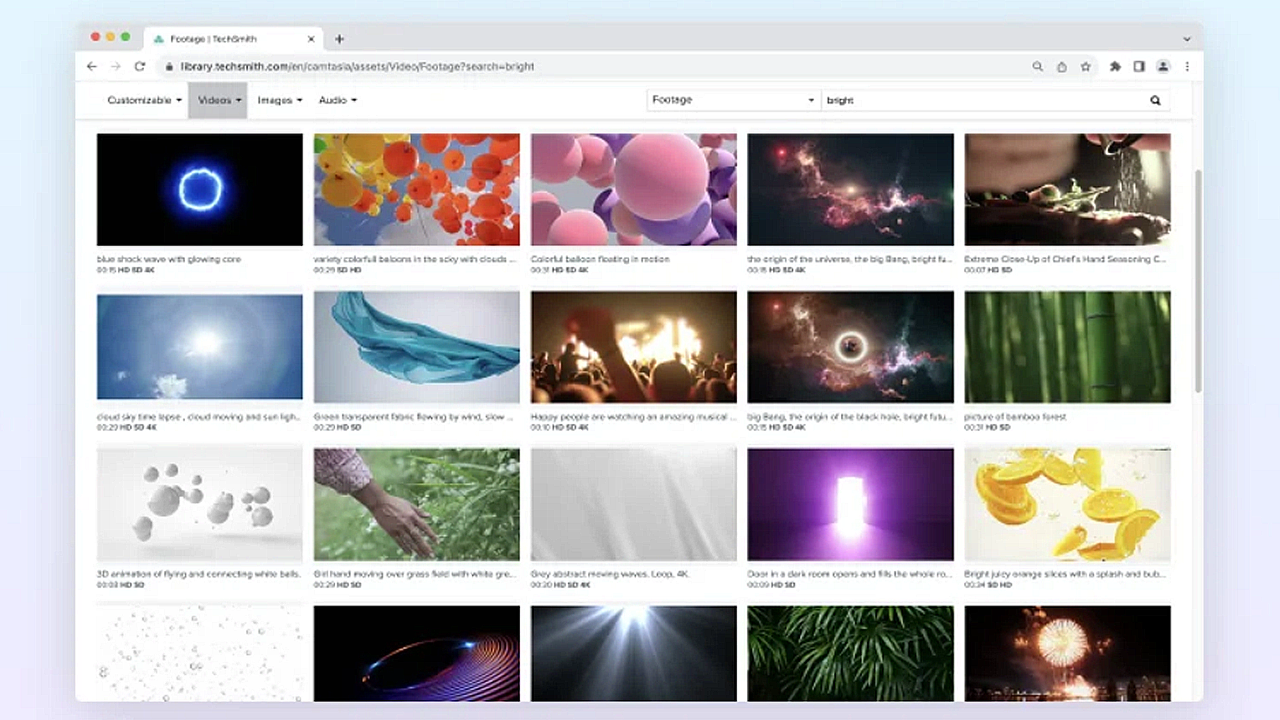
Assets are now easier than ever to access and add to your projects. You can browse over 100 million professional, royalty-free video assets directly in Camtasia Editor. Add polish to your video with photos, videos, audio, and customizable digital content, without ever leaving the editor.
If you are starting with a blank Camtasia project, browse our premade assets for inspiration, such as adding a title to introduce your video or add context to a recording.

Select Media tab > Camtasia Assets subtab to browse or search our free and premium online assets. To add an asset to your video, drag the asset from the Camtasia Assets subtab onto the desired location on the timeline or canvas.
To learn more about Camtasia assets and how to use the assets in your videos, see Enhance Your Video with Camtasia Assets.
Note: To access online assets in Camtasia Editor version 2023.2.0 or earlier, click the Download button > Download more assets. See Find Camtasia Assets on the Website tutorial.
The library stores any custom assets or media you want to reuse across multiple Camtasia projects. Save intros, animated backgrounds, icons, titles, music, groups, annotations, and more to your library to use consistent elements across your videos.

Select Media tab > Library subtab to browse your saved assets or media. To add a library asset to your video, drag the asset from the Library subtab onto the desired location on the timeline or canvas.
To learn how to save and organize assets in your library to reuse across projects, see Reuse Assets Across Projects (Library).
Get tips on how to position media or assets.
See Position Media on the Canvas or 3 Keys to the Camtasia Timeline to get recommendations on how to position media on the canvas or timeline.
Unleash the world’s most powerful screen recorder and video editor.
* Already a Camtasia Editor user? Learn how to update to the latest version.