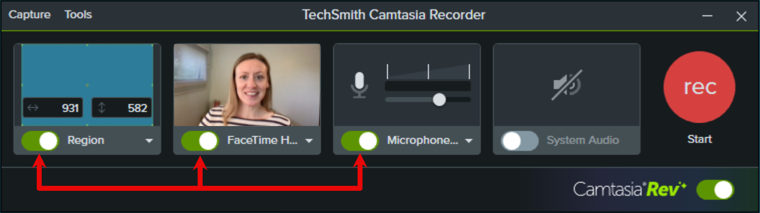
Record & Edit Camera Video (Picture-in-Picture)

Learn how to record video from a webcam or other camera device to connect with your viewers. Select a layout and edit how your camera recording appears in your video.

Camtasia product icon

1. Record your Screen and Camera Together

  1. Complete one of the following to open the Camtasia Recorder:
    • From the Camtasia Home screen, click New Recording Camtasia Rev.
      New Recording option on Camtasia Home screen
    • From an open project, click Record.
      Record button in Camtasia project
  2. In the Camtasia Recorder, click the Screen Recording, Camera, Microphone, and System Audio (optional) toggle buttons to turn them on.
    Toggle on screen, camera, and microphone recording
  3. Camtasia highlights the selected recording area on the screen. Drag the handles to adjust the selection. For more information about selecting the recording area, see Build Your First Video.
  4. Click the Camera and Microphone dropdowns to select specific devices.
    Select camera device Select microphone device
  5. Drag the microphone slider to increase or decrease the audio level.
    Microphone slider on Camtasia Windows Microphone slider on Camtasia Mac
  6. Click the Camtasia Rev toggle to turn on Camtasia Rev.
    Camtasia Rev toggle
  7. Click the Record button.
  8. When you are finished recording, click the Stop button.

2. Edit Layout and Style with Rev

Your recording opens in Camtasia Rev where you can implement your own personal style with just a few clicks.


Size
Set the video size based on where you want to host or share the video. Rev provides size options to target standard video sizes for all your channels.

Layout
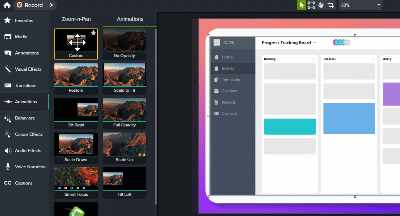
Choose from a series of layouts based on the content in your recording. Options include fullscreen camera or picture-in-picture layouts with both camera and screen recordings.

Background
Choose from a variety of colors, patterns, and animations for the background to make your content more visually engaging.

Effects
Apply multiple effects to the cursor, camera, and screen recording to draw attention or set the tone.

Filters
Apply visual filters to enhance the appearance of camera video.

Note: You can turn off some of the automatic selections in Camtasia Rev, such as backgrounds. Click to deselect the option on the Background, Effects, or Filters tabs.

If you are satisfied with your video, click Export to export your video directly from Rev.

Click the Edit in Camtasia button to further customize and edit your recording. See Move and Resize Camera Recording.

3. Move and Resize Camera Recording

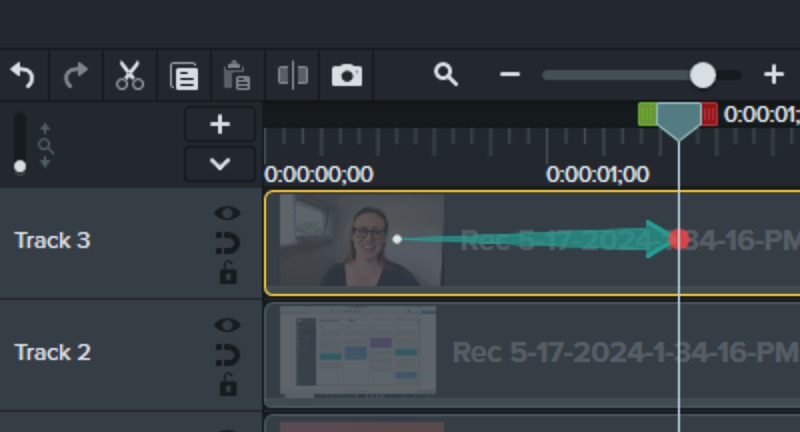
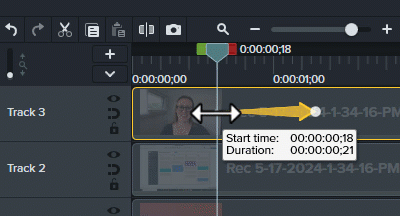
Camtasia Editor opens with components of your video on separate tracks:

  • Background (if selected in Camtasia Rev)
  • Screen recording and system audio combined
  • Camera and microphone recording combined

Complete any of the following options to edit the appearance of your camera recording.

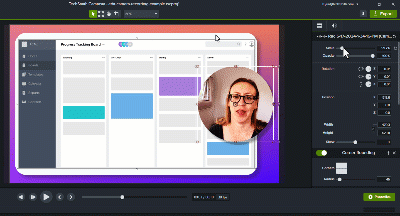
Position and Resize Camera Recording

You can further customize your content in the Rev layout you selected. For example, move your webcam to display on the left instead of the right in your video.

  1. In the Canvas toolbar, select Edit mode.
    Edit mode button
  2. To move the camera recording, click and drag the content to the desired location on the canvas.
  3. To resize the camera recording, click to select the content on the canvas. Drag a corner handle in or out on the canvas or drag the Scale slider in the properties.

Frame Content

Camtasia Rev automatically positions your camera recording in a frame within the selected layout. To edit how your camera recording appears in the frame:

  1. In the Canvas toolbar, select Crop mode.
    Crop mode button
  2. To zoom in or out on the content, click to select the camera recording on the canvas and drag the Scale slider in the properties.
  3. To position the content in the frame, click and drag the camera recording on the canvas.

4. Add Animations to Move or Transition Media

Add animations to media, for example to:

  • Resize the camera video to fill the screen at the start of the video.
  • Reposition the camera video during the video to reveal an area of the screen recording.

To add an animation:

  1. Click the Animations tab.
  2. Click the Animations subtab (Windows only).
  3. Drag the Custom animation onto the camera recording on the timeline.
    Drag custom animation
  4. An arrow appears on the timeline. The playhead automatically moves to the head of the arrow, which indicates where the animation ends.
    Playhead at the head of the animation arrow
  5. In the properties panel or on the canvas, adjust the position and scale of the camera recording for the end of the animation.
    Edit the camera recording scale and position
  6. Optional: Move the playhead to the tail of the arrow and adjust the position and scale of the camera recording for the beginning of the animation.
  7. Drag the arrow tail on the timeline to where you want the animation to start.
    Drag the arrow tail to adjust when the animation starts
  8. Drag the arrow head on the timeline to where you want the animation to end.
  9. Drag the playhead over the animation on the timeline to review it. Make further adjustments as needed.
    Drag the playhead to review the animation

For detailed information about how to apply animations, see Animations In-Depth.

Get Camtasia

Check out the latest features in Camtasia.

Free Download

Already a Camtasia user? Learn how to update to the latest version.

All Camtasia Tutorials