Move work forward by getting feedback and starting conversations around the images, GIFs, or videos you create in TechSmith Snagit.
Use Snagit to capture and create quick videos, marked-up screenshots, and GIFs. Then get a shareable link for that media with just one click. Paste the link into Slack where your team can preview the media right in the channel or direct message. Then click through to Screencast to connect and collaborate with your ideas by adding comments and simple markup right on top of your media.
No need for a meeting, screen share, or mile-long email or chat thread! Simply Capture. Create. Connect.
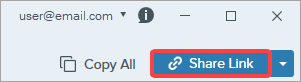
Snagit uploads the file to Screencast and copies a link to your clipboard.
Paste the link into a Slack channel or DM.
People on your team can preview your image, animated GIF, or video directly in Slack.
Note: If you do not see a preview of the content in the Slack message, the Snagit app may not be installed and approved in your Slack workspace. To learn how, see Install the Snagit App in Your Workspace.
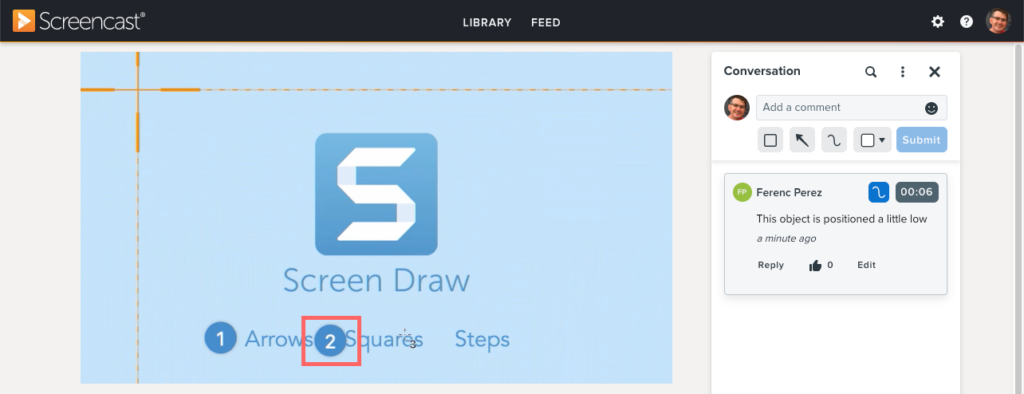
Your team can comment in the Slack thread or click the content link to provide more detailed feedback, such as timestamped comments or simple markup.
Screencast sends an email notification when someone adds a comment or reply so you can easily jump back in and keep your project moving forward.
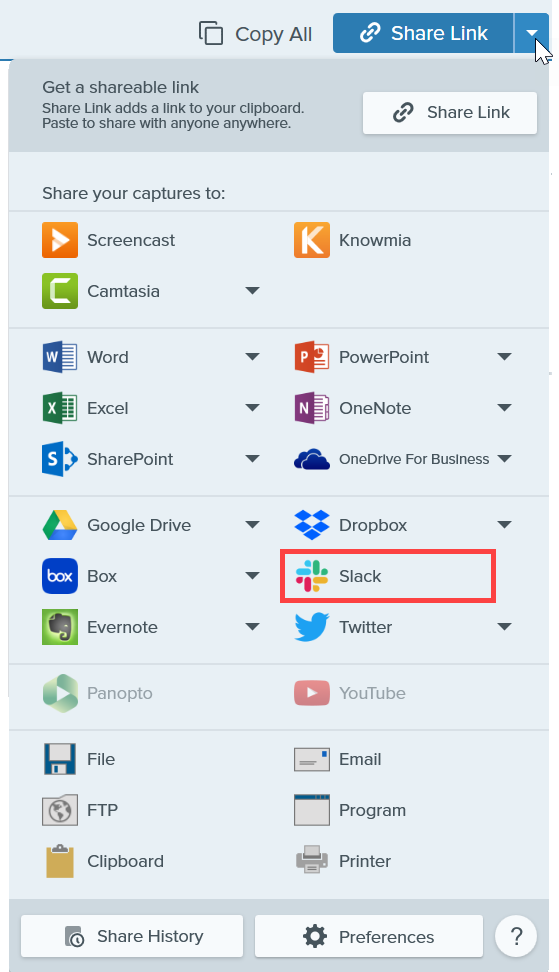
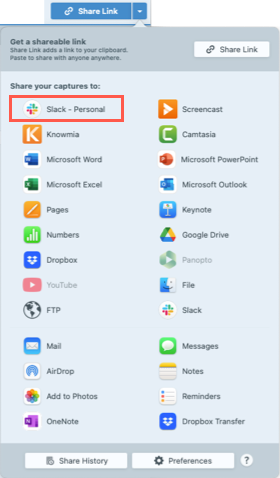
Send to Slack from the Share Menu (Alternative Method)
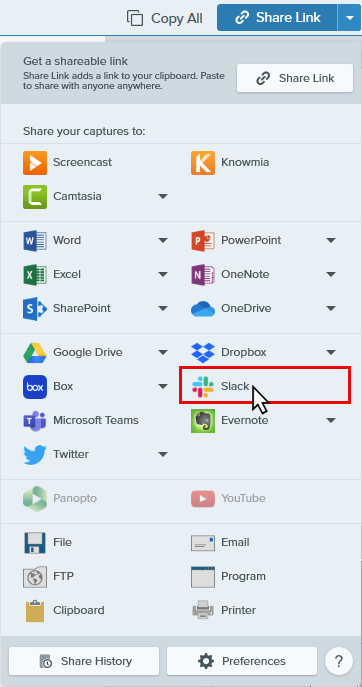
You can also share to Slack from the Share dropdown menu.
Note: If you are not currently logged in to your TechSmith account, you will be prompted to sign in. This allows you to share to the same Slack workspaces from different instances of Snagit.
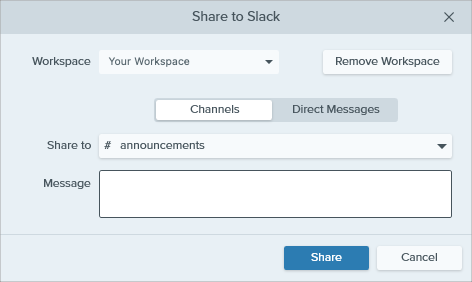
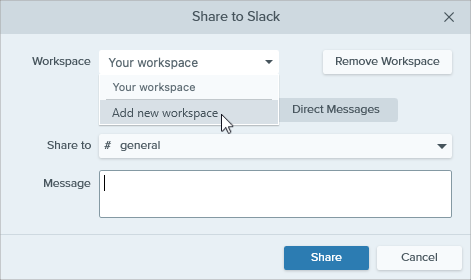
In the Share to Slack dialog, select a workspace from the Workspace dropdown.
Click to select the Channels or Direct Messages option.
In the Share to dropdown, select the channel name or direct message recipient.
Enter an optional message.
Click the Share button. Snagit uploads the image or video to Slack and copies the URL to your clipboard.
Add Additional Slack Workspaces
Windows
In the Share to Slack dialog, select Add new workspace from the Workspace dropdown.
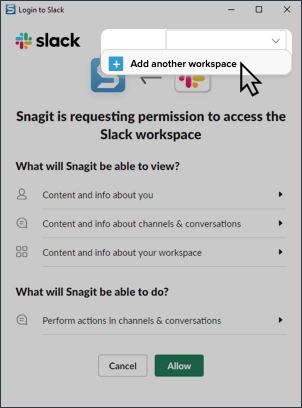
A browser window opens with the Slack permissions dialog. Select Add another workspace from the workspace menu.
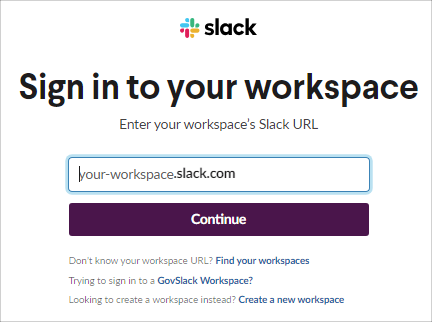
In the Slack sign-in dialog, enter your workspace URL and click Continue.
Select a sign-in option and sign in to your workspace.
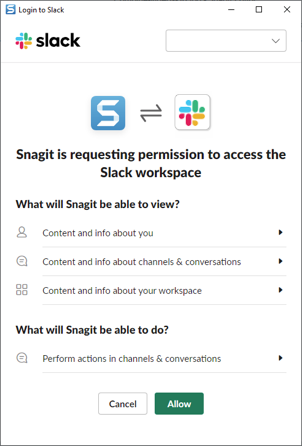
The permissions dialog appears again. Click Allow to allow Snagit access to your Slack workspace.
Snagit adds the workspace to the Workspace dropdown.
Mac
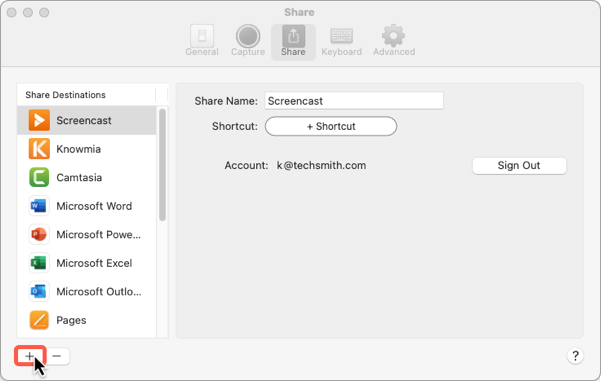
To share to a different workspace, add a new instance of Slack to the Share dropdown menu:
In Snagit Editor, select Share dropdown > Preferences.
On the Share tab, click the + button and select the Slack option.
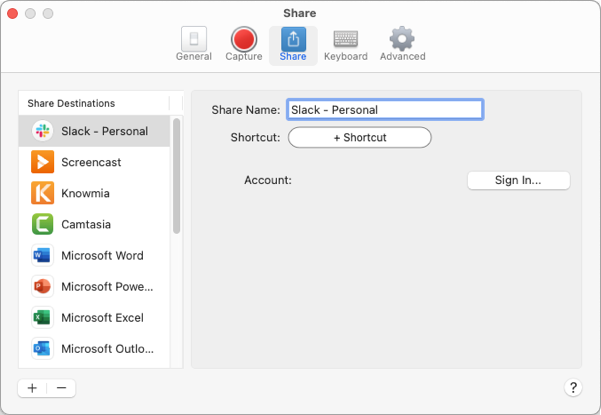
In the Share Name field, enter a name for the Slack workspace and click Sign In.
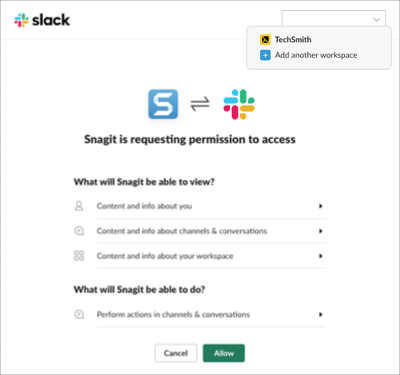
A browser window opens with the Slack permissions dialog. Select Add another workspace from the workspace menu.
In the sign-in dialog, enter your Slack workspace URL and click Continue.
In the sign-in window, select a sign-in option and sign in to your Slack workspace.
In the permissions dialog, click Allow to allow Snagit to access to your Slack workspace.
The new Slack workspace appears in your Share dropdown.
Install the Snagit App in Your Workspace
Slack apps connect the software you use to Slack. The Snagit app allows you to preview and play Snagit content directly in the Slack message.
To view the list of apps installed to the workspace, select Apps in the top left of your sidebar. If you don’t see this option, click More to find it.
If the Snagit app has not been previously installed, click the Add to Slack button below or complete the following:
If the Snagit app has not been previously installed, select Apps dropdown > Add apps> App Directory button to open the Slack App Directory to browse for the Snagit app.
Click the Add to Slack button from the Snagit app page in the Slack App Directory.
A prompt appears. Click the Allow button. To learn more about the security and compliance information, see the Snagit app page.
The Slack app opens. The Snagit app appears in the list of apps installed in your workspace. To learn more about our privacy policy, see TechSmith Privacy Policy.
Note: This tutorial is for Snagit version 2025. Previous versions may look or function differently.
To check your version, select Help menu (Windows) or Snagit menu (Mac) > About Snagit.