


Even the best YouTube video is unfinished without a quality outro.
A YouTube video outro increases watch time on your channel and can even help you get more more subscribers, extend your reach, or drive more traffic to your website.
If you’ve never made an outro for your videos, it can be hard to know where to start. Keep reading to find out everything you need to know to create effective YouTube video outros that will keep viewers engaged with your content and coming back for more!
Here’s what you’ll learn:
- What is a YouTube outro?
- The essential elements of your YouTube outro.
- Outro best practices.
- The five easy steps to creating your own outro.
Easily Create Your Own YouTube Video Outros
Camtasia makes it fast and easy to create custom YouTube outros — no pro skills required! Download a free trial and get started today!
Get started free!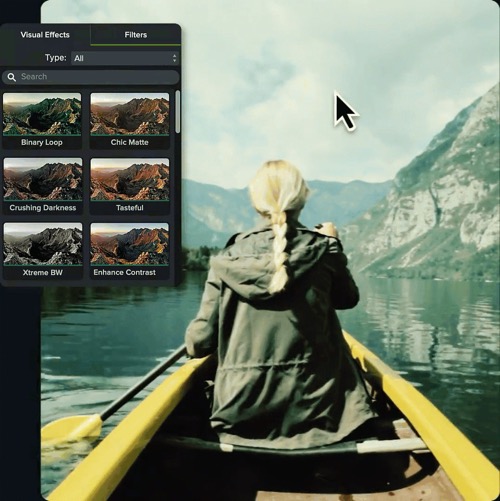
What is a YouTube outro?
A YouTube outro — sometimes called the end screen or end card — is the last part of your video after the main content is done.
It’s the perfect spot for a call to action. Whether you want to point viewers to similar videos from your channel, prompt them to like the video or subscribe to your channel, post a link to your website, or all of the above, an outro gives you one last chance to engage your audience and drive action that can help grow your channel.
You make videos, so obviously you want people to see them. That’s the first step. But make your secondary goal to leverage a YouTube outro to tell your viewers what to do next.
Creating a YouTube outro or end card designed to leverage YouTube’s end screen capabilities lets viewers easily click through to a strategic, relevant next destination of your choice.
There are four types of content you can use in your end screens on YouTube, called elements. They are:
- Video or playlist: Link to a different individual video or a YouTube playlist of multiple videos.
- Subscribe: Link to your own channel where a viewer can click to subscribe.
- Channel: Link to a different YouTube channel.
- Link to approved website: Link to a website outside of YouTube.
Note: for that last one, your site must be part of the YouTube partner program and can’t contain any content that might be considered offensive or dangerous, such as pornography or malware.
Examples of YouTube outros
There are a number of ways to leverage and combine the available elements for YouTube end screens. Below are some examples.

In the example above, YouTube creator Sean Cannell of Think Media uses the subscribe element, and two playlist or video elements. He also uses the space to share his Facebook, Twitter, and Instagram handles (though that field is not clickable) and display his company logo. Check out this outro on his YouTube channel.

In this next example, our own Andy Owen uses the video element to suggest other videos viewers might be interested in. You can view this particular outro on our YouTube channel.
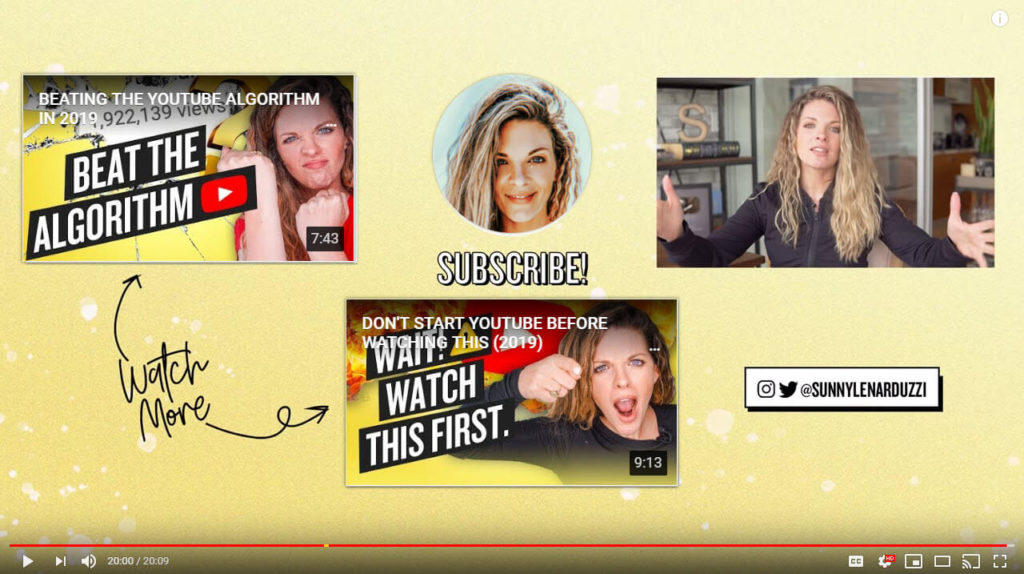
In this example, YouTube marketing expert Sunny Lenarduzzi uses two different video elements in her outro to point viewers to related content, and also a subscribe element. Like the first example, she also shares her handle for Instagram and Twitter in her outro, though that box is not clickable. Watch this outro on her YouTube channel.
Easily Create Your Own YouTube Video Outros
Camtasia makes it fast and easy to create custom YouTube outros — no pro skills required! Download a free trial and get started today!
Get started free!
YouTube outro requirements
We covered the different types of elements available on YouTube, but what are the rules and requirements for YouTube end screens?
First, your video must be at least 25 seconds long to add elements to an end screen.
As for the length of your outro, you can have your end screen elements visible for five to 20 seconds. Remember, the longer they’re visible, the more time your audience has to react and actually take the action you want them to. This is especially true if you’re using more than one kind of element.
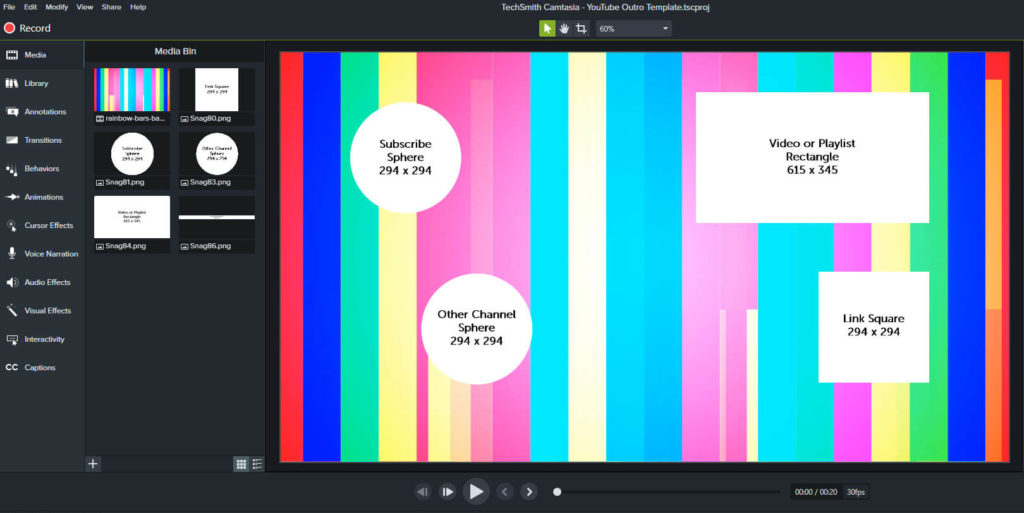
As you think through creating your own custom outro, be mindful of the sizes of the different elements as well. Below you can view the sizing, measured in pixels. This is assuming you use a 1920 x 1080 canvas.

Refer to these sizes as you build your outro to your video so that everything comes together smoothly when you overlay these elements within YouTube.
Best practices for YouTube outros
Don’t be afraid to be creative with your YouTube outro! It should reflect your brand, style, and tone of voice. But, as with anything, there are still a few best practices you should follow to ensure your end screen is as effective as possible..
1. Have a goal in mind
You should create an end screen that is relevant not only to the video, but also supports a specific goal — whether that’s a goal for the particular video, a series of videos, or your channel as a whole.
Goals may include increasing watch time for your channel, getting more subscribers, or driving traffic to an external site. Whatever your goal, make sure there’s a “why” behind your approach.
2. Keep it clean and simple
Don’t throw so many elements at your viewers that they can’t focus! Keep your end screen clean and simple to prevent unnecessary distractions and to make it easy for your viewers to focus on what’s important.
3. Use consistency to help build your brand
This is true not only for your YouTube outros, but for all of your YouTube content. Use consistent colors, logos, editing styles, etc. to help your audience recognize your brand and build trust.
4. Consider your channel holistically
Even if you’re just getting started on YouTube, you can begin thinking about what kind of channel you want to build. What do you want to be known for? What story are you trying to tell?
Think about your channel holistically rather than focusing solely on individual videos to strengthen your message and your brand.
You’ll also have more relevant, related content to point your viewer to after they’ve watched your video.
How to create a YouTube outro
Now you know what outros are, the essential elements, and the rules, and best practices — let’s get you creating your own!
You don’t need a fancy animating software or professional video skills to create outro templates. TechSmith Camtasia makes it incredibly easy to create all kinds of videos and video elements, and it’s the perfect solution for creating YouTube outros.
Follow these steps to create a 20-second video that you can save as a template for your YouTube outros. The steps will also work to create any length outro — simply adjust as necessary.
Step 1: Create a new video project and select your background
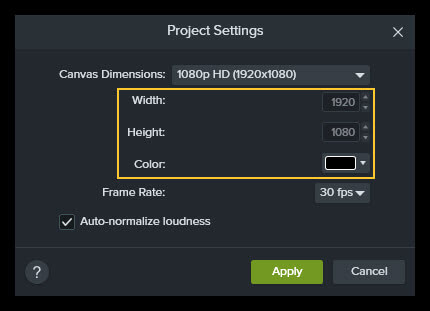
First, open Camtasia and select New Project. The default size of your new project will be 1920 x 1080. If you wish to add this outro to a video that’s a different size, so be sure to resize your new project as appropriate.
Then, you can select a color for your background. If you’d prefer a motion backdrop to a static, solid colored backdrop, go to Library>Motion Backgrounds. There are additional options available through a subscription to TechSmith Assets for Camtasia as well.
Step 2: Add placeholder shapes and annotations to your template
Now that the backdrop is in place, simply add a few element placeholders. This will allow you to perfect the placement now, which will save time on YouTube and keep your outros consistent. I mocked mine up in Snagit, then dragged them onto the canvas.
Note that when a viewer hovers over the subscribe element, there is a rectangle that will pop out. Keep that in mind if it will bother you when something near your subscribe button gets covered up, even momentarily.
See an example below.

Step 3: Save it as a template
Once you’ve created your outro template, produce your YouTube outro as its own MP4 video and be sure to save it. Now, you can reuse it time and again by simply importing it into Camtasia and dragging it to the end of your current video project.
Step 4: Upload your video to YouTube and add the end screen elements
Now that you have your outro built out and added to the end of one of your videos, upload it to YouTube and add your end screen elements in just a few simple steps.
Step 5: Publish your YouTube video and analyze the results
Publish your video! Be sure to schedule regular check-ins to monitor your video and channel analytics. Then, make any necessary tweaks to your strategy based on your data, and continue to watch the views roll in.
More reading
If you’d like to learn more about creating YouTube videos in general, check out How to Make a YouTube Video: The Ultimate Guide. And for more information about growing your YouTube channel specifically, check out our free TechSmith Academy course Video Promotion and Growing Your Audience, which features tips from several expert YouTube creators.
Frequently Asked Questions
A YouTube outro — sometimes called the end screen or end card — is the last part of your video after the main content is done.
It’s the perfect spot for a call to action. Whether you want to point viewers to similar videos from your channel, prompt them to like the video or subscribe to your channel, post a link to your website, or all of the above, an outro gives you one last chance to engage your audience and drive action that can help grow your channel.
A YouTube outro (or end screen) allows you to better engage viewers by adding a call to action. You can point them to other videos you’ve made, prompt them to subscribe to your channel, drive traffic to your website, and more.
Nope! You can start creating YouTube outros or end cards right now with Camtasia.
Your video must be at least 25 seconds long to add a YouTube outro. You can have your outro elements visible for up to 20 seconds.
There are four element types you can add. They are:
1. Video or playlist: Link to a different individual video or a YouTube playlist of multiple videos.
2. Subscribe: Link to your own channel where a viewer can click to subscribe.
3. Channel: Link to a different YouTube channel.
4. Link to approved website: Link to a website outside of YouTube.
1. Have a goal.
2. Keep it clean and simple.
3. Use consistency to help your brand.
4. Consider your channel hollistically.
Share