


In this post, you’re going to learn everything you need to know about video marketing.
This guide includes tons of:
- Helpful frameworks
- Answers from video marketing experts
- Video breakdowns
- Best practices
- And much more
So, if you want to learn more about how to create and edit videos, you’ll love the information in this guide.
Keep reading for our complete guide to video marketing.
Video Marketing 101 [Video Series]
Check out past interviews from Video Marketing World. We talk with expert video marketers about video creation, promotion, audience growth, and getting better in front of the camera.
Our interpretation of what video is and how to apply it to business continues to grow. As marketers, we’re often on our own to prove the power of video within our companies — and figure out ways to harness that power.
That’s why I think you’ll love this guide.
We want to help expand the way you look at and think about video.
What you’ll learn in this guide
We’ve interviewed some of today’s most successful content and video marketers to provide you with tips, tools, and strategies to create video yourself.
How to create a video marketing strategy
10 marketing videos you can make today
How to set up your studio or home office
9 simple edits to add to your video
Why internal marketing matters
What is video marketing?
Video marketing is using videos to create and deliver information and education to your audience and generate demand for your product or service from new consumers.
How to create a video marketing strategy
Most marketers aren’t new to creating content for their target audience and potential customers. It’s at the heart of what we do.
But when, where, and what kinds of videos should you show to consumers throughout your marketing campaigns?
Start with three video categories
Put your video content strategy in three categories:
- Traffic driving videos (short, concise videos for social media platforms)
- Content marketing video (longer, more in-depth videos for YouTube & your website.
- Website videos (“about us” and testimonial videos)
Let’s go over each one:
1. Social media videos
These videos have a single purpose: To drive traffic. They are, obviously, hosted on social media platforms because you’re not concerned about who has ownership of that video.
Don’t expect them to have a long shelf life. They promote something like an upcoming event or maybe another piece of content you want people to see.
2. Content marketing videos
These videos provide something of value that educates or entertains your audience. Andy Crestodina believes this type of video is best hosted on YouTube.
“YouTube is such a powerful engine for discovery. Their Recommendation engine is driving massive amounts of attention towards video.”
Andy Crestodina, Orbit Media
Once your video is on YouTube you can embed it on your website, so you don’t lose a visitor to your site, but you’re also building up an audience on YouTube as well.
3. About us / testimonial video
These videos build trust, so you’ll want to spend more time and money producing them. These videos explain who you are and maybe contain customer testimonials.
This is the video you want to be hosted on your website so that you have full control and ownership of it.
Andy explains it this way.
“That should be in a much nicer player than YouTube. With YouTube you can’t control the colours, you can’t stop it from suggesting other videos, and then you’ve got people watching cat videos on your website.”
Andy Crestodina, Orbit Media
This will not only help you decide what types of video content to create, but also help build trust with your audience.
Create a simple, repeatable video content strategy
Before you add video to your content marketing strategy, make sure you have a solid plan in place.
Looking for the simplest formula to create video content every single week?
Create a weekly live stream.
That is exactly what we’ve done for nearly a year.
But even if you don’t have a live stream, you can still follow our video content strategy.
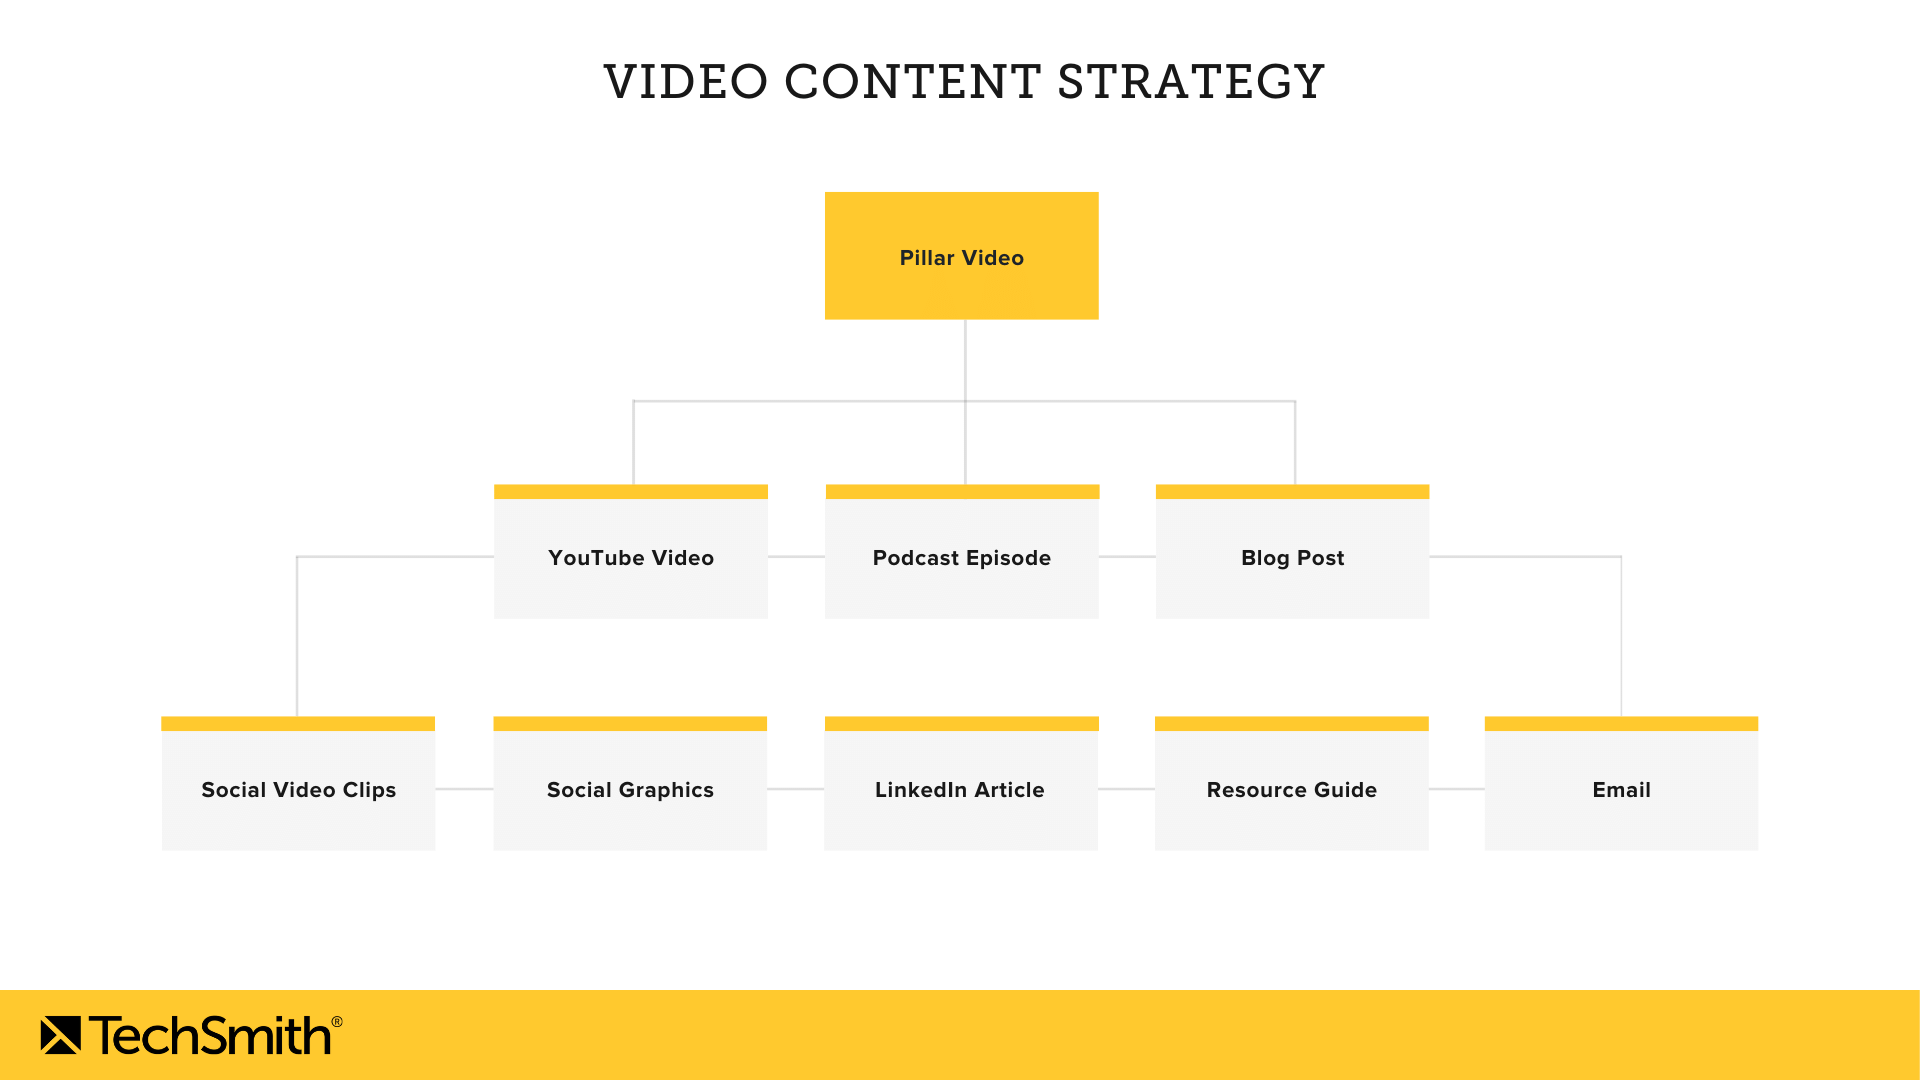
It all starts with a pillar video.
Most marketers are familiar with the idea of pillar content.
You take one big piece of content (or one big topic) and slice it up into a bunch of other smaller topics or clusters.
Rather than slicing it up into different topics, let’s take a look at how we slice it up into different media types.
One TechSmith live stream gets:
- Posted on YouTube
- Added to our podcast feed
- Created into a blog post
- Cut into clips for social media
- Created into social graphics
Want to take it even further?
Try:
- Posting your blog post as an article on LinkedIn or Medium
- Creating a downloadable resource guide
- Sending an email that breaks down and links to the video
A live stream video is just one example, but you can use this same method for nearly any video you make.
Use a video distribution framework
If creating a video is the first half of the battle, distributing it is the second.
Distribution is the backbone of a solid content marketing plan.
How you approach the distribution of your video depends on a number of variables:
- Your audience
- Your goals
- And which platforms you have a strong presence
Every distribution plan is unique.
So, while we can’t write your distribution plan for you, we can review important considerations and give you some ideas.
Think about video hosting
If you create videos and want to distribute them on your website, you need to consider hosting.
To choose the right hosting platform, you must understand your needs. Video hosting platforms offer similar but different features making some more suitable for certain situations than others.
Utilize video search engine optimization (SEO)
Organizations that use video in their marketing efforts receive 41% more web traffic from search than those who don’t.
Our research found that the vast majority of people found their most recent watched video by searching for it.
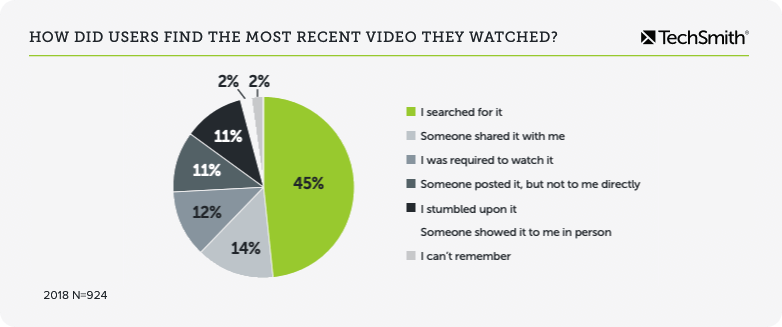
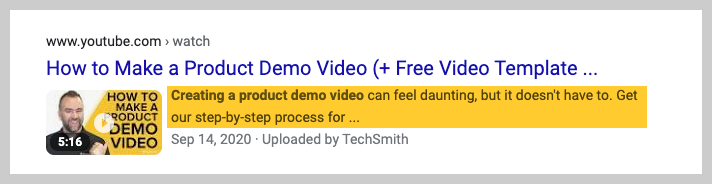
That’s why you need to pay particular attention to your video titles and follow SEO best practices.
Most people end up distributing a video on YouTube (even if they don’t use YouTube to host that same video on a website) because YouTube is the second most-used search engine behind Google. You want to have content in the places where people are searching for it.
Here are some SEO highlights to remember:
Titles should be 70 characters or less if possible.

While descriptions can be up to 5,000 characters, only the first 157 characters will appear in search results.
Focus on getting your keywords and main subjects toward the front of your description.
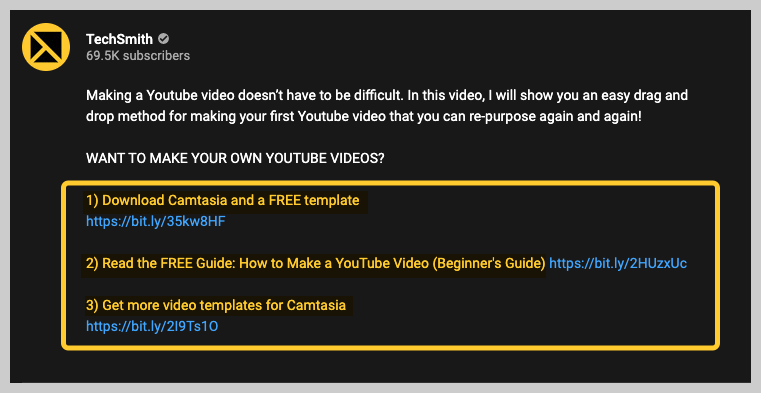
Link to other useful content or webpages at the end of your YouTube description. If people are interested in more of your content, don’t make them hunt for it.
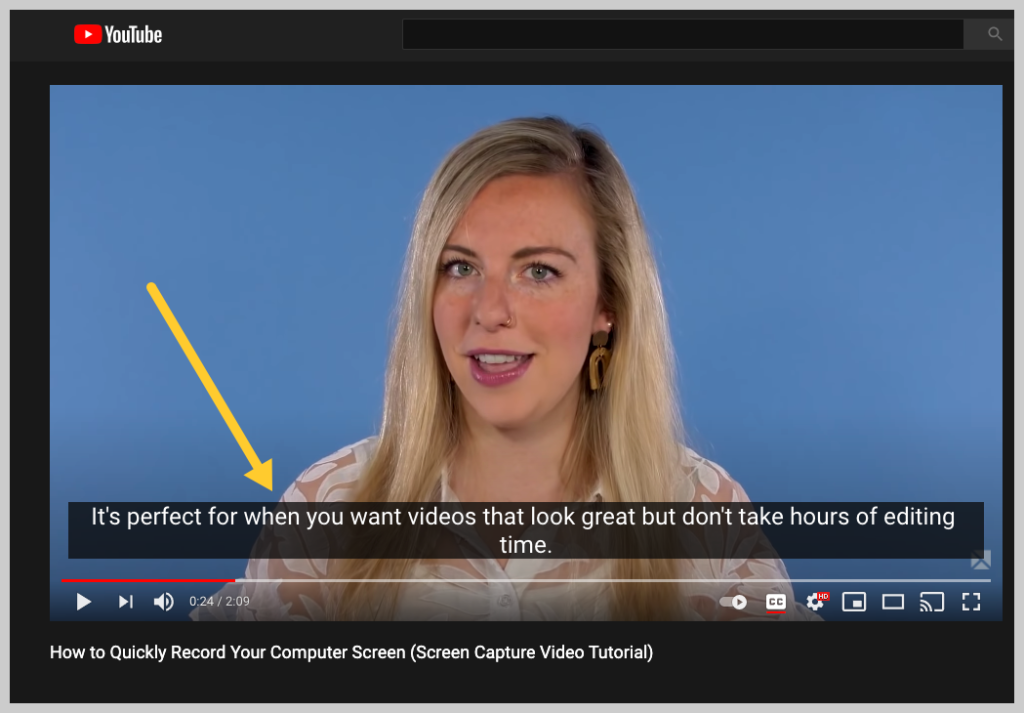
Generate captions for your video. This will let people understand your video’s message even with the sound off or if they are deaf or hard of hearing.
These are just basic tips. If you want to improve your SEO, select a professional hosting platform with built-in SEO tools to help you even more.
10 marketing videos you can make today
It doesn’t matter if you work at a Fortune 500 company or small business, video marketing for your businesses shouldn’t be overwhelming.
Even if you’re the only one at your organization championing video content, I hope you keep moving forward in the video revolution.
But where do you even begin?
To get the most bang for your buck, start with an instructional video.
Instructional videos simply show off your knowledge to someone else. And they’re getting more popular every year.
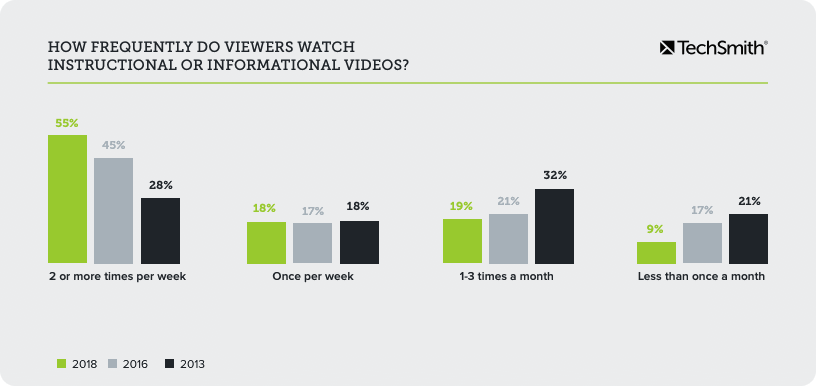
Whether you need to demonstrate a technical process for a new product feature or teach your new coworker how to use her email, a video is a great way to communicate.
Over half of the most common type of videos that marketers are investing in are a type of instructional video.
That gives you a lot of good videos to start with.
In fact, here are 10 types of videos your business can start making today:
- Screencast video
- Social media video
- YouTube content marketing video
- Explainer video
- Software demo video
- Customer story video
- Training video
- Tutorial or how-to video
- Presentation video
- Microvideo
What gear do you need to make marketing videos?
When starting out with video, you can feel overwhelmed and like you don’t have the right tools to create your video.
High-end equipment makes you feel legit — and you can’t deny the difference in quality. But specialized equipment means acquiring specialized skills and knowledge that require a lot of time and training.
But here’s the good news — When starting out with video, don’t worry too much about equipment.
You can make high-quality videos with things like screen recording software or a smartphone and a little bit of creativity.
And, these more basic tools can help you learn video creation and the techniques you need when you do upgrade your gear.
Here’s what you need to get started.
1. Microphone
Whether for your mobile device, input directly into your camera or computer, a microphone will improve the overall quality of you your video.
A decent mic doesn’t have to be expensive, but it’s well worth the investment.
2. Screen recorder and video editor
When you choose screen recording software, pick a tool with built-in recording, editing, and sharing features. It will save you time and let you do all of your work in one tool.
Recording your screen is a great way to make a YouTube video without a camera.
3. Lighting
When you record camera video or even a webcam, video lighting will make a big difference in how you look, and the overall quality.
Again, you don’t have to choose a full professional video lighting rig. Even an inexpensive LED ring light will help.
4. Camera or webcam
Cameras can be large investments, ranging from hundreds to thousands of dollars.
While DSLRs or other high-end cameras can drastically improve the look of your video, they also add a ton of settings and options to manage, increasing the complexity of shooting your video.
Not everyone needs to go out and get a fancy DSLR to shoot their videos.
In fact, most people can live with a little bit of grainy video as long as the audio sounds good.
So, to start, I would focus on getting an external USB microphone to improve the quality of your audio.
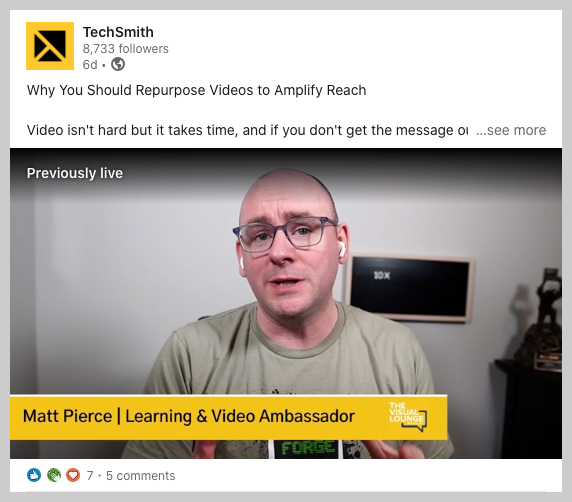
In case you’re wondering, here’s an example of a recent video I shot with Matt Pierce, TechSmith’s Learning and Video Ambassador.
He’s using a DSLR set up and while I have an external webcam.
For comparison, his set up costs easily $1000+ while my webcam only set me back around $100.
For most people, I would suggest getting an external microphone and external webcam and then moving up from there after you’ve made several videos.
And don’t forget. Most of us carry an HD — even 4K — camera around with us all day long. Your smartphone likely shoots high-quality video. Use it!
Here’s what the experts say:
“To easily improve the quality of your video, use an external microphone. I use my Yeti podcasting microphone and move it out of the video frame. You could also use a lavalliere microphone.
And be aware of ambient noise.
It’s amazing how often you get an air-conditioning hum or some other background sound when in an office environment, which can be noticeable and distracting in your video.” — JAY BAER, Founder of Convince & Convert and New York Times best-selling author of six books
“My dad called me the other day and he goes, ‘What’s a good digital camera that I should get?’ I said, ‘Your phone,’ and we just had a little bit of a laugh because I think sometimes people forget how powerful our phones can really be.” — MADALYN SKLAR, Live Video Strategist, and Creator of Video Like a Rockstar Program
“I’m a big believer in starting with what you have and getting crafty as a creator. Before upgrading my gear, I grew my YouTube channel from scratch to 50,000 subscribers by recording in front of a window, using a webcam, and placing my computer on a stack of books as a makeshift tripod.”
SUNNY LENARDUZZI
“Being aware of good audio quality will set you up for great success. Look into external microphone options on Amazon or B&H Photo that are compatible with your camera (there are lots of smartphone-friendly options that just plug into your microphone jack).
If you’re not diligent with your audio and post a video that is tough to listen to, it’s not likely many people will stick around for the first 30 seconds, much less the whole thing.” — AMY LANDINO
How to make a marketing video
1. Set a goal and plan ahead
Viewers connect with videos on an emotional level that other types of content can’t replicate, and these emotions impact loyalty and decision-making.
According to a 2016 study from the Tempkin Group, when people have a positive emotional association with a brand, they are more likely to trust the company, purchase from the company, and forgive the company’s mistakes.
To do this, however, your video must have a purpose.
A video without a purpose is like wandering in the forest with no trail. To get somewhere, you need to define your target. Video content needs a goal and structure to help its viewers see what you want them to see.
The best video production processes, regardless of the size of the video, start by asking a simple question:
What do you want the viewer to do or understand after viewing your video?
The more tangible your answer, the better.

By zeroing in on a single objective, you avoid getting bogged down with too many ideas, which helps you produce a more focused video. Once you know your video’s purpose, think about how to use and distribute the video.
Will it be posted on YouTube, Facebook, and Twitter? Does it belong on Instagram? Is it part of an email campaign?
Determine all the potential and probable uses for your video before you shoot. This allows you to plan for the clips, shots, and images you need to tailor your video for each distribution platform rather than chase after them in post-production.
As you know, social media platforms don’t offer a one-size-fits-all option for your content. User preferences and platform variations create bewildering lists of best practices for each platform.
When it comes to video, here’s what you need to keep in mind:
| Platform | Maximum Length | Maximum File Size | Ideal Format |
| 60 seconds | 4GB | Min: 600 x 600 Max: 1080 x 1080 resolution | |
| 2 minutes, 20 seconds | 512MB | 1080 x 1080 or 1080 x 1920 resolution | |
| 240 minutes | 10 GB | 1080 x 1080 or 1080 x 1920 resolution | |
| YouTube | 15 minutes* | 128 GB | Min: is 426 x 240. Max 3840 x 2160 resolution |
| 30 minutes | 5GB | Min: 256 x 144 Max: 4096 x 2304 resolution |
Now that you’ve defined the purpose of your video, it’s time to plan your video with a script, storyboard, or outline.
2. Script your video
A script is the most formal of these planning tools. Use a script if you are creating a video where you want to direct on exactly what to say.
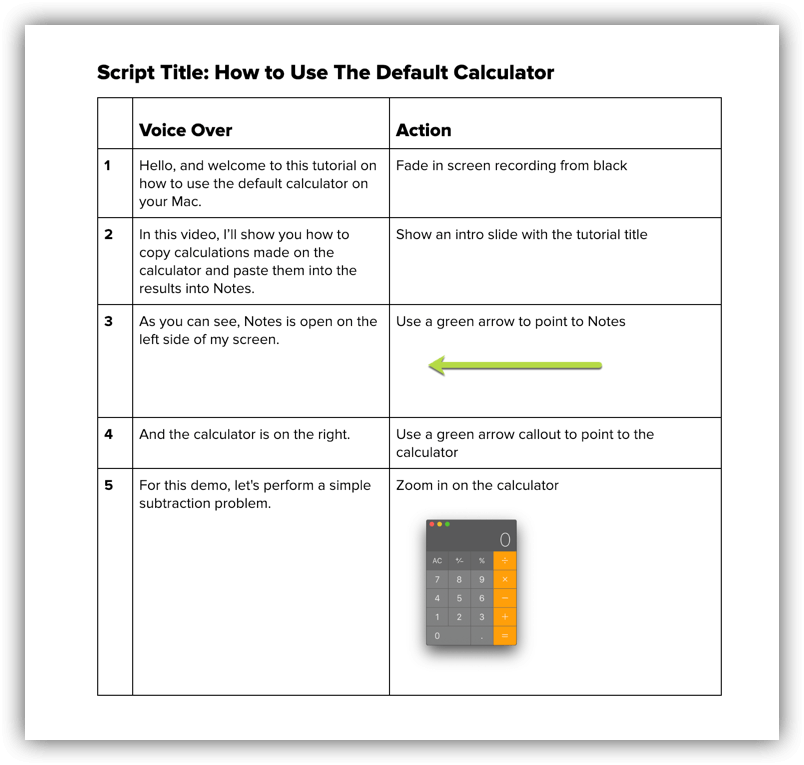
Get specific and plan out the visuals (shots, angles, graphics, etc.) that will accompany each line of dialogue.
3. Storyboard your video
A storyboard can be used as a middle-ground between a script and outline.
But, even if you write a complete script, a storyboard helps you visualize how your video will look in each shot.
To create a storyboard, draw your video out frame by frame and include notes for each.
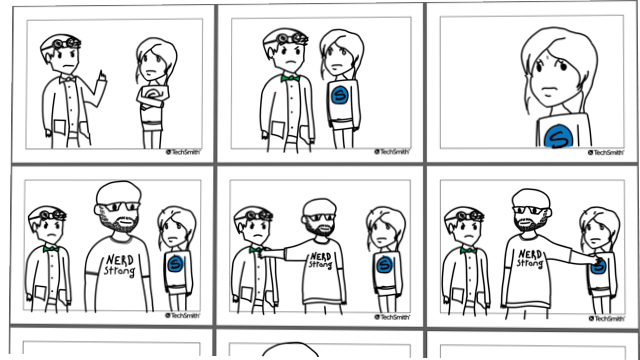
Those notes can include specific dialogue, cuts, shots, questions, or graphics you’ll use to tell your story.
Remember, don’t start the storyboard until you’ve defined the purpose of your video. Every frame needs to tie back into that purpose or play a role in telling that story.
4. Outline your video
An outline is the least formal of these planning tools.
Use a video outline when you are creating a video where the subject has flexibility to speak.
We find outlines to be the most helpful with interview or vlog-style videos.
Here’s a basic example of a script outline that you can use to get started:
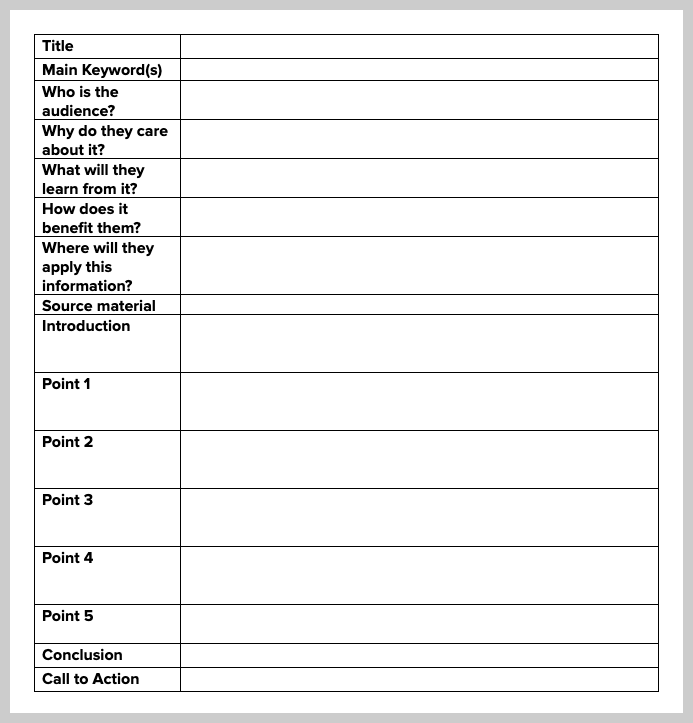
At the top of the outline, state the purpose of your video. If it’s an interview-style video, write the questions you will ask your subject, prompting answers to achieve your purpose. If it’s a vlog-style video, write the points your subject will make.
What the experts say…
“When I was first getting started creating video content, I selected topics I was passionate about that contributed to the areas of expertise that I wanted to be known for, and that I wanted to share with the world. Today this is still true, but I also look to my audience to get specific on what video topics they want to see.” — AMY LANDINO Co-founder of Aftermarq, and Best-Selling Author of Vlog Like a Boss
“The number-one way I decide what video content to create is by thinking like my customer. I focus on answering client FAQs with my videos.” — SUNNY LENARDUZZI, Founder of YouTube for Bosses, and Video Branding Expert
5. Record your voice over
If you’re recording a software demo, tutorial video, or other videos without camera footage, it’s time to record the narration.
I’m a big fan of the Audio-First Workflow.
Camtasia comes with a built-in, easy-to-use voice recording feature and can be an excellent option. If you have experience recording and editing audio, it’s a great option.
But you can also check out TechSmith Audiate.
Audiate takes voiceover recording and editing to an entirely different level by transcribing your voice in real time — as you record. Then, you can literally edit your audio just like you would edit text in a document.
So, rather than staring at a wave form and trying to figure out exactly what you said and where, you can see it right on your screen.
Audiate even automatically flags all your “ums,” “uhs,” and other hesitations so you can easily find and delete them. You can even delete them all at once.
Already have a voice over recorded? Import it into Audiate and it will transcribe it for you.
When you’re done, save audio file and import it into Camtasia. You can even export the edited text as a transcript or as an SRT file for captions.
And trust me, you want to caption your video.
6. Record your screen or shoot your footage
Start by cleaning up your computer screen and closing unnecessary applications. Turn off notifications that might pop up.
Next, open the application you want to record and conduct a few practice walkthroughs of exactly what you want to show your viewers. This helps you get smooth cursor motions and, in the end, you’ll have less editing to do.
Then, open the Camtasia recorder and record your screen just as you practiced. Remember, if you make a mistake, don’t stop! Simply pause and then start right before the mistake. You can always smooth things out when editing later on.
If you want a simple way to increase engagement and help viewers connect with your content, try adding a webcam recording to your screencast.
When you finish recording your desktop, you can edit your video.
When shooting camera video, start by gathering any equipment you need for your video. Remember, don’t get overwhelmed by the equipment. You can get a high-quality video with only five tools:
- Tripod
- Smartphone
- Microphone
- A clean backdrop
- Lights
Set up your recording space and make sure the area is well-lit (more on that below). Record in a spot that has a lot of natural light or add some video lighting to your equipment list.
Place your camera on a tripod and position it as close to your subject as possible, while still getting everything you need in the shot. Being close to the subject will help you get the best possible audio when recording with a smartphone camera.
When the scene is set, use your storyboard and script to guide you through each step.
Remember, just because you have a camera video, it doesn’t mean you can’t also use screen video. Some of the best videos include both. And Camtasia makes it easy to combine camera and screen video in one project.
How to set up your studio or home office
Whether you use a traditional studio, in-house, or need to shoot an interview video with your laptop, you can do this!
Even if you’re going it alone, the following tips will help you navigate the process successfully.
Now, let’s take a moment to address the scene around you and the people you’ve selected to be part of it.
Address the mess
Oftentimes, content marketers shoot in an office space or business setting. With all due respect to business settings, they aren’t the most interesting to view.
They also aren’t set up for video shoots. Even though they may look clean to your eye, papers, desktop items, stacks of folders, wires, and docking stations can make your video look messy and distracting.
Find a place to shoot with a quiet background and foreground. Clean it up if you need to and plan your camera angles to crop out excessive items that create unwanted noise and distractions.
If your scene is boring, add an interesting, natural prop. Even a tall plant or piece of artwork can help.
Considerations when shooting at your desk
It’s not uncommon to see video of a subject matter expert from Company A interviewing another subject matter expert from Company B.
Both subjects sit at their desk and gaze into their webcams with a pair of white earbuds.
While there’s nothing inherently wrong with that, a few simple changes can make it much cleaner.
Finally, if when shooting from your laptop, find a quiet space.
Next, let’s discuss some considerations for your in-office talent and techniques you can use to coach even the most unwilling, stiff subject to greatness.
Choosing talent
Nervous about appearing on camera? Remember, it doesn’t have to be YOU in the video.
You can choose anyone—absolutely anyone in your office—to participate in your video. First, recruit people who are comfortable speaking in front of audiences.
Look for colleagues who present often at meetings or talk at conferences. If you can’t find this person, look for those who perform in some capacity.
Perhaps they are in a choir or coach their kid’s soccer team. These experiences improve on the skill of speaking more concisely and with precision.
To teleprompter or not to teleprompter
People love and hate the teleprompter. When used well, subjects appear highly-polished, reputable and credible on the topic they are discussing.
When that doesn’t happen, subjects look the opposite: stiff, unsure, and uncomfortable. Using a teleprompter with comfort is a skill, and your video subjects will be better at it if they’ve practiced.
When you use a teleprompter, it opens up who can participate in your video. Give them a chance to get comfortable with the teleprompter ahead of time.
Coaching office talent
Before you put your subject in front of a camera, tell them what you want the viewer to understand when they view the video. Tell your subject specifically what to expect.
If you have a chance to provide interview questions ahead of time, do it.
Remember, most of us are more comfortable behind the camera than in front of it. Help your subject become as comfortable as possible before you shoot.
Wardrobe and appearance
Help your subject become camera-ready by helping them decide what to wear, how to look, and how to carry themselves.
Depending on your company and the type of video, appropriate dress may vary. If your company makes outdoor equipment, wearing a business suit to demonstrate your latest product probably won’t work. On the other hand, an investment banker probably would look out of place in hiking apparel.
Advise your subject to dress appropriately for the subject and audience and to wear specific, solid colors that stand out from your backdrop.
When shooting someone who is fidgeting or speaks with their hands, give them something to hold to subdue this tendency.
9 simple edits to add to your video
Editing is the process of rearranging and refining your shots to clearly and creatively convey our ideas.
It can be straightforward, but it can become a bear of a process with no apparent end in sight. Most content marketers don’t have the luxury of time, so let’s review some common editing techniques available to help you define your own unique style.
1. The hard cut
Use the standard or hard cut when you cut from the end of one clip to the beginning of the other. As the most basic cut, it’s the easiest to do. But, used improperly, it can be jarring and it also has the least amount of visual meaning if you are trying to be creative.
2. The jump cut
The jump cut allows you to jump forward in time, without changing your camera angle. Jump cuts work well when you want to speed up your story without worrying about adding in more footage. They can feel abrupt, however. To smooth out jump cuts, use B-roll footage over the cut. B-roll is any supplemental footage used to cover up the main shot (A-roll).
Jump cuts are great for hiding jump cuts, or other edits. You can avoid jump cuts by shooting multiple camera angles, but you have to plan for this before filming.
Jump cuts used to be considered unprofessional, but formats like screencasts and vlogs, along with platforms for regular content creators such as YouTube, have changed that.
3. The L cut and J cut
These cuts are similar, but slightly different; some people already use them without knowing it.
In an L cut, viewers hear the audio from the previous shot (clip A) but see a visual from your next shot (clip B). Use an L cut to contextualize your audio or to provide more meaning.
The J Cut is the opposite. With a J Cut, your viewer hears the audio from the next clip (Clip B) before they see the video that goes with that audio.
4. The cross dissolve
A cross-dissolve is a transition between two clips where both are on-screen for a portion of the dissolve. As the first clip fades out, the second clip fades in. They can create a dramatic effect and, as a result, are often overused. Included sparingly, they can be effective.
5. Fade-in and fade-out
A fade-in or fade-out is a gradual transition from one image to another. A fade-in/fade-out is usually a transition from a blank screen or image to a blank screen (image to black), and indicates a scene is beginning or ending.
6. Cropping, zooming, and panning
Long shots—commonly called wide shots—show your subject from a distance and emphasize place and location. Close shots reveal details of your subject and highlight emotion or personality. Medium shots fall in between. Sometimes we plan for a shot that doesn’t quite work in editing.
During editing, you can make some modifications to your shot through the use of cropping, zooming, or panning effects.
Keep in mind that these modifications aren’t a replacement for planning for the ‘right’ shot during a shoot, and you may sacrifice quality when changing the resolution of an image.
Crop to cut out unwanted elements in a video. Zoom to include a dramatic effect or draw attention toward a specific object. Pan to move the viewer’s focus from one component of your scene to another.
Animations and effects
7. Slow down/Speed up
You can slow down or speed up video for a number of reasons. Perhaps you need to show a long process and don’t want to bore your viewer. Or there could be a dramatic or funny moment that is easily missed, so you slow the clip down.
These are instances where you would speed-shift your footage. Remember if you change the speed of your visual, its audio will become pitched. This effect is easier to use on B-roll or footage where the sound is immaterial.
8. Titles and lower-thirds
Add titles and lower-thirds to provide contextual information to your viewer.
You can place a title anywhere on your image as it is likely the priority visual for your viewer.
A lower-third is — unsurprisingly — placed on the lower-third portion (to the right or left) of the screen. It doesn’t cover up your visual and is meant to be complimentary to your primary subject.
9. Color editing
At its most basic, color editing makes your video clips appear to be in the same color space. Often, we shoot on multiple days. Lighting and other variances give us video that appears visually different. Warming and cooling tones in your clips gives the appearance they were shot on the same day.
Video editing tips
Editing gives you an incredible amount of freedom to test new approaches and techniques. Much like voice in writing, editing is about style and personal preference.
The possibilities in video editing are so vast we can’t fit them all in on article.
Three of my go-to video editing tips would include:
- Be consistent with the style and length of your transitions across your video. This is a simple way to make your video more polished.
- Create breathing room for your viewers to absorb your message and digest what they just heard with B-roll and natural sound.
- Just start. Just like anything else, it takes practice to get better. Your first video isn’t going to be as good as your second video. And your third video will be better than your first two, and so forth. You’ll learn your own style over time.
We’d also love for you to hear from some of the best editors we know.
We asked advanced editors in the TechSmith community to share some of their most treasured techniques with you.
“My editing style has always been to keep our content as concise as possible. I want people to get what they need from my videos as fast as possible.
And to keep our videos on brand, we always use the same font, brand colors, and tone of the music – which creates consistency and familiarity.” — SUNNY LENARDUZZI
“When I edit my videos, I like to deliver as much value as possible in the shortest amount of time. So my editing style is very much a speedy coaching session. I cut out a lot of dead air or pauses.” — AMY LANDINO
Why internal video marketing matters
We tend to first think about the ways we can apply video to our external audiences because it allows us to break through and connect with them, but its value is broader than that.
It applies to your internal audiences, too.
We need to successfully communicate with product teams, leadership, sales, support, etc.
And video lets you communicate remotely and stay in touch with team members across the globe.
The way we consume information and communicate has fundamentally changed.
The expectations of this transformation may have been influenced by the way we consume information online, but they are finding their way into office spaces and boardrooms.
Thanks to tools like Facebook, TikTok, Instagram, and Snapchat, it has never been easier to create, share, and consume visual content.
Every day, two billion GIFS are sent through Giphy, and one billion hours of videos are watched on YouTube.
Through our own research, we found that by using more visual content — screenshots, screencasts, images, videos, and GIFs — in employee communications, businesses could unlock billions in productivity.
In an eight-hour day, communicating with employees using effective visuals, such as videos and screenshots vs. plain-text email, could save each affected employee six minutes and 43 seconds.
Over a 40-hour week, that equals 33 minutes and 36 seconds. When calculated for a year (230 working days), it comes to over 25 hours of added productivity. Businesses could gain up to $1,200 in productivity per year for every employee who consumes content as part of their jobs.
For a company of 500 workers, this could gain the equivalent of seven full-time employees — without hiring a single person.
We know visuals are essential to the effectiveness of communication and, therefore, essential to instruct and inspire content marketers to use more often and inventively than ever before.
At the same time, we believe content marketers are at their best when they have established a consistent and reproducible video production process. While creative thinking is key, improving upon the fundamentals of video creation is equally important.
Wrapping up
As a content marketer, you know you’re in the video revolution.
More than half of you say that when it comes to content, video has the best ROI.
It’s more likely to be consumed and shared on social media than other content. The vast majority of your customers say video helps them make purchase decisions.
More and more, companies are looking to video to help them articulate their product or service offerings on social media and wherever content is consumed. Businesses that fail to embrace video will soon find themselves far behind their competitors.”
Wendy Hamilton, TechSmith CEO
Not only do we want to encourage you to think about new ways to apply video to your business, but we want to help equip you with what you need to share the power of visuals with other people in your company, and deliver effective video to your audience.
Video offers an unparalleled way to engage and excite customers about a product or service while also providing a more personal emotional connection to your brand.
I hope this guide helps you get what you need to establish a video production workflow that incorporates best practices and the tools and techniques that work for you.
