Camtasia allows you to add or edit cursor paths and upload custom cursors to create professional looking videos such as:
- Software or product demos
- Instructional or how-to videos
- Business presentations and recorded slideshows
Cursors are used to tell a story, draw viewers’ attention to key parts of the screen, or add polish to a video.
Emphasize a button or link with your cursor, match your voice narration with the on-screen cursor movement, correct a mistake made with the cursor during recording, and much more.
Replace or Import a Cursor
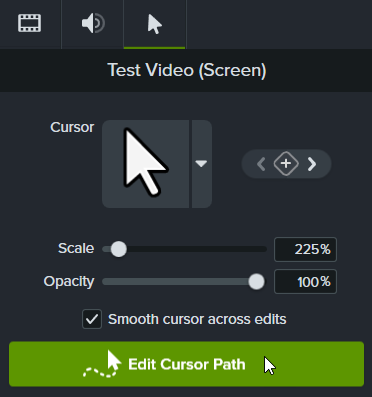
Adjust the cursor size and style, or add a custom cursor to improve your videos and reduce distractions.
- Select a Camtasia recording (TREC) on the timeline or canvas.
Note: You can only edit the cursor path on screen recordings captured with Camtasia (TREC) or after a new cursor path is added. To create a new cursor path in a video or image imported into Camtasia, see Create a New Cursor Path.
- On the cursor tab in the Properties panel, click the Edit Cursor Path button.
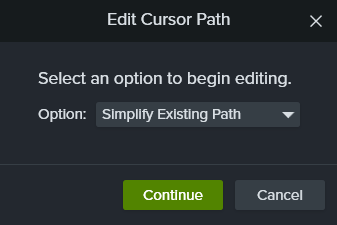
- In the Edit Cursor Path dialog, select Simplify Existing Path or Create New Path in the dropdown and click Continue.
Note: You only need to complete this step the first time that you edit the cursor path.
- Click to select a point to edit on the timeline.

You can also click the keyframe arrows in the cursor Properties panel to move your selection between cursor keyframes on the timeline.

- Click the cursor dropdown and select one of the Replace Cursor Image options.
- Current: Edit only the cursor at the playhead.
- Similar: Edit all cursors of the same style as the cursor at the playhead.
- All: Edit all cursors on the timeline.
- To replace the cursor, complete one of the following:
- Click one of the available cursor images found in the recording.
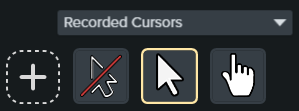
- Click the Recorded Cursors dropdown and select a different category of available cursors. Then select your desired cursor.
- Click the + icon to import a new cursor image. Available file types for imported cursors are BMP, JPG, JPEG, PNG, PDF, TIF, and TIFF.
Note: To select the location of the pointer for the imported cursor, move the crosshairs in the image. Click Save Cursor Edits to apply.
- Click and drag the Scale control to adjust the size of the cursor on the canvas.
The newly edited cursor is visible during video playback.
Edit a Recorded Cursor Path
Edit a recorded cursor path to improve your cursor flow from location to location in your video.
- Select a Camtasia recording (TREC) on the timeline or canvas.
Note: You can only edit the cursor path on screen recordings captured with Camtasia (TREC) or after a new cursor path is added. To create a new cursor path in a video or image imported into Camtasia, see Create a New Cursor Path.
- On the cursor tab in the Properties panel, click the Edit Cursor Path button.
- In the Edit Cursor Path dialog, select Simplify Existing Path or Create New Path in the dropdown and click Continue.
Note: You only need to complete this step the first time that you edit the cursor path.
- The cursor path and points appear on the canvas and timeline.
- Click to select a point to edit, then complete any of the following options:
- Click and drag the playhead on the timeline to the location to edit. Right-click the playhead line, then select one of the following options to edit the cursor path:
- Add Cursor Point at Playhead: Adds another point to the path to allow for more detailed control over the cursor movement and look.
- Split Cursor Path at Playhead: Adds a new path segment and two new points to the timeline. This is useful if you want the cursor to pause at a location before continuing on its path.
- Extend Cursor Path to Playhead: Extends the path duration to the selected location and adds two new cursor points on the timeline.
Note: The Extend Cursor Path to Playhead menu option is only available if the playhead is on a cursor keyframe and there is no timeline cursor path in that location.
- If you have split cursor paths after editing, click the Smooth cursor across edits checkbox in the Properties panel to improve the cursor flow.
- Click and drag the Scale control to adjust the size of the cursor on the canvas.
- Click Finish Editing to exit cursor path editing.

Create a New Cursor Path
Add a cursor to images or videos in Camtasia.
Note: You cannot add the Cursor Path Creator effect to media recorded with Camtasia. To edit a cursor path in a Camtasia recording (TREC), see Edit a Recorded Cursor Path.
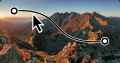
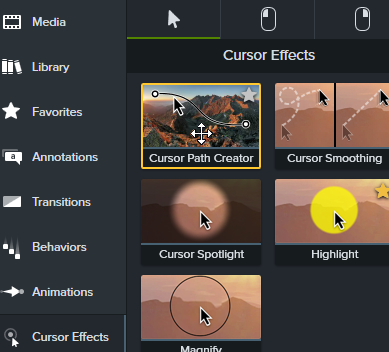
- Drag the Cursor Path Creator effect from the Cursor Effects or Visual Effects tab on to an image or video on the canvas or timeline.
- The cursor path and points appear on the canvas and timeline. Click to select a point to edit, then complete any of the following options:
- Click and drag the playhead on the timeline to the location to edit. Right-click the playhead line, then select one of the following options to edit the cursor path:
- Add Cursor Point at Playhead: Adds another point to the cursor path to allow for more detailed control over the cursor movement and easing of the cursor path.
- Split Cursor Path at Playhead: Adds a new path segment and two new cursor points to the timeline. This is useful if you want the cursor to pause at a location before continuing on it’s path.
- Extend Cursor Path to Playhead: Extends the path duration to the selected location and adds two new cursor points on the timeline.
Note: The Extend Cursor Path to Playhead is only available if the playhead is on a cursor keyframe and there is no timeline cursor path in that location.
- If you have split cursor paths after editing, click the Smooth cursor across edits checkbox in the Properties panel to improve the cursor flow.
- Click and drag the Scale control to adjust the size of the cursor on the canvas.
- Click Finish Editing to exit cursor path editing.
Restore the Original Cursor Path
To restore the original cursor path, click Restore Path in the Properties panel.

All Camtasia Tutorials