Add Cursor Effects
Learn how to add cursor effects in Camtasia Editor to emphasize the cursor and edit cursor clicks.
Learn how to add cursor effects in Camtasia Editor to emphasize the cursor and edit cursor clicks.
Most videos have the cursor burned into the recording file. Camtasia Editor records the screen and cursor data separately in the Camtasia Recording file format (TREC). This allows you to edit the cursor and eliminates the need to re-record to perfect cursor movement or position.
Camtasia Editor’s cursor editing and effects help to:
If you want to add a cursor to a still image or a video not recorded in Camtasia Editor, you can add the Cursor Path Creator effect to design the cursor path. Add a Left Click or Right Click effect to add cursor click keyframes to simulate clicks. See Add a Click Effect & Edit Cursor Clicks.
If you recorded with Camtasia Rev turned on, you can change the layout or effects anytime.

See Introduction to Rev Media.
Add a cursor effect to a Camtasia Recording file (TREC) on the timeline to emphasize the cursor to support the message in your videos.
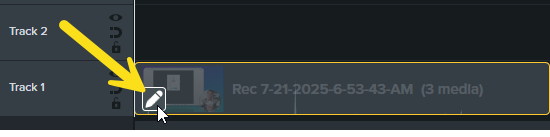
To apply Cursor effects and edit the properties in Camtasia Editor, you must unpack Rev media. Right-click (Windows) or Control-click (Mac) the Rev media on the timeline and select Unpack Rev Media. See Introduction to Rev Media.


In the Camtasia Recording file format (TREC), you can add or edit mouse clicks at any time. Apply a cursor click effect to visually emphasize a click. You can also add new cursor keyframes to simulate a click in an image, video, or recording file.
To apply Cursor effects and edit the properties in Camtasia Editor, you must unpack Rev media. Right-click (Windows) or Control-click (Mac) the Rev media on the timeline and select Unpack Rev Media. See Introduction to Rev Media.
Cursor Color
Edit the cursor fill and outline colors to match the video aesthetic or to stand out from the screen content.
Cursor Glow
Emphasize the cursor with a glow effect. Give your cursor a glow effect to stand out on the screen and grab viewers’ attention.
Cursor Highlight
Add a circle of color to draw viewers’ attention to the cursor.
Cursor Isolation
Hide the screen video to only display the cursor track.
Cursor Magnify
Enlarge the cursor area to show detail.
Cursor Motion Blur
Add a blur cursor movement to simulate a fast-moving cursor across the screen.
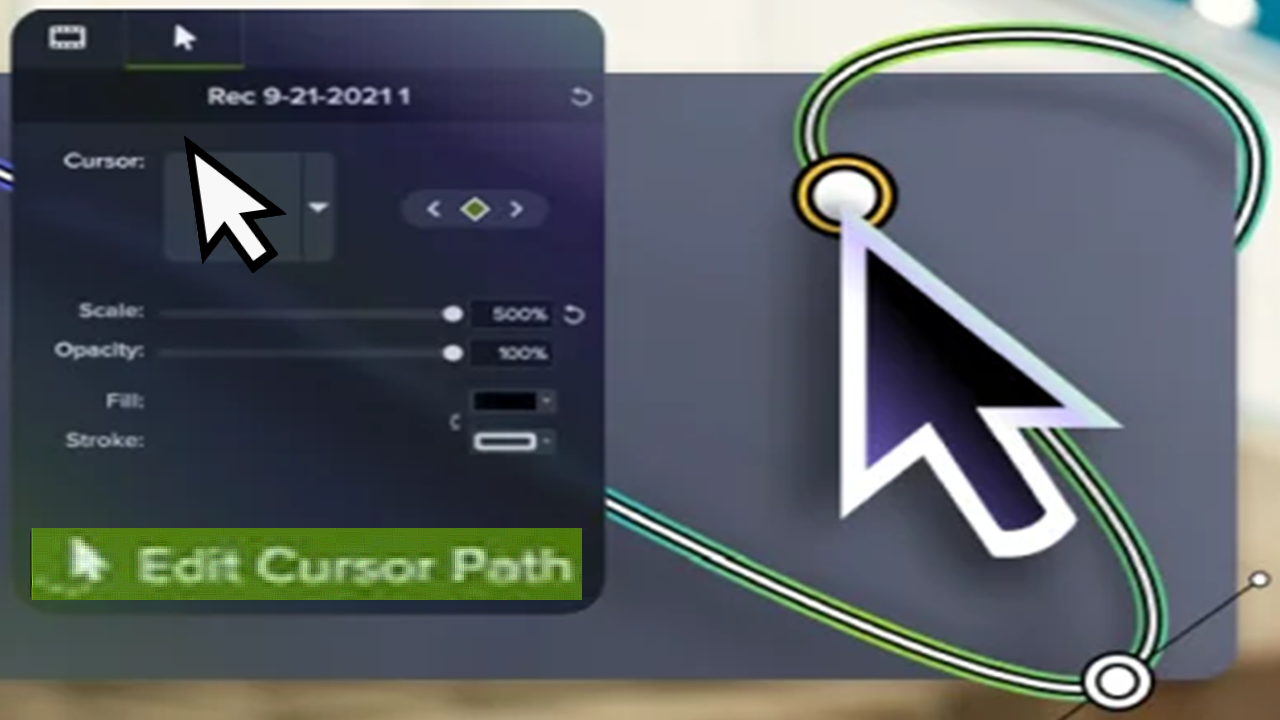
Cursor Path Creator
Add to images or videos recorded outside of Camtasia Editor to design your own cursor path to simulate a demo or recording. Combine with left or right click effects to build click actions on anything! See Customize Your Cursor and Path.
Cursor Shadow
Add a visual effect that makes your cursor appear to float above the screen.
Cursor Smoothing
Transform distracting, jumpy cursor movements into smooth lines. See Quickly Smooth Cursor Movements.
Cursor Spotlight
Dim and blur the area outside of the highlighted cursor area to emphasize specific actions and cursor movements.
Gradient
Add a circular gradient highlight to emphasize specific actions and cursor movements and to match the video ascetic.
Kinetic Cursor
Add momentum to cursor movement to appear as if it is being pulled and pushed across the screen.
Lens
Enlarge the cursor area to emphasize cursor movements and show detail. Lens appears as though the cursor is viewed through a magnifying glass with no frame.
Negative
Invert the colors within the cursor area to emphasize specific actions and cursor movements.
Click effects help to visually emphasize the action of a click within a video.
Click Burst 1-4
Select any of the four click burst animations to display around the mouse click area.
Click Zoom
Add a zoom lens over the mouse click area.
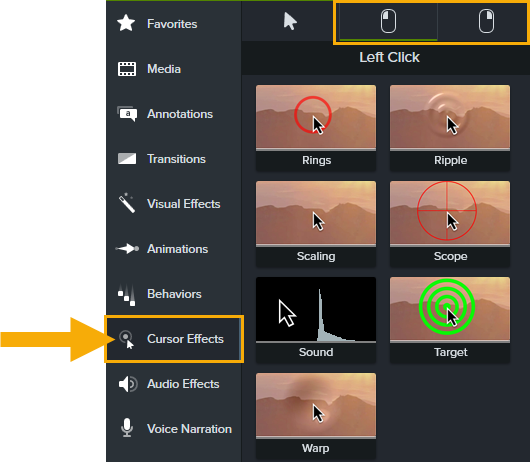
Rings
Add an expanding ring over the mouse click area.
Ripple
Add a transparent ripple over the mouse click area.
Scaling
Automatically scale the cursor down and up again to simulate the mouse click on the screen.
Scope
Add a visual target over the mouse click area.
Sound
Combine with other click effects to emphasize a cursor click.
Target
Add a circular visual target over the mouse click area.
Warp
Add a transparent visual effect to emphasize the mouse click that appears to push in the area around the mouse click.
Tip: Combine the Sound and the Scaling click effects to emphasize a click.
You can add multiple cursor effects to a clip. These two click effects pair perfectly together to emphasize the action of a click.
Unleash the world’s most powerful screen recorder and video editor.
* Already a Camtasia Editor user? Learn how to update to the latest version.