


Have you ever played a video and couldn’t hear clearly?
Background noise can take many forms—dogs barking at the mail carrier, lawnmowers outside your office, or even sounds from your computer fan and mouse.
Why background noise removal is important
Clean and crisp audio in your videos is essential to maximize engagement and knowledge transfer. Unwanted noises distract the viewer and divert their attention from your voice and the content you share.
In a TechSmith study, 35% of viewers reported that high-quality audio narration keeps them engaged. Audio quality is the most critical quality of a video.
Best practices for high-quality audio
You create videos to convey a message, aiming for viewers to focus on your content without distractions. While you can’t control their viewing environment, you can ensure high video quality by following these best practices and leveraging noise reduction technology.
- Use the best quality microphone you can afford.
- Locate a quiet space where there are minimal distractions.
- Always run a quick test to ensure audio is being recorded.
- Record your audio or video with a tool that offers noise suppression during recording, like Camtasia.
- Use audio effects, such as noise removal, to enhance or correct audio.
- Add audio filters or sound effects, which can further polish the audio
Steps to use to remove background noise from audio and video files
Step 1: Upload your video
Pick a video editor that supports multi-track editing. This makes it easy to edit video and audio tracks separately. The market-leading choice is Camtasia.
Then
- Start a “New Project”
- Upload your video file
Go from screen recording to polished video
A screen recording is just the start. Camtasia’s editor helps you add the callouts, animations, and edits you need to create a truly professional video.
Free Download
Step 2: Isolate the audio track
The next step is to extract the audio from the video.
- Select the video track
- Right-click and select ‘Separate Audio from Video.’
Alternatively, begin by uploading your audio file or making a new video recording.
Step 3: Use noise reduction features
In Camtasia, click and drag the Noise Removal effect onto the audio track. You can also automatically reduce noise before recording.
In Audiate,
- Click the Properties button
- Click the + icon to view Effects
- Click to apply the Remove Noise effect
Step 4: Fine-tune the sound quality
Camtasia and Audiate both provide easy-to-use sliders to adjust sound quality.
- Sensitivity: Adjust how frequently the noise removal effect will be applied. When the sensitivity is high, the noise removal will apply even if the noise is soft.
- Tip: If the audio becomes distorted, lower the sensitivity.
- Amount: Adjust the amount of noise reduction applied. The higher the amount, the more dramatic the noise removal.
- Tip: If the audio becomes distorted, lower the amount.
Audiate: Best for audio editing
Audiate integrates with Camtasia to enable AI-first video creation that starts with a script or audio recording. Audiate enables anyone, not just audio engineers, to have best-in-class audio.
- Effortlessly improve and enhance audio files.
- Silence room noise and other imperfections
- Automatically detect and remove “ums,” “ahs,” and other hesitations
- Apply advanced audio enhancements
Features of the best audio editing tools
Other audio editing products with background noise removal include Audacity, Kapwing, and TopazAI.
- Tip: Be sure to evaluate the quality and flexibility of online tools closely.
Professional video editing tools like Camtasia and Audiate offer numerous benefits over free products, enhancing video quality and efficiency.
- Precise control: Capabilities like frame-by-frame editing and advanced audio adjustments provide control.
- Better sound quality: Sound is vital in any video, and premium software includes advanced audio features. These tools help clean up background noise, balance audio levels, and seamlessly add sound effects or music.
- Customization: Premium software provides extensive customization options like keyboard shortcuts and personalized workspaces.
- Support and community: Access to tutorials, forums, and professional support are valuable for troubleshooting and improving efficiency.
Best practices for clean audio in video
To be recognized as an expert, your audience must hear your content clearly, not your background noise. High-quality audio is a critical component of any video.
Camtasia and Audiate make an excellent team for removing background noise. With clean and crisp audio, your videos will be elevated to a premium experience for your viewers.
If you can edit a doc, you can edit a video
Stop fearing the timeline. Camtasia Audiate transcribes your recording so you can edit your video just by editing the text.
Free Download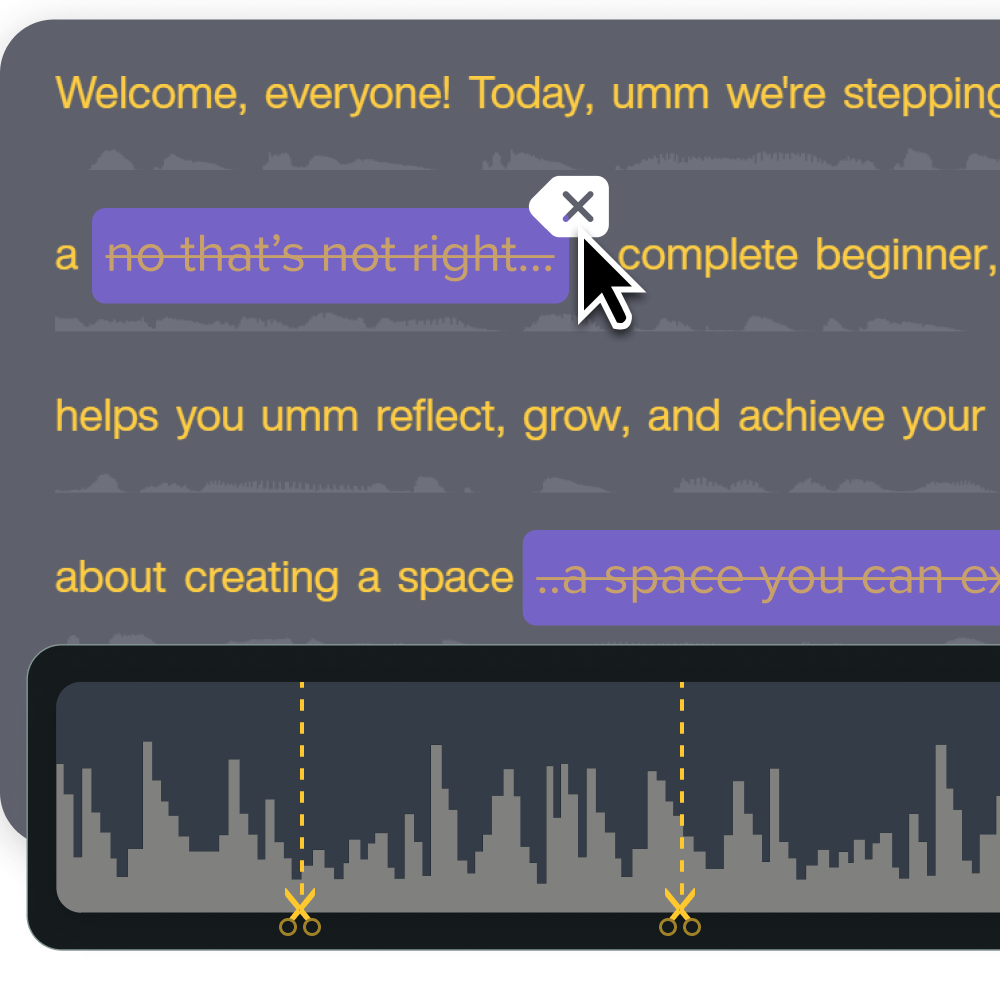
Share