Spotlight Tool (Mac)
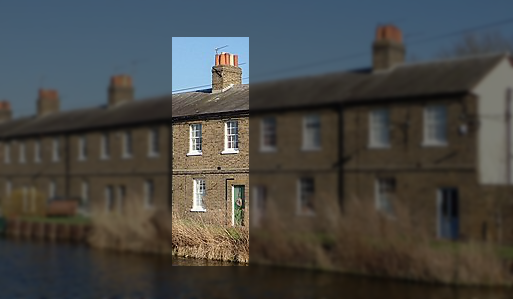
Call attention to an area by dimming and/or blurring the rest of the image.
Call attention to an area by dimming and/or blurring the rest of the image.
Note: Spotlight and other tools in the Snagit Editor toolbar are available to annotate images. To draw your viewer’s attention while you record video, try Screen Draw. To enhance video you have already recorded, share your video to TechSmith Camtasia.
Note: If the tool is not visible in the toolbar, click the More dropdown to select the tool. See Customize the Snagit Toolbar.
Note: Windows users can achieve a similar effect with the Selection tool and the Spotlight & Magnify effect. To learn more, see Add Effects.
Edit the properties to customize the tool.
Tip: Save tool customizations as Quick Styles.
After you edit tool properties, save your customization as a Quick Style for future use. See Quickly Access Favorite Styles and Tools.
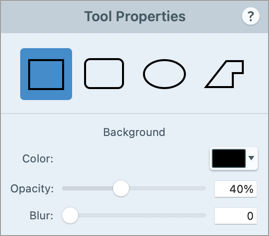
Shape
Select a rectangle, rounded rectangle, oval, or polygon shape for the spotlight.
Color
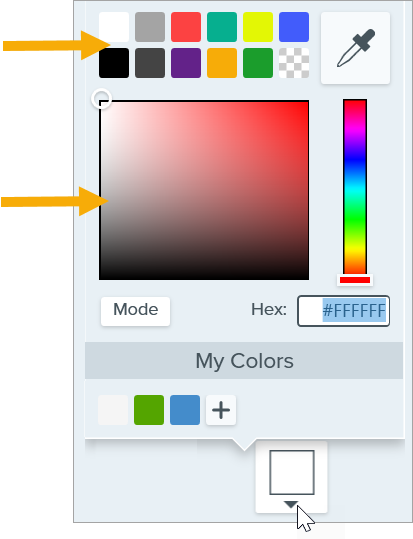
Click the dropdown and select one of the following to set the background color for the image surrounding the spotlight:

Opacity
Drag the slider to adjust the transparency of the background color surrounding the spotlight.
Blur:
Drag the slider to adjust the clarity of the background image surrounding the spotlight.
Note: This tutorial is for Snagit version 2024. Previous versions may look or function differently.