


Whether they’re for online learning, corporate communication, or anything in between, audiences expect your professional videos to be polished and engaging.
Used strategically, special effects can help you clarify messaging and punch up your visuals, so your videos grab viewers’ attention and keep it.
Whether you’re editing a step-by-step tutorial or a corporate update, Camtasia’s video effects let you create cinematic, brand-consistent content, even if you’re not an editing pro. From green screens to color correction, you can apply better effects and deliver the quality your audience expects.
What video special effects do (and why they matter)
Special effects help make your videos clearer and more professional by:
- Guiding focus to your current talking points
- Highlighting key information audiences need to remember
- Reinforcing your brand’s overall tone
The goal isn’t to overwhelm the viewer with flashy graphics but to highlight the video’s core messaging so they remember it when it counts. When used right, they keep viewers’ eyes on the screen and following along, which naturally helps them learn faster and retain more of what they watched.
But “used right” is key — that’s why Camtasia’s video editor blends creative flexibility with a user-friendly experience. Drag-and-drop motion graphics, high-quality AI assistance, and precise color and audio controls make it easy to turn your ideas into pro-level visual effects.
Go from screen recording to polished video
A screen recording is just the start. Camtasia’s editor helps you add the callouts, animations, and edits you need to create a truly professional video.
Free Download
7 core types of special video effects in Camtasia (and when to use them)
There are tons of different special effects you can use, from basic transitions to advanced cinematography techniques. But for things like corporate trainings and branded social media video content, you’re looking for a balance of effort and return.
These seven core effect categories make the biggest impact with the lightest lift — especially when you use Camtasia.
1. Motion graphics and animations
Motion graphics and animations add life to static videos. Whether you’re illustrating a simple pun to break up drier content or making your brand name jump across the screen for added visual flair, motion gives your content another dimension.
Camtasia’s drag-and-drop animation tools and Behaviors panel create an intuitive experience for beginners to experiment with and integrate animated elements into their videos.
The Behaviors panel features multiple customization settings and allows you to layer actions on top of one another. So you might layer a slide-in with a pulsing feature atop a bright-red arrow to call attention to a new compliance policy.
2. Green screen and AI background removal
Green screens are the default way to replace or adjust the background of a scene. For example, you might blur out the background of a speaker’s home office to help the viewer focus on their facial expressions and words. Or you could use a dynamic background to create a looping effect that spices up an otherwise static screen.
With nothing more than a smartphone, some green fabric, and the right video editing software, you can create a DIY green screen that sets the stage. Or you can use Camtasia’s AI Background Removal to either blur or change the background with no green screen required.
Camtasia builds in multiple media layers, so you can quickly preview options and choose the right one for your content. Once you’re in the Visual Effects tab, just drag the Background Removal effect onto the media and customize the effects in the Properties panel.
3. Color correction and lighting filters
Color correction and lighting filters help you maintain the same tone and level of contrast throughout the video, taking it from amateur to professional. For example, you might use a glow effect to color-correct washed-out scenery or change the lighting filter to sharpen contrast between objects for visual clarity.
Camtasia’s manual color adjustments give you intuitive control over visuals, so you can see how different lighting and color options affect the final product.
Pro tip: Use the same lighting across scenes to keep your content consistent, even as you change from one background to the next.
4. Transitions and pacing effects
Special effects, like fades, dissolves, and wipes, create flow and rhythm within a video. Use them to divide your content into digestible sections or correct pacing issues that distract the viewer and hurt retention.
For example, you might use the wipe effect to signal the end of each educational video in a tutorial series, giving the viewer a consistent experience for every wrap-up.
Camtasia has an extensive transition library along with a live-preview function, so you can see how different effects change the tone of your content.
5. Cursor and highlight effects
Cursor and highlight effects guide the viewer’s attention, making them essential for things like software demos and instructional content. They’re your secret weapon in detail-heavy and technical videos, because they help you call out what matters most to the viewer without hiding or downplaying other info.
Camtasia really shines here with advanced but user-friendly cursor enhancements like:
- Kinetic Cursor: Add momentum to cursor movement to make it look like it’s being pushed or pulled across the screen.
- Magnify: Zoom in on the area around the cursor to show detail.
- Motion Blur: Blur your cursor movement so it looks like it zips across the screen.
6. Text and title animations
On-screen text and title animations can improve accessibility and branding by adding more dimension to a video or giving the viewer more context, ultimately improving overall engagement.
For example, you can use animation tools to make titles pop or perk the viewer up for the next section of the video. And while you should always use standard captions to make your videos accessible for the hearing-impaired, they also add a visual layer to your audio that reinforces learning.
Camtasia automatically generates standard captions for your video, but you can also use the Dynamic Captions feature to summarize main topics or add tidbits that clarify the content. For example, you might add a “bottom-line” Dynamic Caption to the final section of your video, wrapping up the points you covered.
Plus, Camtasia lets you standardize colors and fonts across your animations and captions so they align with your brand and give your videos a consistent look and feel.
7. Speed, slow motion, and time-lapse
Clip speed adjustments emphasize important elements in the video, whether it’s the steps of a demo or the emotion behind a farewell video montage.
Use slow-motion effects to highlight details, like the individual buttons on a touchscreen or the texture of an object. Meanwhile, time-lapse effects work great for showcasing long processes in a condensed format.
Camtasia’s special effects let you accelerate, freeze, blur, and create new motion paths on every video.
Faster video creation with Rev
Make videos as easy as click, click, done! Camtasia Rev is so fast it’s like magic!
Learn More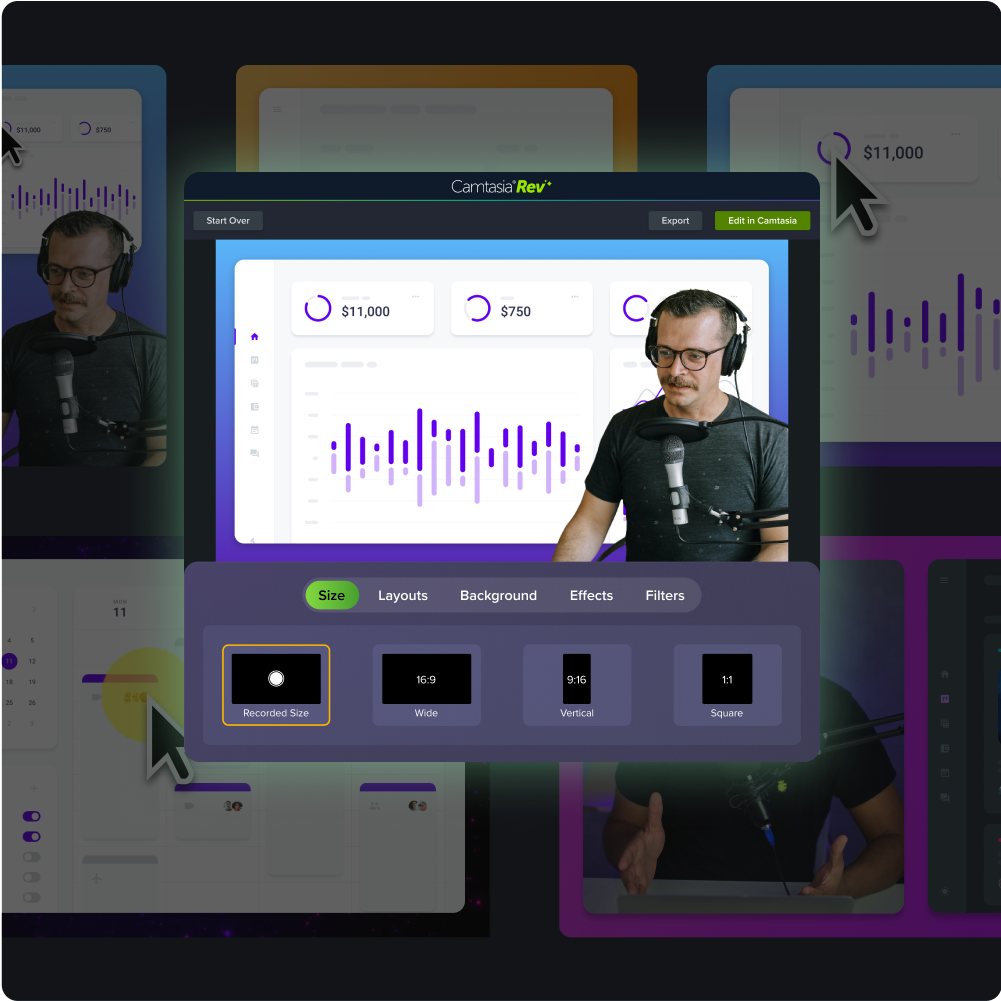
How to add and customize effects in Camtasia
Camtasia’s intuitive workflows and user-friendly video editing tools make it simple to jump right into post-production. But to get you started, here’s a quick overview of how it works.
Step 1: Plan your video’s story and structure
Mapping out your video story makes it easier to see where to add effects, like fades for a topic shift or cursor highlights for a demo section.
Plan out each element for a smooth flow, and consider how graphics, color grading, transitions, pacing, and background will impact the video’s takeaway. The more thoughtful your effects, the more likely they are to leave a lasting impression.
Step 2: Import or record your footage
You can import your video footage directly into Camtasia and then edit. Or you can use the tool’s multi-track recording capabilities to capture your video right from your screen.
Camtasia’s multi-track feature automatically records your camera, screen, system audio, and microphone into different tracks, which you can edit independently. You get maximum control over visuals and sound, so you can fine-tune each element. If you need to update the voiceover or screen recording later, it’s easy to swap out just that one track.
Step 3: Add and adjust effects from the Visual Effects tab
When you’re ready to start adding special effects, navigate to the Visual Effects tab on the left-hand side of the screen, then drag an effect onto your imported footage or track recording.
To customize, click the Effect so it turns yellow, then adjust the parameters of each effect, such as speed, direction, color, or font. Toggle on the Properties panel to explore custom options for each effect or delete unneeded effects.
We highly recommend experimenting with the presets for each effect to get an idea of what works best with your branding and video type. You can also try layering different effects, like motion text and transitions, for more polished storytelling.
Step 4: Preview, refine, and export
Once you’ve adjusted your parameters, you’re ready to see how the effect looks and make any tweaks, like shortening up a transition or speeding up a clip to keep the video more engaging. Camtasia’s real-time preview feature makes it simple to fine-tune as you move from one part to the next.
When you’re finished editing, you can export your video in a platform-optimized format for YouTube or Screencast, or set up custom presets. If you’re using Screencast, you can set up a password to share files securely for team review.
Looking for professional screen recording software?
From simple screen captures to polished video editing, TechSmith has everything you need to create professional-quality content.
Learn More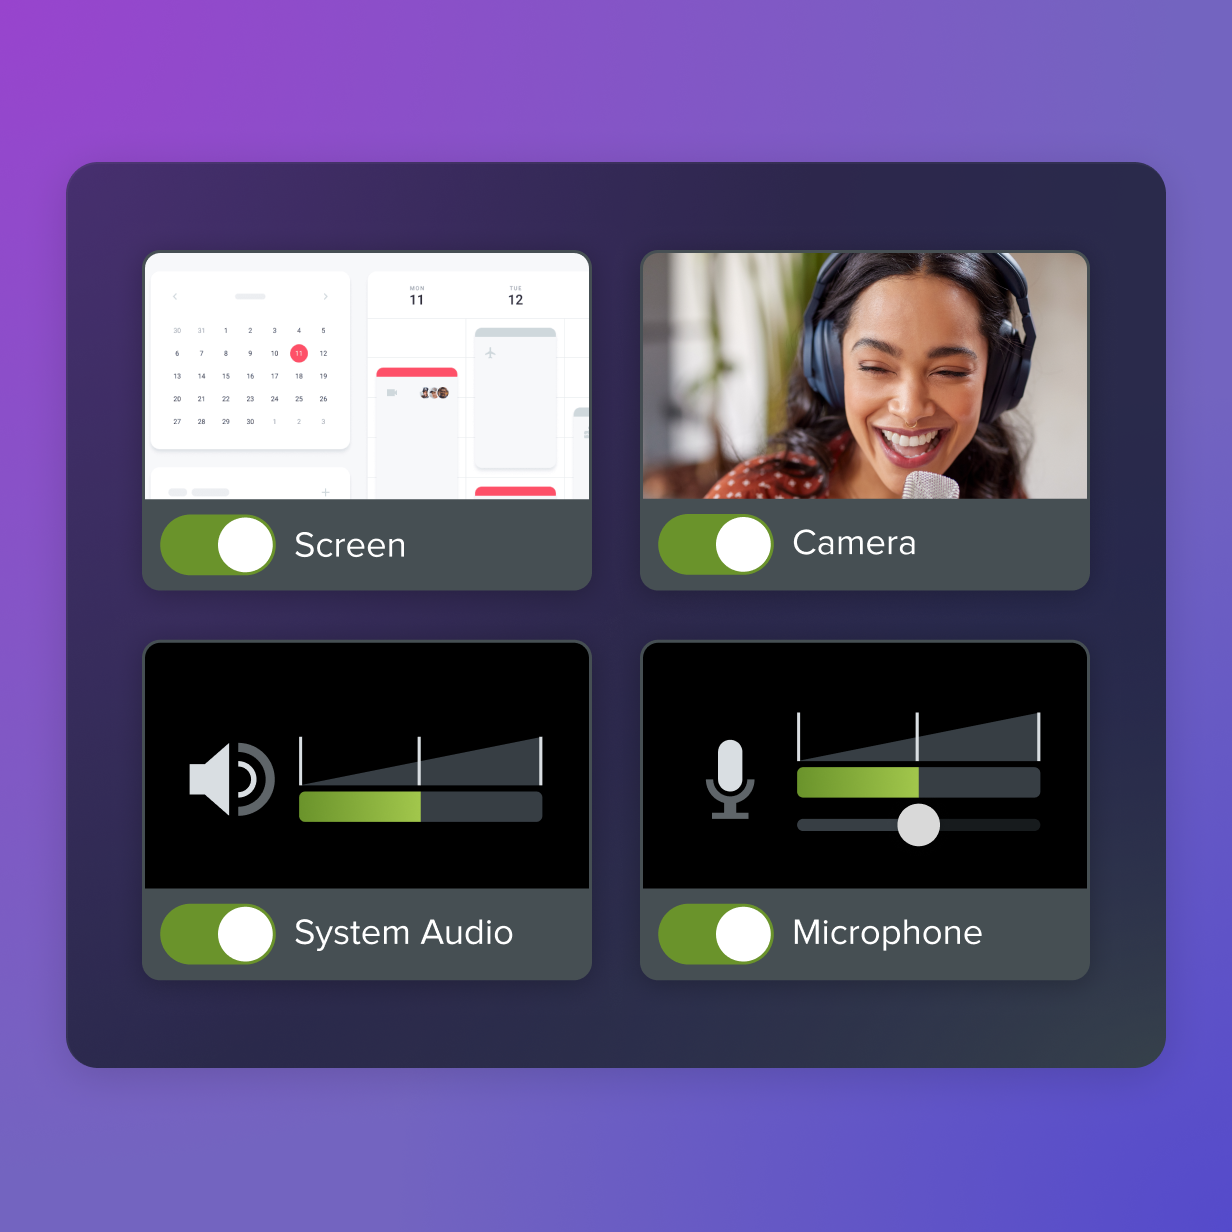
Bring creativity and clarity together with Camtasia
Special effects shouldn’t be all flash and no substance. When you use them strategically, they can enhance your storytelling and make your content clearer and more engaging — so people actually want to watch it.
If you want your videos to make a real-world impact, Camtasia’s all-in-one suite has the user-friendly features content creators need for pro-level edits and stunning visuals.
Camtasia delivers simple drag-and-drop tools, granular controls, and AI assistance for an intuitive experience that gives you the freedom to experiment confidently. With our comprehensive software, anyone can produce professional-grade videos that captivate and educate.
Ready to take your videos to the next level with visual effects? Get started with Camtasia!
Share