What’s the secret to the perfect video editing workflow? Similar to many questions we get asked, the true answer to this one is: it depends. But it all depends on you.
Building a workflow that’s efficient, doesn’t cut corners, and saves time can take a while to figure out, especially if you’re new to it all.
But once you’ve figured out what works for you, you can start to level up your videos and fine-tune your craft.
The Visual Lounge’s host Matt Pierce breaks down a sample video editing workflow that covers the main areas of video editing, from organizing your footage to adding audio and graphics.
Download our workflow example or feel free to mix and match each element to find out what works for you.
You can watch the video on this topic at the top of this post, to listen to the podcast episode, hit play below, or read on for more…
Why is a video editing workflow so important?
Do you really need a process? If you’re one of those video editors that like to go with the flow and that works for you, then stick with it.
But for those who want to speed up their videos, fine-tune their process, and waste less time figuring out what to do next, a workflow is a must-have.
A workflow can help you stay on track and leave no stone unturned in the editing process. By following it step-by-step, you ensure you don’t miss anything that you need to go back in and add later on.
For beginner video editors who aren’t sure where to start, building a workflow (or using ours) is a good starting point.
The big picture
When we talk about video editing, the conversation usually revolves around things like types of cuts or the little bits and pieces that go into editing. We end up losing sight of that big picture plan.
Most videos follow four key stages:
- Preparation: This includes things like writing, scripting, storyboarding, casting, scheduling, props, location, set.
- Shoot/Production: This is all about lighting, sound, camera, screen recording, gathering assets.
- Post-production: When you organize footage, create a rough cut, fine cut, picture lock, add audio, visual effects, edit color, and add title and graphics.
- Distribution: The final part is where you post, share, market, review analytics, do A/B testing.
We’ll be diving into the post-production side of things – what happens when the cameras stop rolling, and you have to produce a polished product.
Building an editing workflow
Editing is about a lot more than just what type of cut to use. If you want more on that topic specifically, check out our previous episode on Types of Cuts for Video You Should Know.
But for now, let’s look at it from a wider angle. We’ve split our workflow example into eight different sections.
1. Organize footage
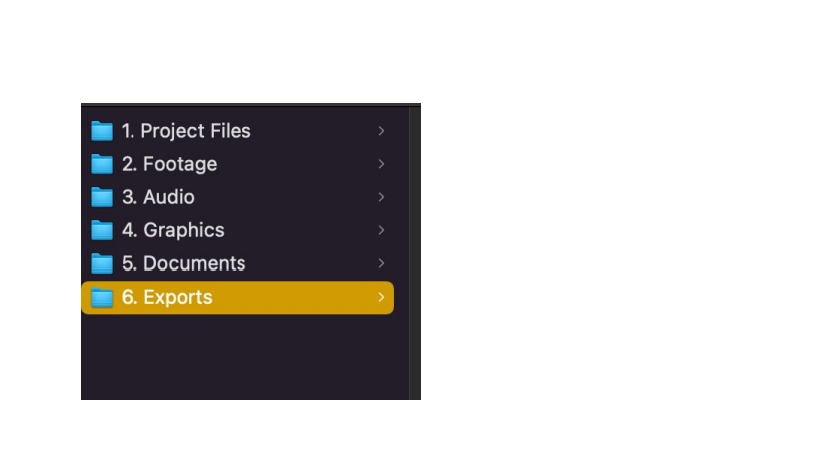
If you’ve gone through the huge process of preparing your video, shooting B-roll footage, making graphics, intros, outros, and so on, don’t just leave it all lying around.
If you don’t organize everything into separate folders or through software like Camtasia, it can quickly become a confusing mess once you sit down to edit.
The last thing you want to do is get into the flow of editing only to need to jump out and find the right hex code for your logo.
It disrupts your creative flow and wastes time, so organizing your footage and other assets is the first step to a successful editing workflow.
2. Rough cut
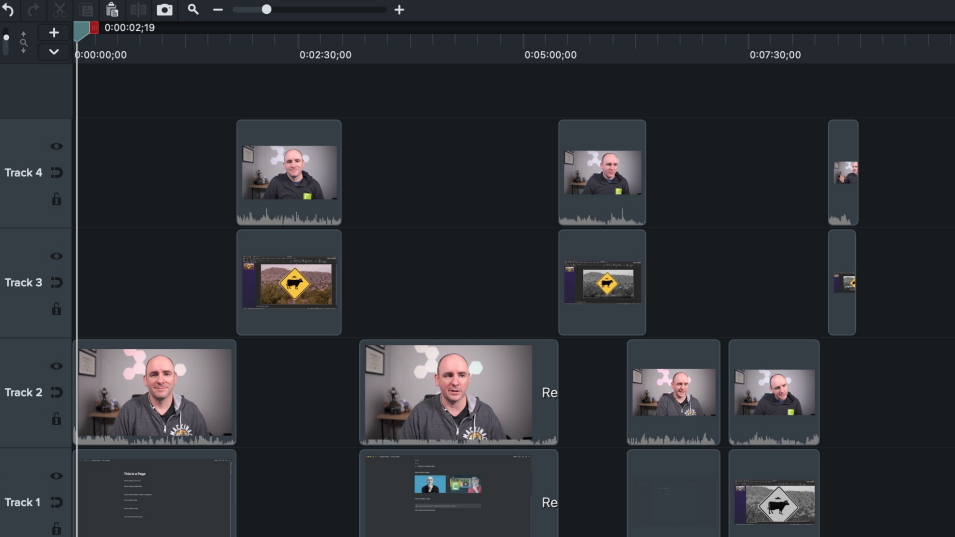
The next step is the rough cut, where you bring all that footage together and start ordering it. At this stage, don’t worry about getting things perfect.
The aim of the rough cut is to get a good idea of the order before you start applying big cuts or visual effects.
3. Fine cut
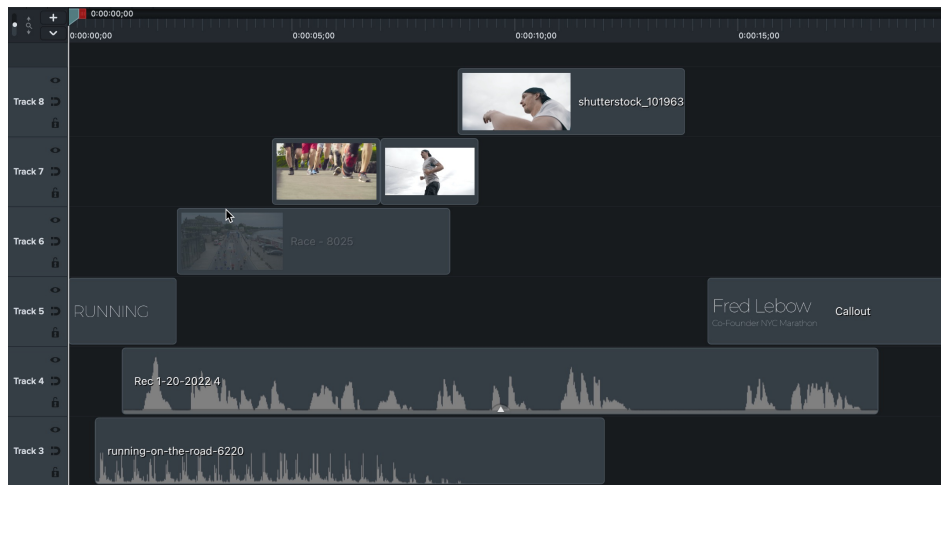
Once you’ve got a good idea of what’s going where, it’s time to tidy everything up. This is where you really start thinking about J-cuts, L-cuts, and you can start adding things like B-roll.
We’re not talking about effects or transitions yet. It’s just about getting the basic structure and the flow of the video.
Some editors will do their rough cut and fine cut together, but it depends on the project. For a larger project, it’s better to do a rough cut and then go back and trim everything down for the fine cut.
While creating your fine cut, one of the top questions to ask yourself is: is this what my audience needs? Every decision and cut you make should be with them in mind, after all.
4. Picture lock

Picture lock is when you commit to not making any big changes unless absolutely necessary. It’s after you’ve created your fine cut, added in your B-roll, main audio, and you’re happy with the structure.
This is a great point to involve your stakeholders or managers (if you have them) and get feedback on the picture lock version. You can ask things like: does it cover all the right information? Is the message clear? Does the structure make sense?
5. Visual effects
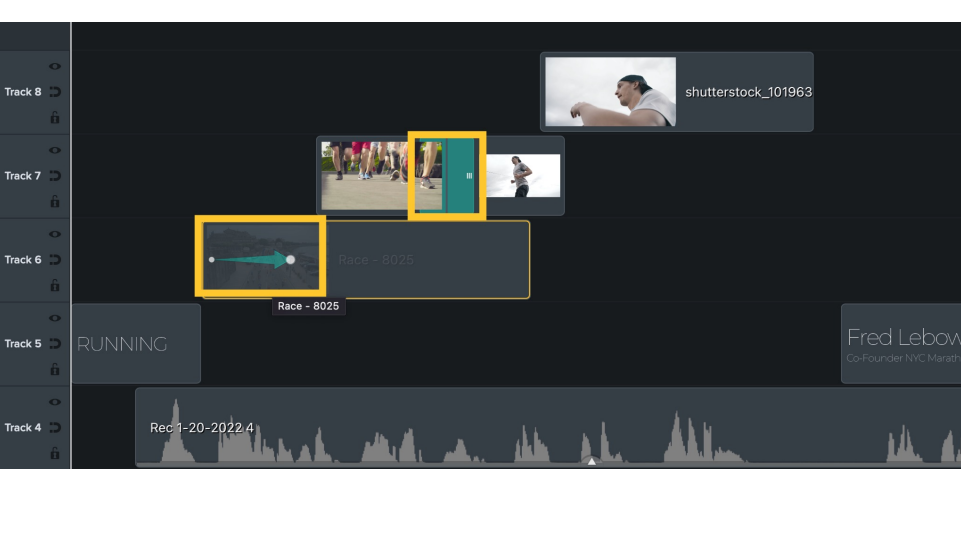
When you’re ready to move on to the next stage, visual effects is a good next step. This is where you can start adding in visual effects like transitions and animations.
It’s usually better to add these in after you’ve got your structure already made, but you can add them before if that works for you.
6. Audio post
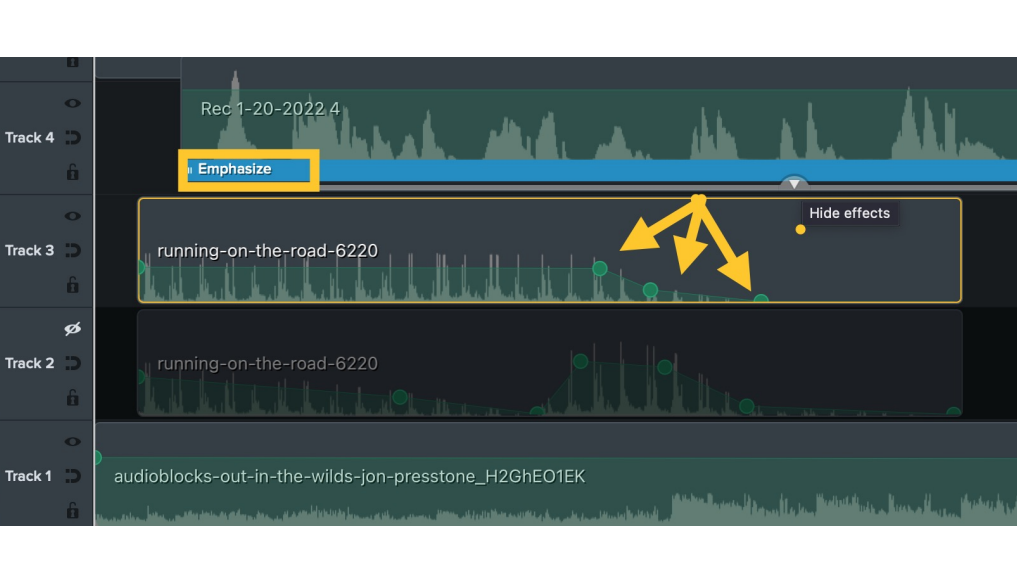
At this stage, we’re not talking about your narration (if you have one) because that should be part of the main rough/fine cut. Instead, we’re talking about things like adding emphasis, making sounds fade or raising them at certain points.
Camtasia’s Emphasize feature is really handy for this because it allows your voice track to automatically minimize the music track to make your voice clearer.
This is also the point where you should add in music if you’re using any. However, some people prefer to choose the music first and build the video around that. In this case, you’d add it during your rough cut and put it in your picture lock version.
7. Color
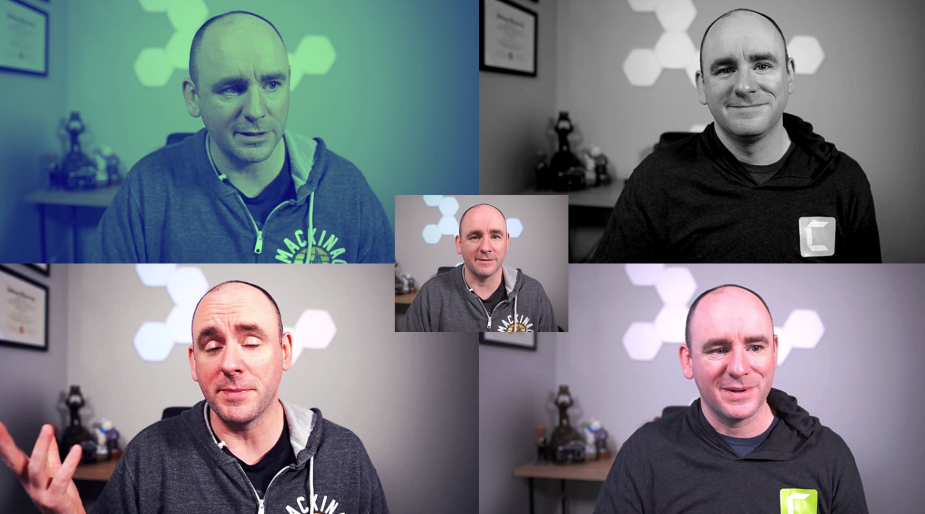
This part won’t apply to every video out there, but if you want to tweak the color, this is a good spot to do it.
One thing to watch out for when doing color editing is to make sure that it’s on every piece of footage you want to edit. It’s really easy to miss a section and realize afterward that the color changes drastically between shots.
Camtasia and other software have some easy color correction features to use, whether you want to do a two-tone look, black and white, or a more natural color correction.
Some people prefer to deal with color correction earlier on in their editing process, which is perfectly fine. But a common problem is that it can slow your machine down while editing. An alternative is to use Camtasia’s proxy video feature. This lets you work on a low-quality version of the video for now, but it will render as high-quality footage when you’ve finished.
8. Title and graphics

One of the final touches for most editing projects is to add your title and graphics.
The reason why it’s best to do this last is because (hopefully) you won’t have to change anything else by this point. You’ll have your structure, effects, audio, color correction, and so on all sorted.
The title and graphics are just the icing on the cake.
If you want to add moving graphics into your video, you might want to pop those in earlier as part of your picture lock version.
Is this right for me?
While the workflow example above is a solid one to follow, it’s not set in stone. If you have a different way of working, great!
The most important thing is to find what works for you. You might decide that you’ll never want to mess around with color correction. If so, leave it out! If you prefer adding the titles in the intro of your video right at the start, that’s good too.
Doing what works for you will also go a long way in helping you get faster and more efficient at making videos.
Once you know what works, you can repeat those patterns in all your videos. The last tip we’ll leave you with is, even if you find those patterns that work, don’t be afraid to try out new things as well. Experiment with and explore different techniques to keep your videos fresh and your skills always leveling up.
For more tips on leveling up your videos, head over to TechSmith Academy where you’ll find plenty of resources on video editing and much more.


