Create Stunning Animations with Media Mattes

Learn how to create stunning animations or transitions with the Media Matte effect.

Camtasia product icon

In this tutorial:

Animation example with media mattes

About Media Mattes

The Media Matte visual effect is a simplified way to add track mattes or “masking” to your videos.

When you apply the Media Matte effect to media on a track on the timeline, sections of the media on the tracks directly below display or are hidden by transparency and brightness properties of the media on the track above.
Media Matte effect on a track on the timeline

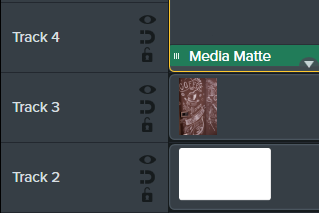
Camtasia supports the following transparent media file formats: .mp4, .mov, .gif, .png, and .bmp.

Note: Apply a Media Matte with Alpha mode to a track that contains media with transparent pixels or media that does not cover the entire canvas such as still images and annotations.

Apply a Media Matte Effect

Apply a Media Matte effect to compatible media on a track.

  1. Click the Visual Effects tab.
  2. Drag the Media Matte effect onto an image or clip on the timeline.
  3. Click the Properties button.
  4. Select a mode from the Mode dropdown. See Media Matte Modes.
    Media Matte properties
  5. Drag the Intensity slider to adjust the visibility of the selected mode.
  6. Set the amount of time you want the effect to Ease In or Ease Out during playback. (Optional)

Note: Create complex track matte animations and transitions by grouping media. See How to Use Group Tabs.

Media Matte Modes

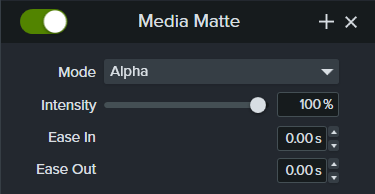
There are four modes available in the Properties panel after applying the Media Matte effect:

Media matte and track matte mode examples
  • Alpha: Media on the tracks below is not visible through the transparent pixels and visible through the opaque pixels on the track above.
    • Maximum Intensity = 100% visible
    • Minimum Intensity = 0% visible
  • Alpha Invert: Media on the tracks below is visible through the transparent pixels and not visible through opaque pixels on the track above.
    • Maximum Intensity = 0% visible
    • Minimum Intensity = 100% visible
  • Luminosity: Intensity of the media brightness determines the level of pixel visibility and transparency between tracks.
    • Maximum Intensity = 100% visible
    • Minimum Intensity = 0% visible
  • Luminosity Invert: Intensity of the media brightness determines the level of pixel visibility and transparency between tracks.
    • Maximum Intensity = 0% visible
    • Minimum Intensity = 100% visible

Add Track Mattes Manually

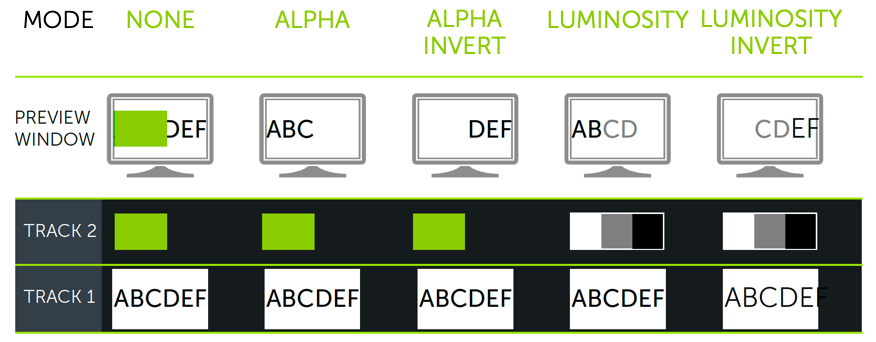
To manually enable track mattes on the Camtasia timeline, right-click (Windows) or Control+click (Mac) the Disable track icon icon on a track and select a Track Matte Mode option: Alpha, Alpha Invert, Luminosity, or Luminosity Invert. See Media Matte Modes.
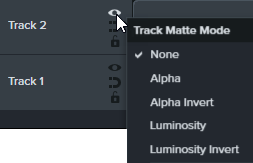
Track matte options

Additional Resources

  • Track Mattes Explained: This 6-minute YouTube video shows the manual alternative workflow using track mattes.
  • Track Mattes Reference PDF: Download this reference PDF of track matte modes and timeline navigation shortcuts.
  • Track Mattes Getting Started Project: Download this sample project package with media, track matte, and animation to experiment on your own. See How to Use a Template to learn how to import and create a video project from this template.