Edit Audio

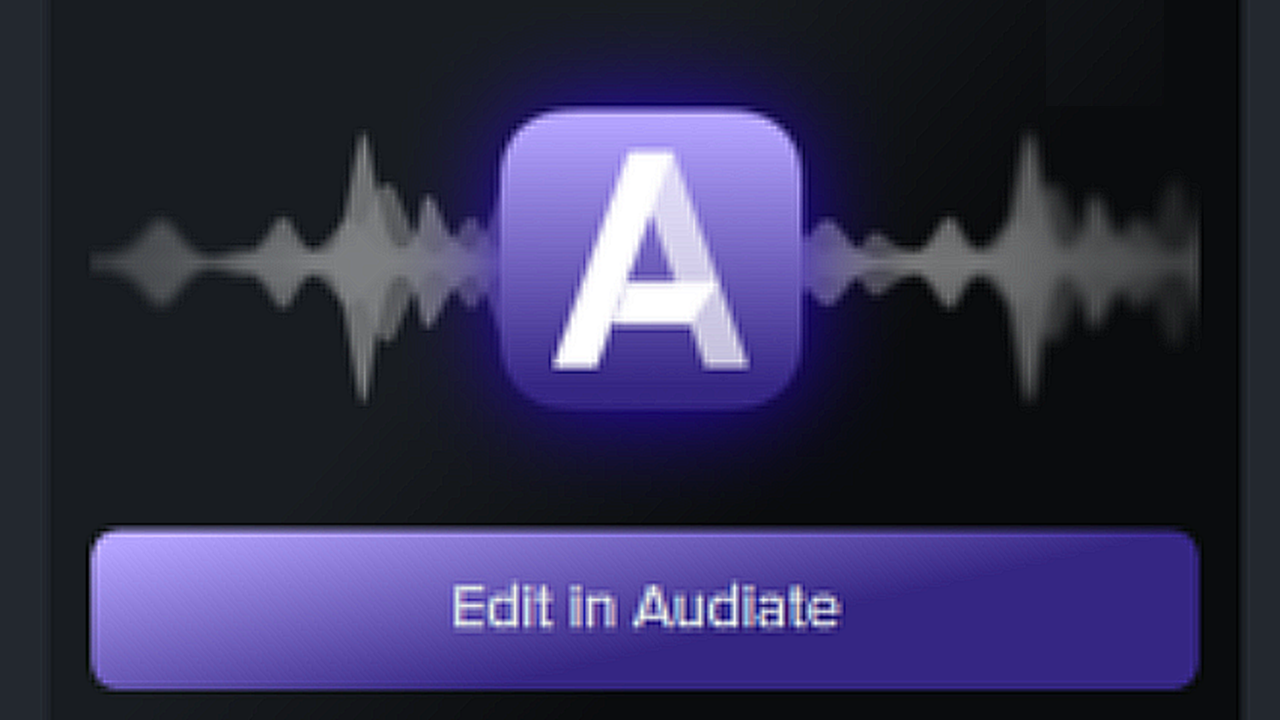
Learn how to edit audio on the timeline in Camtasia or send audio to Audiate for text-based editing.

Camtasia 3D icon

In this tutorial:


Audio quality is just as important as video quality, if not more so.

  • We detect audio errors more easily than visual errors.
  • Most people won’t watch a video with bad audio, even if the video itself is very good.
  • People are more likely to continue watching a poor quality video if the audio is good.

Tip: Start with great audio.

  • Use the best quality microphone you can afford.
  • Use default Camtasia Recorder audio settings.
  • ALWAYS do a short test recording to ensure audio is being recorded.
  • Use Audio Effects to enhance or correct audio.
  • Add audio points to adjust the volume of specific areas of the waveform.

Edit Audio on the Timeline

OptionDetails
Select audio on the timelineDouble-click a clip with audio. The clip turns green and the audio bar appears.
Silence a section of audioUse the playhead to make a selection. Right-click the selection and choose Silence Audio.
Silenced section of audio
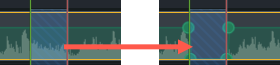
Add and move audio points to adjust volume of parts of a clipDouble-click on the audio bar to add points. Click and drag the audio points up, down, or across the audio bar.
New audio point
Fade audio in or outTo create a fade, add three audio points to the audio bar. Drag points up or down to create the desired fade.
Audio points rise to indicate fade in
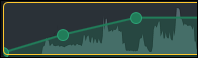
-OR-
Click the Audio tab and drag the Fade In/Fade Out effects to the clip on the timeline.

See Add Audio Effects.
Delete audio pointsRight-click an audio point and select Delete or Remove All Audio Points.
Delete audio point options
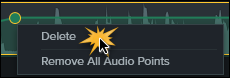
Separate system audio from screen recordingRight-click audio and select Separate Video and Audio.
Change the look of the waveform (Windows only)Select Edit > Preferences > Program tab > Mirror waveform.
Mirrored waveform
Save audio as M4A, MP3 (Windows only), or WAVTo export an audio file, select Share > Export Audio Only.

See Export an Audio File.
Apply Mix to Mono to have audio in both channelsSelect audio clip on timeline and click Properties button > Audio subtab Audio subtab > Mix to Mono checkbox.
Adjust audio level of all selected clipsSelect audio clip on timeline and click Properties button > Audio subtab Audio subtab. Drag the Gain slider to adjust the clip’s audio level.
-OR-
Drag the audio bar up or down.
Drag audio bar to increase or decrease the volume level
Adjust the audio level for the whole projectClick the volume indicator below the Properties button. Drag the slider to adjust the project’s audio level.
Master gain slider for project

Edit Audio in Audiate

Edit audio in TechSmith Audiate to reduce the time spent editing narration and to create smooth, professional sounding voice clips.

  • Use text-based editing to quickly remove words or edit hesitations, such as “ums” or “ahs”.
  • Edit and correct the transcription to export as a script or captions.

Note: Audiate is only available in English, but supports voice recording and transcription in all non-Asian languages.

  1. Right-click a clip on the timeline that includes spoken audio and select Edit in Audiate.
  2. Camtasia locks the current project and opens Audiate. If you have not previously installed TechSmith Audiate, click the Download Audiate button.
  3. Edit the audio in Audiate. To learn how to edit audio in TechSmith Audiate, see Edit Audio & Mistakes.
  4. Select Export > Export to Camtasia.
    Export to Camtasia option
  5. The Sync with Camtasia dialog appears. Select an option to sync the edited audio:
    Sync with Camtasia dialog
    • Edit Camtasia Timeline: Automatically updates the entire Camtasia project timeline to sync with the edited audio. For example, if you changed the duration of the audio clip, select this option to automatically update other media on the timeline to match.
    • Edit Media Only: Edits only the original video media to match the edited audio. Other clips on the timeline are not changed. Select this option if you prefer to manually adjust other media on the timeline.
  6. Click Export.

The edited audio file is imported back into the Camtasia project.

Tip: Start projects in Audiate to avoid time-intensive editing later.

Record or import audio in TechSmith Audiate first. Audiate automatically creates a transcript for you to delete “ums”, “ahs”, and pauses with the text-based editor. Export the audio directly into Camtasia to finish your project. Learn more about Audiate.