Capture Your Screen
Learn how to take your first capture with Snagit.
Learn how to take your first capture with Snagit.
This topic provides a brief introduction to help you take your first capture with Snagit. For more in-depth information about how to capture a screenshot or video of anything on your screen, see the following topics:
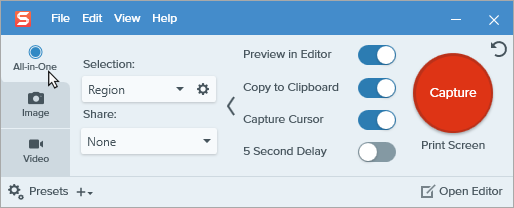
The Capture window provides access to all Snagit capture settings. To open the Snagit Capture window:
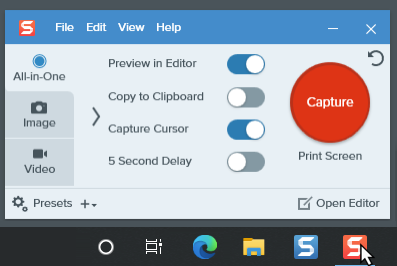
In the Capture window, select the capture type and settings to capture anything on the screen.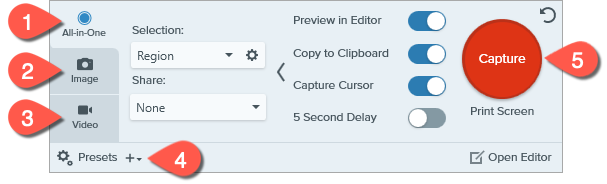

All-in-One tab
Quickly Capture an image, video, or scrolling capture. See Take Your First Capture.

Image tab
Customize the settings to capture an image. Automatically add effects, share directly to a destination, and more. See Capture an Image.

Video tab
Customize the settings to capture a video. Set up audio or a webcam device for video. See Record a Video with Snagit.

Presets
Save frequently-used capture settings and assign a keyboard shortcut to each to increase speed and efficiency. Click the Presets button to open the list of presets. See Save Capture Settings as Presets.

Capture button
Click the Capture button to start a capture with the current settings selected on the tab.


The capture opens in the Snagit Editor where you can preview, edit, and share the capture.
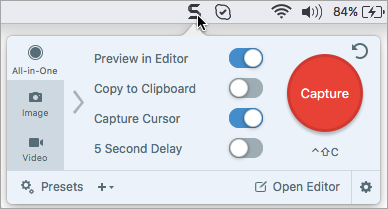
Tip: Save time with the global capture hotkey and presets.
The global capture hotkey (Print Screen for Windows or Control+Shift+C for Mac) starts a new capture with the current settings in the Capture window. These are typically saved from your most recent capture. To edit capture settings, open the Capture window.
To set different keyboard shortcuts for your most common captures, see Save Capture Settings as Presets.
Note: This tutorial is for Snagit version 2024. Previous versions may look or function differently.
