









To send a screenshot, capture an image of your screen, add any context your viewer needs, and paste it into a message or share it via a link. On a PC, you can use PrtScn or Alt+PrtScn for a basic capture, or use Snagit to capture, annotate, and share a screenshot in one workflow.
A picture—or a screenshot—may be worth a thousand words. But a great screenshot is even more valuable.
Sending a screenshot is one of the clearest ways to communicate. It shows exactly what you mean, so there’s less room for confusion. It allows the recipient to see exactly what you’re referring to, whether it’s an error message, a website layout, or detailed instructions.
Screenshots save time because you don’t need long descriptions to explain complex ideas. They also cut down on back-and-forth, since the image often answers the question before anyone has to ask it.
Whether you’re providing feedback on a design mockup or documenting an issue for tech support, Snagit is the best way to take and send a screenshot.
Step 1: Quickly capture what’s on your screen.
Step 2: Annotate it to ensure your message is clearly communicated.
Step 3: Send the screenshot in a way that works with your existing workflow.
No confusion or intimidating walls of text for your coworker, and no jumping through hoops for you. It’s a win-win.
Key takeaways
- A screenshot is most useful when it shows the right area of your screen and includes enough context for the recipient to act.
- On a PC, PrtScn and Alt+PrtScn are quick options for basic screenshots that you can paste into another app.
- Snagit is recommended when you need scrolling capture, precise capture options, annotations, and easy sharing.
- Screencast lets you share a screenshot with a link, so recipients can view it without needing an account.
How do you send a screenshot on a PC?
You can send a screenshot on a PC by pressing PrtScn or Alt+PrtScn, pasting the copied image into another app, or using Snagit to capture, edit, and share a link. Built-in tools work for simple captures, while Snagit offers more control when a screenshot needs clear markup or a reliable sharing workflow.
There’s more than one way to take a screenshot – and some options are clearly better than others.
If you use Windows, you already have a built-in tool for taking a basic screenshot. Press print screen (PrtScn) to capture your entire screen and copy it to the clipboard, or Alt+PrtScn to copy a screenshot of the window that is currently open. From there, you can paste the copied screenshot into another app.
You can also open the Windows Snipping Tool to access free-form and rectangle screenshot modes, plus a pen and highlighter for basic, hand-drawn annotations.
Snipping Tool is helpful for quick captures, but it offers limited control for detailed screenshot communication. It lacks advanced features like precise cropping, annotations, or the ability to capture scrolling windows.
Those limitations can slow you down when you need more flexibility and customization options. For a more comprehensive solution that’s still easy to use, there’s Snagit.
Snagit offers flexible, powerful screen capture options such as:
- Scrolling capture (both automatic and manual)
- Text capture
- Specified region capture
- Specific pixel width and height capture
- Repeat capture
- Menu capture
- Multiple region capture
How do Snipping Tool and Snagit compare for webpage screenshots?
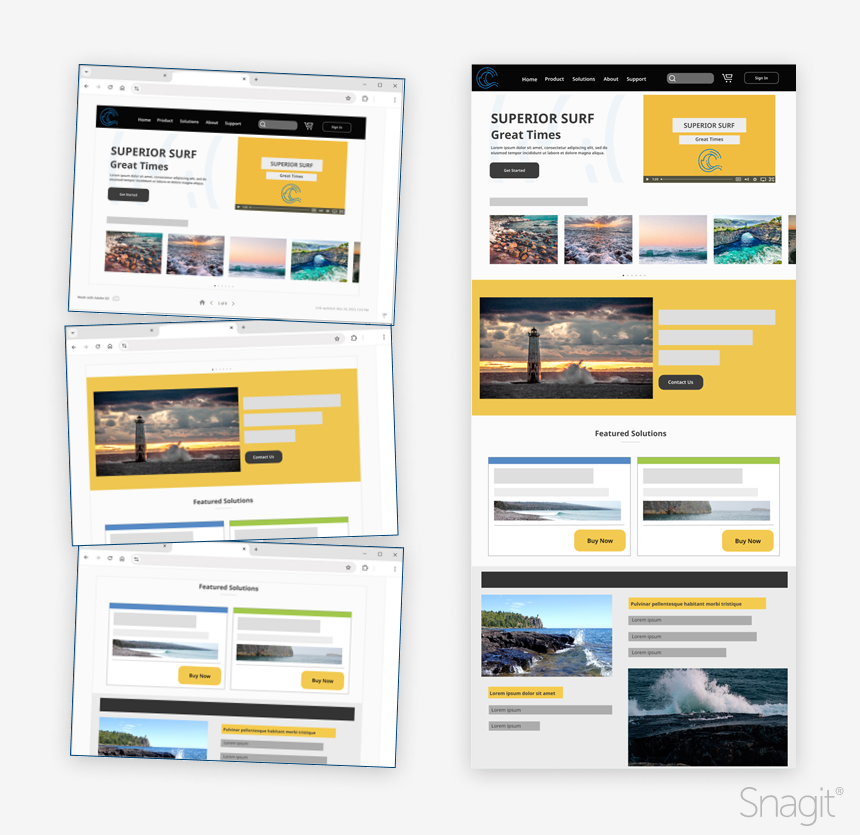
Snagit is better for long webpages because scrolling capture can collect the content in one image instead of splitting it into multiple captures.
Snipping Tool may require multiple separate screenshots for content that extends beyond the visible screen. Snagit’s scrolling capture helps keep the page intact, making the final screenshot easier to review and share.
How do Snipping Tool and Snagit compare for editing screenshots?
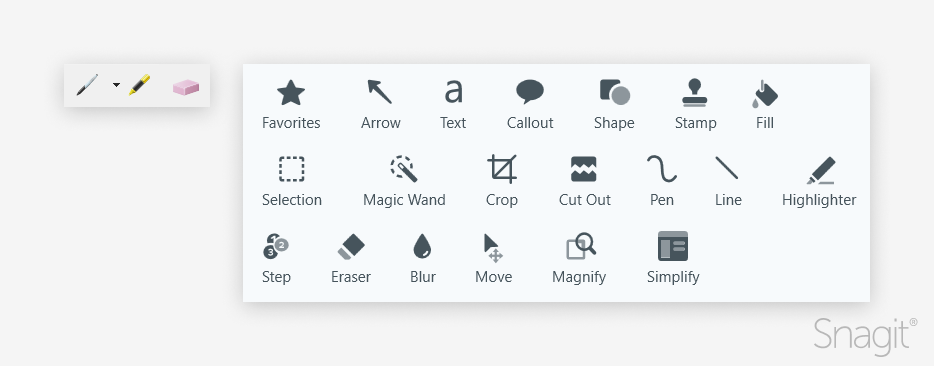
Snagit offers more editing and annotation options, including callouts, arrows, steps, labels, stamps, and editable captured text. That makes it easier to point out exactly what matters before you send the screenshot.
Snipping Tool’s hand-drawn annotation options are limited, while Snagit’s Editor contains a full toolbox of easy-to-use editing and annotation tools and effects that go beyond hand-written text and highlighting.
Try Snagit’s callouts, arrows with multiple custom colors, font properties, automatically sequenced steps and labels, professionally designed stamps, and even options to edit text captured in your screenshot.
How do you send screenshots using Snagit?
To send screenshots using Snagit, capture the screenshot, edit and annotate it, then share it through Screencast. This keeps the capture, context, and sharing steps in one clear workflow.
Step 1: Capture your screenshot
With Snagit installed, press the capture hotkey: PrtScn on Windows or Control+Shift+C on Mac. Click and drag on the screen to select a specific area to screenshot, or click fullscreen. Then click the camera icon to snap your screenshot.

To take a scrolling capture instead, click the Scrolling Capture icon, then use the window scroll bars or mouse wheel to scroll the content you want to capture, either vertically or horizontally. Snagit captures anything shown within the selected area.

Tip: For even more powerful and flexible capture options, open Snagit’s Capture window and explore the different settings on the Image capture tab.

Step 2: Edit and annotate
Your screenshot opens automatically in the Snagit Editor. Select from a wide variety of annotation and editing tools and effects.
Add annotations like arrows, callouts, labels, and shapes to help communicate your message. Customize the annotation colors, sizes, fonts, and more to ensure your message stands out or to match your brand or product colors.

Remove unnecessary parts of the image with the crop, cut out, selection, or simplify tools, to help focus your viewer’s attention on what’s important.

Finally, add effects like borders, color filters, or capture information about the screenshot to add polish or context.
Step 3: Share via Screencast
When you’re ready to share your screenshot, make sure that anyone you send it to can view it. No need to worry about file size, format, or account access.
Click the share link to instantly upload your screenshot to Screencast, Camtasia’s cloud-based content hosting solution.

Snagit automatically copies a shareable link to your clipboard to paste wherever you get work done – email, Microsoft Teams, Slack, Zoom Chat, and more. Recipients can open and view your link – no account needed.
Even better, Screencast’s built-in collaboration and feedback tools help you to keep your work moving forward, even after you’ve sent the screenshot link. Add comments to solicit feedback, ask specific questions, and more.

Your recipients can reply and add new comments (still no account needed) to keep the conversation going.
Why use Snagit for screenshots?
Snagit is useful when you need more capture control, clearer annotations, sharing, and reuse than the Windows Snipping Tool provides. It captures, annotates, shares, and stores your screenshots in one streamlined, easy-to-use package for further editing and reuse.
Don’t waste your time trying to figure out how to get what you need from Snipping Tool. Take the screenshots you actually want with Snagit.
The best snipping tool for Windows and Mac
Don’t let clumsy built-in tools hold you back. Take and edit screenshots with Snagit!
Get Snagit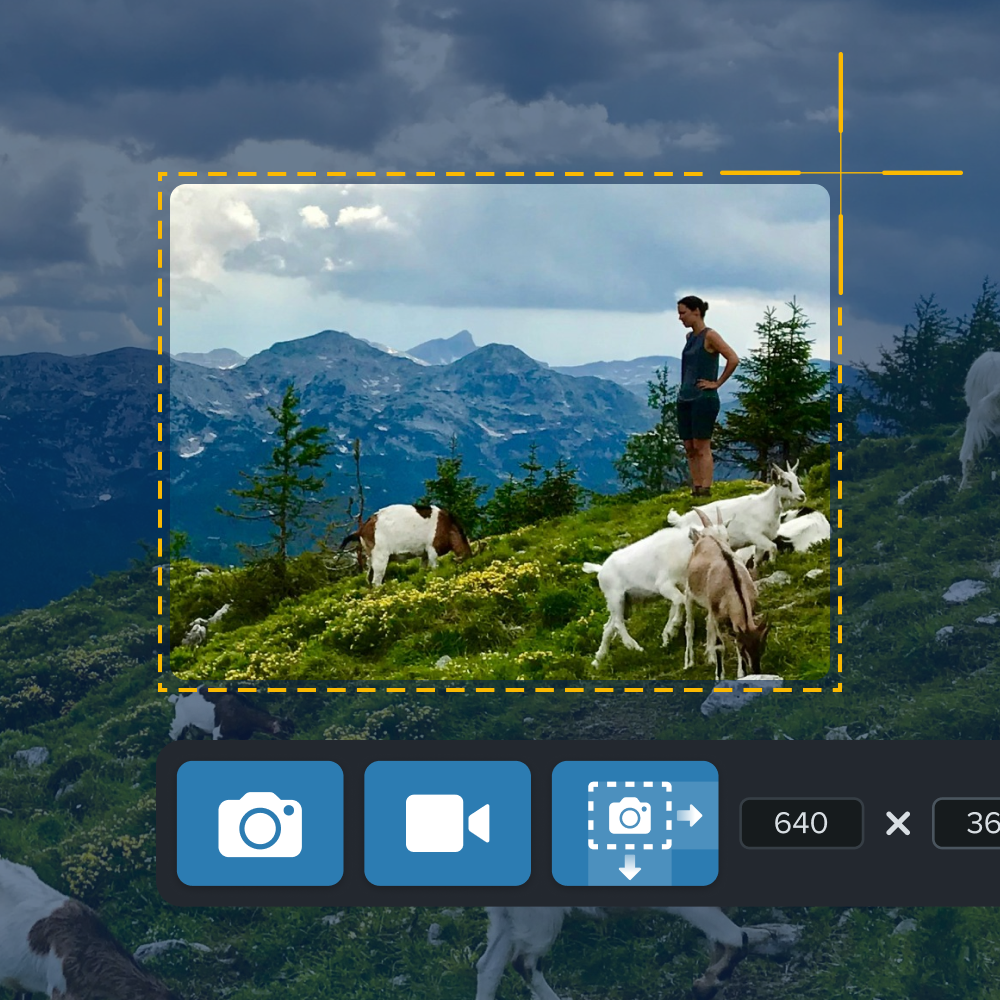
What is the best alternative to the Windows Snipping Tool?
We recommend Snagit because it combines screenshot capture, editing, and sharing into a single workflow. Don’t let clumsy built-in tools hold you back. Take and edit screenshots with Snagit!
How can you try Snagit for free?
The free trial lets you test the capture, edit, and share workflow before deciding whether Snagit fits your needs. Try it yourself and see how easy it is to capture, edit, and send high-quality visuals.
Improve communication, enhance productivity, and save time with Snagit’s powerful tools designed for effortless collaboration and clarity.
Download Snagit for a free trial today.
Additional resources
- Tutorial Videos Without a Mic or Camera for L&D Teams
- What Is the Knowledge Transfer Process in L&D?
- Screenshot Video: How to Turn Images Into a Quick Video
Send clearer screenshots with less back-and-forth
A useful screenshot does more than show your screen. It highlights the right details, provides the recipient with context, and makes the next step easier to understand. Send clearer screenshots with less back-and-forth.
A useful screenshot does more than show your screen — it highlights the right detail and makes the next step obvious. Download Snagit for a free trial and try the full capture-to-share workflow yourself.
Frequently asked questions
How do I send a screenshot on a PC?
On a PC, press PrtScn to copy your full screen or Alt+PrtScn to copy the active window. Then paste the screenshot into the app where you want to send it. If you need to add arrows, callouts, labels, or a shareable link, use Snagit to capture the screenshot, edit it, and share it through Screencast.
How do I send a screenshot in an email?
For a basic email, capture a screenshot with PrtScn or Alt+PrtScn, then paste it into your message. If the screenshot needs explanation, add annotations first, so your recipient knows where to look. With Snagit, you can also click the share link, upload the screenshot to Screencast, and paste the copied link into the email.
Do recipients need a Screencast account to view my screenshot?
No. When you share a screenshot via Screencast in Snagit, recipients can open and view it without an account. They can also reply and add comments, which helps keep feedback connected to the screenshot you sent.
How do I send a scrolling screenshot?
In Snagit, start a capture and click the Scrolling Capture icon. Use the window scroll bars or mouse wheel to scroll the content you want to capture, either vertically or horizontally. After Snagit captures the content, you can edit it and share it through Screencast.
What should I add before sending a screenshot?
Add only the context your recipient needs to understand the screenshot. Arrows, callouts, labels, shapes, and steps can point attention to the most important area. Cropping, cutting out, selecting, or simplifying parts of the image can remove distractions before you send it.
Share