


You’re in a crunch and your boss needs crucial information from you. Cool. I’ll just screenshot. Wait… How do you do that again?
We’ve all been there. Luckily, you are in the right spot. In this article, you will learn how to efficiently and effectively open and use the Snipping Tool shortcut to take a screenshot. We will also cover a better way to take and edit screenshots.
The best snipping tool for Windows and Mac
Don’t let clumsy built-in tools hold you back. Take and edit screenshots with Snagit!
Get Snagit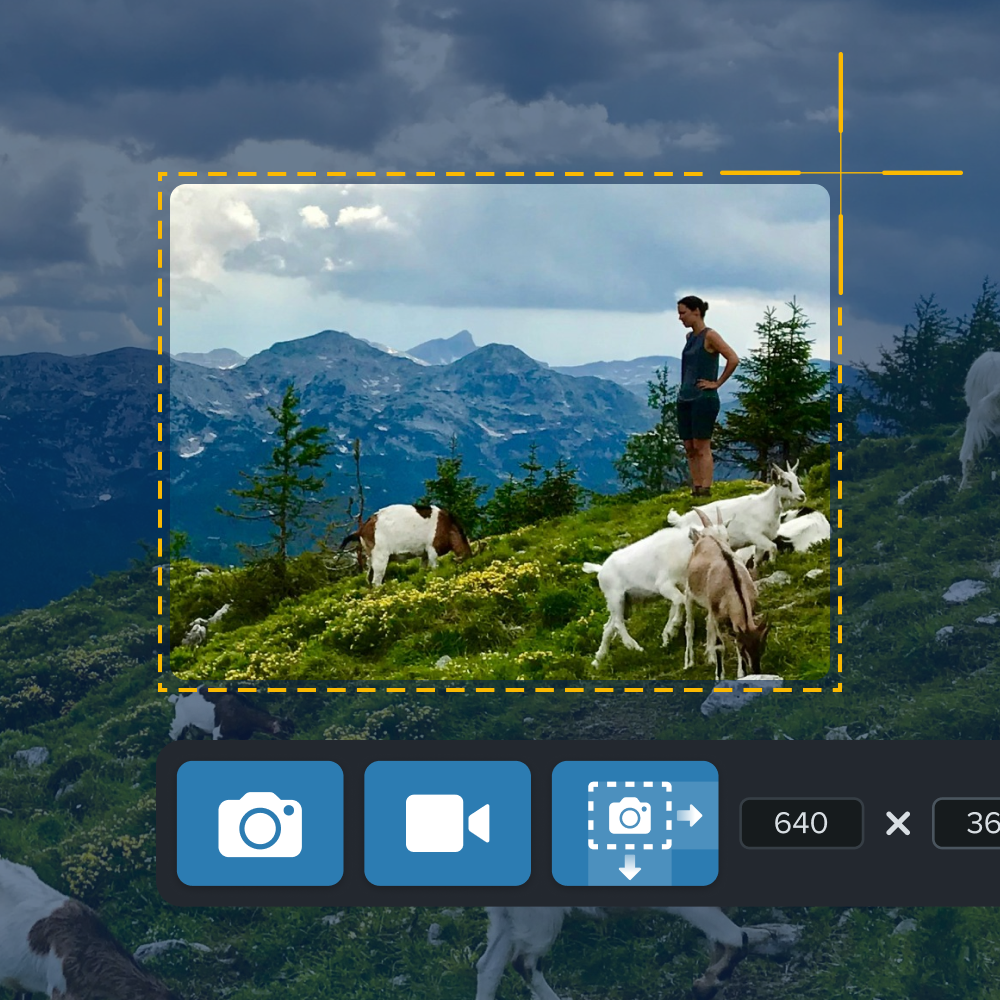
Why use a shortcut key for Snipping Tool?
The most common keyboard shortcuts are copy and paste, but imagine you have to revert to the days when you didn’t know shortcuts.
Ah yes… the old right-click and scroll method. How many extra seconds did that add? Multiply that by the amount of times you copy and paste a day, multiply by 365 and you’ll see the numbers add up year over year.
Our time is priceless, and those seconds add up.
The primary benefit of keyboard shortcuts is saving time, so why not invest the time to learn them? Since you are reading this article, you are on the right track.
Fun Fact: The first screenshot ever taken was back in 1960, over 60 years ago! Humans have always sought ways to share visual information.
Open the Snipping Tool with shortcut
To open the Windows Snipping Tool, use the snipping shortcut by pressing the Windows key + Shift + S. The full screen will dim.
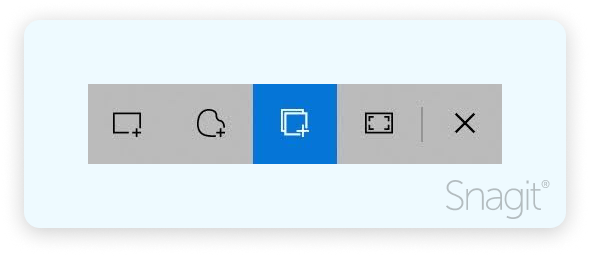
From there, you have 4 different snipping tool options that can be located at the top of your screen:
Rectangular snip
With this option, you can screen-snip rectangular shapes. This is generally used for most captures.
Free form snip
This option gives you the ability to capture screenshots in any shape your free hand can make. This tool is used out of preference over the rectangular snip.
Window snip
If you want to capture the full screen of your browser, use this option. This can be helpful when you need to provide a POV of your screen for a coworker.
Full screen snip
This option will capture all of your monitors simultaneously. If the information is across multiple screens, this is an effective way to capture all of it.
The Windows Snip & Sketch window will pop up. Click on this to retrieve your screenshot. You can also find this at the bottom of the screen next to the start menu.
Capture your screen faster with Snagit
The Snipping Tool has a clunky shortcut key. What if you want an easy-to-remember shortcut key that makes sense to you?
Snagit, the leading screen capture tool, allows you to create shortcut keys that are unique to you! If you haven’t already, give Snagit a try here. Open up Snagit Capture. Under the big red “Capture” button click the phrase below. Here you can change your shortcut to whatever you like!
Snagit’s capture options are extensive. You can screenshot a scrolling website as one, drop-down menus, and even adjust your capture down to individual pixels with the arrow keys on your keyboard.
You might find that the Snipping Tool is limited in the editor department. Instead of dragging a screenshot from platform to platform to edit, you can do everything in Snagit.
Once you capture your screenshot, it will go straight to Snagit’s Editor where you can edit your screenshot with arrows, callouts, annotations, and more! Look at this before and after:
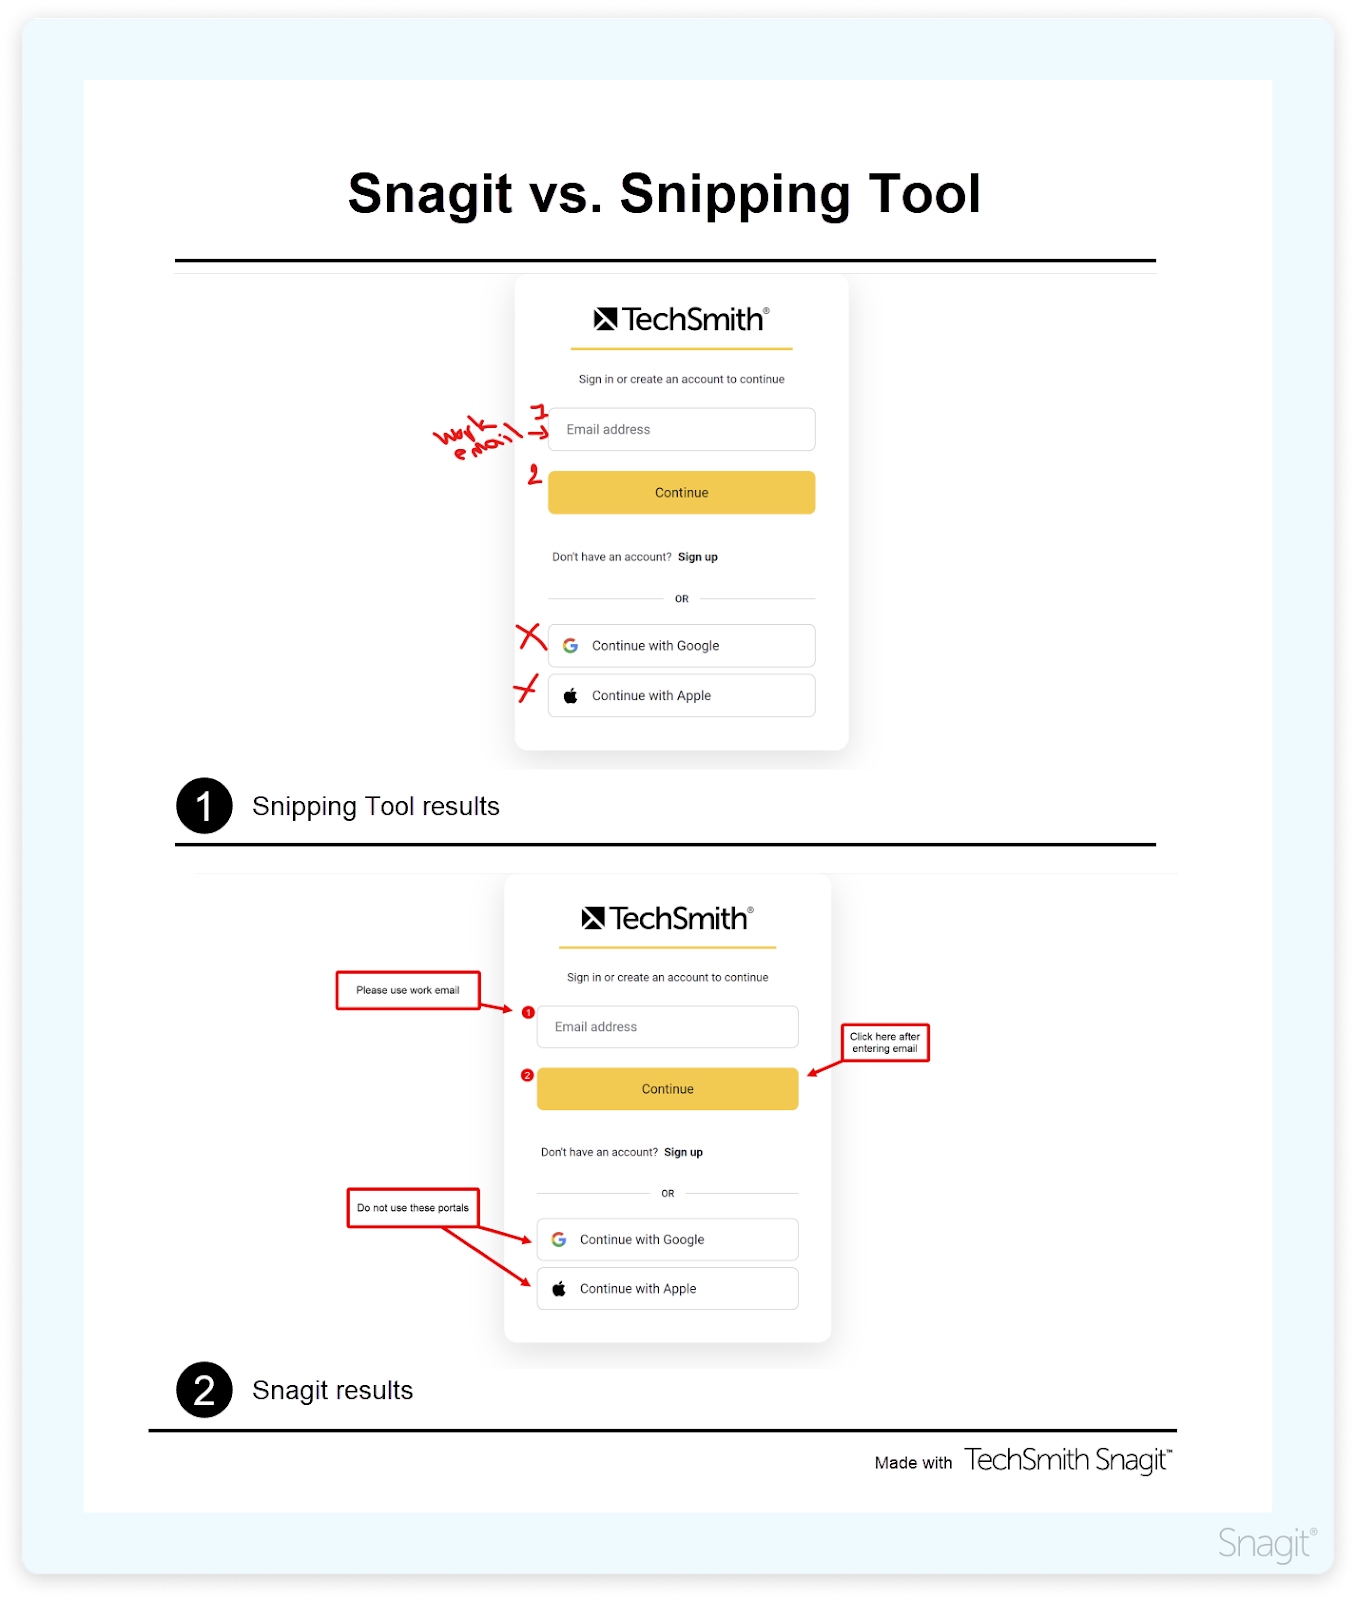
Snagit vs Snipping Tool
The Snipping Tool is a great built-in tool for quick, simple screen captures, but it doesn’t go much further than that. However, Snagit has a variety of features that can spruce up a simple screenshot and take complex ones.
What tool is right for me?
If you take an occasional screenshot, the Snipping Tool is fine, but if you rely on screen capture every day, it’s worth the investment to get Snagit.
Snipping Tool benefits:
- Free with the Windows computer
- Easy-to-use
- Basic editor
Snagit benefits:
- Scrolling capture so you can screenshot beyond what you can see on your screen.
- Grab text from images and PDFs to copy and paste anywhere.
- Screen record quick videos like tutorials, product demos, and data shareouts.
- Multi-faceted editor to add clarity and information to your captures.
- Organized library so you can always refer back to your past content
- Easy-to-use interface with no steep learning curve.
Want to learn more about what tool is right for you? Check out this article where we compare both tools.
Create how-to guides in seconds with Snagit
Document any internal process as you do it. Step capture organizes the screenshots, numbers, and steps into a clear, shareable visual.
Learn More
FAQ
You can change the key to the print screen shortcut.
Go into settings/ Press the Windows shift and I keys.
Click on “Ease of Access”
On the left-hand side of the screen, scroll down to “Keyboard” and click
Scroll down and you will see “Print Screen Shortcut.” Slide this on.
Yes, the Snipping Tool has some editing options. You can use the highlighter, pencil, or pen tool.
If you are looking for more advanced capturing and editing options then it is worth giving Snagit a try.
Share