


TL;DR: To take a scrolling screenshot, use a tool like Snagit that supports scrolling capture. While native tools like Windows Snipping Tool typically capture only visible areas, Snagit lets you scroll vertically or horizontally to capture entire webpages, long spreadsheets, and chat threads in a single shot.

Can I take a scrolling screenshot with Windows Snipping Tool?
The short answer is no. As of early 2026, the built-in Windows 11 Snipping tool primarily handles static rectangular, window, or full-screen captures. While it has added video recording, it lacks a native image scrolling feature. If you’re tired of manually pasting five different screenshots together in Paint, you need a dedicated tool like Snagit.
How to take a scrolling screenshot on Windows 11 and Mac
Whether you’re documenting a complex 50-step workflow, archiving a long Slack thread, or capturing a full website for design review, manual stitching is a waste of your time. If your daily work involves sharing “what’s on my screen,” you need a way to grab the stuff that isn’t on your screen yet.
Here is how to take a scrolling screenshot in Snagit:
- Select your area: In the All-in-One tab, click Capture and drag the orange crosshairs to select a specific region.
- Start the scroll: On the All-in-One toolbar, click the Scrolling Capture button. It’s the icon with the window and arrows.
- Scroll: Use your mouse wheel or the window’s scroll bars to move through the content.
- Finish up: Click Done when you’ve reached the end. Snagit will combine all the pieces into a single seamless image.
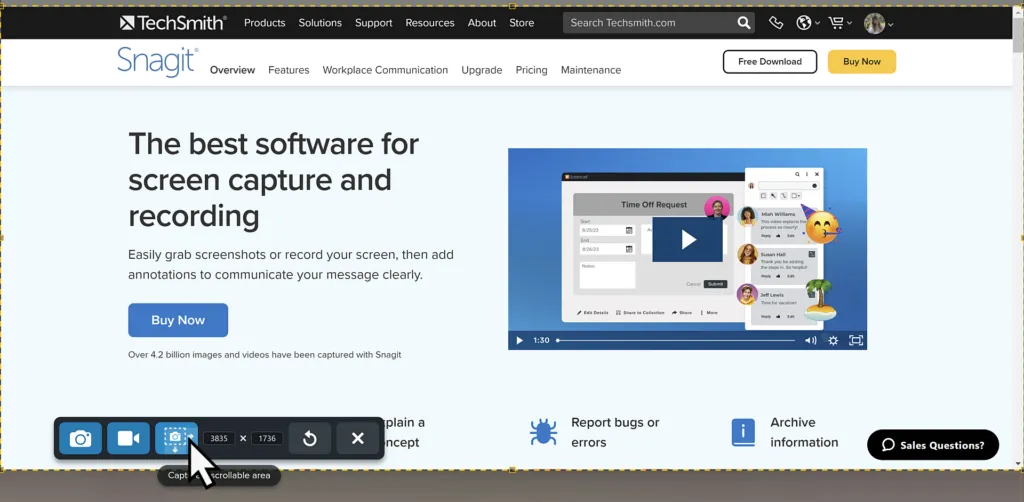
Take a scrolling screenshot with Snagit
Capturing an entire website, including everything that’s out of view, is easy with Snagit.
Free Download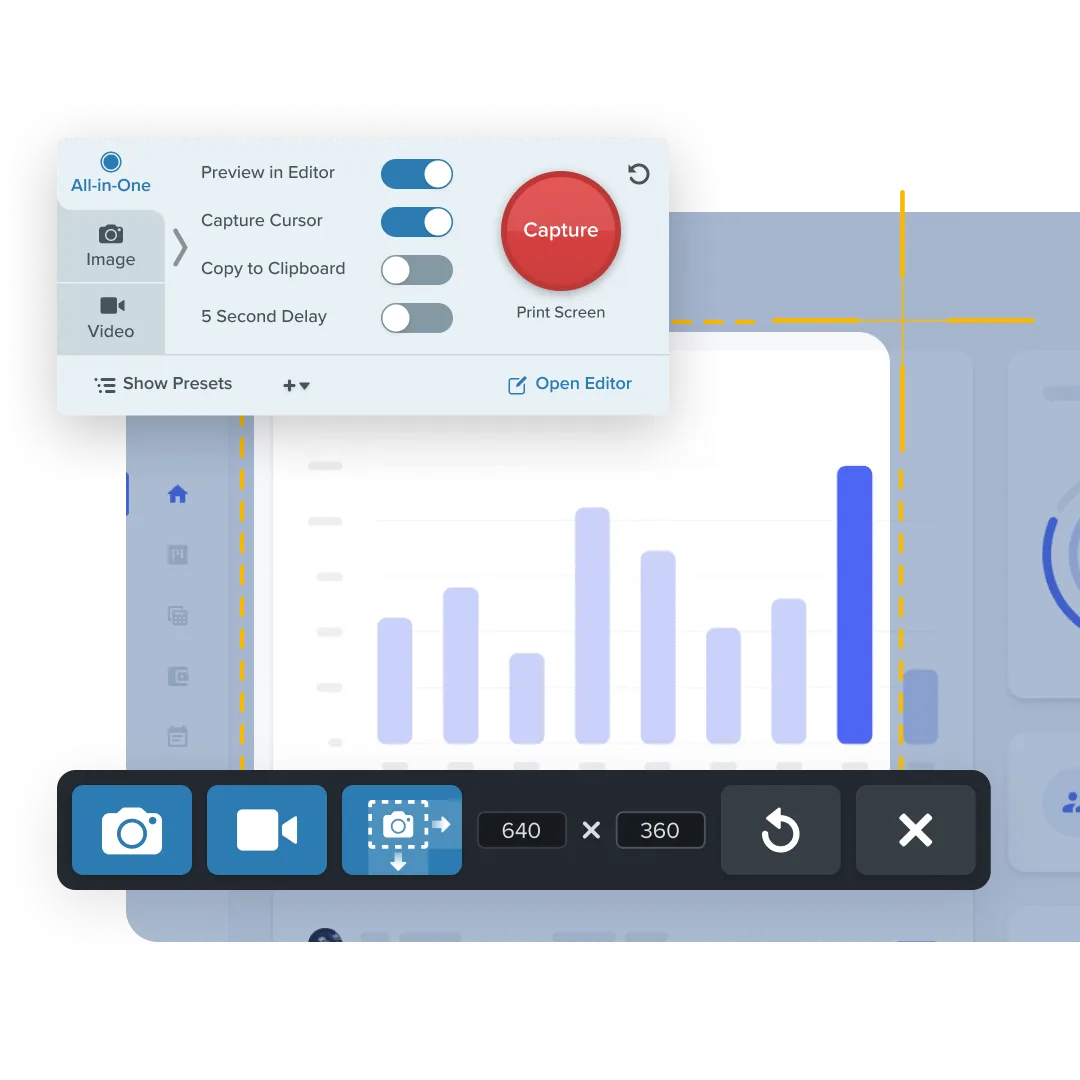
Pro tips for perfect scrolling captures
If you want a capture that looks like a high-res marketing asset rather than a shaky handheld video, follow these protocols:
- Master the “steady scroll” technique: Don’t use your mouse’s “free spin” mode. Use the scroll bar or the arrow keys for a fixed, rhythmic movement.
- Clear the digital clutter: Modern websites are full of “sticky” elements like headers, chatbots, and cookie banners that could lead to a “ghosting” effect. Before you hit capture, use “Inspect Element” to delete sticky headers and other distracting elements.
- Don’t try to capture the whole internet: When working with social media feeds and other apps with an “infinite scroll,” set a mental stop point.
3 Reasons scrolling captures will save your sanity
- No more Frankenstein images: Stop stitching separate files together. Get one clean, high-res image every time.
- Text recognition: Snagit can Grab Text from your scrolling capture, turning a flat image of a spreadsheet into actual, editable data.
- Context is king: Use the step tool or callouts to point out exactly what matters in a long document.
Record your screen with Snagit
Snagit makes it easy to share quick updates and how-to’s by capturing exactly what’s happening on your screen.
Get Snagit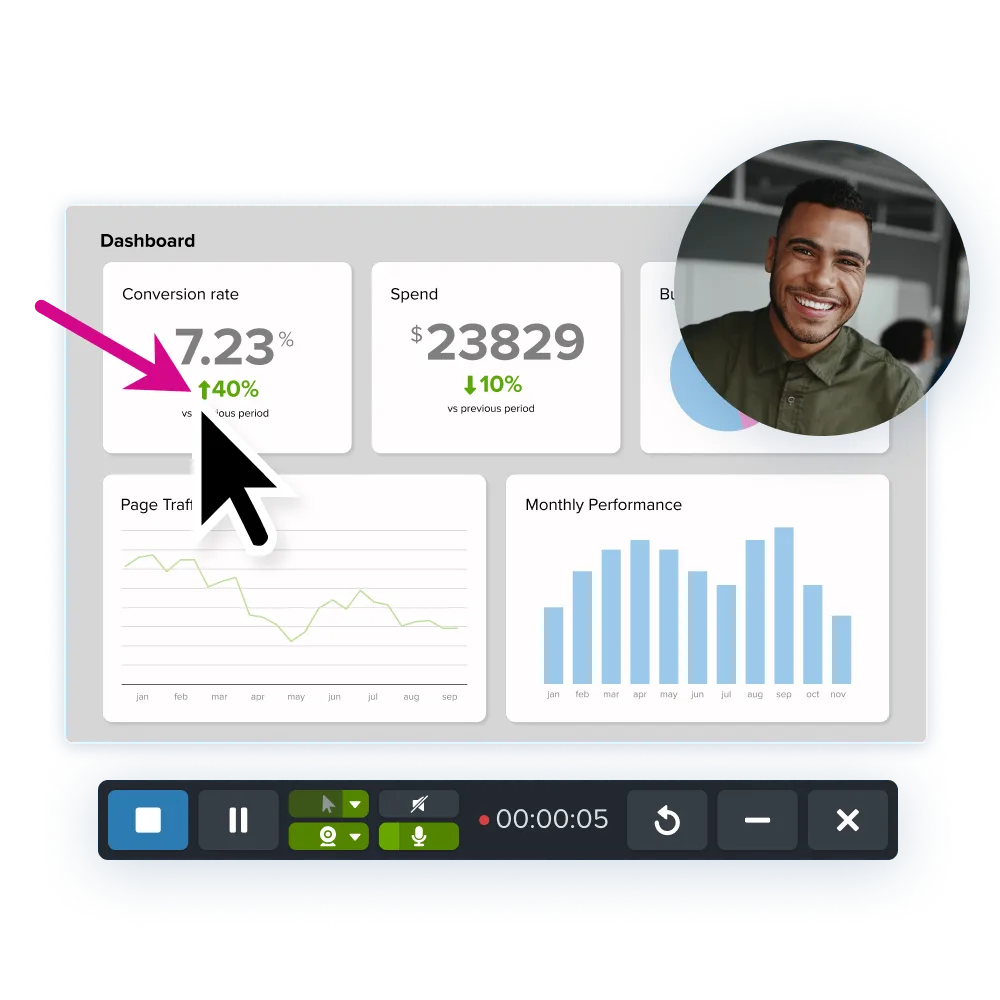
Frequently asked questions
No, the built-in Windows 11 Snipping Tool cannot capture scrolling screenshots. While it allows for rectangular and window captures, it lacks the “stitch” technology required for long pages. To capture a scrolling window on Windows, you must use a dedicated tool like Snagit.
Capturing long spreadsheets requires Snagit to ensure headers stay aligned. Here’s how:
1. Select the All-in-One Tab in Snagit and click Capture
2. Select the area of your spreadsheet
3. Click the scrolling capture button and scroll your Excel sheet manually to the end.
4. Click Stop to process the image into a single file.
If your scrolling screenshot is blurry, it is likely because you scrolled too fast during a manual capture. Slow down and move the scroll bar at a steady, moderate pace when taking scrolling captures.
Yes, most modern mobile devices have a native “Scroll” or “Capture More” button that appears immediately after taking a standard screenshot. However, these are often limited to vertical scrolling in web browsers and may not work in all third-party apps.
Share