
Built-in screenshot tools for Windows, like the Snipping Tool, can sometimes fill your basic screenshot needs.
Simply press the print screen button on your keyboard to do so. You can open the snipping tool that way as well.
But what if you need to go beyond the bare minimum? Screenshot your computer screen with more detail, or add extra annotations and effects with Snagit!
There’s a better way!
With the power to easily communicate details and share knowledge, Snagit’s features make it the best screenshotting software for Windows 10.
From advanced effects and editing tools to detailed capture techniques, Snagit can help you create amazing screenshots with ease.
Read on for an easy-to-follow walkthrough of how to take a screenshot on Windows 11, plus how to store and organize your screenshots.
Upgrade your screen captures
Don’t let clumsy built-in tools hold you back. Take and edit screenshots with Snagit!
Try it Free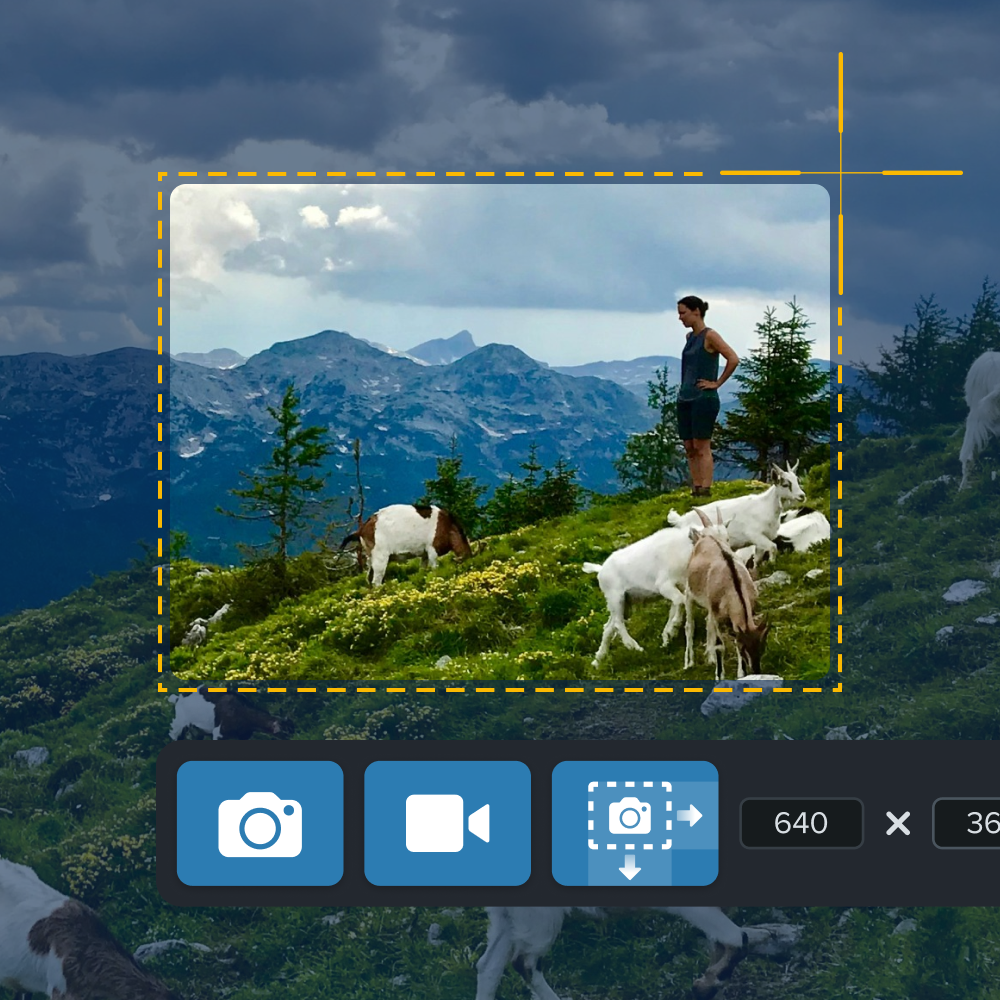
How to screenshot on Windows 10 & 11
When it’s time to go beyond basic screenshots, TechSmith Snagit combines powerful features with an easy-to-use interface. You can download a free trial here to start taking great screenshots!
Step 1: Select what type of image you want to capture
Taking a screenshot with Snagit starts the same – with the print screen button. With Snagit open, simply click the red Capture button. You can also do this from the Snagit icon in your toolbar.
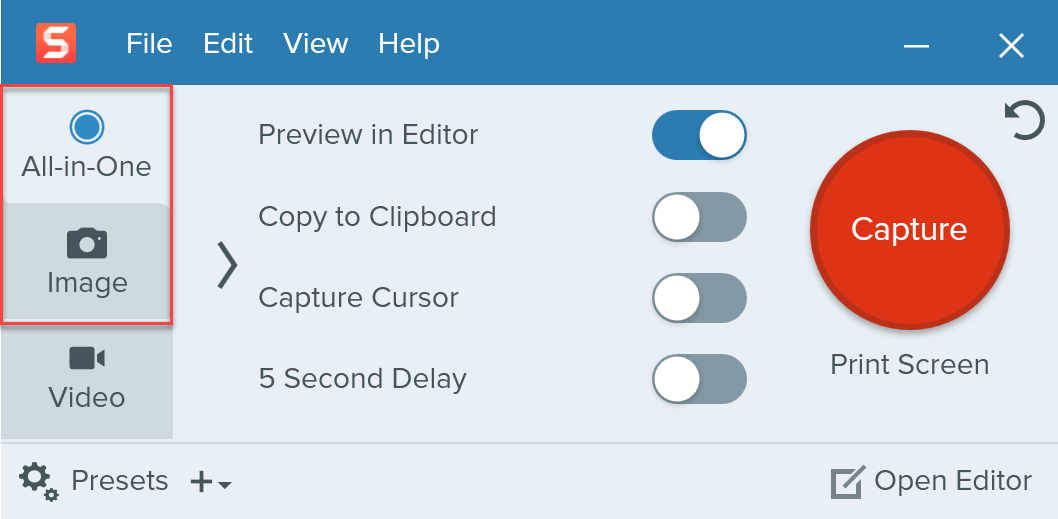
In the toolbar, you will notice different screenshot options. You can select either All-In-One or Image to screenshot your screen.
All-In-One gives you the option to select image, video, or panoramic capture. This is a great option if you aren’t sure exactly what type of screenshot you need.
The Image setting will display your options for a still screenshot, including panoramic, window, full screen, and more. This is a great option when you need to tailor your capture dimensions to your screen.
To use Snagit super efficiently, you can program keyboard shortcuts or hotkeys to speed up your screenshotting process.
For this tutorial, let’s use the All-in-One capture setting.
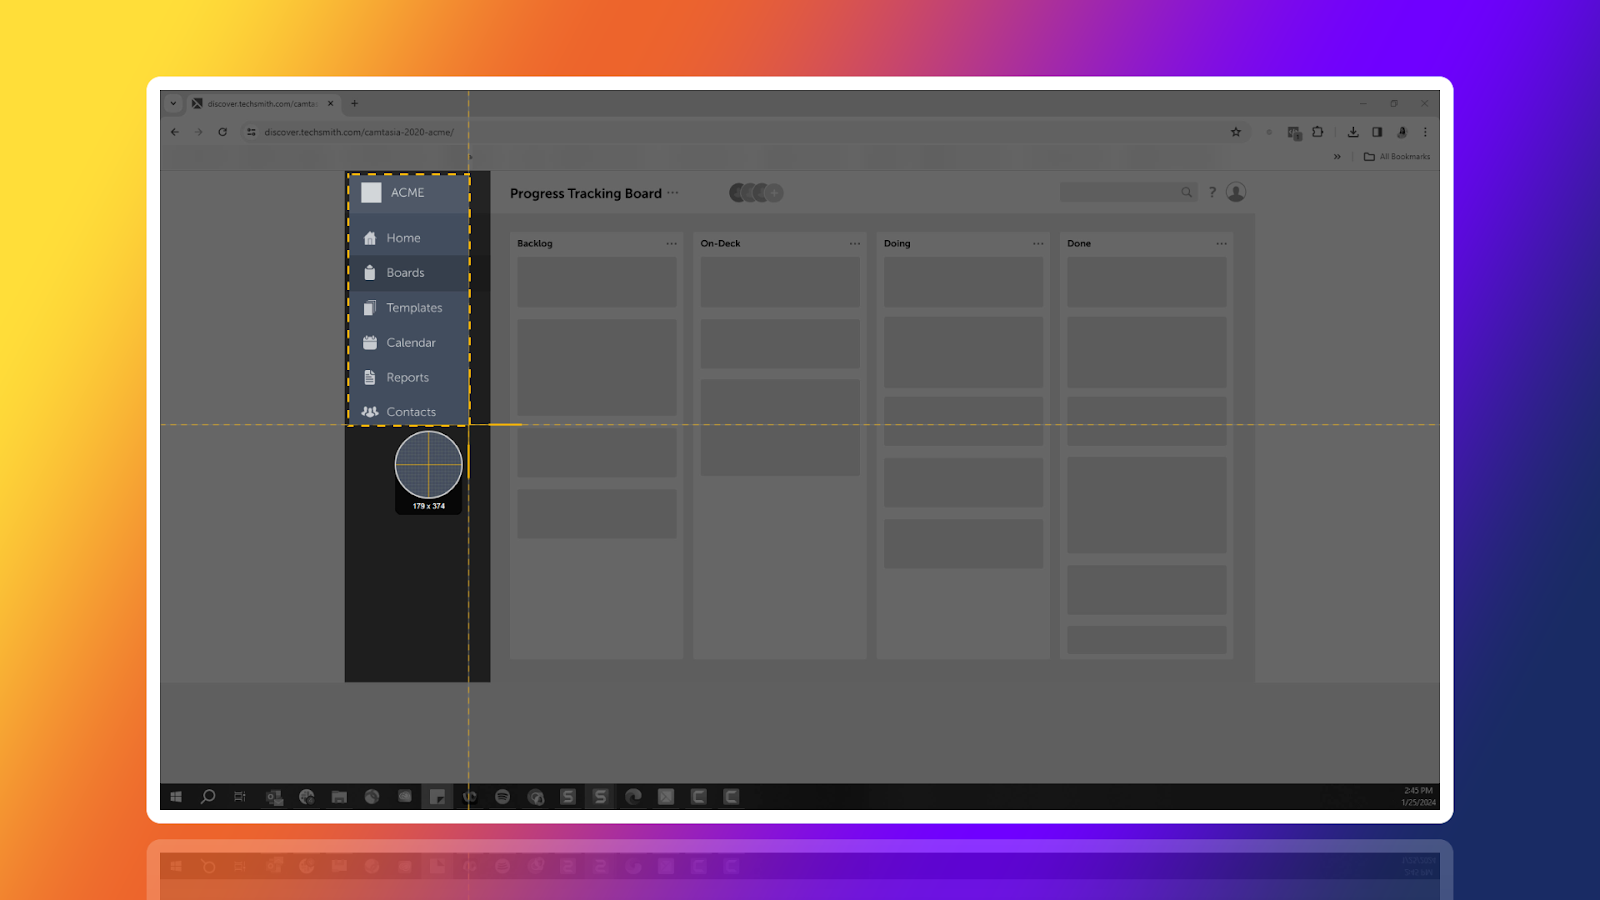
Step 2: Use the crosshairs
If you’re wondering how to take a selected screenshot on Windows, look no further than Snagit’s crosshairs feature. It makes it easy to select the area you want to capture and leave out the rest!
Hover over windows or regions to auto-select the area, or click and drag across a portion of your screen to make a custom selection.
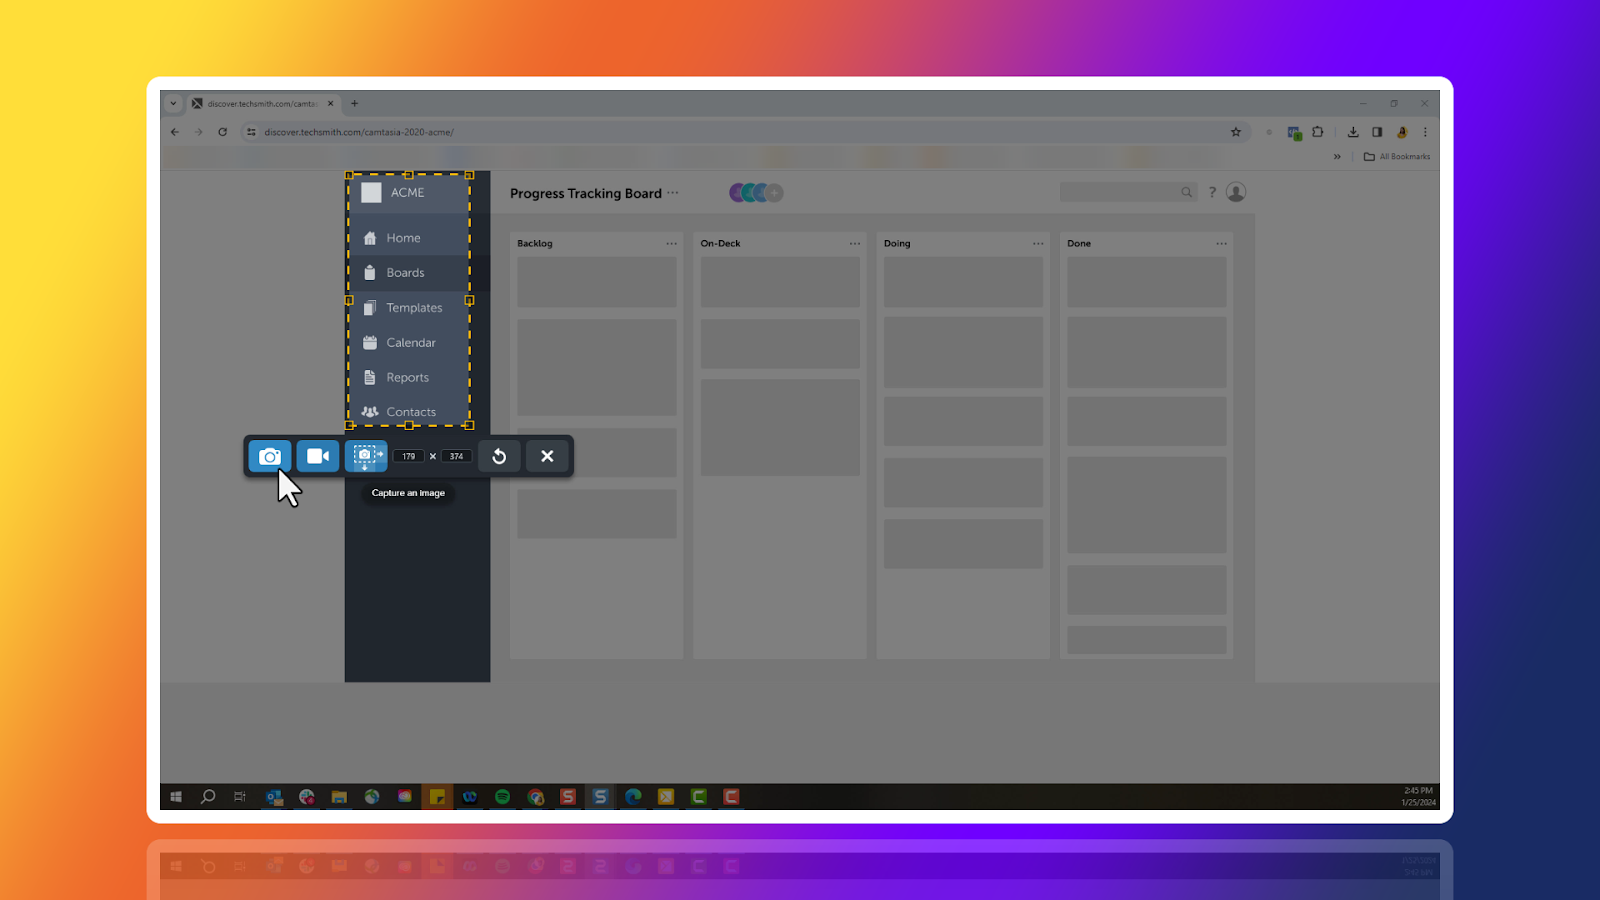
Step 3: Preview your selected region
Release the crosshairs to preview your selection. If needed, use the handles at the edges to make adjustments.
Then, when you’re ready, click the camera icon in the Snagit toolbar to take your screenshot.
Adding annotations and effects to screenshots on Windows
After you capture your screenshot, your images and videos open automatically in the Snagit editor. Then, you have the option to add various annotations and effects such as text callouts, symbols, blur, and more.

Snagit also makes it easy to crop and change the size of your screenshot.
You can find more in-depth tutorials on editing and adding effects to Snagit screen captures here.
How to record your screen on Windows 10
Need to record a video of your screen instead of a still image in Windows? Snagit makes screen recording incredibly simple. It can even record audio and video at the same time!
📚 Recommended Reading: In-Depth Guide on How To Screen Record Windows
You can select either All-In-One or Video from the capture options. From there, follow the same steps as you would for screenshotting your screen.
When you need to take your screen recording to the next level, TechSmith Camtasia offers a lot more tools for annotation, picture-in-picture recording with your webcam, and more. Compare TechSmith screen capture and recording options here.
Read an in-depth tutorial on how to record your screen on a Windows machine.
How to share screenshots and screen recordings on Windows
With Snagit, it’s easy to share screen captures to any platform. You can easily copy and paste a link or file into a chat or email.
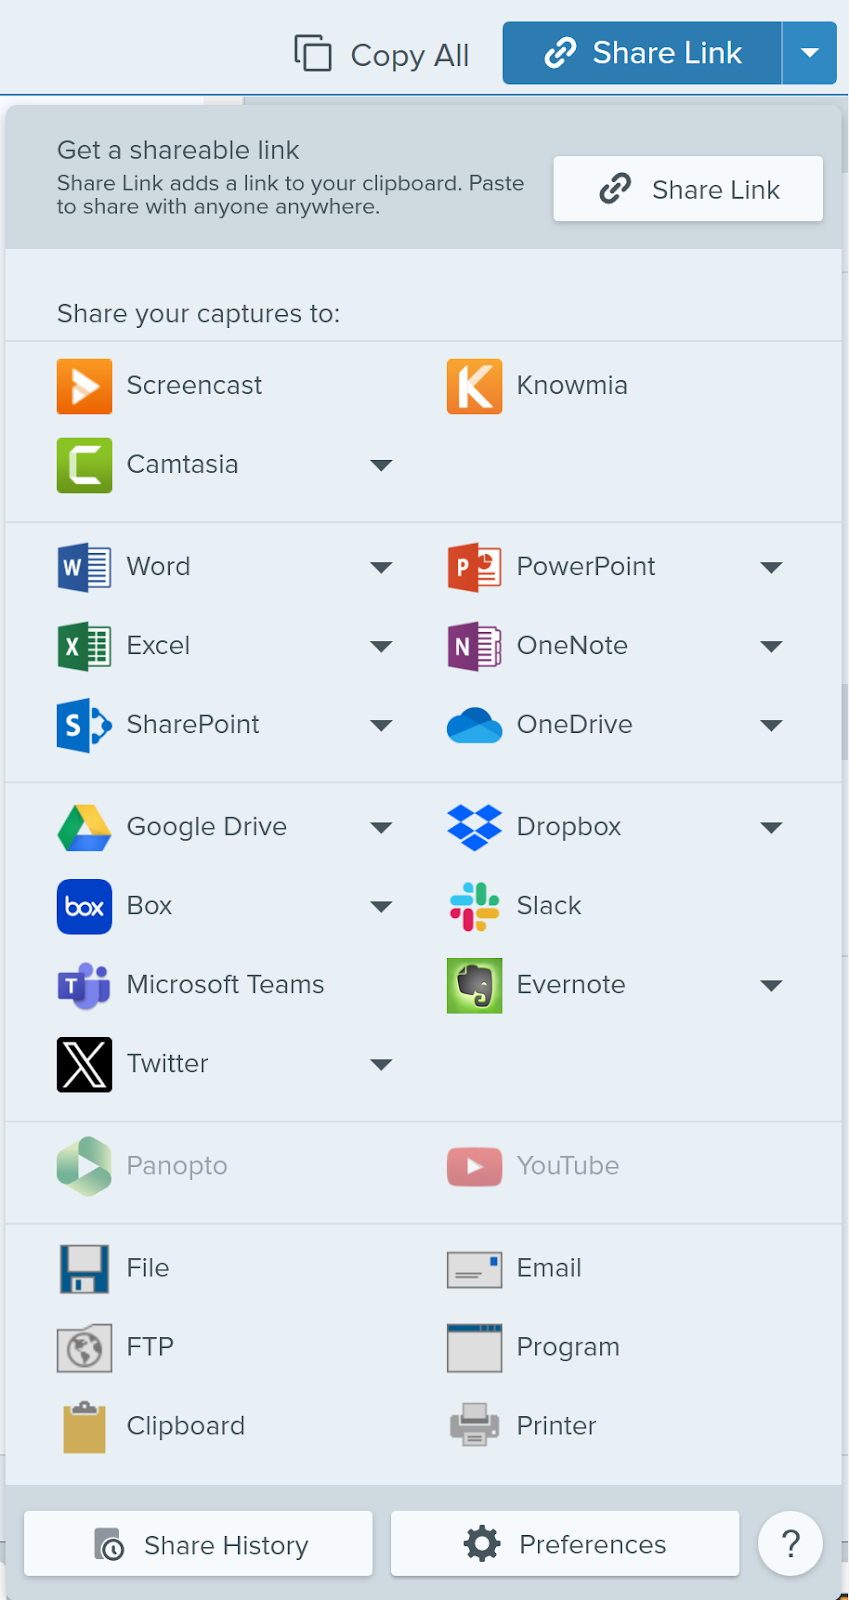
To save or share a screenshot to your computer, a network drive, or a hosting platform, simply click the Share button in the top right corner of the Snagit editor. Then, select where you’d like to share your captures to.
Or, click the Share Link button and watch as a unique link is copied to your clipboard. Paste it in any messaging application to easily share!
To copy and paste your screen capture, right-click on your finished image and select copy. From there, you can paste your screenshot wherever you want!
Still, you can drag and drop your screenshot into several applications including Google Docs, Microsoft Word, Microsoft PowerPoint, and more.
How to store and organize your screenshots
There’s no need to clutter your desktop with screenshots or create a bunch of folders. Any captures taken with Snagit are automatically saved to the Snagit library!
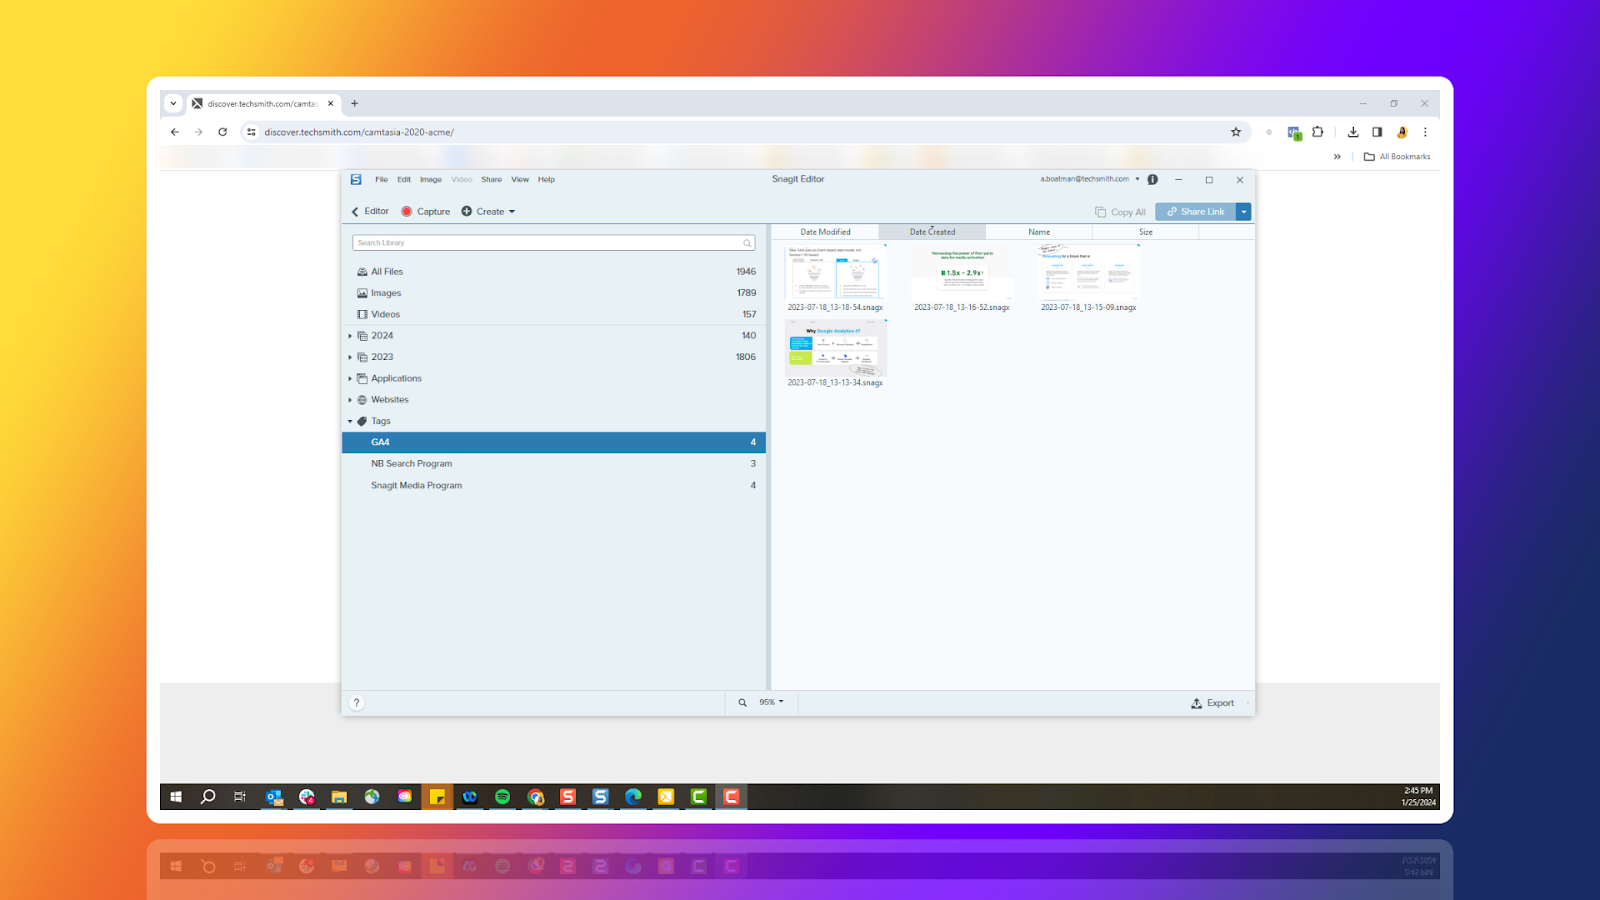
Screenshots can be organized in the Snagit Library by capture type, date, applications, windows, and more. You can even create custom tags to organize your screen captures.
It’s that easy! You’ll be a screen capture pro in no time.
Get ready to amaze your coworkers and friends with your clear, easy-to-follow screenshots and annotations. You now can communicate information anytime, anywhere!
For a great video walkthrough of the instructions in this post, check out this video:
Ready to get started with screenshots? Download a free trial of Snagit!
Annotate and edit screenshots with Snagit
Professional mark-up tools and powerful features make it easy to create helpful images.
Try it Free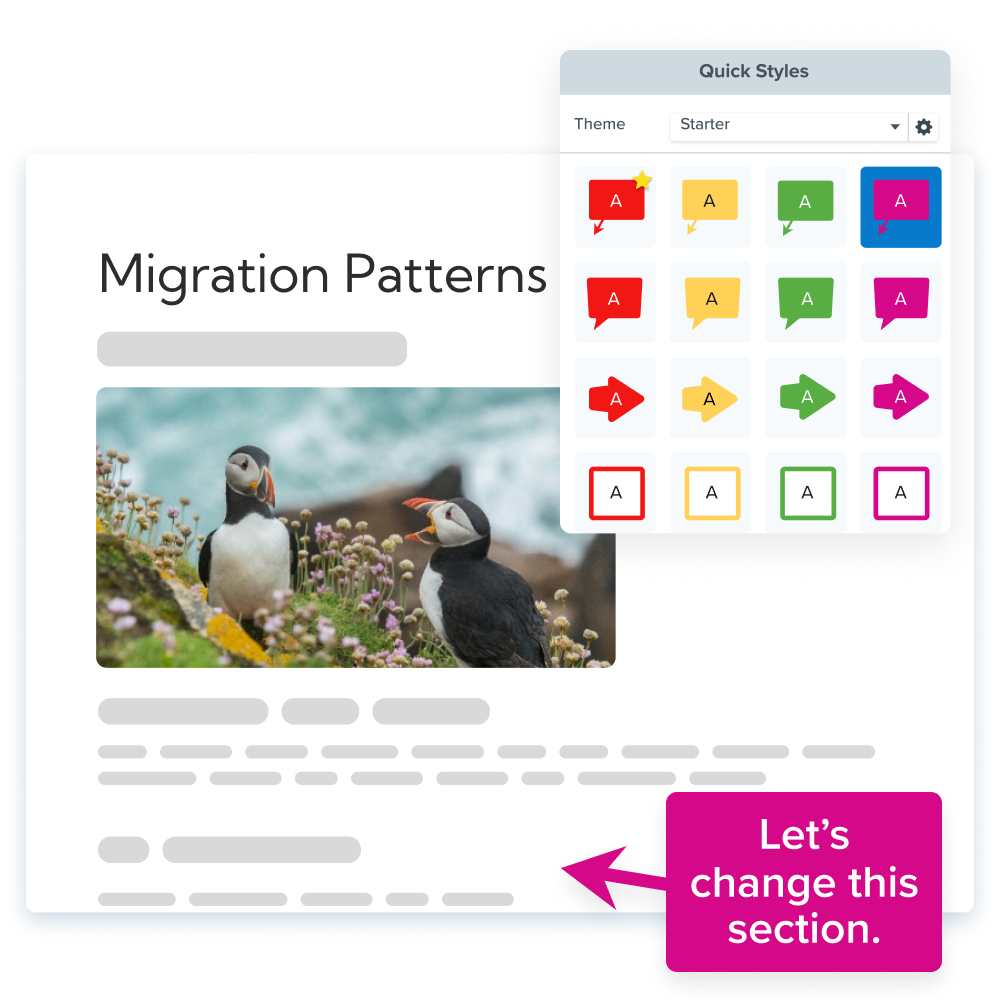
Frequently Asked Questions
Where are screenshots saved on Windows 10?
With Snagit, all screenshots will go directly to the Snagit library for easy access and organization.
Can you record audio and video at the same time on Windows?
Yes, you can! Both Snagit and Camtasia allow you to record your screen and your audio at the same time.
Can I crop captured videos and screenshots on Windows?
Yes! Capture or record your screen with Snagit. This will automatically open the editor, and then you can click and drag the borders of your image or video to crop it.
Share