


Do you often need to save or share what you see on your computer screen? While mobile and desktop operating systems offer basic screen capture tools built-in, most have limited functionality.
Do you find that the built-in tools on your devices don’t offer as many functions as you’d like?
That is why there are also third-party apps, like Snagit. Snagit is the perfect tool for people who take lots of screenshots and need more robust tools than the ones built into their devices.
In this blog post, we’ll show you how to take a screenshot on both Mac and Windows! We’ll be using built-in tools like the Windows Snipping Tool and third-party programs like Snagit.
The best snipping tool for Windows and Mac
Don’t let clumsy built-in tools hold you back. Take and edit screenshots with Snagit!
Get Snagit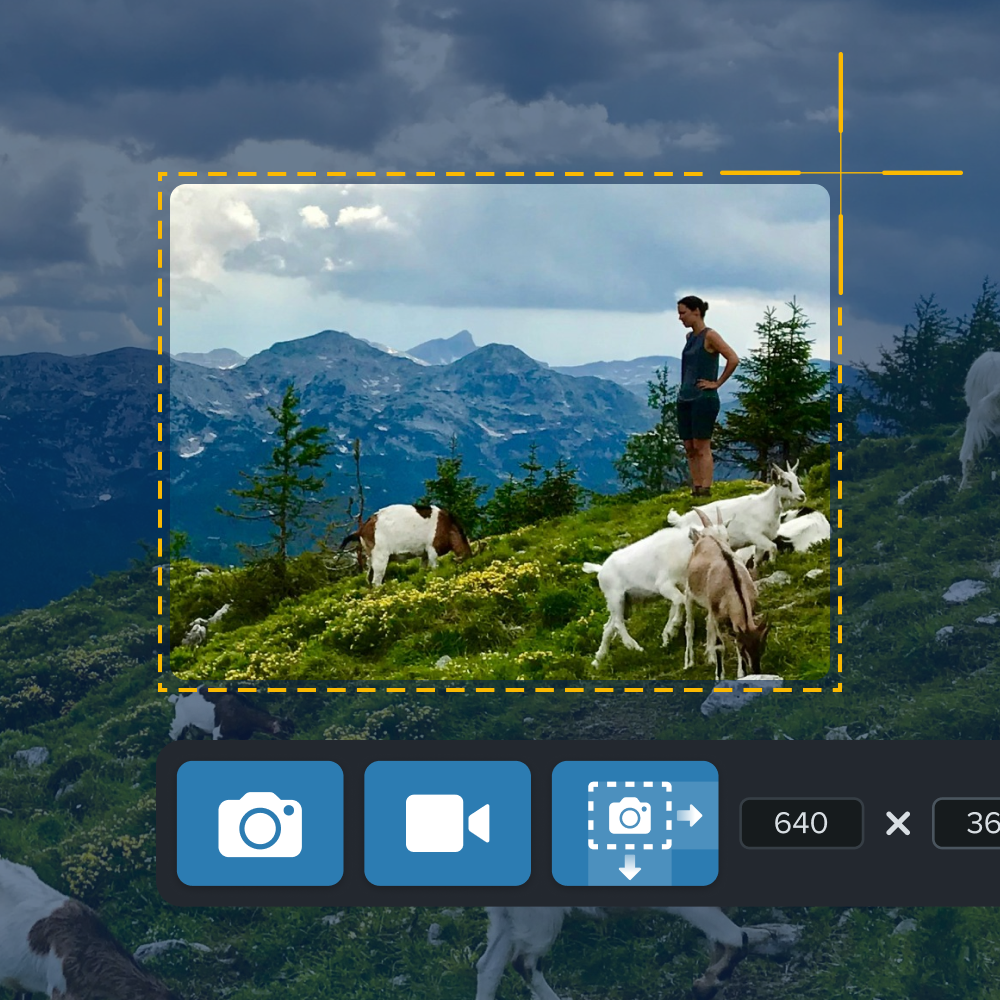
So whether you need to learn how to capture your screen on your computer or how to take, edit, and annotate screenshots, we’ve got you covered!

How to take a screenshot on PC
There are several methods you can use to take a screenshot on your Windows 7, Windows 8, Windows 10, or Windows 11 computer.
Capture the whole screen on Windows
To capture the entire screen, simply press the Print Screen button (PrtSc). This will copy the screenshot to your clipboard. You can then open any program that allows you to insert images, such as Paint, Microsoft Word, or PowerPoint, and paste the screenshot by pressing Ctrl-V.
The downside to this capture is that it screenshots everything you can see on your monitor.
If you only want to capture the window you currently have open, you can hold down the PrtSc button at the same time as the Windows key Alt.
Capture parts of the screen on Windows
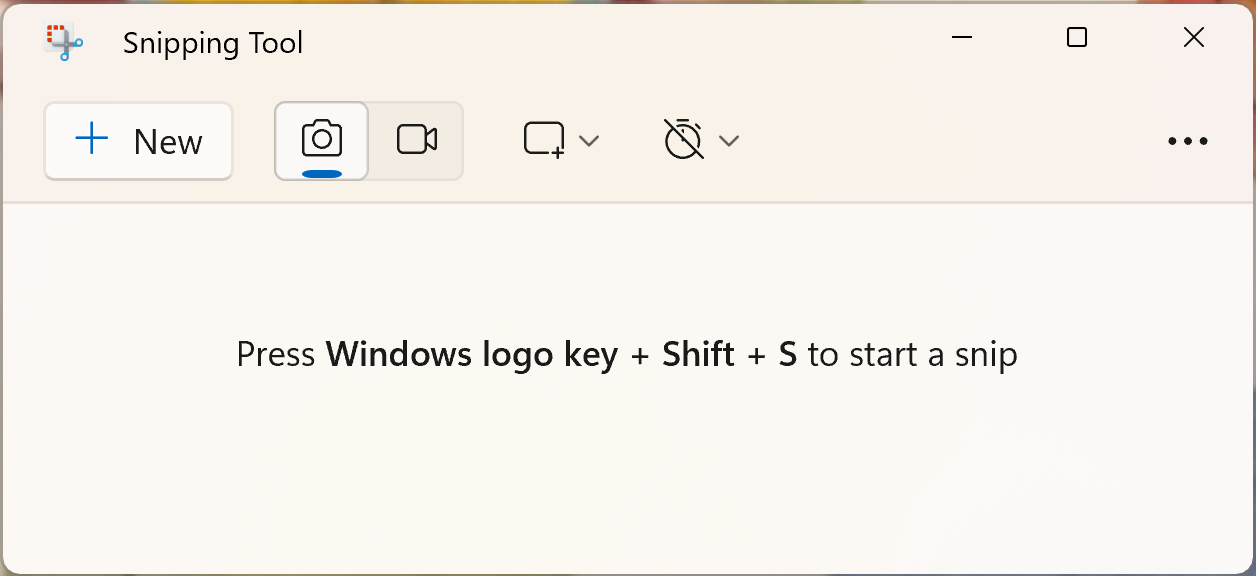
The Snipping Tool (available on Windows 7 and later versions) allows you to select the area of the screen you want to capture, as well as add notes and save the image in different formats.
You can open the Snipping Tool by searching for it in the toolbar search. Use the Windows-S shortcut to open Windows search and type in Snipping Tool.
Just follow the instructions, and take as many screenshots as you need!
How to take a screenshot on Mac
These methods work with versions of macOS–10.10 (Yosemite) or higher.
Capture the whole screen on Mac
Here are the steps to follow when taking a screenshot on a Mac:
Press the Shift+Cmd+3 to screenshot your full screen.
Next, you can either click on the preview that appears in the corner of your screen or open the capture from your desktop to edit and/or share it.
Capture parts of the screen on Mac
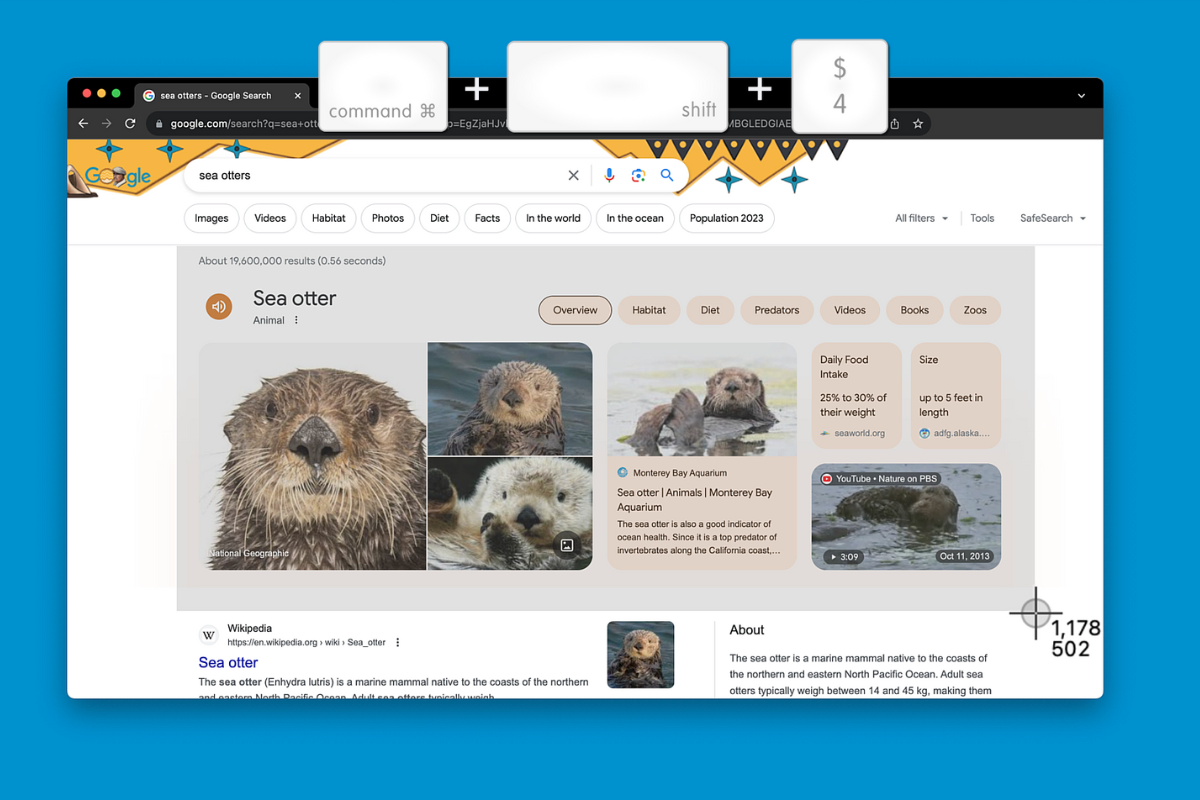
Shift+Cmd+4 turns your mouse into crosshairs. From there, you can select a specific window or drag and drop the crosshairs, selecting the area you’d like to capture.
To capture a screenshot on a Mac, press Shift+Cmd+5 simultaneously to open the screenshot tool.

With the screenshot tool open, you’ll notice several new options for taking different types of screen captures, including recording the entire screen and recording a portion of the screen.
Expert Tip: If your MacBook has a Touch Bar, you can capture it in your capture by pressing Shift+Cmd+6.
To copy a capture of your entire screen to your clipboard you need to press Shift+Cmd+Ctrl+3 at the same time.
How to take a screenshot on Chromebook
Press the screenshot key to take your capture.
Without a screenshot key, press Shift + Ctrl + Show (the key that looks like a rectangle beside two vertical lines) or Shift + Ctrl + F5 if you do not have the Show key.
Your capture is saved to your downloads folder. To access it, open your launcher and click on Files, My Files, and Downloads.
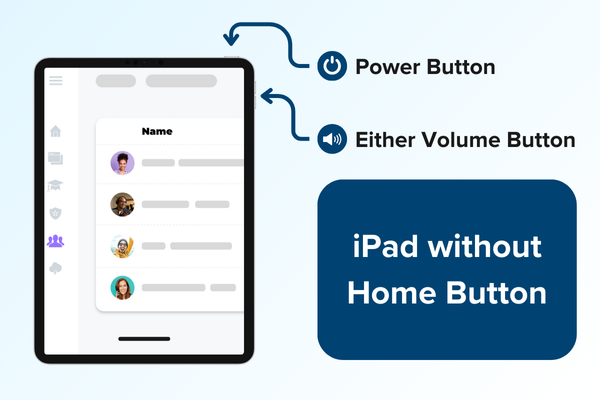
How to take a screenshot on iPad
Without a home button: Press the power and one of the two volume buttons at the same time.
With a home button: Press the home and power buttons simultaneously.
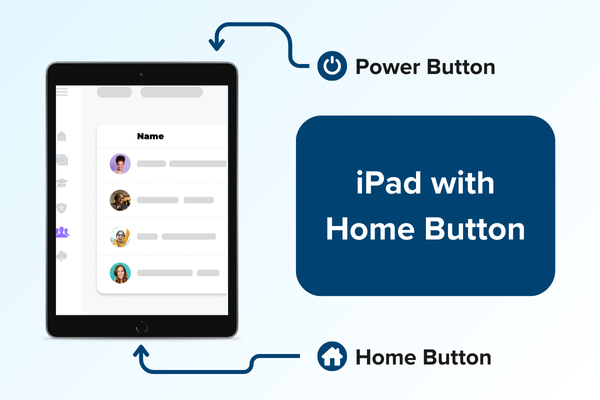
Either way, your screenshot appears in the bottom left corner of your screen and is saved in your pictures app.
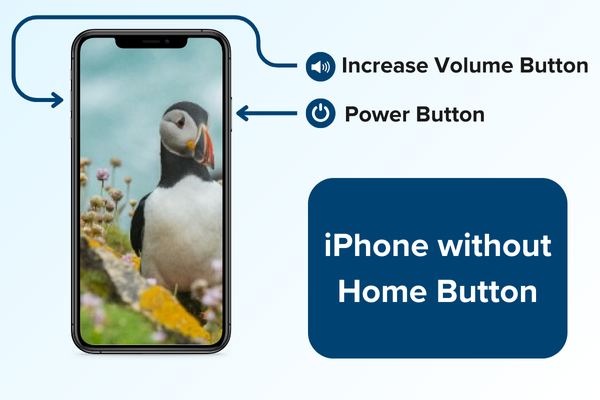
How to take a screenshot on iPhone
Without a home button: Press the power and volume up buttons at the same time.
With a home button: Press the home and power buttons simultaneously.
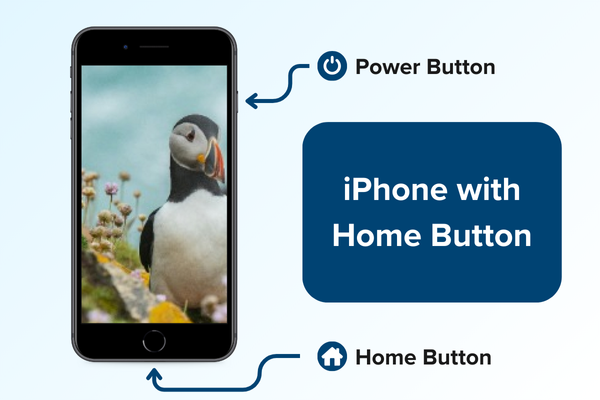
With either method, your screenshot appears in the bottom left corner of your screen and is saved in your pictures app.
How to take a screenshot on Android
Press the volume down and power buttons at the same time.

Your capture will be saved to your photo library.
Screen capture using Snagit
With Snagit, you have way more possibilities for capture. The software offers precise capture, image editing, free cloud-sharing, and so much more.
Step 1: Open the capture window
Open Snagit from your menu. If you’re in the Snagit editor, click the Capture button in the toolbar to bring up the Capture window.
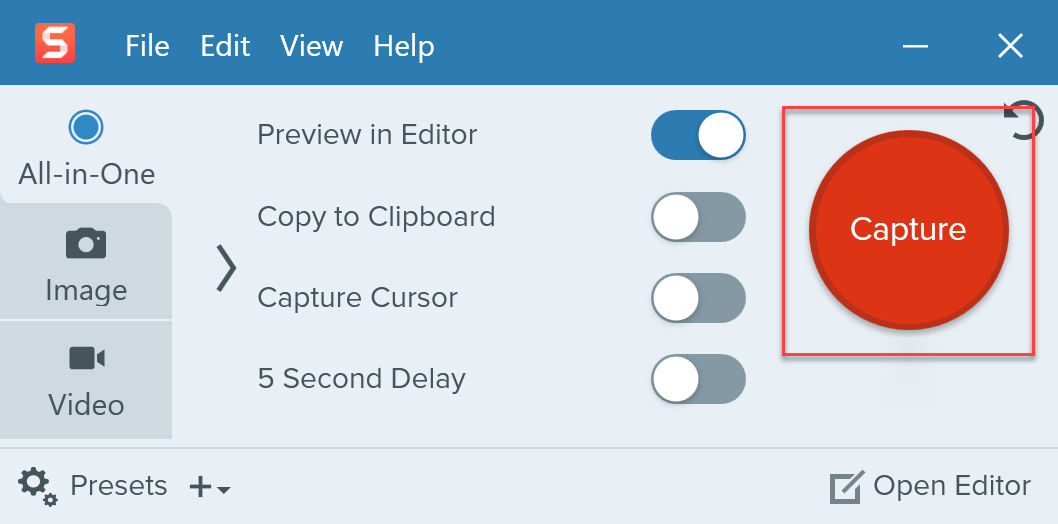
Step 2: Choose your screen capture settings
Grab your entire desktop, a region, or a window with Snagit’s All-in-One Capture®. Take quick image screenshots. Or even record videos.
Step 3: Click the capture button
Click the Capture button on any tab in the Capture window to start your screen capture. You can also start a capture by using the keyboard shortcut Shift+Cmd+3 or PrtSc keys.
Step 4: Click and drag the crosshairs to select parts of your screen
Your capture is automatically saved in the Snagit library. Use Snagit and Screencast’s Share Link feature to share your screenshot with anyone!
No matter which method you choose, taking a screenshot should be fast and convenient for you.
Annotate and edit screenshots with Snagit
Professional mark-up tools and powerful features make it easy to create helpful images.
Try it Free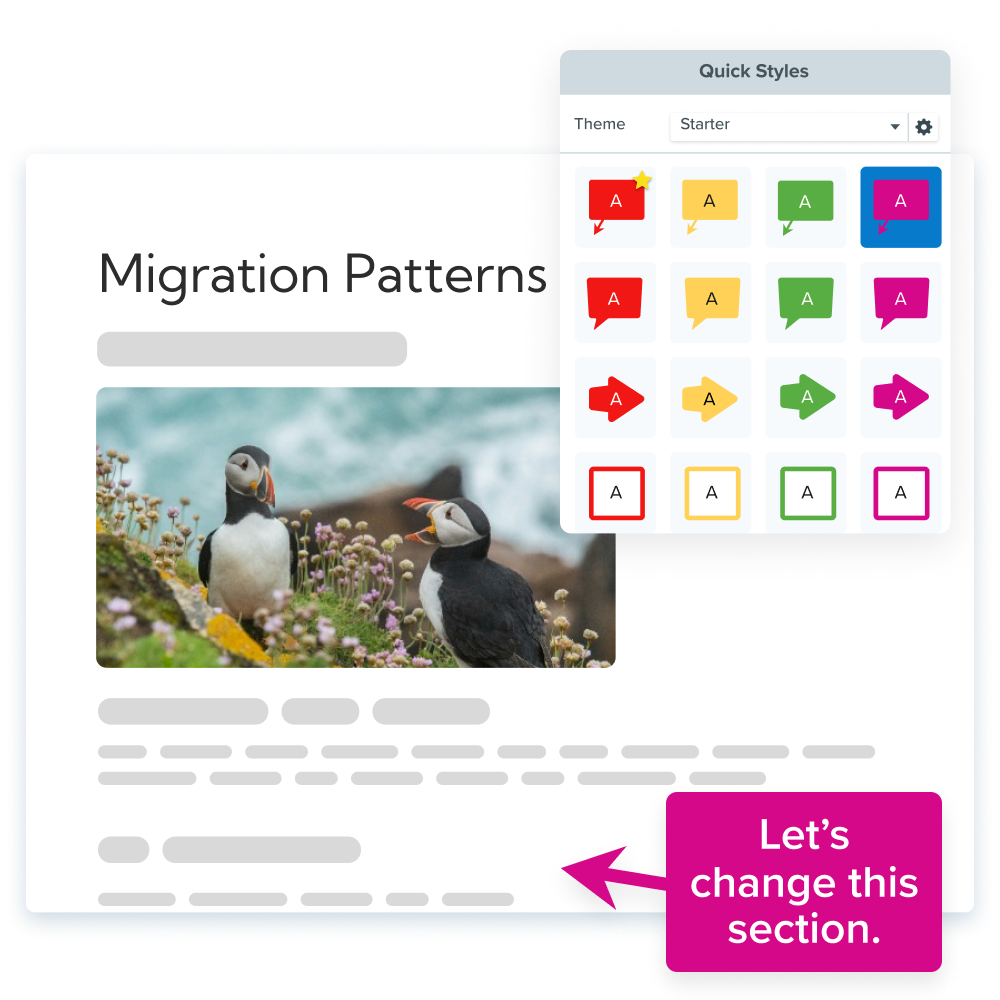
Share