Pen Tool
Draw freehand or straight horizontal or vertical lines on an image.
Draw freehand or straight horizontal or vertical lines on an image.
Note: Pen and other tools in the Snagit Editor toolbar are available to annotate images. To draw your viewer’s attention while you record video, try Screen Draw. To enhance video you have already recorded, share your video to TechSmith Camtasia.
Note: If the tool is not visible in the toolbar, click the More dropdown. To customize your toolbar, see Customize the Snagit Toolbar.
Tip: Press Shift to draw a straight line.
To draw a straight horizontal or vertical line, press and hold Shift as you click and drag.
Note: To edit a Pen line, you must select the Create as vector (Windows) or Create editable line (Mac) option before drawing it. Lines drawn without this option cannot be edited.
Edit the properties to customize the tool.
Tip: Save tool customizations as Quick Styles.
After you edit tool properties, save your customization as a Quick Style for future use. See Quickly Access Favorite Styles and Tools.
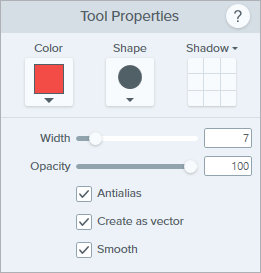
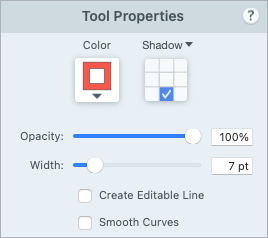
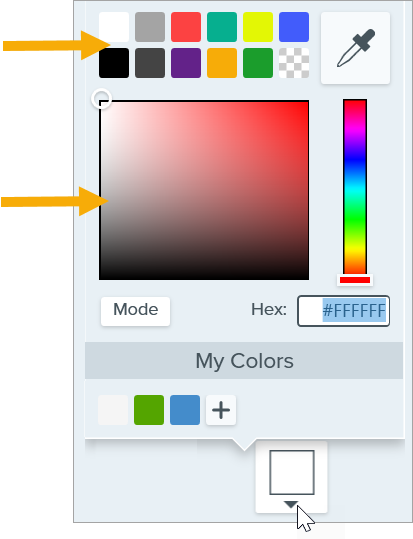
Color
Click the dropdown and select one of the following to set the color:

Shape (Windows only)
Click the dropdown to select the shape style.
Note: Snagit Mac only supports the circle shape for pen drawings. If you open a SNAGX file on Snagit Mac, lines drawn with other shapes display as though drawn with the circle shape. See Snagit File Format Compatibility.

Shadow
Click to select a shadow direction. To turn off the shadow, click to deselect the shadow direction. 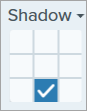
Advanced Shadow Properties
Click the dropdown arrow to access additional Shadow properties: 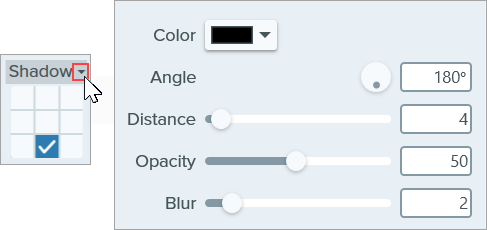
Width
Drag the slider or enter a value in pixels to adjust the width of the arrow/outline/line.![]()
Opacity
Drag the slider to adjust the transparency level.![]()
Create as Vector (Windows) / Create Editable Line (Mac)
Select this option to draw a line that can be edited.![]()
![]()


Antialias (Windows)
Select this option to blend pixel edges with the background.


Smooth (Windows)
Select this option to smooth sharp angles into curves.
Note: This option is only available with the circle Pen shape.


Smooth Curves (Mac)
Select this option to blend pixel edges with the background and smooth sharp angles into curves.
Note: This tutorial is for Snagit version 2024. Previous versions may look or function differently.