Introduction to Step Capture
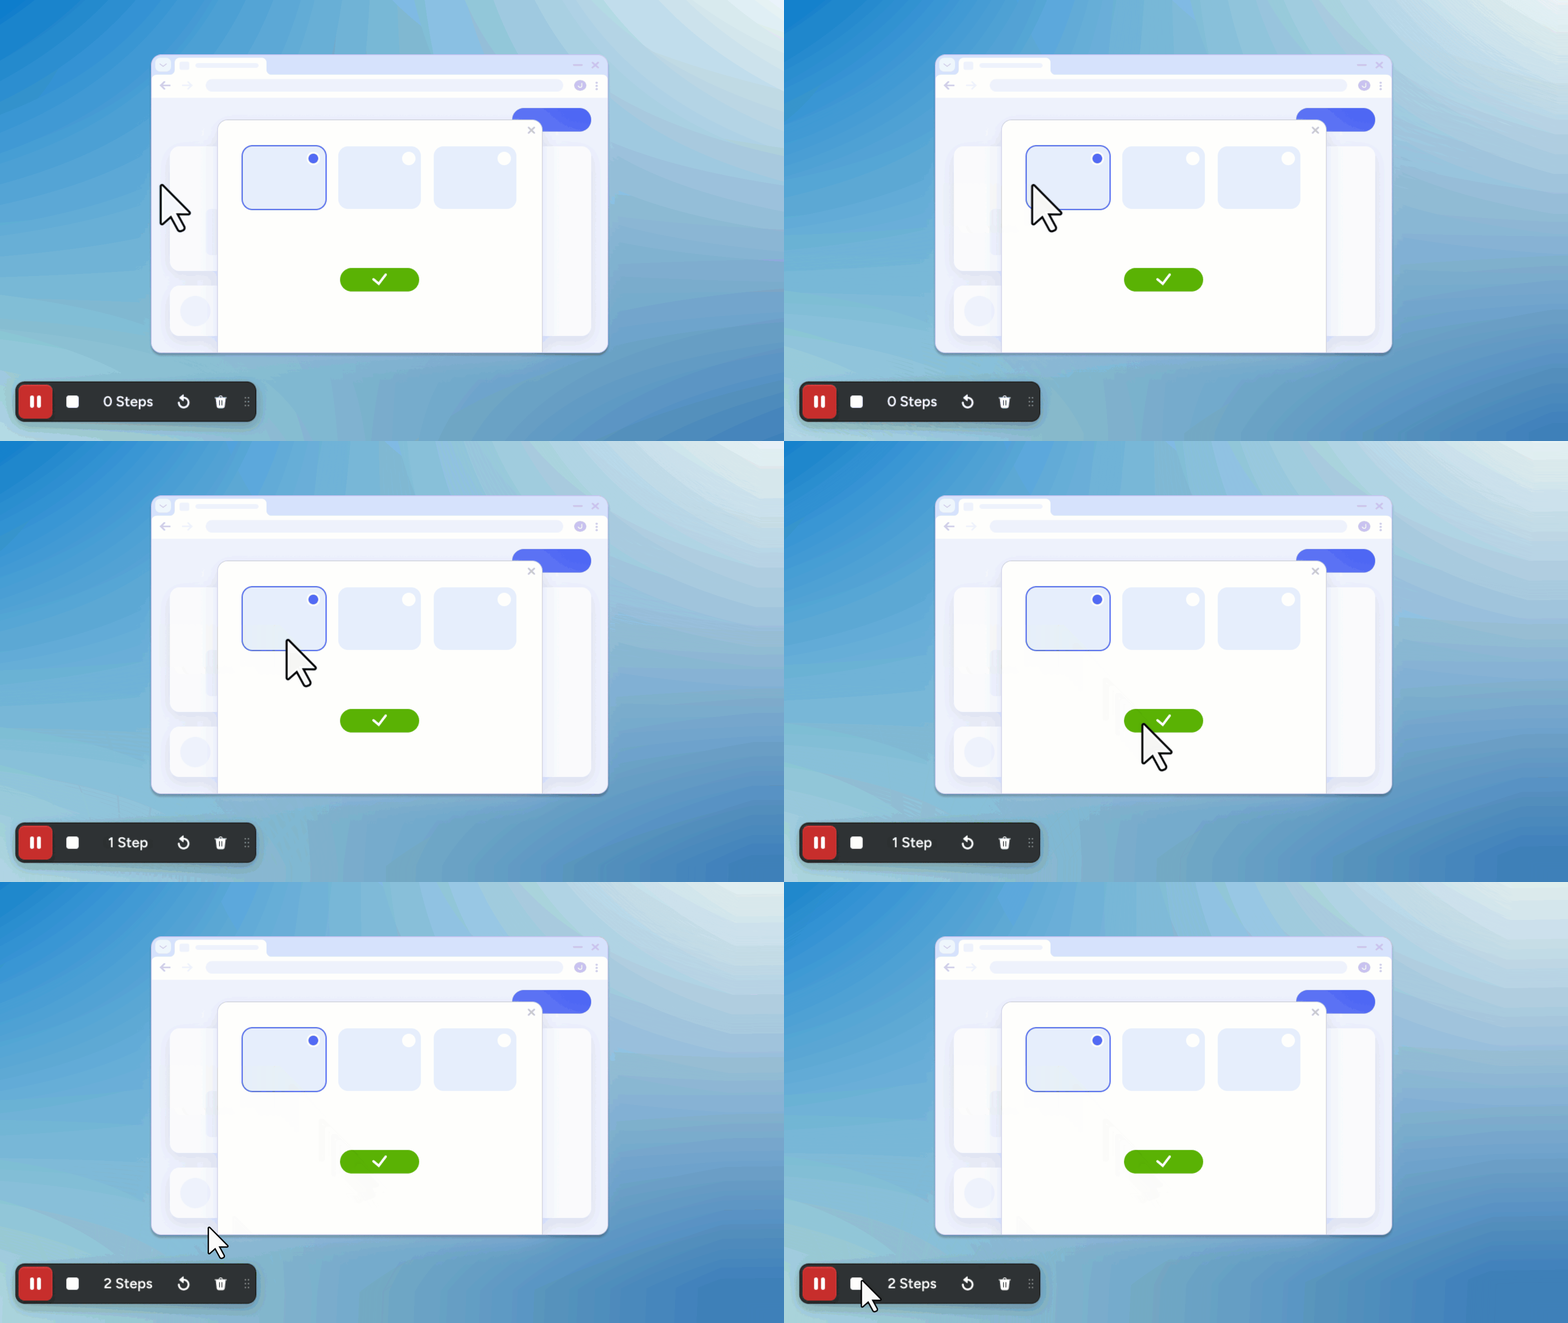
Snagit Step Capture automatically grabs screenshots as you click through a process, then turns the screenshots into an editable visual guide or video.
To capture a process and turn it into a video:
- Capture the steps using Snagit Step Capture.
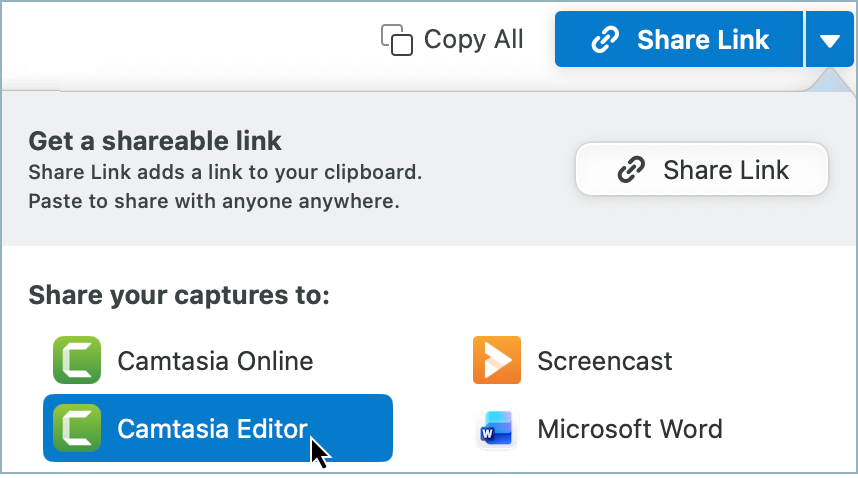
- Customize the Step Capture in Snagit and then share to Camtasia Editor.
- Camtasia Editor automatically applies video enhancements for a ready-to-share video.
Note: This feature requires Camtasia Editor version 2026.2.0 or later and Snagit version 2026.3.0 or later.
Video Edits & Enhancements
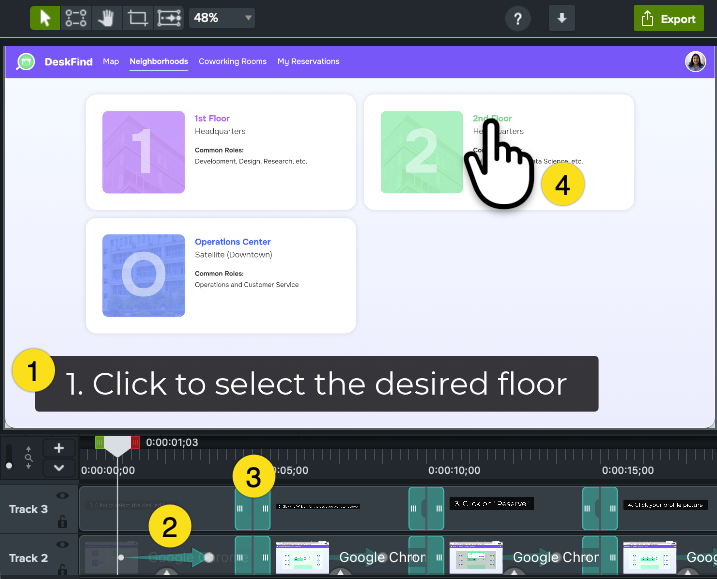
Camtasia Editor automatically adds these enhancements to create a professional, ready-to-share video from a series of screenshots:
- Title callouts
- Animations & focus areas
- Transitions
- Cursor enhancements
Complete any of the following to further edit and customize the video:
Tip: Increase the timeline zoom level to help with precise editing and selections.
Drag the Zoom slider to the right to zoom in on the timeline.

Customize the Title Callout
Edit the Text
Double-click the callout on the canvas and enter new text.
Change the Position
Click and drag the callout on the canvas to a new position.
Change the Style
Click to select the callout on the canvas. In the Properties, edit the style or select a theme.
To change all callouts in the video, right-click (Windows) or Control-click (Mac) on the timeline track with the callouts and select Select All On Track. Edit the properties.
Change the Focus Area or Animation
- Click to select the step media on the timeline.
- Position the playhead before the animation arrow. This is the starting position for the step.
- In the Properties, select the Visual Properties tab.
- Drag the Scale slider to zoom in or out.
- Click and drag on the canvas to change the focus area shown.
- Position the playhead after the animation arrow and repeat steps 3-5 to set the end position for the step.
Change the Transition
- Click to select a transition on the timeline.
To select all transitions on a track, right-click (Windows) or Control-click (Mac) near the timeline track name and choose Select all Transitions on Track.
- The selected transition(s) change to yellow. In the Properties, select a new transition from the Type dropdown menu.
Edit the Cursor
Change the Cursor Style
- Drag the playhead before the start of the animation arrow.
- Click to select the step media on the timeline.
- In the Properties, select the Cursor tab.
- To change the cursor size, drag the Scale slider.
- To select a different cursor, click the Cursor dropdown and choose a new cursor.
- Drag the playhead after the end of the animation arrow and repeat steps 3-5.
Edit the Cursor Path / Position
- Click to select the step media on the timeline.
- In the Properties, select the Cursor tab.
- Click the Edit Cursor Path button.
- On the Canvas, drag to position the white handles where you want the cursor to start and end.
- Click Finish Editing.
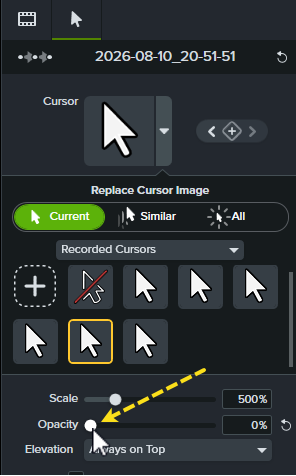
Hide the Cursor
- Click to select the step media on the timeline.
- Position the playhead before the animation arrow on the media.
- In the Properties, set the Opacity to zero.
- Position the playhead after the animation arrow on the media and repeat step 3.
Add Narration or Background Music
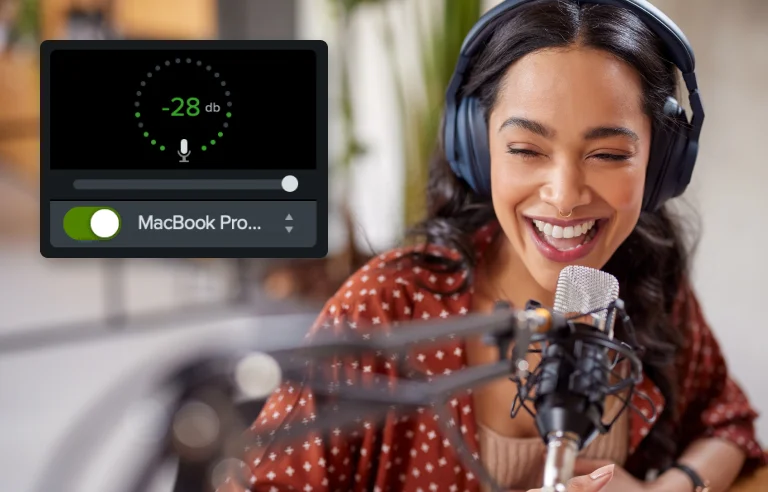
Record a voiceover or generate an AI voice based on your script to accompany the video. Voice narration can enhance your video by adding instructions, insights, context, convey emotion, or tell a story.
See Record or Generate Voice Narration.
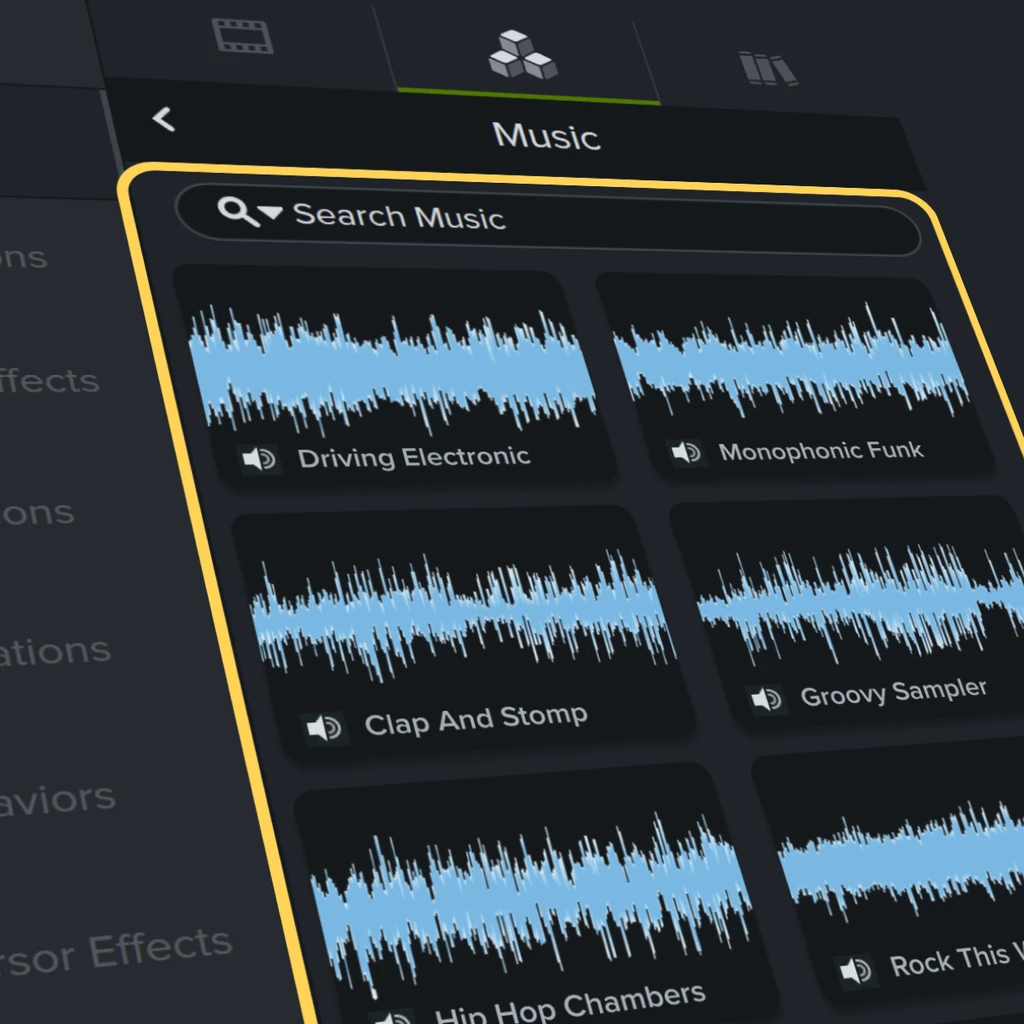
Background music can help set the perfect tone for your video and make viewing more engaging and enjoyable for your audience. Explore and select from hundreds of royalty-free instrumental and vocal audio tracks in various moods, styles, and genres directly in Camtasia Editor.
See Set the Tone with Background Music.
Add an Intro or Outro
Camtasia Editor has professionally designed, royalty-free assets that you can customize to create an intro, outro, and call-to-action for your video.

See Add Text to Your Video.
Export Your Video
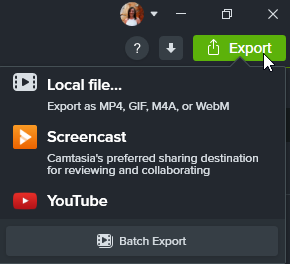
After completing the final customizations or edits, click Export and select an option from the dropdown. Export the video to your local hard drive, Screencast, YouTube, and more.
See Export & Share Your Video.
Update a Step
Did something in the process captured change or do you want make an improvement to a single step? No need to start from scratch! Camtasia Editor allows you to replace or update a step at any time.
Replace from an Updated Step Capture (SNAGX)
- Open the desired Camtasia Editor project on your computer.
- After taking a new Step Capture of the updated process in Snagit, select Share dropdown > Camtasia Editor. The file is added to the Media Bin.
- Position the playhead on the timeline at the beginning of the step you want to replace.
- In the Media Bin, right-click (Windows) or Control-click (Mac) on the Step Capture file. Select Add to Timeline as Single Image and choose the step to add.
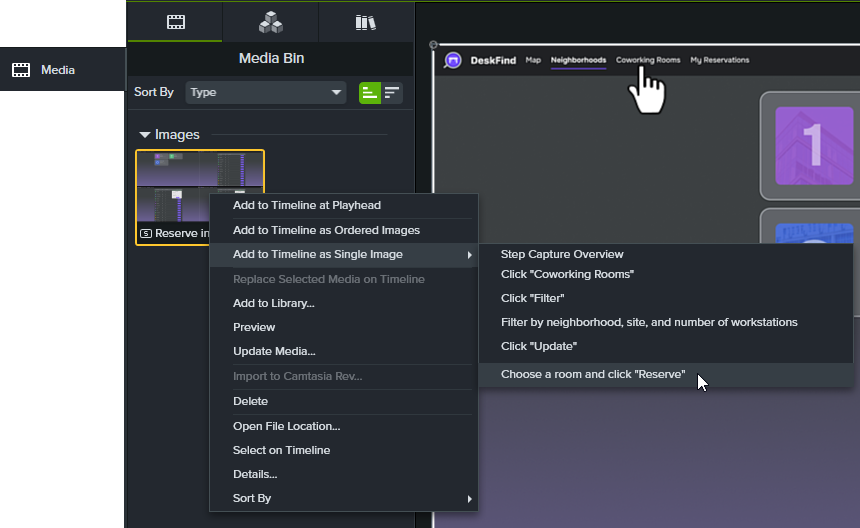
- Camtasia Editor adds the new step image to the timeline. Drag the new image onto the existing media to replace and hold for a couple seconds until a green outline appears.
- A contextual menu appears. Select a replace option from the menu.
Replace with an Image File
- In Camtasia Editor, select Media tab > Media Bin subtab > + icon > Import Media.
- Select the desired image file and click Import (Windows) or Open (Mac).
- Drag the new image from the Media Bin onto the existing step to replace it on the timeline and hold for a couple of seconds until a green outline appears.
- A contextual menu appears. Select a replace option from the menu.
Get Camtasia
Unleash the world’s most powerful screen recorder and video editor.
All Camtasia Tutorials