TechSmith ®
TechSmith ®

Manage Content as a Team

Learn how to create a Team Library for specific individuals to access and contribute content securely.

3D Screencast icon

Team Libraries Overview

Create a Team Library to securely share and manage media with specific people, for example to share project updates or meeting recordings. Team Library members can:

  • View and add media to the library
  • Organize content into folders
  • Delete media and folders from the library
  • Edit content titles, descriptions, and other metadata
  • Download media and comments
  • Add and remove other members

Team Libraries vs Collections

Both Collections and Team Libraries allow you to share sets of media with others to view.

Team Libraries allow you to manage content collaboratively and to share more securely:

  • No need to add or share Access Phrases for protection
  • By default, only invited team members can view and download content
  • Members can be removed to restrict access

To learn about Collections, see Share in Collections.

Create a Team Library

  1. In the Screencast Library, click the + icon next to Team Libraries.
    Plus icon next to Team Libraries
  2. Enter a name for the Team Library.
  3. Enter the email addresses of anyone you want to invite, separated by commas.
    Create a New Team Library dialog
  4. Click Add. Screencast sends an invitation email to each of the addresses you entered.
  5. Click Create Team Library.

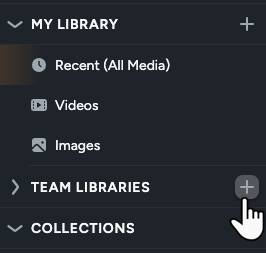
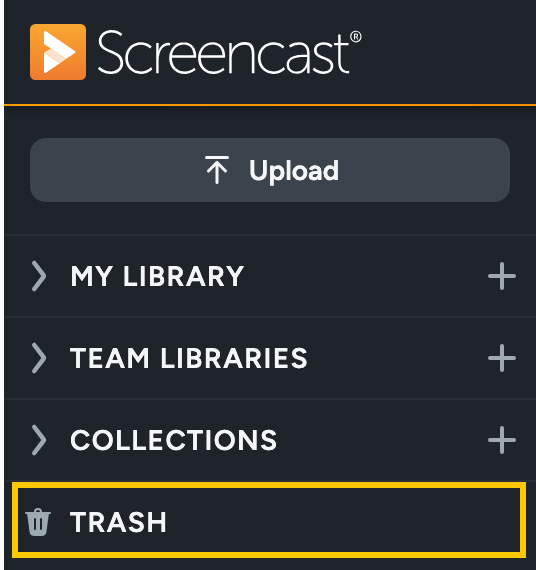
The new library appears in the left sidebar under Team Libraries.

Note: Users with free Screencast accounts can create one Team Library with up to 5 members. Users with Screencast Pro accounts can create up to five Team Libraries with up to 300 members.

How Invitees Become Members

To become a member, invitees must accept the invitation from one of the following:

  • Email invitation from TechSmith Screencast
  • Pending Invitations in the left sidebar
  • Notifications in the upper-right corner

Invitees are required to sign in or create a TechSmith account. Once they accept the invitation, their status changes from “Pending” to “Contributor”.

Manage Team Library Members

Both Managers and Contributors can add and remove other members:

  1. In the Screencast Library, click the name of the Team Library you want to manage.
    Click on the name of a Team Library
  2. In the upper-right corner, click Share.
    Share button
  3. Complete any of the following:
    • Add a member: Enter the email address, or multiple addresses separated by commas, of anyone you want to invite. Click Add. Screencast sends an invitation email to each of the addresses you entered.
    • Remove a member: Click the Remove team member icon icon next to the person you want to remove.
  4. Click Done.

Note: If you remove a member, any content they added remains in the Team Library but they will no longer have access to view or manage it.

Manage Content in Your Team Library

Upload Media

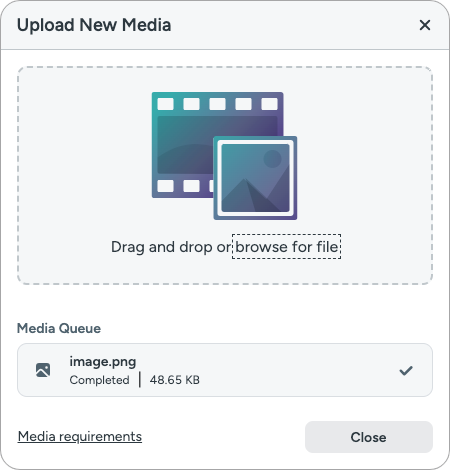
Upload an image or video from your computer or mobile device to a Team Library.

View steps
  1. In the Screencast Library, click to select the Team Library.
    Click on the name of a Team Library
  2. Click the Upload button.
    Upload button
  3. The Upload New Media dialog appears. Drag a file onto the dialog or click browse for file. Ctrl+click (Windows) or Command+click (Mac) to select multiple files.
    To learn about supported file formats, see Upload Content to Screencast.
    Upload New Media dialog with one file successfully uploaded
    A checkmark appears to indicate the content has been uploaded to your Team Library.
  4. Click the Close button.

Add Media from Your Personal Screencast Library

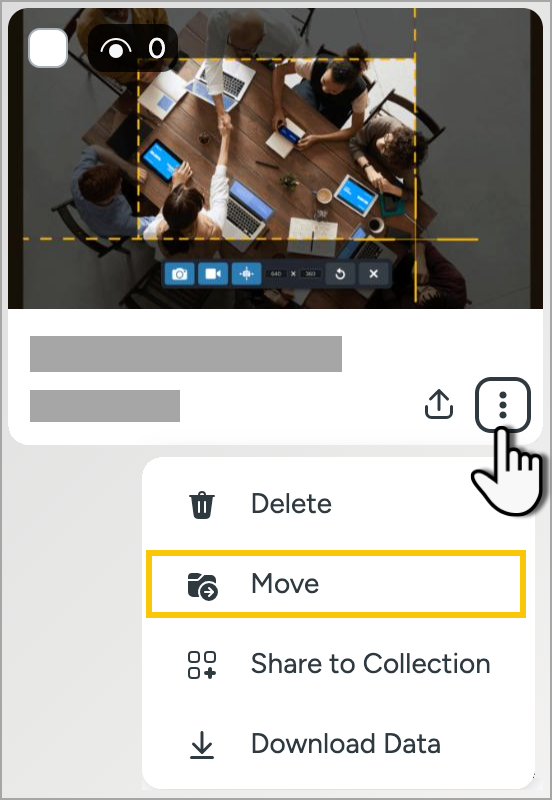
Move individual or multiple pieces of media from your library into a Team Library.

View steps
  1. Complete one of the following:
    • To add a single piece of media: In My Library, click the More options icon icon on the media and select Move.
      Media options menu
    • To add multiple pieces of media: In My Library, click the checkboxes to select the desired media, then click the Move button.
      Select and move multiple media
  2. In the Move Media dialog, select a Team Library or folder from the dropdown.
  3. Click Move.

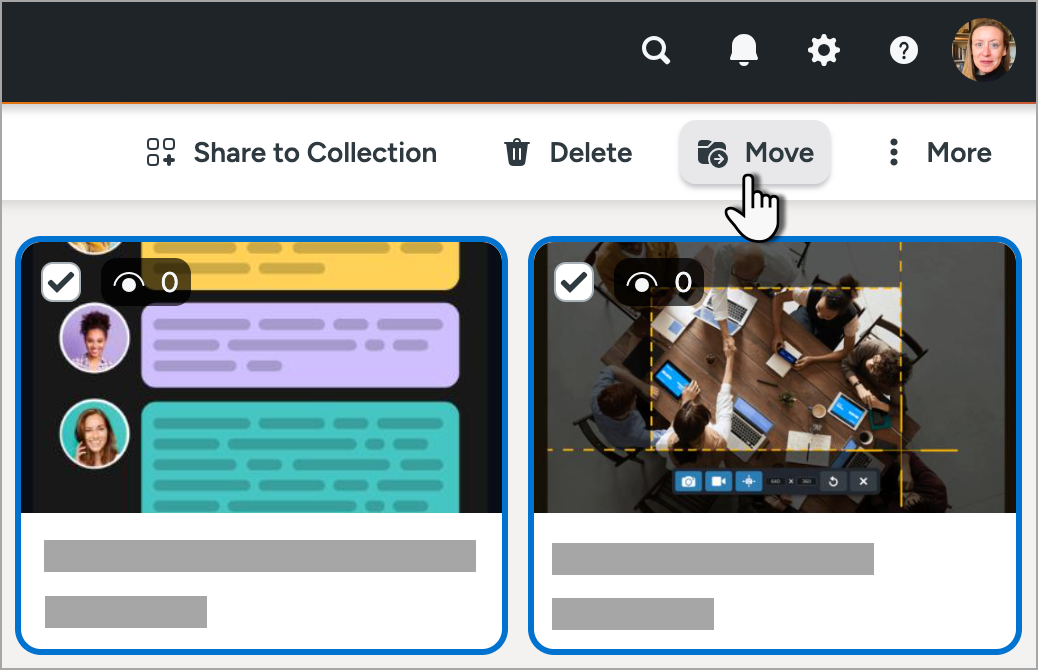
Media is removed from your personal library and appears in the Team Library.

Create a Folder

Create folders to organize content in your Team Library.

View steps
  1. In the Screencast Library, click the Library options icon icon next to a Team Library and select the Add Folder option.
    Add Folder option highlighted in the Team Library options menu
  2. Enter a folder name.
  3. Click Create.

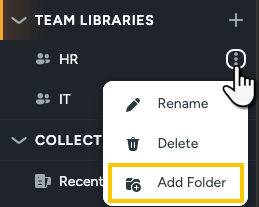
Note: You can move a folder and all of its content to a different Team Library or to your personal library.

Delete Media or Folders

Delete individual media from a Team Library
  1. Click to select the library or folder name.
  2. Click the More options icon icon on the media and select Move to Trash.
    Media options menu with Move to Trash highlighted
Delete a folder from a Team Library
  1. Click to select the library.
  2. Click the Library options icon icon next to the folder and select the Move to Trash option.
    Move to Trash option highlighted in the Folder options

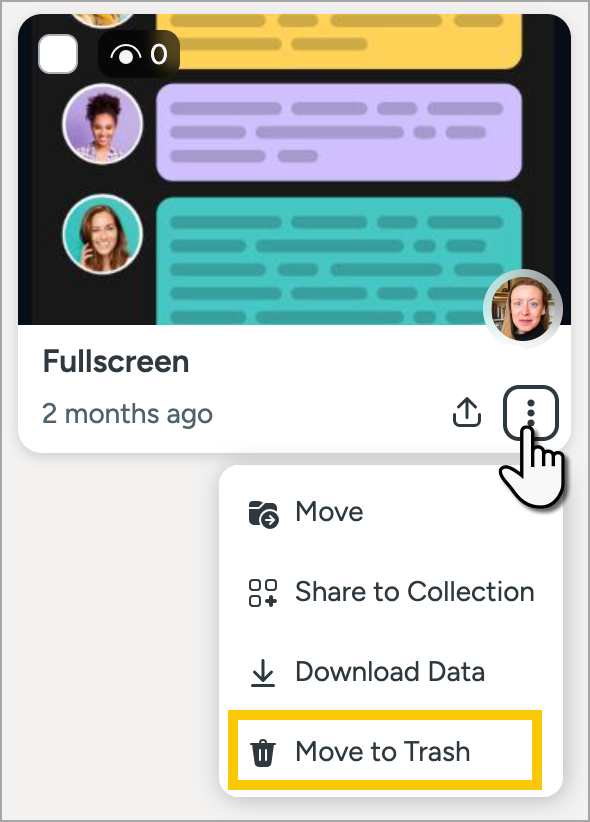
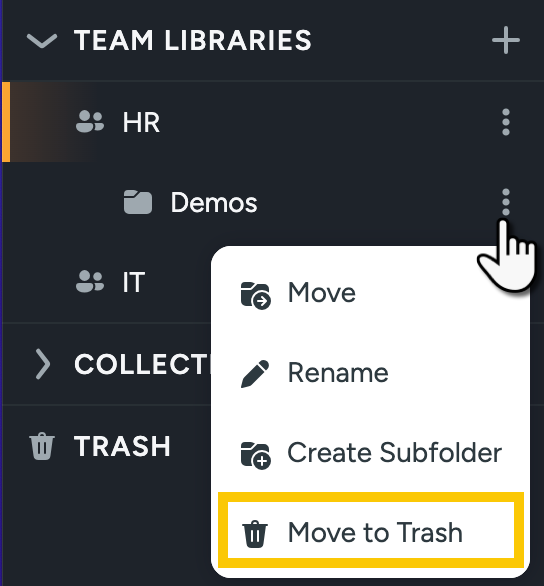
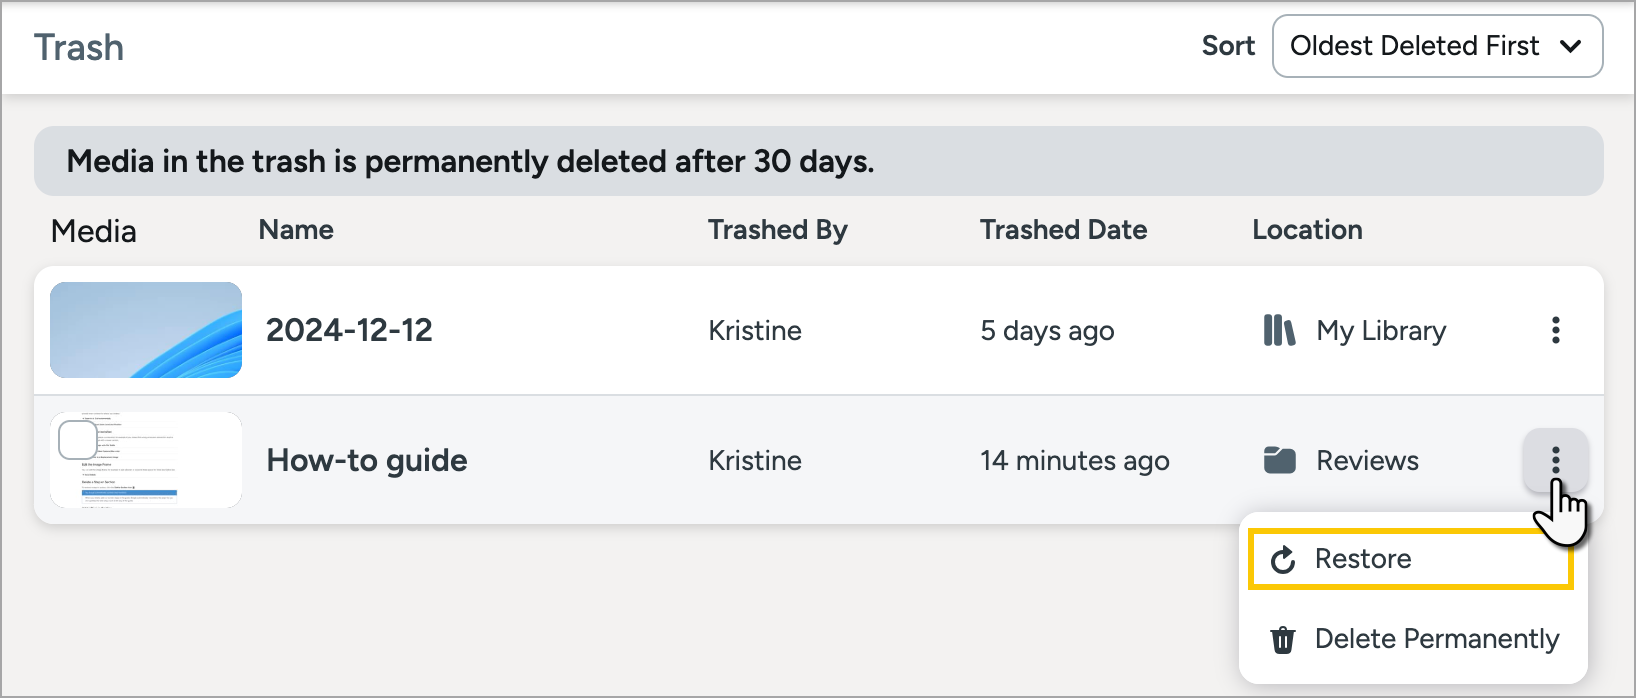
The folder and all of its content are moved to the Trash. Media in the Trash is permanently deleted after 30 days.

Note: The Trash remembers what Team Library and folder media was deleted from. If you Restore Media from the Trash, the media and its folder move back to the Team Library from where it was deleted.

Restore Media from the Trash

When media is deleted from a Team Library, any member of the Team Library can view the item in the Trash within 30 days and restore it.

View steps
  1. In the Library, click Trash.
    Trash button in the Screencast Library sidebar
  2. Click the More media options menu icon icon for the media you want to restore and select Restore.
    Select Restore from the More media options menu

Media is returned to the Team Library from which it was deleted.

Delete a Team Library

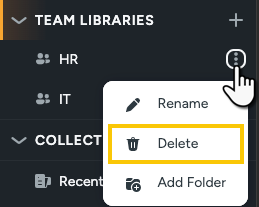
The manager of a Team Library can delete the library, which also permanently deletes all media in the Team Library.

  1. Click the Library options icon icon next to the library and select the Delete option.
    Delete option highlighted in the Team Library options menu
  2. A warning appears that you are about to permanently delete the Team Library and all of its content. Click the checkbox to confirm this action, and then click Delete.
    Confirmation to permanently delete a team library and all of its content

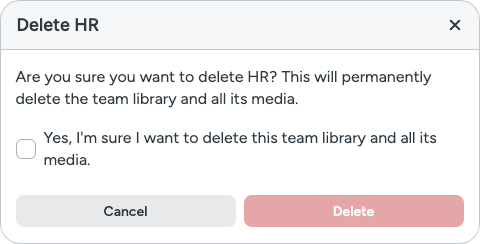
Note: When you delete a Team Library, the team and all of its content is permanently deleted and cannot be restored. To avoid deleting the content, move the content from the Team Library to your personal library before you delete the Team Library. Follow the same steps as moving media from your personal library to a Team Library. See Add Media from Your Personal Screencast Library.

FAQs

What is the difference between a Team Library and a Collection?

Collections can be viewed by anyone with the link, but Team Libraries provide more secure sharing:

  • No need to add or share Access Phrases for protection
  • By default, only invited team members can view and download content
  • Members can be removed to restrict access

Team Libraries also allow members to manage content collaboratively.

Who owns the content in a Team Library?

When content is moved to a Team Library, it is removed from the original owner’s library. Any member of the Team Library can view, edit, delete, or move content into their own library.

What is the difference between a Manager and a Contributor?

Only the Manager, the person who created the Team Library, has access to delete it. Contributors have access to view, add, edit, move, or delete content in the Team Library.

Can a Team Library have multiple Managers?

Only the person who creates a Team Library can be the Manager.

What happens when a Team Library Manager leaves?

It is not possible to remove a Manager from a Team Library. In this situation, we recommend that a member creates a new Team Library and moves all the content to the new Team Library.

Do members have to have a Screencast or TechSmith account?

You can invite someone who does not have a TechSmith account to join a Team Library, but they will be required to create one when they join.

How many members can a Team Library have?

Users with free Screencast accounts can create one Team Library with up to 5 members. Users with Screencast Pro accounts can create up to five Team Libraries with up to 300 members.

What happens if someone deletes media from a Team Library?

When selected media is deleted from a Team Library, it is moved to the Trash for 30 days. Any member of the Team Library can view and restore media from the Trash within 30 days. See Restore Media from the Trash.

What happens when you delete a Team Library?

The Team Library and all of its content are deleted immediately.

All Screencast Tutorials