In this tutorial:
Auto-Generate Captions (Screencast Pro)
For Screencast Pro accounts, captions are automatically generated based on the audio transcription for any videos uploaded to Screencast.
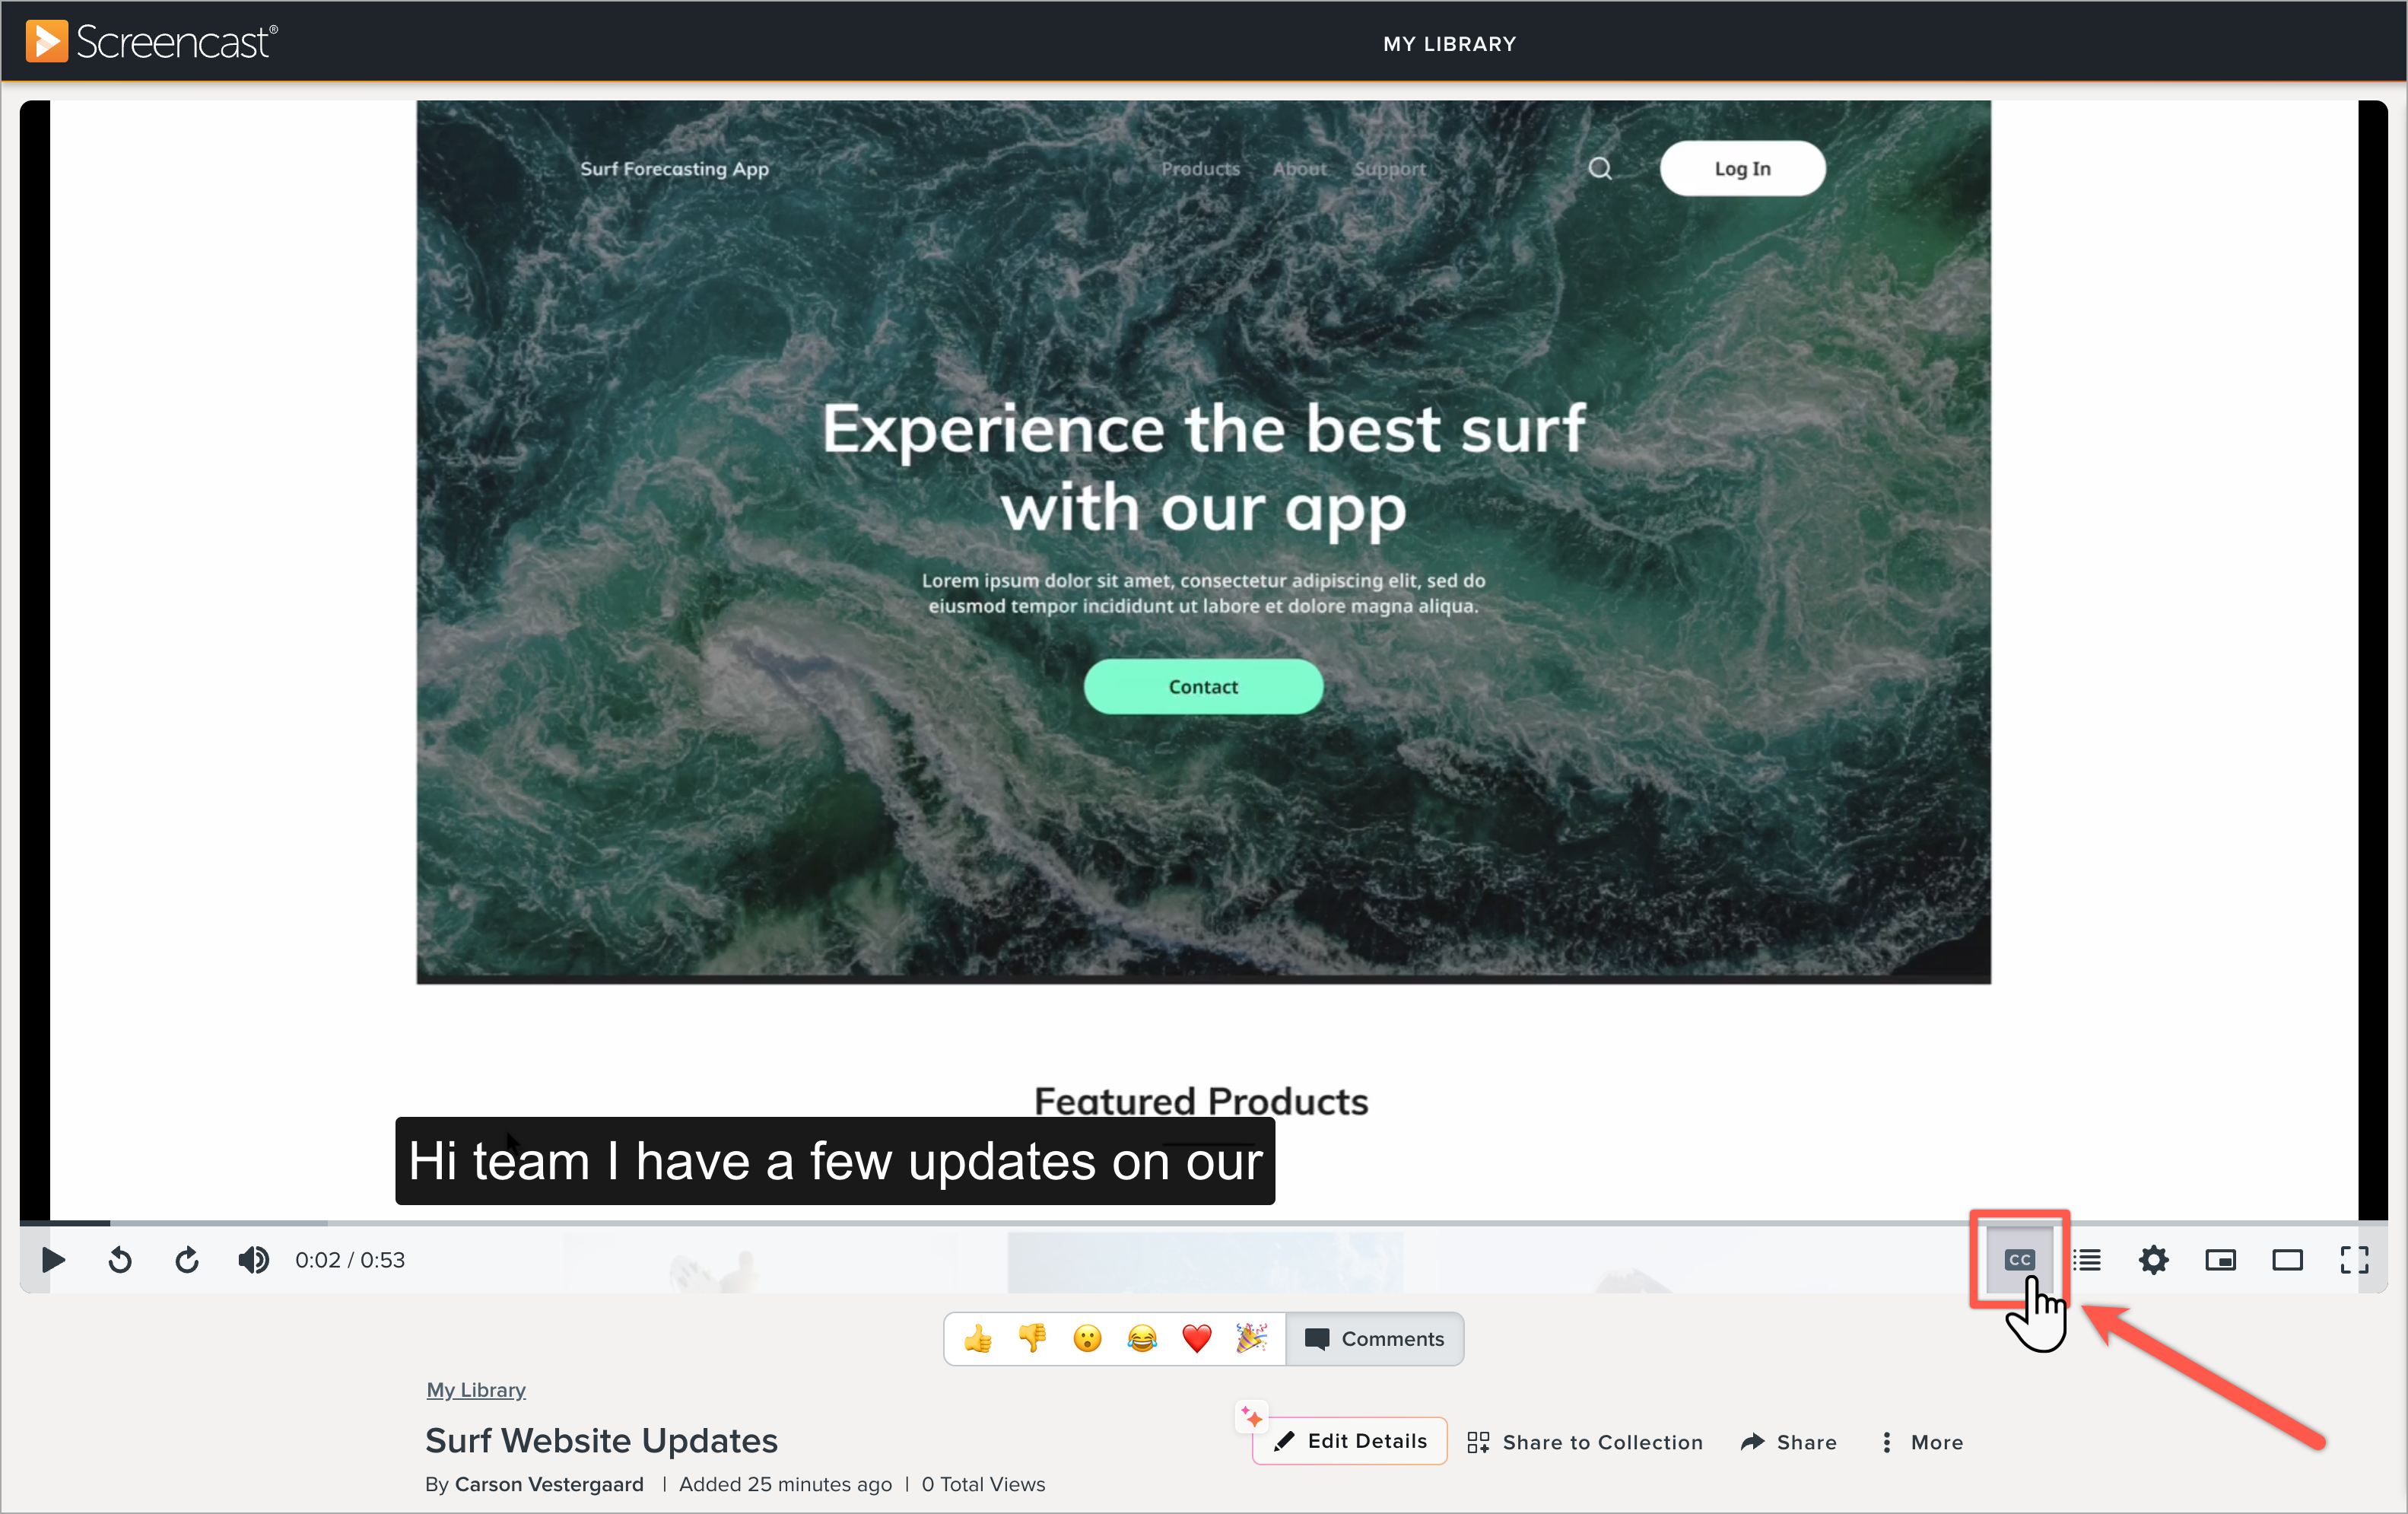
Your viewers can click the CC button to view the closed captions.
Video Uploaded Before Auto-Generate was Available
You can auto-generate captions for videos you uploaded to Screencast prior to having Screencast Pro or before this feature was available.
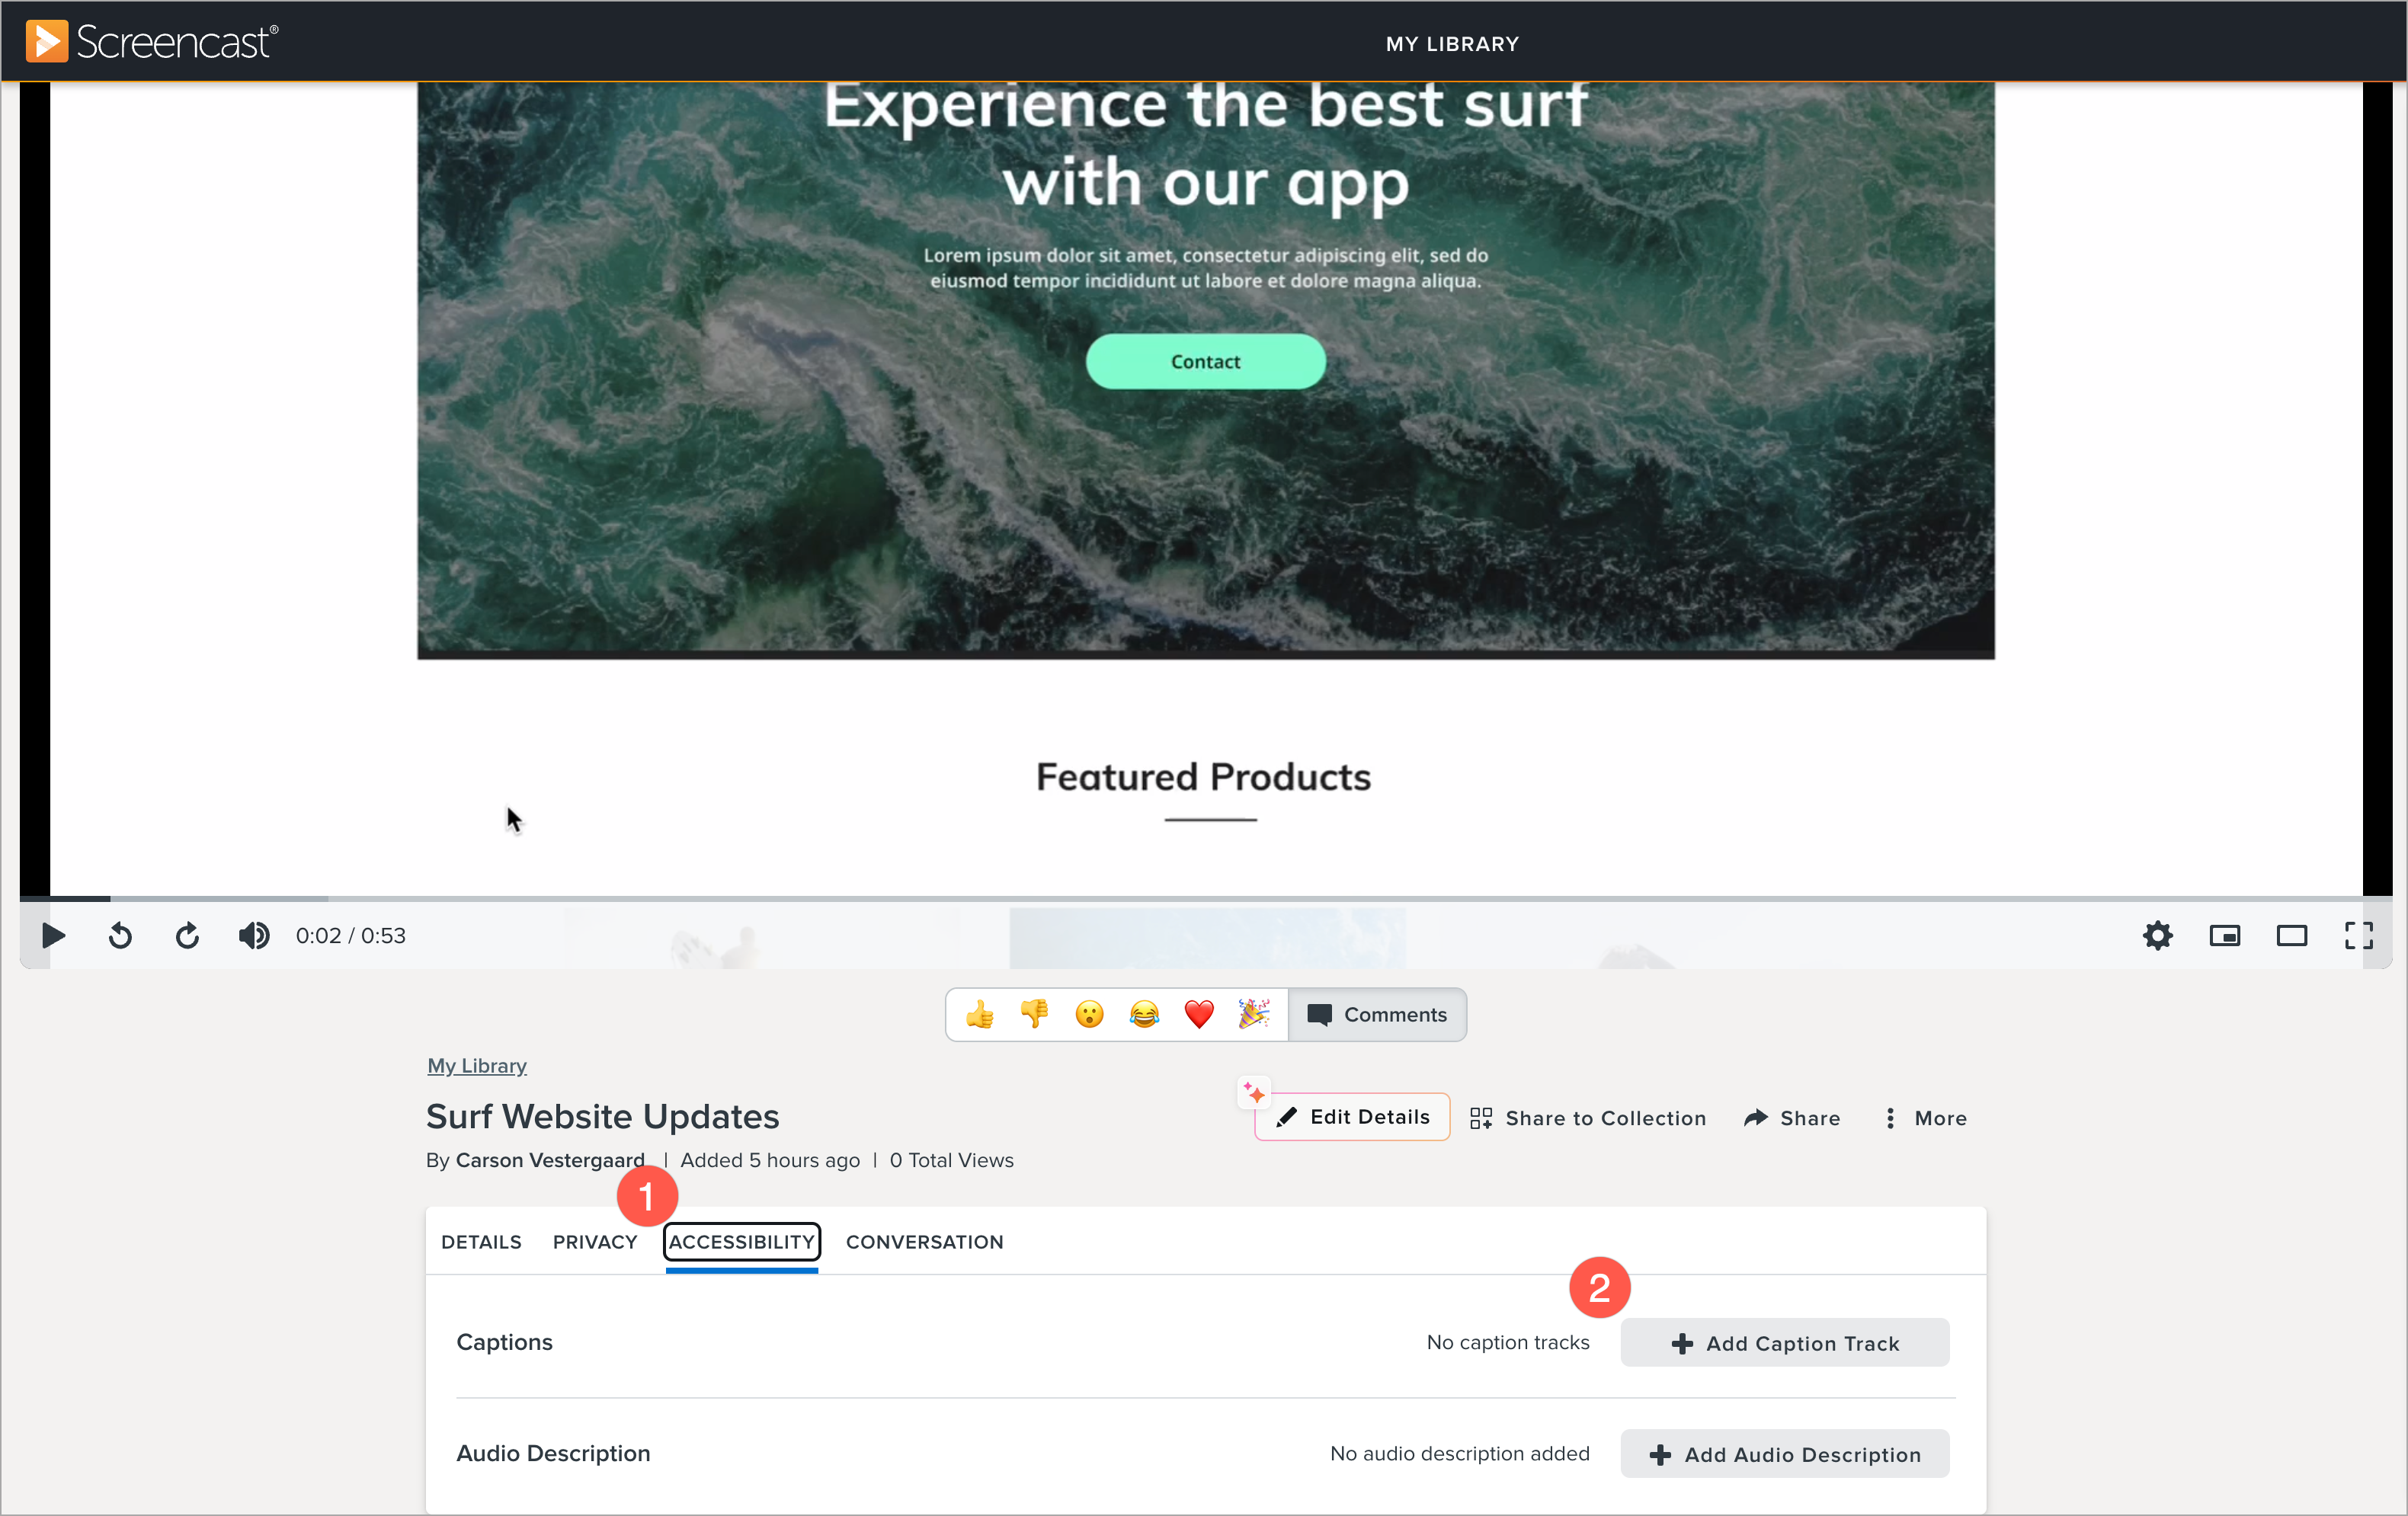
- Open your video and select the Accessibility tab.
- Click Add Caption Track.
- With Speech-to-Text already selected, click Apply.
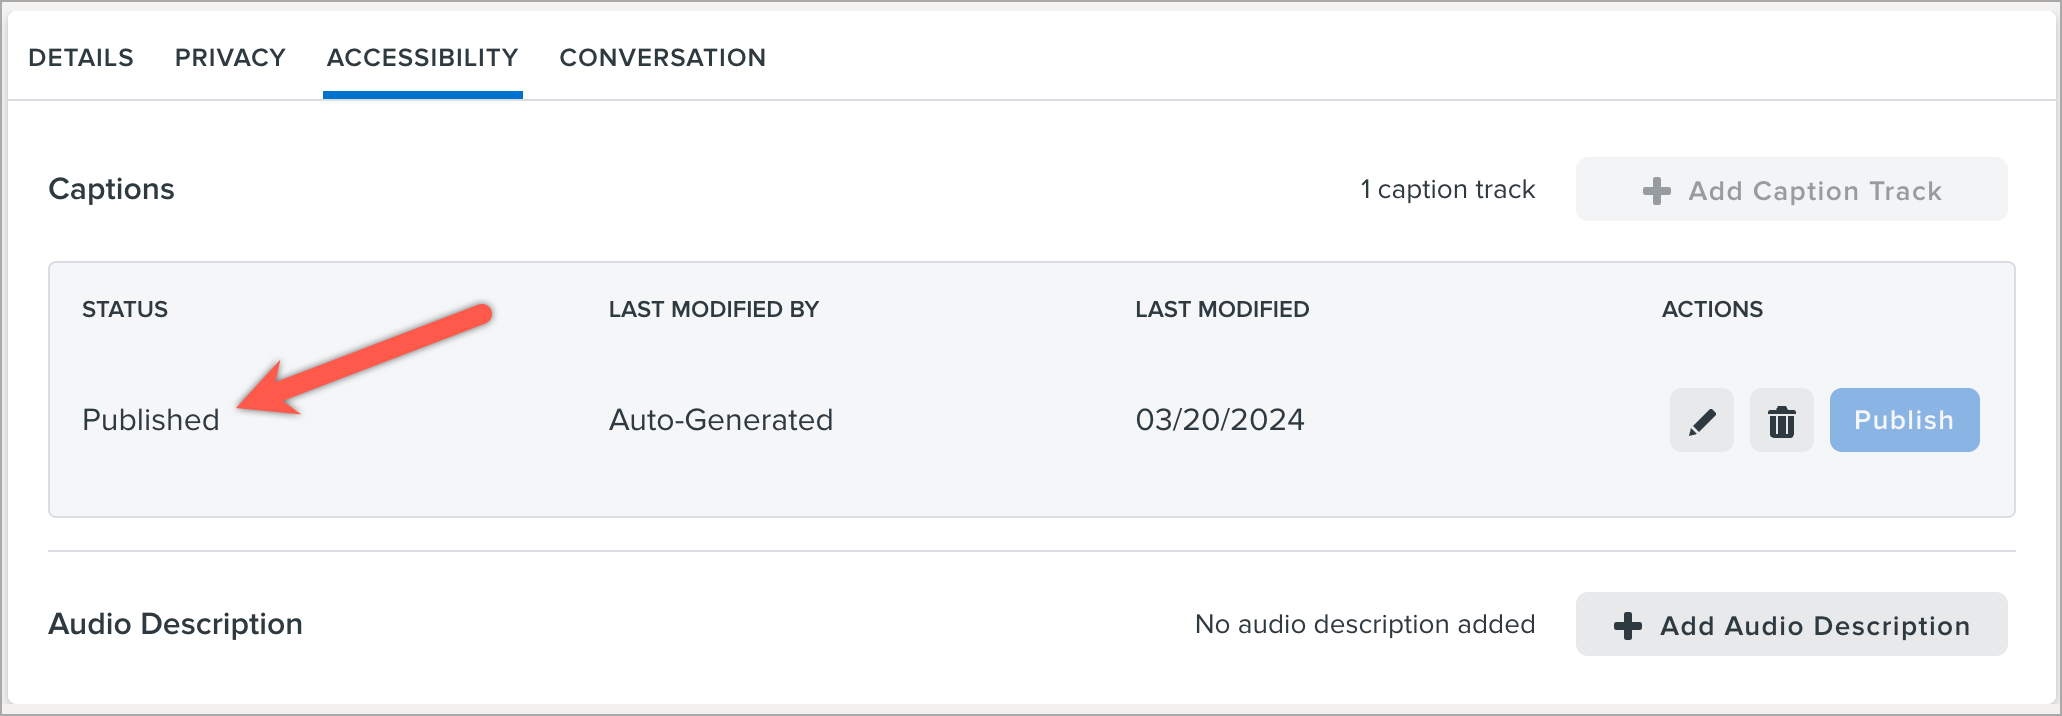
The status will automatically change from Transcribing to Published when ready.
Note: To stop auto-generating captions for new video uploads, click  in the upper-right corner > Settings > turn off Generate captions after upload toggle.
Edit Captions
Complete the following to edit your published captions, including auto-generated captions (Screencast Pro).
- Open your video and select the Accessibility tab.
- Click the
 Edit button.

- The Caption Editor opens. Click Play to review the captions or drag the timeline left or right to scrub through the video.
- Complete any of the following:
- Click the caption box to edit text.
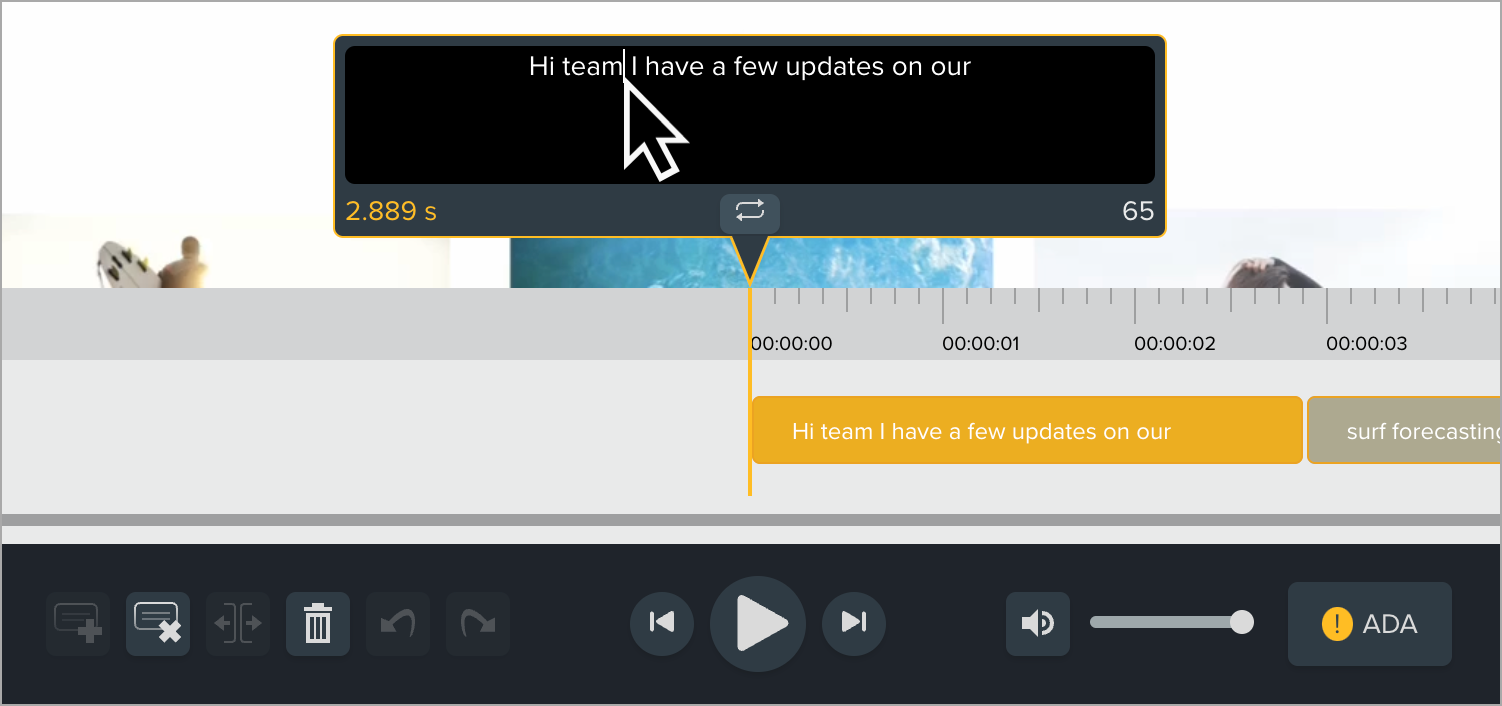
- To delete a caption, click the
 Delete Caption button.
- To add a new caption, click the
 Add Caption button.
- To split a caption, click the
 Split Caption button. For example, split captions if the duration or character count is longer than the ADA-recommendations.
- Click the
 ADA button to view tips to make your captions compliant with the Americans with Disabilities Act (ADA).
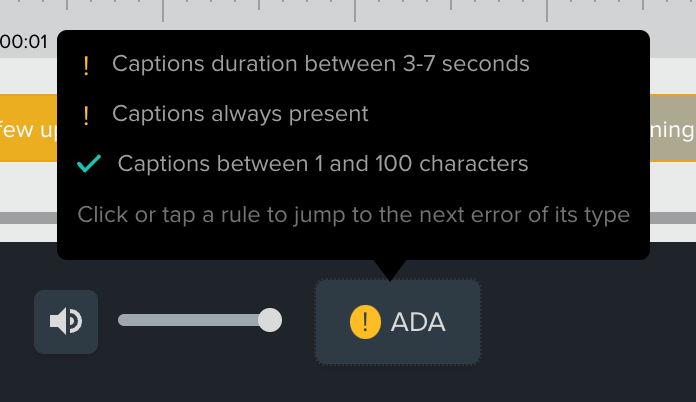
- When you are done editing, click Publish.
The Accessibility tab indicates that captions were last modified by you.
Import a Caption File or Manually Add Captions
- Open the video and select the Accessibility tab.
- Click the Add Caption track button.

- The Add New Caption Track dialog appears. Select Custom and click the Create button.
- Complete either of the following:
- Click Import.
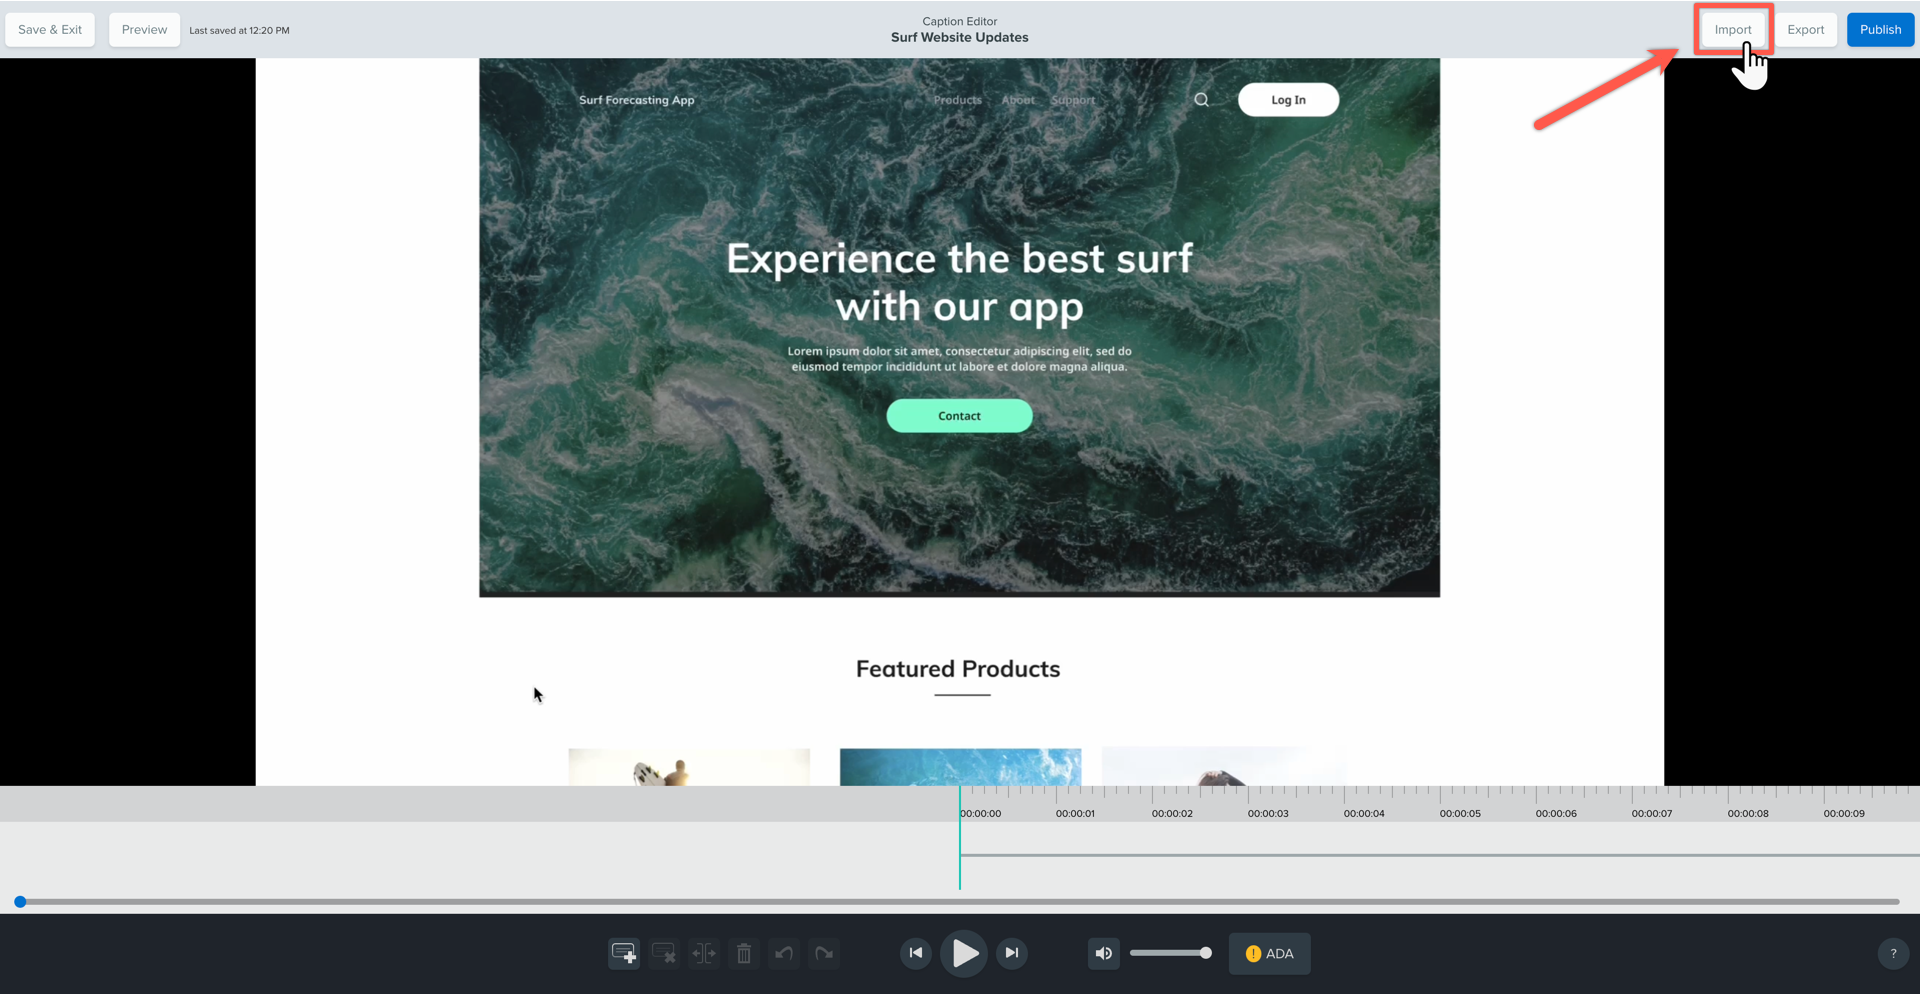
Browse to select a caption file to import and click Open. Screencast supports SRT, VTT, TTML, SBV, and SAMI file types.
- Manually type your own captions, beginning with the
 Add Caption button.
- Click Publish.


![]() in the upper-right corner > Settings > turn off Generate captions after upload toggle.
in the upper-right corner > Settings > turn off Generate captions after upload toggle. 


