How to Use Group Tabs

Learn how to group media to organize your timeline and edit multiple pieces of media at once.

Camtasia product icon

In this tutorial:

Working with Groups

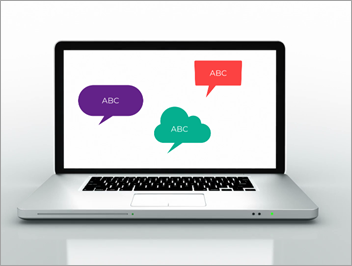
A group is a set of media, annotations, and/or enhancements combined into a single track.
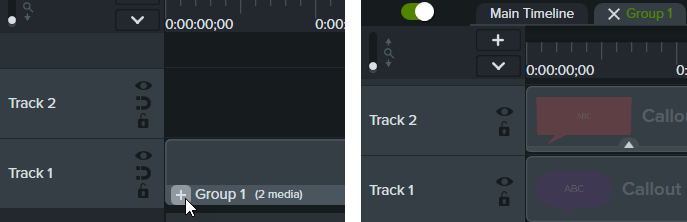
Plus sign to expand the media group

Group media to:

  • Organize the timeline.
  • Move a set of media on the canvas or timeline.
  • Edit properties such as scale or opacity for all media in the group together.
  • Create custom assets that can be shared and reused across projects.
  • Save a media group to your library to use in a future project.

Characteristics of a group:

  • Groups can contain an unlimited number of media, annotations, enhancements, or tracks.
  • Groups can be nested in other groups for further organization.
  • Spaces are maintained between media in groups on magnetic tracks.

Create a Group

  1. Hold Shift+click to select media on the timeline to add to the group.
  2. Right-click (Windows) or Control+click (Mac) the selection and select Group, or press Ctrl+G (Windows) or Command+G (Mac).

Edit a Group

Some groups in the default Camtasia library and on the TechSmith Assets for Camtasia website have editable properties such as title, subtitle, or shapes. See Discover the Properties Panel.

OptionSteps
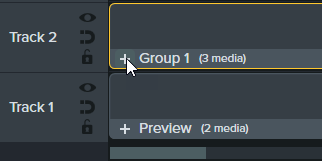
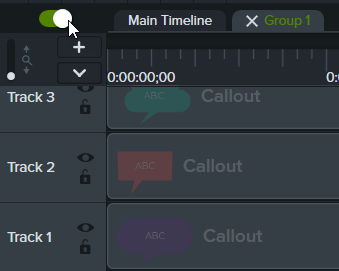
Open Group
Expand a group on the timeline to view and edit media individually.
Click the Open Group icon icon on the group on the timeline or click a group on the canvas and press Ctrl+Shift+G (Windows).
Plus sign on the media group tab

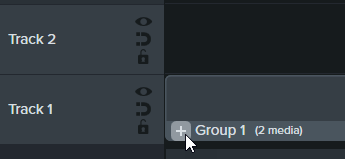
Media within the group appear on separate tracks. The group name displays in a tab above the timeline.
Group 1  name displays in the tab
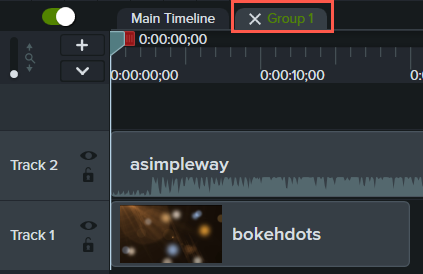
Close Group
Collapse items within a group to a single track.
Click the Close group icon icon on the group tab above the timeline or press Control+Shift+U (Windows).
Click X icon on the tab to close the group
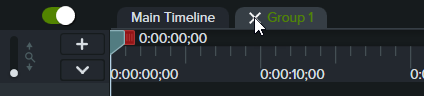
The group displays on a single track on the timeline.
Navigate Between Groups and TimelineClick a tab to navigate between open groups or the main timeline. Camtasia displays a green tab name for the currently selected tab.
Active tab name displayed in green
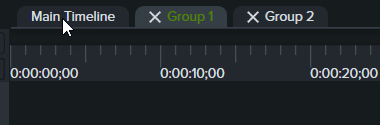
Add Media to an Existing Group
  1. Right-click (Windows) or Control+click (Mac) media on timeline or canvas and select Cut.
  2. Click the Open Group icon icon to open the target group.
    Click the plus icon to open the group
  3. Paste media into the group:
    • On Windows, right-click the canvas or an empty section of the timeline and select Paste.
    • On Mac, click the Add a Track icon. Control+click the empty track and select Paste Media at Playhead.
      Click plus sign to add a track on the timeline
Remove Media from Group
  1. Right-click (Windows) or Control+click (Mac) clip on timeline and select Cut.
  2. Click the Close group icon icon to close the tab.
  3. Paste media:
    • On Windows, right-click the canvas or an empty section of the timeline and select Paste.
    • On Mac, click the Add a Track icon. Control+click the empty track and select Paste Media at Playhead.
      Click plus sign to add a track on the timeline
Rename GroupDouble-click group tab on timeline and type new group name.
Ungroup MediaRight-click (Windows) or Control+click (Mac) group on the timeline and select Ungroup.
Edit Group PropertiesSelect a group on the timeline or canvas and click the Properties button.
Properties button
The Properties panel displays a list of editable group properties (also known as Quick Properties). See Create Custom Assets.
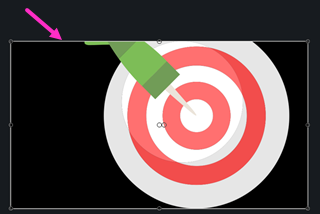
Resize All Media in a GroupSelect a group on the timeline or canvas and drag the corner handles on the canvas. All media in the group is scaled proportionately.
Drag the corner handle to resize the group Resized group of media
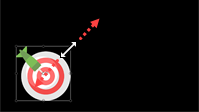
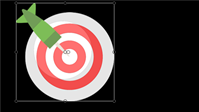
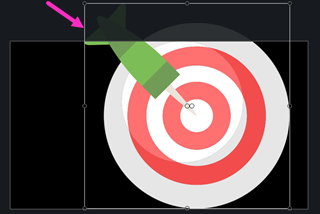
Resize Group Area
Set the overall area of the group to a different size for advanced editing workflows. The size of individual media within the group is not affected.
Right-click (Windows) or Control+click (Mac) a group on the timeline and select Resize Group. Select one of the following options:
  • Canvas Size: The group is the same size as the canvas. Camtasia crops any items that extend beyond the canvas edge. This option is useful to center a group on the canvas and prevent it from being moved accidentally.
    The group is the same size as the canvas
  • Visible Size: The group area includes all items without cropping. This is useful to zoom out on items that extend beyond the canvas.
    The group area includes all items without cropping
  • Custom Size: Enter a custom height and width in pixels and click Resize. This is useful to restrict media from displaying beyond an area of specific size.
    Use a custom sized group to display a specific size
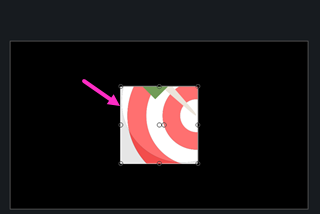
Crop Group on the Canvas
  1. Click to select a group on the timeline or canvas.
  2. Click the Crop button.
    Crop icon
  3. Drag the handles on the canvas to the desired size.
    Drag the handles on the canvas to resize Cropped group after resizing
Move GroupClick and drag to move a group:
  • On the timeline to a different time in the video.
  • On the canvas to a different location on the screen in the video.
Add Enhancements
Add animations, behaviors, and effects to media groups or individual media in groups.
To a Group:
Click and drag enhancements onto a group on the timeline.

To Individual Media:
  1. Click the Open Group icon icon to open the group.
    Plus sign on the media group tab
  2. Click and drag enhancements onto media in the group on the timeline.
Rotate Group on the CanvasSelect a group on the timeline or canvas and drag the center handle.
Drag the center handle to rotate a group Group after rotating

Add a Group to the Library

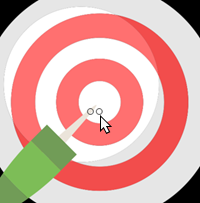
Save media groups to your Library to share or reuse in projects.

  1. Right-click (Windows) or Control+click (Mac) a group on the timeline and select Add to Library.
  2. Enter a name.
  3. Select a library.
  4. Click Use Canvas Size or Use Visible Size to set the saved group dimensions. To learn more about these options, see Reuse Media Across Projects (Asset Libraries).
  5. Click OK (Windows) or Add (Mac).

Preview a Group

Preview only the media within a group on the canvas.

  1. Click the Open Group icon icon to open a group.
    Click the plus icon to open the group
  2. Click the Preview Mode button.
    Preview Mode button toggled on
    • Enable Preview Mode: All media on the timeline is visible on the canvas.
      Media on timeline is visible on the canvas with preview mode on
    • Disable Preview Mode: Only the group is visible on the canvas. The exported video includes all media.
      Only the group is visible on the canvas with preview mode disabled