TechSmith ®
TechSmith ®

Improve Audio with Effects

Learn how to enhance your voice recording with studio-quality effects in Camtasia Audiate. Add effects to improve tones, remove background sounds, and adjust volume levels in the recording.

3d Audiate icon

Your audio recording setup or environment can impact the audio quality. Common audio issues include:

  • A loud computer exhaust fan
  • The microphone volume is too high
  • Hum or buzz from microphone and power cords
  • Speaking too close to the microphone
  • Echoes or reverberations from the environment in a home studio
  • Too loud or too quiet sections in the voice recording

Audiate Effects

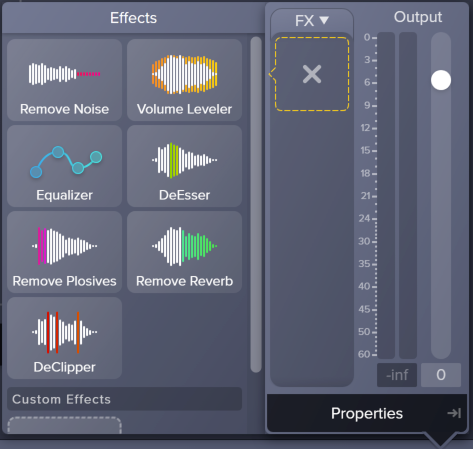
Camtasia Audiate includes the following built-in effects.

Audio EffectDescription
Remove Noise iconRemove background noise in the recording such as a fan or street ambiance to produce a cleaner, clearer voice recording. See Remove Noise Audio Effect.

Tip: Remove Noise first

The Remove Noise effect helps improve the audio quality for most recordings. For the best result, apply Remove Noise to most recordings before applying other effects.

Volume Leveler iconAdjust the volume level of individual words to create a consistent level across the recording. See Volume Leveler Effect.
Equalizer iconQuickly apply a preset or manually adjust the equalizer properties to improve the clarity and tone. See Equalizer Effect.
De-esser iconRemove hard consonant pronunciations such as “Ess” or “S.” See De-esser Effect.
Remove Plosives iconRemove pops and breath sounds from powerful “P” pronunciations. See Remove Plosives Effect.
Remove Reverb iconRemove audio tails and echoes which commonly occur in large open spaces. See Remove Reverb Effect.
De-clipper iconRemove distortion and clipping that occur from improper microphone levels. See De-clipper Effect.

VST Effects (Beta)

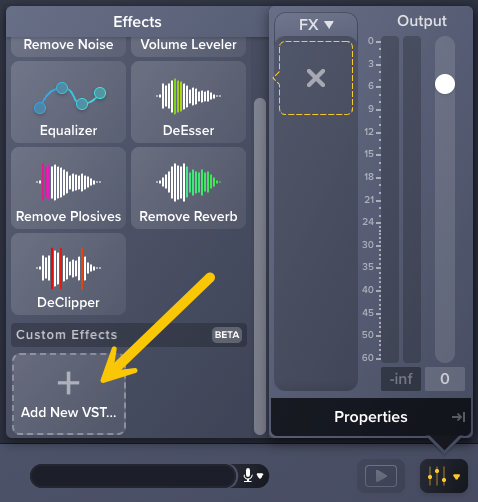
Virtual Studio Technology (VST) effects are third-party plugins that simulate traditional recording studio hardware. If you use VSTs, you can add them to Camtasia Audiate to apply additional effects, such as reverbs and phasers.

  1. Install a VST using one of the following:
    • (Recommended) If the plugin has an installer, use the installer and its default install location.
    • If the plugin does not have an installer, download and move the files to one of the following locations:
      • Windows: C:\Program Files\Common Files\VST3
      • Mac: /Library/Audio/Plug-Ins/VST3
  2. In Camtasia Audiate, click the Properties button.
    Properties button
  3. Click the + icon to view audio effects.
    Add effects icon
  4. In the Custom Effects section, click Add New VST.
    Add New VST button
  5. Browse to select a VST and click Open.
    The VST plugin opens, and the effect is automatically applied to the project.
Additional Info About VSTs in Audiate
  • Camtasia Audiate currently supports VST3 file format. VST and VST2 formats are not supported.
  • Missing plugins may affect audio but will not break an Audiate project. If a VST plugin is missing, a message appears in the Properties panel.
  • Some third-party plugins may not work correctly on Macs with Apple Silicon processors. To learn more about Intel vs. Apple Silicon plugin issues, view this FL Studio support article.
  • Updates to the operating system may break third-party plugins. If you are experiencing issues, check that the plugin is compatible with your specific OS.

Apply an Audio Effect

  1. Open an an audio recording in Camtasia Audiate.
  2. Click the Properties button.
    Properties button
  3. Click the + icon to view the available audio effects.
    Add effects icon
  4. In the Effects section, click to apply the desired effect. To review the applied effect, click the Play button.
    Effects properties panel

    Tip: Apply the Remove Noise effect first.

    The Remove Noise effect helps improve the audio quality for most recordings. For the best result, apply Remove Noise to most recordings before applying other effects.

  5. To customize the effect, edit the properties. The changes are immediately applied to the audio. To learn more about each audio effect, see Audio Effects Overview.
    Remove Noise properties panel
  6. To save a preset of the effect with customized properties, click the Presets dropdown and select Save Preset.
  7. To apply another effect, click the + icon.
    Add effects icon

    Note: To disable an applied effect and keep its properties settings, click the on/off toggle in the effect’s properties panel.
    Disable effect toggle

The audio playback changes when each effect is applied, disabled, deleted, or the properties of the effect are adjusted.

Remove an Audio Effect

  1. Click the Properties button.
    Properties button
  2. In the FX section, select the effect to remove.
    Remove Noise properties panel
  3. Click Remove Effect.

Save an Effect Chain Preset

Save frequently used effect combinations as Effect Chain Presets.

  1. Apply and customize multiple audio effects.
  2. In the properties panel, click the FX dropdown and select Save Effect Chain Preset.
  3. Enter a descriptive name in the Effect Chain Preset Name field and click OK.

To apply an Effect Chain Preset, select it from the FX dropdown.

All Audiate Tutorials