Edit Audio & Mistakes
Learn how to use Audiate’s text-based and waveform editors to adjust or remove pauses, hesitations, and mistakes from audio or video recordings.
Learn how to use Audiate’s text-based and waveform editors to adjust or remove pauses, hesitations, and mistakes from audio or video recordings.
Camtasia Audiate automatically transcribes recorded voice-overs and imported audio files.
Clean up your narration to create smooth, professional voice clips. Use text-based editing to quickly remove words or edit mistakes, such as “ums” or “ahs”.
Audiate provides suggested edits to quickly clean up your audio. Automatically silence or delete all filler words, such as “ums” or repeated words, and shorten or remove long pauses.
Note: Audiate currently supports automatic filler word detection for English only.
To review and apply Suggested Edits:


Silence Filler Words
Replace hesitations and repeated words with silence. This does not change the length of your audio.
Filler Words are tagged and highlighted with a pink color in your transcription.

Note: You can adjust what type of words and phrases are tagged as filler words in the Settings menu.
Silence Pauses
Remove all sounds (breaths, room noise, etc.) from extended pauses in your narration track. This does not change the length of your audio.

Delete Filler Words
Cut all filler words, such as “ums” and repeated words, from your audio. This will shorten your overall audio track.
Filler Words are tagged and highlighted with a pink color in your transcription.
Note: You can adjust what type of words and phrases are tagged as filler words in the Settings menu.
Shorten Pauses
Replace long pauses with shorter ones. This will shorten your overall audio track.
Enter the pause duration (in seconds) and the desired shortened duration (in seconds). Audiate shortens any pauses longer than this amount to the shorter duration.

Settings
Select the type of words and phrases Audiate tags as Filler Words. You can also build a list of words to always ignore.

Audiate’s text-based audio editing reduces the time it takes to play back and review content.
Remove a Word
Remove incorrect or unnecessary words from the audio.
Remove a Phrase or Selection
Remove extra or unnecessary phrases from the audio.
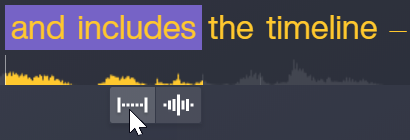
Remove a Pause
Ellipses in the transcription represent pauses.![]()
Add a Pause
When deleting words or audio segments, consider adding a pause before or after to provide a natural pause in the audio.
To add a half second of silence before or after a selection:
To customize the pause length:
Silence an Audio Selection
Silence or mute a segment in the audio.
The text selection changes to white indicating the audio has been silenced for the duration of the selection.
To undo this action, click to select the word or click and drag to select the segment, right-click (Windows) or Control-click (Mac), and select Unsilence.
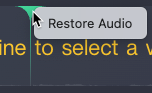
Restore Audio
Restore audio that was previously deleted.
When a selection is deleted, Audiate adds a marker to the location.
Click the marker and select Restore Audio.
Find and Replace
Quickly search for and replace words, filler words, or pauses.
Note: To learn how to edit the transcription text for exporting a script or captions, see Edit the Transcript.
When you need to make precise audio edits, use the Audiate waveform editor.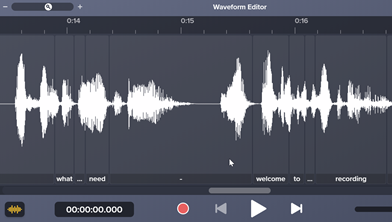
To open the waveform editor:
Complete any of the following to navigate and edit in the waveform editor:
To adjust the audio levels for individual words or sections:
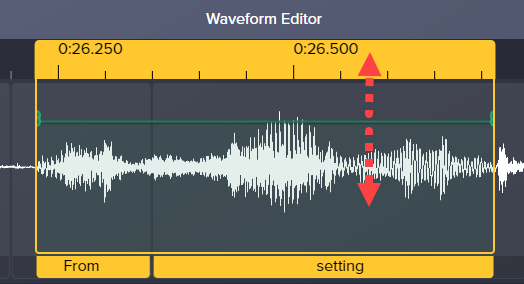

Note: If you position the In and Out keyframes in a vertical line, Audiate creates a linked keyframe which automatically eases in or eases out the audio. This eliminates pops in the audio when there is a silence or change in the audio level.
Tip: Export audio to Camtasia Editor
To export the edited audio as a WAV file to use in Camtasia Editor or other applications, click the Export button.![]()
During the editing process, play back the audio edits to make sure you have the desired effect and quality.