Snagit templates allow you to combine images into a single document for comparison, to explain a process or concept, or to provide a timeline of events. To add images and text to a template, see Create Visual Guides with Templates.
Edit the layout of a template to meet your needs and match your brand colors. Then save the file to use as a customized template later.
Open a Template
To start with a blank template without any images or text:
- Select Create > Image from Template.

- The Create Image from Template dialog appears. Click to select a template.
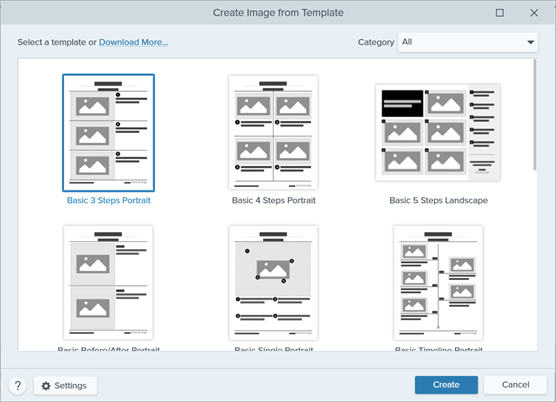
- Click the Settings button.

- The Template Settings dialog appears. Select an Image Scale option to set how Snagit scales images added to the image areas in the template:
- Fill entire drop zone: Snagit scales the image to fill the entire image area. If the original image is larger than the image area, some of the original image may not be visible. If the original image is smaller than the image area, Snagit increases the image size so that the entire image area is filled.

- Fit entire image: Snagit scales the entire image to fit within the image area. Some of the image area may be empty.

- Select a Footer Author Name option (Windows) or Created By option (Mac) to customize the text that displays at the bottom of the template.
- System: The computer display name shown in parentheses.
- Custom: Enter your own text, such as your name or company name.

- Click Save.
- Click Create.
The template opens on the canvas. To add images, text, and other annotations, see Create Visual Guides with Templates.
Edit Sections
- Add Section: Click the
 icon to add another section. Select the type of section content from the menu.

- Resize Section: Drag the blue divider line between sections.

- Delete Section: Click the Delete Section icon
 next to the section you want to remove.
Edit Image Areas and Text Boxes
Note: On Mac, click the  icon in the upper-right corner of an image area or text box to allow editing.
- Move: Click and drag in an image area or text box to move to a new location.

- Resize: Click and drag the handles to resize the selected image or text box.

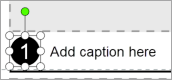
- Swap Image and Caption: To quickly move an image with its caption, click and drag the Drag to Swap to another image area.

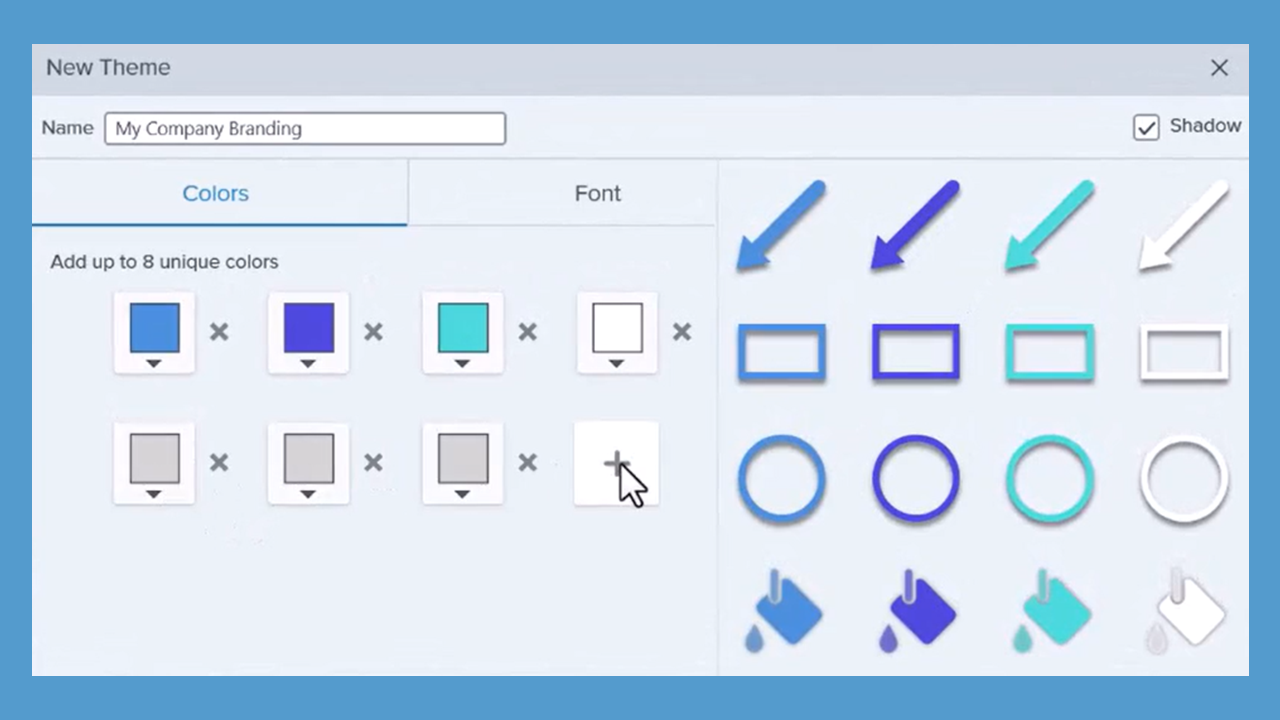
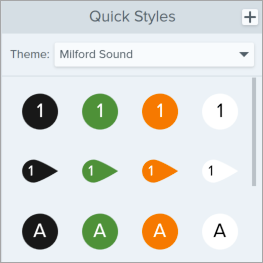
Customize with Theme Colors
Apply colors from a theme to match your organization, product, or project brand. To learn how to create a theme with a custom color palette, see Snagit Themes.
- In the template image, click to select a tool object on the canvas, such as text, a step number, or a line.
- Optional: In the Tool Properties, click Select All to select all objects of the same tool type.
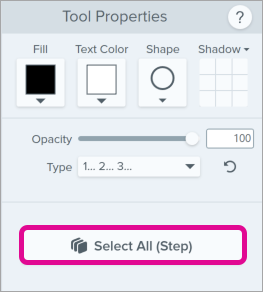
- In the Quick Styles, click the Theme dropdown and select a theme.
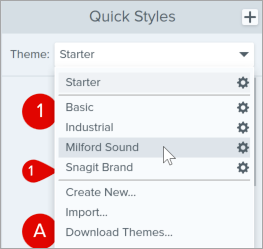
- Complete one of the following:
- In the Quick Styles, click to select a style.
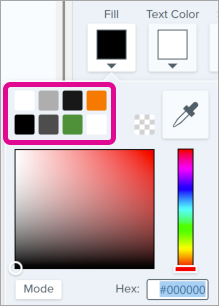
- In the Tool Properties, click to select a color property and select a preset color from the theme palette.
Save to Reuse
Save the edited file as SNAGX to use in place of a template later. Select File menu > Save As > SNAGX file type.
To edit images and text, see Create Visual Guides with Templates.
Tip: Share your SNAGX file.
Share your SNAGX file with colleagues to create consistent documents across your organization. See Share Captures.
Get Snagit
The best screen capture software for professionals
All Snagit Tutorials