In this tutorial:
Use Snagit to capture and create images and videos to provide feedback, share out information, or demonstrate a process. Then send your media directly to Microsoft Teams where others can view and respond within the channel or in a chat message.
Note: To share to Microsoft Teams, your IT or Microsoft Teams administrator must pre-approve Snagit’s plugin for Microsoft Teams. Admins can refer to the following:
- In Snagit Editor, click to select a capture in the Recent Captures Tray.
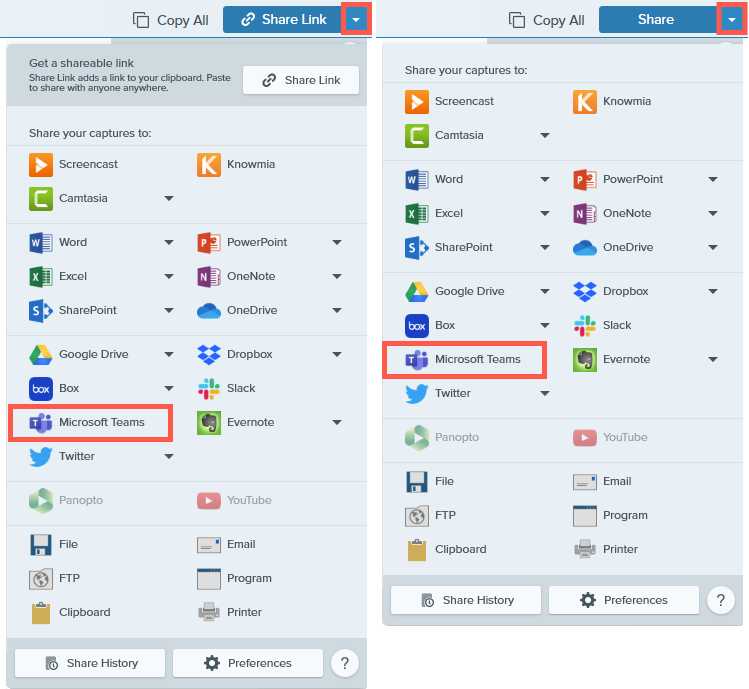
- Click the Share Link dropdown or Share dropdown and select the Microsoft Teams option.

You may be prompted to sign in to Microsoft Teams.
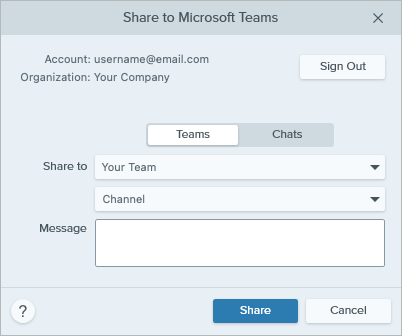
- In the Share to Microsoft Teams dialog, click to select either the Teams or Chats option.

- In the Share to dropdown(s), select a team and channel or a chat recipient.
- Optional: In the Message field, enter a description, question, or prompt for feedback.
- Click Share.
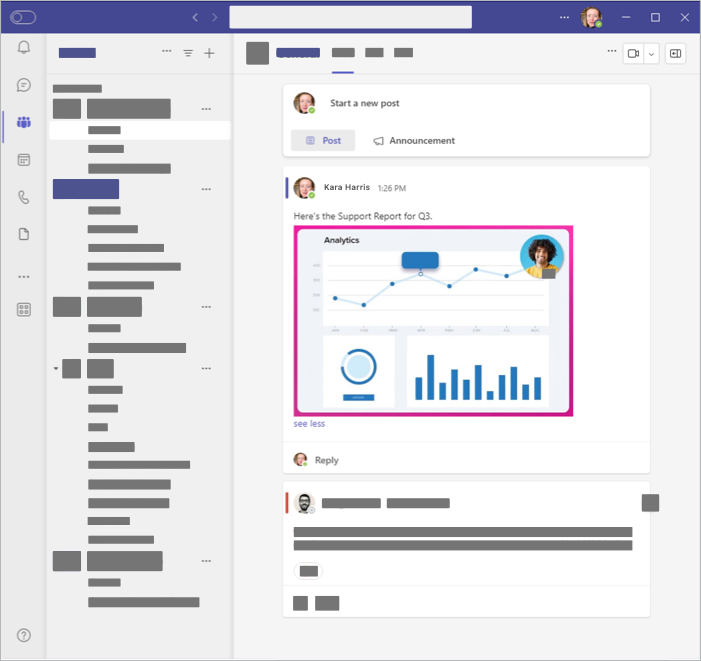
Your image or video is uploaded to Microsoft Teams, and a link is copied to your clipboard.

Drag and Drop to a Teams Channel
- In Microsoft Teams, navigate to the Teams Channel where you want to share.
- Click Start a new post.
- Enter a subject and message (optional) for your post.
- In Snagit Editor, click to select a capture in the tray. Control+click (Windows) or Command+click (Mac) to select multiple captures.
- Drag the selected capture(s) onto the post in Microsoft Teams.
- Click Post.
Drag and Drop to a Chat
- In Microsoft Teams, navigate to the Chat where you want to share.
- In Snagit Editor, click to select a capture in the tray. Control+click (Windows) or Command+click (Mac) to select multiple captures.
- Drag the selected capture(s) onto the Type a new message field in Microsoft Teams.
- Optional: In the Type a new message field in Microsoft Teams, enter a description, question, or prompt for feedback.
- Click the
 send icon.
Note: This tutorial is for Snagit version 2024. Previous versions do not include this feature or functionality.


