Import & Manage Your Project Media (Media Bin)
Import and manage recordings, video, audio, and image source files for your current project in the Media Bin.
Import and manage recordings, video, audio, and image source files for your current project in the Media Bin.
The Media Bin contains any media you record or add to your current video project. To open, select Media tab > Media Bin subtab. 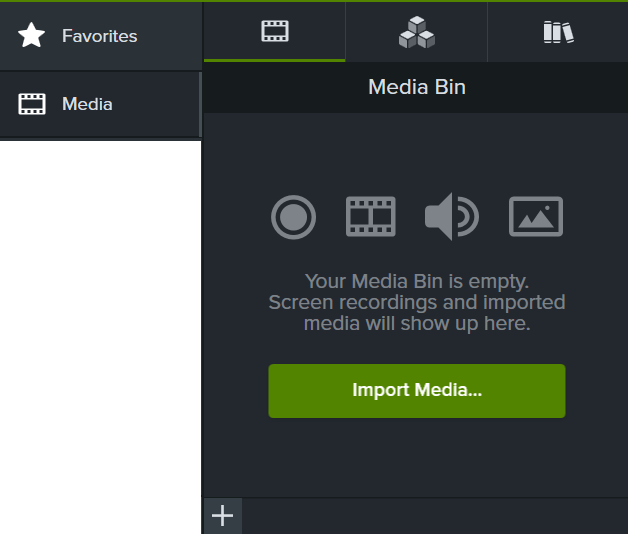
Select any of the following options to record or import content into the Media Bin to use in your video:
The imported media appears in the Media Bin.
Import a recording or footage from others into Camtasia Rev to apply a consistent look and layout in your video. See Apply Quick Layouts & Effects with Camtasia Rev.
Send images or videos to Camtasia from your mobile device.
The imported media appears in the Media Bin. See Record an iOS Demo or Tutorial.
The imported media appears in the Media Bin.
See Record Voice Narration (Camtasia Editor) or Record a Voice-Over (Camtasia Audiate).
To include the media in your video, select Media tab > Media Bin subtab. Drag the media onto the desired location on the timeline or canvas.
Get tips on how to position media or assets.
See Position Media on Canvas or Explore the Timeline to get recommendations on how to position media on the canvas or timeline.
After adding media to your project, the following tasks help you view and organize content in the Media Bin.
| Change Media Bin View | Click the Media Bin View button to change the media display to one of the following options:
|
| Sort Media | Select an option from the Sort by dropdown. Click the Ascending or Descending button. |
| View Media Details | Right-click media and select Details. |
| Locate Unused Media (Media not located on the timeline) | To remove unused media, right-click in the Media Bin and select Delete Unused Media. To select unused media, right-click in the Media Bin and select Select Unused Media. |
| Create a Proxy Video | Create a proxy of your high definition videos to improve editing performance such as lags or skips during playback. Right-click media in the Media Bin and select Proxy Video > Create Proxy Video. An icon appears in the video thumbnail when the process is complete.  |
| Delete a Proxy Video | Right-click (Windows) or Control+click (Mac) the proxy media in the Media Bin and select Proxy Video > Delete Proxy Video. To delete all proxy videos:
|
| Rename Media (Mac Only) | Right-click media and select Rename. Type a new name. |
| Create a Reverse Video | Create a copy of your video media where the events are in reversed order. Right-click (Windows) or Control+click (Mac) the media in the Media Bin and select Reverse Video. The new media is added to the Media Bin. Note: Reversed videos do not include audio. To cancel a reverse video while processing, right-click (Windows) or Control+click (Mac) the media in the Media Bin and select Cancel Reverse Video. |
| Windows | Mac |
|---|---|
| Video Files AVI, MP4, MPG, MPEG, MTS, M2TS, WMV, MOV | Video Files MP4, MPG, MPEG, MOV |
| Camtasia Recording Files TREC | Camtasia Recording Files TREC |
| Image Files BMP, GIF, JPG, JPEG, PNG, PDF, TIF, TIFF, JSON (Lottie) | Image Files BMP, GIF, JPG, JPEG, PNG, PDF, JSON (Lottie) |
| Audio Files WAV, MP3, WMA, M4A | Audio Files M4A, WAV, MP3 |
| Caption Files SMI, SAMI, SRT | Caption Files SAMI, SRT |
| PowerPoint Files PPT, PPTX | PowerPoint Files PPT, PPTX |
Check out the latest features in Camtasia.
Already a Camtasia user? Learn how to update to the latest version.