In a recent TLDChat on #videoFriday, I had the chance to talk with Mike Sloat. Mike is a long-time video creator who has made thousands of videos (music, corporate videos, etc.) I had the chance during the live stream (jump to 1:02:44 in the video) one thing he would recommend to people looking to learn to get better video. His response? “Practice Editing.” Practice is key to learning how to edit videos well.
Mike’s advice is fantastic because being a good video editor helps you become better at knowing how to tell stories. In addition, learning to become a good video editor will help you become more familiar with the various media, assets, structure and style you’ll need and want to create your own videos.
However, if you are new to video, this is no small task. Video editors can feel intimidating and overwhelming, and just getting to the point of practicing can feel difficult. But don’t worry, there’s hope. Let’s look at one of the key ingredients of video editing, and get you one step closer to making your awesome video.
The Video Editor Timeline
Most video editing software these days has a non-linear timeline editor or sometimes called an NLE (nonlinear editor). This is the part of the software that allows you to add media, cut it, arrange, adjust it – basically manipulate the parts the video, so it looks, sounds, and feels the way you want it. The nonlinear part means that you don’t have to put the media onto the timeline in linear or sequential order. If you wanted, you could add the last clip, then a middle clip, then fill-in between, before adding the beginning media.
There are several components of a video editing timeline you should be aware of:
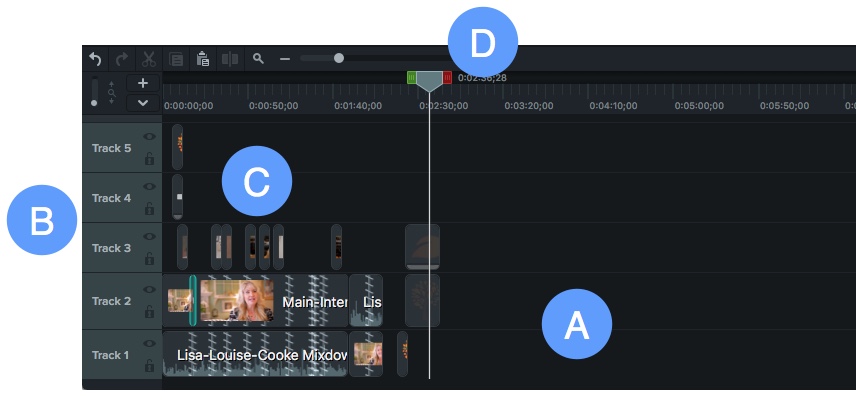
A) Timeline. It’s called a timeline because the various pieces of video will be lined up horizontally, with footage on the left displaying before footage on the right. Usually, the timeline will have time code markers indicating the location of each frame.
B) Tracks. Usually stacked vertically, allowing for multiple pieces of media (both audio and visual) to be added to your video. In most editing programs, visual items on the higher tracks will appear on top, in what is called the z-order (https://en.wikipedia.org/wiki/Z-order).
C) Media. The media sits on the timeline and can be made up of video, audio, text, images, etc. These are the elements of your video.
D) Playhead. The playhead depicts where in the video you are previewing. The playhead is an essential element to make sure you are editing the correct part of your video.
Depending on your video editor, there are other functions that will help you with your video editing. These could include tools for cutting, splitting, zooming in for a close view of your timeline, track locks and more. If you’re not familiar with your software’s editing timeline, it’s worth taking a few minutes to get familiar with its functions. A quick tip for when you’re learning a new piece software is to hover your mouse over the tool you’re wondering about. Usually, a tool tip will appear giving you the name of the tool, so you can easily research what it does and how it works.
Workflow for Editing with a Video Timeline
There are many ways you can go about editing video, and you should determine what works best for you. The following are suggestions to help you get started, but as you get comfortable with your editing workflow, feel free to make changes.
1) Gather all of the footage that you think you might want to use in your video. Not sure if you need something? It’s okay to gather it, so it’s at the ready.
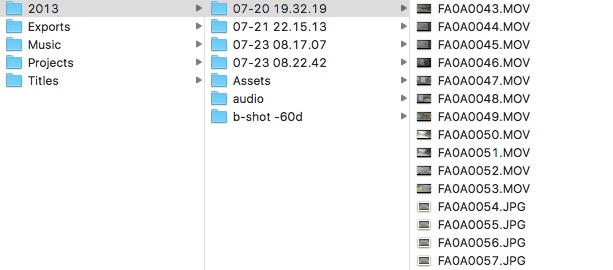
1a) If you have a lot of footage, it is helpful to label everything. It seems like a lot of work, and it is, but the bigger the project, the easier it will be to find everything that you need later.
2) Once you have your footage gathered, add the key footage to the timeline to start building the order and general flow of the video. If I was editing an interview, or a tutorial, this would be the main footage.
Once added to the timeline, you should trim each clip, and narrow down the footage to the key pieces. At this point, don’t worry about effects or other editing tasks (like transitions). The key here is to nail your message down. 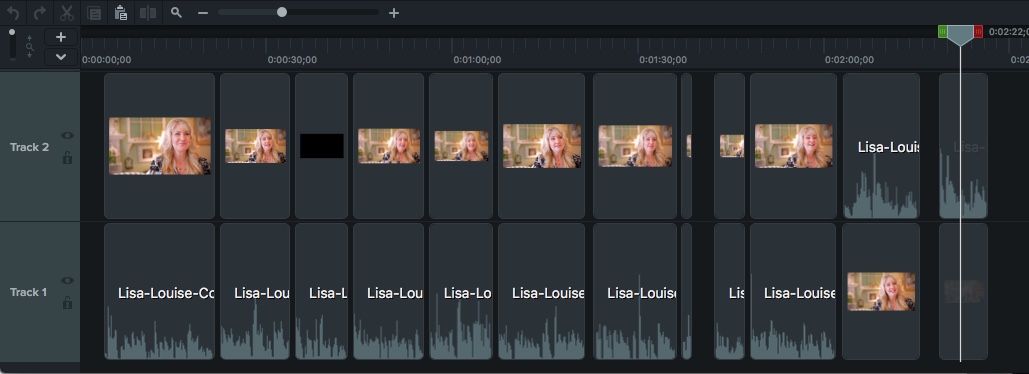
3) Once you have your main footage in place and are giving the message you want, you can start adding secondary footage, including adding b-roll, lower thirds, and other images or text.
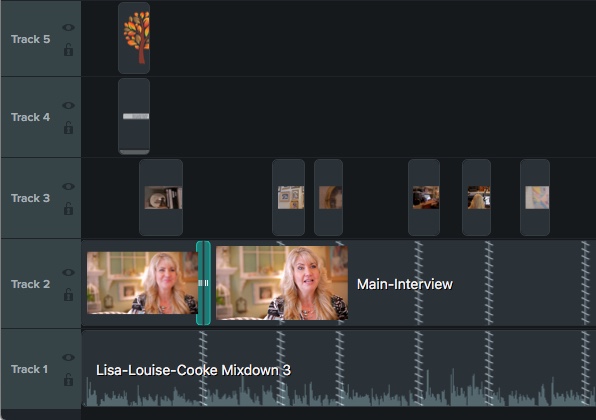
4) Once you’ve built out your video visually, you can add audio, like music.

The Art of Editing Video on the Timeline
Editing video on the timeline is a mixture of both art and science. There are lots of effects, interesting and cool things you can try. But as with many things in life, less is more.
As you get into editing your video, I’d recommend watching a lot of videos. What are they doing well? What types of editing did they do that you found effective? As you look at these videos, write down ideas of the concepts for editing that you would like to mimic or try yourself.
If you need more help learning about video editing, check out some of these other posts:
How to Use a Webcam Recorder to Add Personality to Your Videos
B-roll: The Secret Sauce of Any Great Video
What are your thoughts about editing video? Let us know on Twitter or Facebook.
Want to learn more about making video?
Visit the TechSmith Academy for free access to learning materials and downloadable resources that will help you improve your video creation skills!


Share