
Before DIY video creation software became widely available, organizations would have to spend big money to hire a professional to complete a video project.
Fast forward to today: anyone and everyone can make a video! Plenty of affordable tools are within reach, for both businesses and hobbyists.This means you can improve your content with video without big budgets or a ton of time.
The turnaround time to create a video depends on the project and how polished you’d like the finished product to be. You can create a simple screencast in only a few minutes. You only need the time it takes you to record your computer screen and capture the activity.
Let’s talk about how you can start simple. Use videos as an extension of documentation or written content which already exists.
When you re-purpose your existing content, it saves time, increases engagement, and allows your audience to choose how they’d like to consume their content.
Step 1: Pick your topic.
You’re probably thinking “duh”. Obviously you’ll need a topic before you can begin planning. There is some strategy involved in picking a good topic, though.
The main thing to consider is how you will focus on where to start. It’s likely that when you consider potential topics for a video, more than one idea comes to mind.

How you prioritize your video creation will depend on the goal you’ll aim to achieve with your video (more on that later). One way to approach prioritization is to identify a problem, and use video to solve that problem.
For example, if onboarding new employees is inconsistent, make a video based on the current training documentation. This is exactly what Dollar Shave Club does to ensure that everyone is on the same page.
Another approach to prioritization might be addressing requests that your organization receives. TechSmith Newsletter editor, Lauren North, added video to the mix after readers requested more video content.
Step 2: Set a specific (smart) goal.
After you’ve selected a topic for your first video, it’s time to set a goal. This is where you’ll want to get super specific with your plan—note EXACTLY what you’d like to accomplish, and define what success will look like.
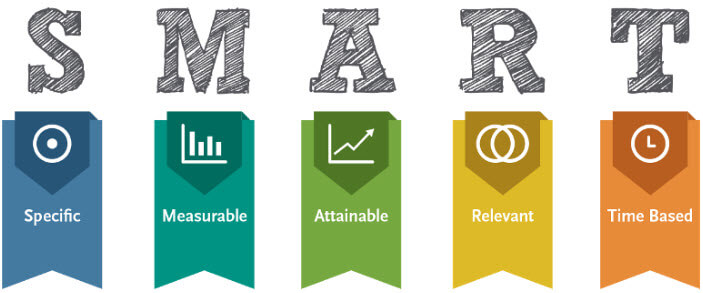
You can set yourself up for success by following the S.M.A.R.T. goal guidelines. There are a few variations for this acronym, but the general idea is to keep it Specific, Measurable, Attainable, Relevant, and Time-bound.
Depending on the desired outcome of the video, you’ll like also want to include a clear call to action for your viewer. An example of a goal in this format could be the following:
Within a six-week time frame, identify the top five written articles viewed on your company’s support site.
Create five corresponding videos to help explain how to resolve each issue, resulting in customers being better able to “self-solve” their problem.
Measure the number of page visits, and number of help tickets submitted both before and after the videos are posted to measure the success of this approach.
Once you figure out precisely what you’d like to accomplish, you’ll be better able to develop an approach to achieve the goal you’ve defined.
Step 3: Create your first video
There are lots of different ways you could approach actually creating your first video, much of which will be dependent on your topic and the goal you’ve defined—we won’t get too in-depth on the creation aspect here.
Regardless of the type of video you aim to create, you will want to put together a simple plan before you start recording—this is known as creating a storyboard. Decide what you will record—whether it will be yourself, someone else, or your screen—before beginning.
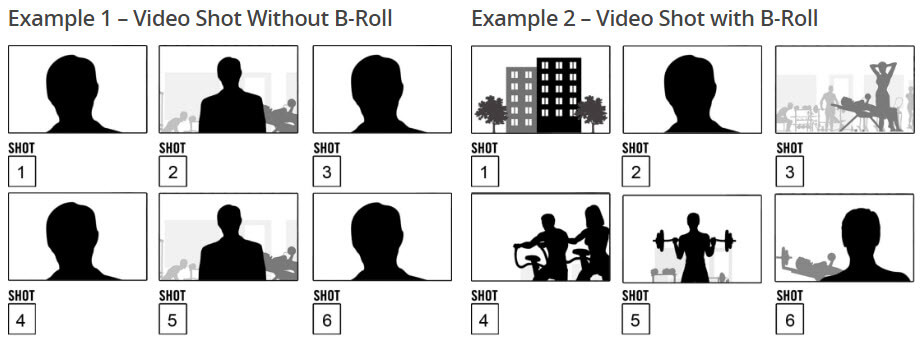
Include supplemental footage you’ll require in your storyboard as well, which is known as B-roll. You’ll also want to put together a script to read from, so you don’t forget what you want to say while recording.
After you complete recording, you can edit your video. The Camtasia Getting Started Series has some good information about editing basics to get you started.
For your first video, don’t get too hung up on being fancy with your editing—it can be a bit overwhelming and time-consuming at first, but also really fun as you get more comfortable.
Step 4: Measure.
Once you’ve gone through this entire process and have created your first video, ask yourself (and your team, if applicable) a few questions. What did and didn’t work, what went well, what you should stop doing, and what you should start doing.

Don’t forget to evaluate against the metrics you defined, to assess your results. Refine your goals and processes as you iterate and continue to create more video content.
When creating videos (as with all aspects of life), perfect never arrives, so no need to be too hard on yourself. Lots of little improvements over a period of time means you’ll be a pro before you know it!
Now what?
Starting small with video by utilizing existing content means you’ll painlessly build up knowledge, skills, and experience. Creating videos will continue to get easier!
If you are looking for a video editing program to start creating your own videos, Camtasia is a good option. You can even sign up for a free trial if you’re ready to get started right away.
Are you using video? We’d love to hear how you got started or how you plan to–let us know in the comments below.
Share