










Video transitions are editing effects that connect one clip, scene, or idea to the next. The best ways to use video transitions are to keep tutorials clear, add energy to demos, and reinforce brand consistency. They also make storytelling edits feel natural and add variety, but only when it helps the viewer follow along.
Camtasia’s video transitions prioritize smooth pacing, not flash. With our drag-and-drop tools, a broad transition library, and intuitive timeline controls, even beginners can master everything from simple fades to complex, branded transitions and deliver polished, consistent results.
Key takeaways
- Use video transitions to guide attention, mark a change in topic, or make two clips feel connected.
- Start with simple cuts, fades, and dissolves for most tutorials and training videos.
- Limit transition styles to two or three so viewers can focus on the message.
- Match transition timing to your narration, background music, and the pace of the scene.
- Add standard or closed captions so accessibility is part of the editing process from the start.
- In Camtasia Editor, you can drag transitions onto the timeline, preview them, and adjust timing before you export.
How do video transitions improve flow and viewer engagement?
Video transitions improve pacing, guide viewer attention, and support comprehension by showing when one idea ends and the next begins. We found that 98% of professionals who use video say it improved the effectiveness of their messaging. Within videos, thoughtful transitions control the rhythm of your storytelling, which can increase engagement, comprehension, and retention.
Common transition types include:
- Cuts and jump cuts for quick changes in pace
- Fades, cross-fades, and dissolves for softer shifts between ideas
- Wipes and slides for clear changes between steps or sections
- Zooms and whip pans for fast, energetic movement
- Match cuts, J-cuts, and L-cuts for subtle scene changes that feel natural
Transitions can be especially useful for product demos or training videos, which might otherwise feel overwhelming or hard to follow.
Camtasia Editor offers dozens of transition options, plus a visual preview feature, so you can experiment in real time. For example, you might try both a whip pan and jump cut transition in a fast-paced scene to see which better fits the video’s context.
The future of work is async
Survey shows more than half of workers would rather watch a video update than attend a meeting.
Get the Full Report
What are five ways to use different types of video transitions?
The right transition depends on the content, audience, and purpose of the video. Whether you want a subtle shift or a direct tonal change, Camtasia’s transition library provides the video effects and customization options to keep content moving in the right direction. Here, we’ll look at a few examples that can help you get started.
1. How should tutorials and training videos use clean transitions?
Tutorials and training videos usually work best with simple effects, like cuts, fades, or dissolves.
These options add clarity and continuity to learning content, breaking down complicated concepts and giving viewers a chance to get ready for the next phase.
For example:
- You might fade out at the end of each instruction if you’re illustrating a step-by-step process.
With Camtasia Editor, you can complement transitions with other special effects, like the Kinetic Cursor or a simple call-out. These cinematic additions help you highlight the most important information on the screen, giving you a chance to reinforce your messaging before the final fade.
2. How can dynamic transitions improve product demos and walkthroughs?
Short slides, wipes, and zooms can add energy to product demos and mark changes in app navigation. These effects can also divide content and simulate app navigation for a more interactive walkthrough.
For example:
- A slide transition can quickly change scenes at the beginning of a demo video to generate excitement before getting into the meat of the product.
- A wipe feature during a walkthrough can visually mark off each step.
You can also add a music track under your narration to complement dynamic transitions. Camtasia Editor makes it easy to separate sound from visuals by letting you break up the tracks for precise video editing.
3. How can branded transitions support marketing and communication videos?
Branded transitions help marketing and communication videos feel visually consistent from one asset to the next. Customize transitions with your brand’s colors, graphics, or logo to add energy and ensure consistency across your marketing assets. For example, you might start all your dissolves with your company’s brand color palette to reinforce brand identity.
Camtasia’s themes and templates make it simple to apply your brand style to marketing videos without limiting your creativity or design flexibility. For instance, if you’re using a new logo for each new product in a range, you can update the logo in your transitions for each product video.
4. How do invisible transitions support professional storytelling?
Match cuts, J-cuts, and L-cuts make scene changes feel natural because the edit does not call attention to itself. Whether you want to let audio lead into scenes or scenes lead into audio, these transitions can keep viewers invested in the next shot.
For example, you might:
- Use an L-cut between your CEO discussing how a new product was conceived and a video detailing the design process.
- Use a match cut to transition between two visually similar items, like from one corporate location to another.
Camtasia Editor’s multi-track timeline makes it easy to handle audio fades and subtle edits, giving you control over when one track ends and the next begins.
5. How can creative transitions add variety and engagement?
Creative transitions should support the video’s mood and pace instead of competing with the message. Motion-based or geometric effects can add that stylistic layer without pulling focus from the message.
Camtasia’s filters can also help you add more variety to improve engagement. For example, you might use a black-and-white filter for clips that add historical context to a new compliance policy and then use a zoom transition to cut back to the main points.
What are the best practices for professional-looking transitions?
Good transitions should clarify the message, not decorate the edit. Good transitions should clarify the message, not decorate the edit. Keep these best practices in mind:
- Use transitions to improve viewers’ comprehension or emotional connection rather than to add flash or motion.
- Limit transition styles to two or three to avoid confusing or distracting viewers.
- Align transitions with background music or voiceover to improve rhythm, drive home your messaging, or smooth shaky or disjointed scenes.
- Experiment with different transitions before deciding which ones add value to the content.
- Preview your final edits on several devices. Use Camtasia’s export options for different platforms, like YouTube or an LMS, to ensure smooth playback.
- Add standard or closed captions to make content more accessible for the hearing-impaired.
Why use Camtasia for seamless video transitions?
Camtasia Editor helps you apply and adjust transitions with drag-and-drop controls, timeline editing, and built-in previews. Transitions may make your content more polished, but they can also eat up a lot of your time and mental energy. Educators and professionals can use our software to create polished videos — no advanced editing skills (or headaches) required.
To streamline the video editor’s job, Camtasia’s transition library pairs with drag-and-drop animation. This way, you have more freedom to experiment without having to research or master the individual techniques.
Camtasia is built for approachable, professional-grade video editing. And with Camtasia Online, you can import or record new media, add new clips to existing video content, and export to Screencast.
Screencast makes it easy for teams to collaborate. As you draft your videos, you can share and secure whole videos or select scenes with passphrase protection for input and feedback.
For more advanced features, Camtasia offers AI-assist for automatic zooms or pans and integrated templates for faster video enhancements. No matter which product you choose, you’ll find seamless ways to polish your content before release.
How do you add and customize transitions in Camtasia?
You can add and customize transitions in Camtasia in four steps: prepare the timeline, choose a transition, adjust its settings, and combine it with effects when it helps the viewer.
Go from screen recording to polished video
A screen recording is just the start. Camtasia’s editor helps you add the callouts, animations, and edits you need to create a truly professional video.
Free Download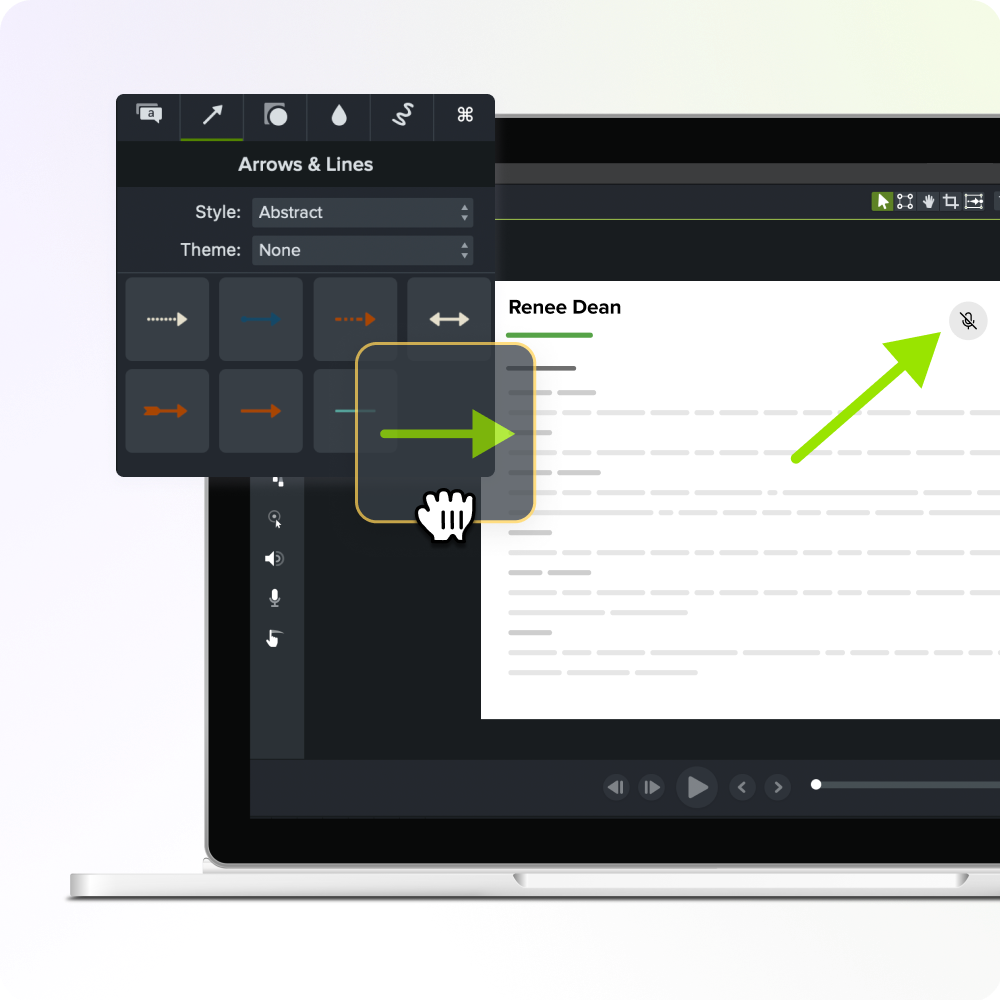
Step 1: Import clips and prepare your timeline
Import the footage, place your clips in order, and review the full sequence to identify natural transition points.
Tip: Limiting the number of transitions can reduce viewer stress and make each one more impactful.
Step 2: Drag and drop transitions from the library
Open the Transitions tab, choose a transition from the library, and drag it between clips. If you’re already working in a media file, the Transitions tab is just a click away.
Tip: Use Camtasia’s instant preview to evaluate whether the transition complements the content or distracts from the story.
Step 3: Adjust duration, direction, and easing
Adjust the transition’s duration, timing, direction, and easing to match the pace of the content. So, you might use a left-to-right slide transition during the first half of an instructional video and then reverse direction during the second half of the video.
If you want to adjust the easing to make the transition look more natural, drag the end of the transition in or out, or select from different preset styles. Applying the transition is as simple as making your final selection before moving on to the next clip.
Tip: We recommend shorter transitions for fast-paced demos and longer fades for introductions or emotional content.
Step 4: Combine transitions with effects for professional polish
Combine transitions with effects only when the combination helps clarify the video. For instance, you might pair text animations with a zoom-n-pan transition to highlight a key point without cluttering the screen.
Tip: If you combine transitions, make sure they add value to your content. There should be a clear intention for the viewer, like reinforcing your brand identity, showing the passage of time, or switching context.
Once you’ve settled on all your transitions, preview the whole video to gauge the pacing. This can give you a better idea of whether your transitions are effective or if they’re overwhelming or unsuited to the material. You can also export your work to Screencast to get a second opinion.
Start creating professional transitions today
The right transitions guide viewers and strengthen message clarity. These shifts can be just as important in a fun marketing video as they are in a serious compliance tutorial. We recommend starting small with built-in templates and giving yourself a little time and space to experiment before you start building custom designs.
With Camtasia, you can improve trust, comprehension, and engagement with our full video suite, which includes a transition library, audio cleaning, special effects, and screen recording. Whatever the video, our editing tools make it easy to capture people’s attention and keep their interest from beginning to end.
Want to seamlessly switch from one video clip to the next?
Explore Camtasia tools for video editing.
Crystal-clear screen recording
Why settle for blurry screen content? Camtasia Editor’s screen recorder captures everything at up to 4K!
Free Download
Frequently asked questions
What are the four common categories of video transitions?
Four common categories of video transitions are cuts, fades or dissolves, wipes or slides, and invisible edits such as match cuts, J-cuts, and L-cuts. Cuts move directly from one clip to the next, while fades and dissolves soften the change between scenes or ideas. Wipes and slides create a more visible shift, and invisible edits help the transition feel natural by using audio or visual continuity.
What is the best transition for a video?
The best transition is the one that helps the viewer follow the message without noticing the edit too much. For most tutorials and training videos, simple cuts, fades, and dissolves are safe starting points because they keep attention on the instruction. Use more dynamic transitions, like slides, wipes, or zooms, when the video needs extra energy or a clear shift in context.
How many transition styles should you use in one video?
In most videos, use two or three transition styles at most. This gives the video a consistent rhythm and helps viewers focus on the content instead of the editing. If every scene uses a different effect, the transitions can start to feel distracting, especially in training or workplace communication videos.
When should you avoid using video transitions?
Avoid or reduce transitions when they distract from the instruction, slow down the pace, or make the viewer work harder to understand the next step. A plain cut is often better than a flashy effect when the content needs to feel direct and easy to follow. Before you export, preview the full video and remove any transition that does not improve comprehension, pacing, or context.
Share