
Ever need to show someone exactly what’s happening on your computer screen? Whether you’re creating a tutorial or troubleshooting an issue, knowing how to screen record is an essential skill these days.
If you’re new to screen recording, figuring out how to start can feel overwhelming. Don’t worry, you’re not alone! In this guide, we’ll walk you through the process of recording your screen and share how to get the best results.
What is screen recording?
Screen recording is the process of capturing everything that happens on your computer, phone, or tablet screen in real-time. It is especially useful in professional and educational settings.
Capturing video of your screen can make it easy to communicate information visually without the need for long explanations. You might use screen recording to:
- Create instructional videos
- Demonstrate a process
- Highlight the functionality of software
- Capture a software bug or error
- Provide feedback on a project
- Deliver a presentation or share an idea
Record your screen with Snagit
Snagit makes it easy to share quick updates and how-to’s by capturing exactly what’s happening on your screen.
Get Snagit
How to record your screen record on different devices
In this section, we’ll walk you through the steps for recording on different devices, so you can find the method that works best for your needs—no extra downloads or fancy tools required. Let’s dive in!
Windows 10 or 11
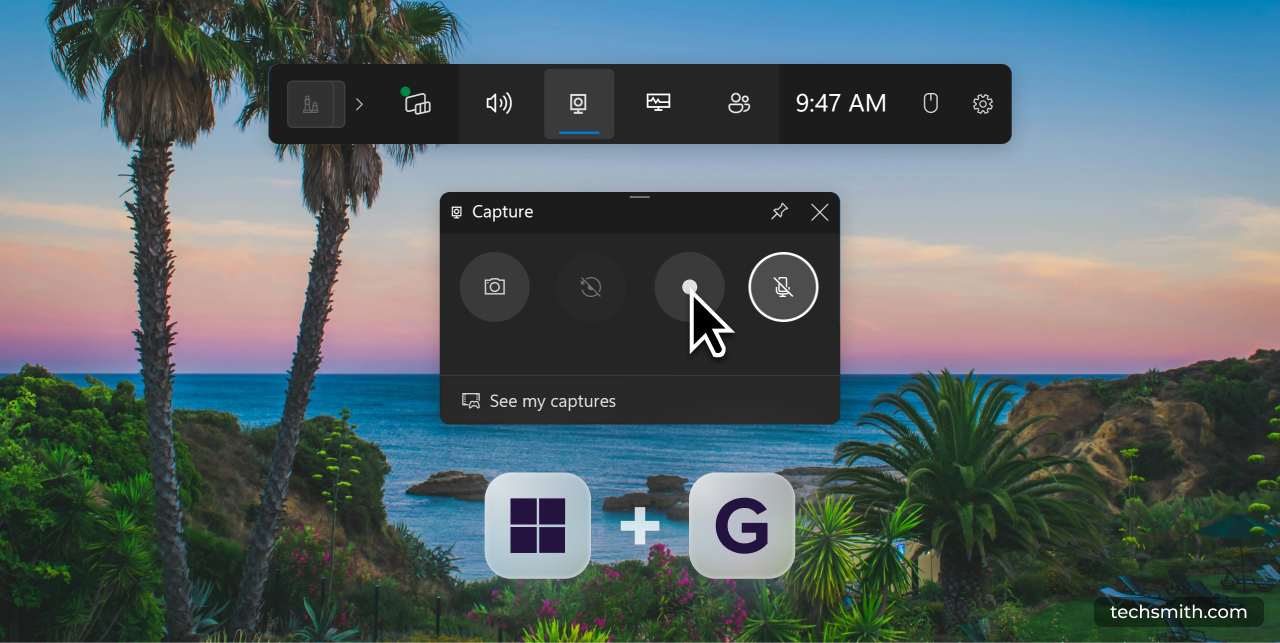
To record your screen on Windows 10 or 11, you can use the built-in Xbox Game Bar. Just hit Win + G to bring up the Game Bar, and then click the record button to start capturing your screen.
When finished, press Window +G again to stop the recording. Your video will be saved in the Videos > Captures folder.
If you’re on Windows 11, you can also use the Snipping Tool to record your screen.
Mac
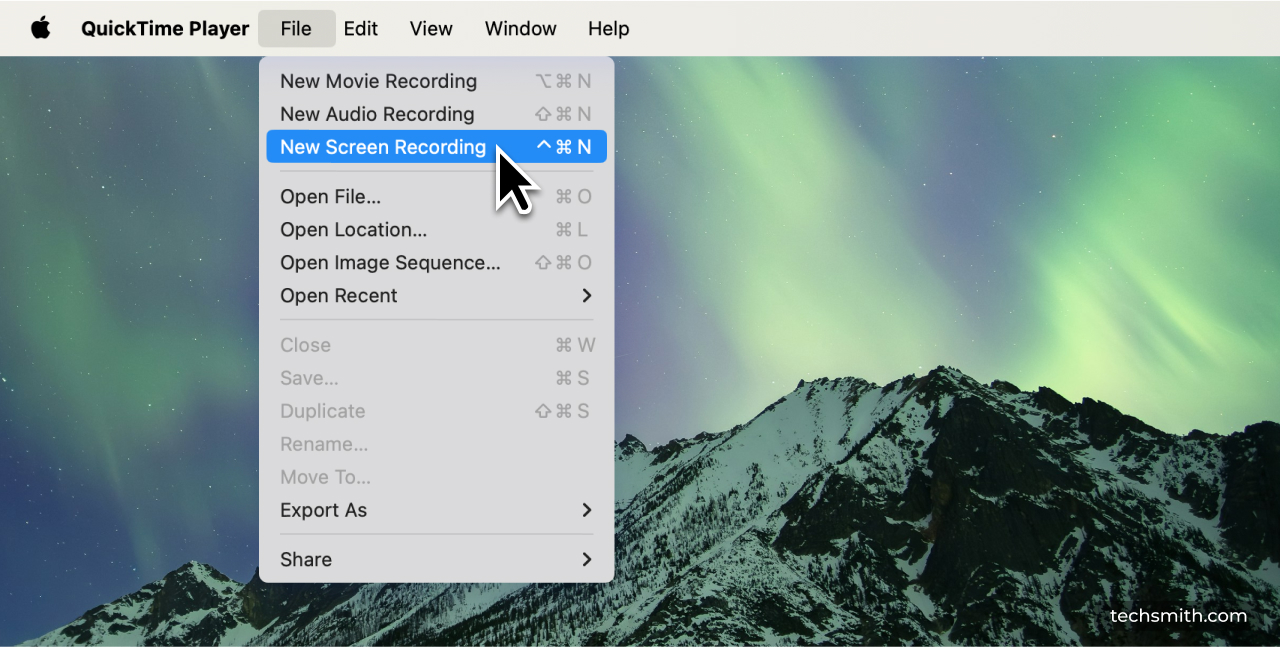
To record your screen on Mac, you can use the built-in QuickTime Player. Open QuickTime Player, go to “File” > “New Screen Recording,” and click the record button to start. When you’re done, click the Stop button in the menu bar, and you’ll be prompted to save your recording.
iPhone and iPad
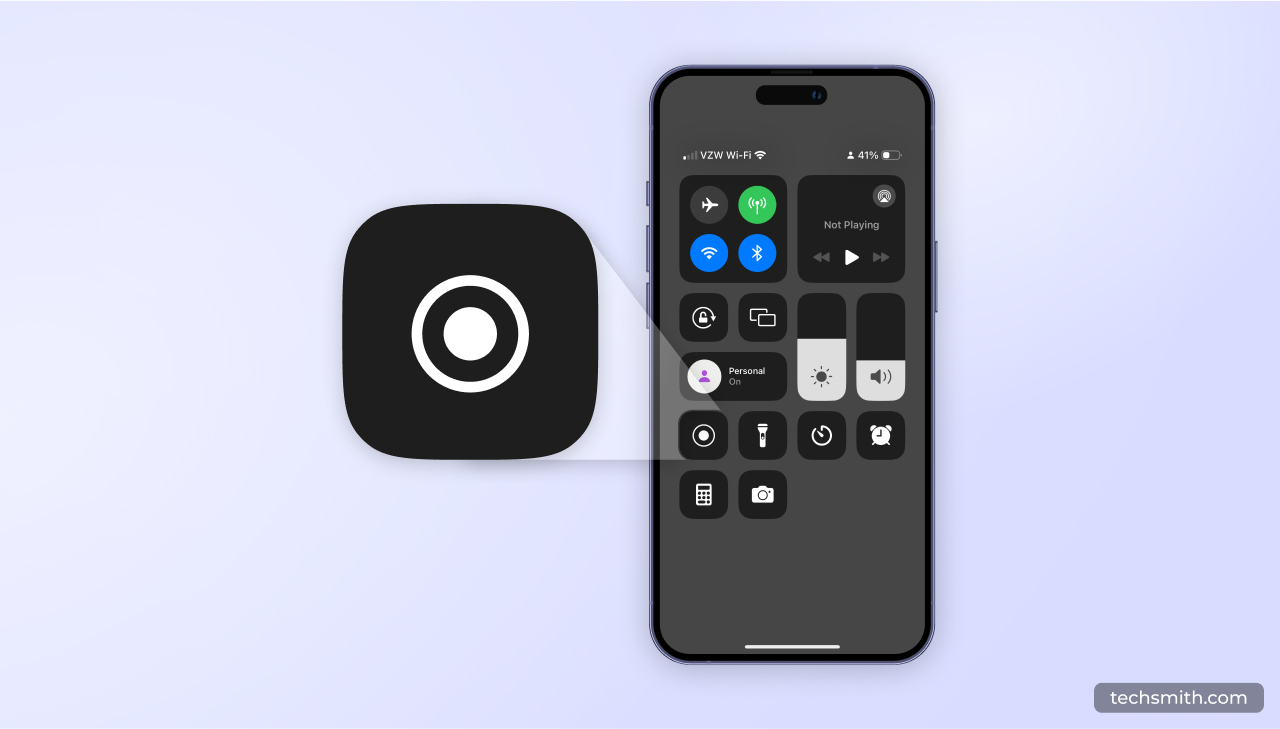
To record your screen on an iPhone or iPad, swipe down from the upper-right corner to access the Control Center. Then, tap the Screen Recording button, it is a circle icon. Your recording will start after a three-second countdown.
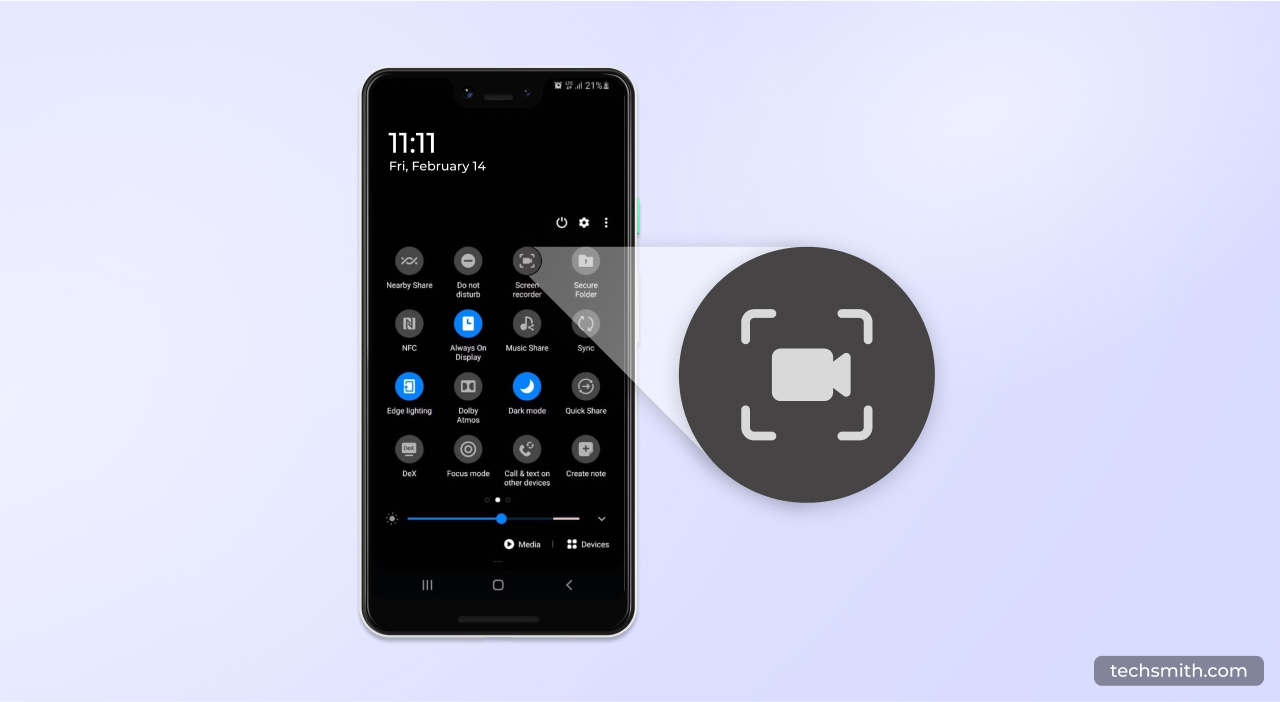
Android
To record your screen on an Android device, swipe down from the top of your screen to open the Quick Settings menu. Then, tap the Screen Recorder icon, choose whether you want to record with sound, and tap Start.
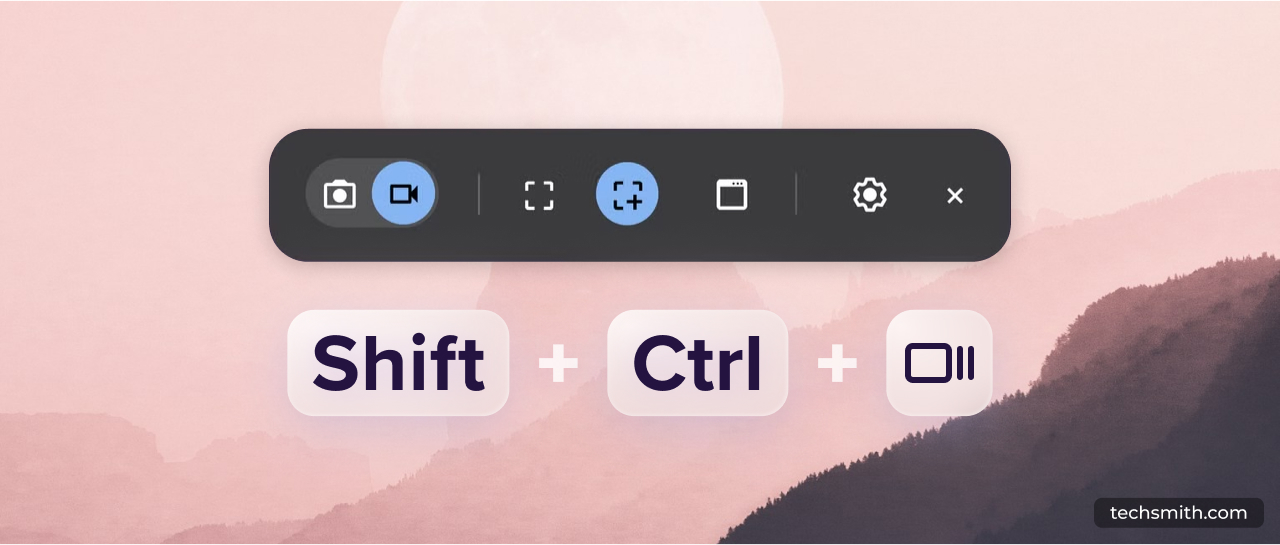
Chromebook
To screen record on a Chromebook, press Shift + Ctrl + Show windows to open the screen capture tool. Switch to the recorder option, and select whether you want to record your entire screen or a specific area, and click the start button.
Once you’re done, stop the recording, and the video will be saved in your Downloads folder.
Why isn’t my screen recording working?
Screen recording is generally straightforward, but there are a few common issues that can trip you up. Here are some of the most common issues and how to troubleshoot them:
No audio in your recording
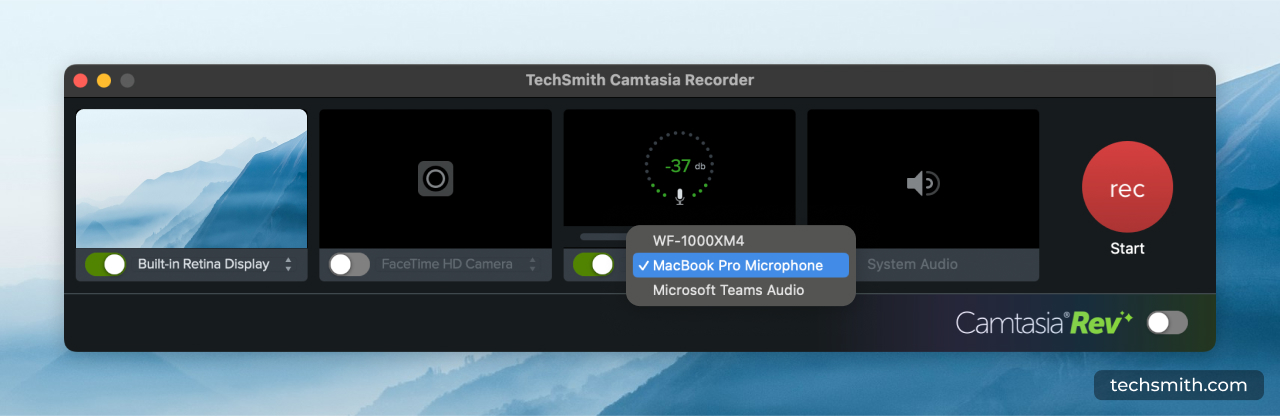
One of the most frustrating issues is realizing when you’re done recording that there’s no audio. This can happen if your microphone isn’t properly selected or the recording settings aren’t configured correctly.
How to fix it: Check your screen recording tool’s audio settings and ensure that the correct microphone is selected. If you’re trying to capture system audio, keep in mind that it’s not supported in most built-in apps.
Screen recording is laggy or freezes
Choppy screen recordings usually happen when your computer’s processing power is stretched too thin. This is common when you’re recording at a high resolution or frame rate on an older or less powerful machine.
How to fix it: Lower the resolution or frame rate of your recording and close any unnecessary applications to free up system resources. For example, Camtasia allows you to adjust these settings to optimize performance without sacrificing too much quality.
Screen recording won’t start
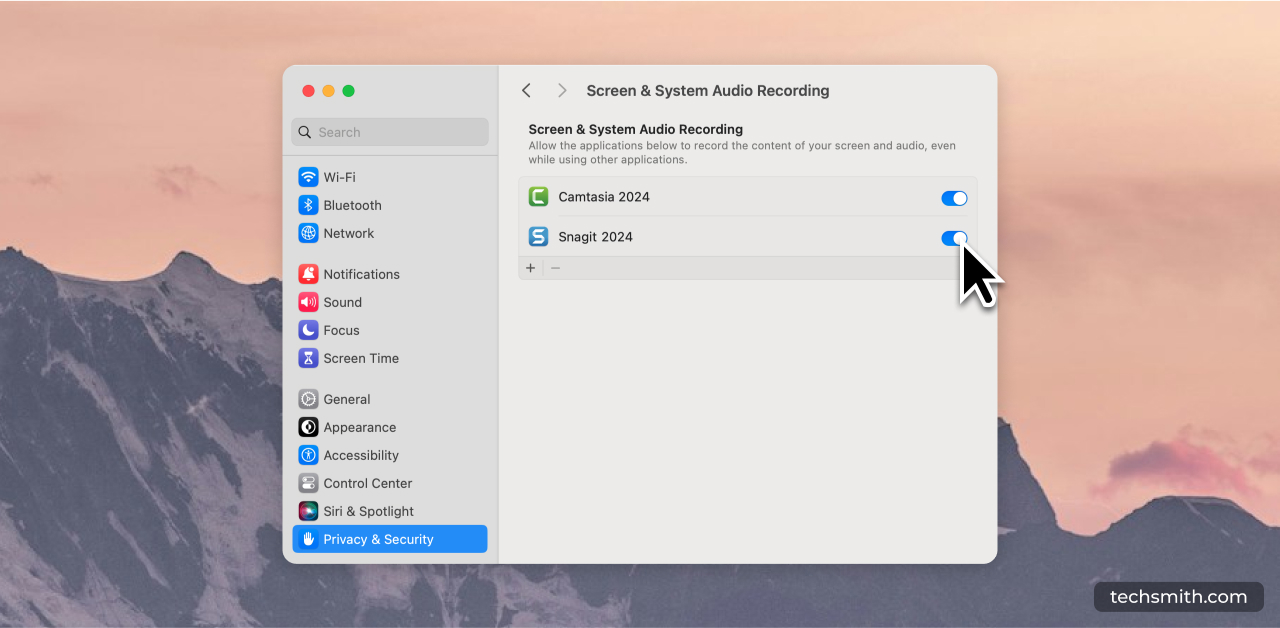
Sometimes, a screen recording tool won’t start or the record button is grayed out. This is usually due to software permissions, outdated software, or conflicts with other applications.
How to fix it: Make sure your screen recording software has the permission it needs to access your screen. On Mac, for example, go to System Preferences > Security & Privacy > Screen Recording to grant access to tools like QuickTime or Snagit. On Windows, make sure there aren’t any background processes interfering with the tool and check to see if your software needs updating.
Screen recording comes out as a black screen
Some content, especially through streaming services like Netflix, Disney+, or Hulu, cannot be recorded due to Digital Rights Management (DRM) protections. It may appear like your screen recording is working, but the end result will be a blank or black screen.
How to fix it: Unfortunately, there’s not a legitimate way to bypass DRM protections since the intention is to protect copyrighted material from unauthorized redistribution.
If you’re having this issue with non-streaming content, try disabling hardware acceleration in your browser or adjusting the display settings, as that can sometimes trigger this issue as well.
Screen video is blurry or low-quality
If your screen recording appears blurry or pixelated, it’s often due to recording at a lower resolution or improper export settings.
How to fix it: Make sure you’re recording at a resolution that matches the screen you’re capturing. Most built-in tools capture at 1080p, but if you’re using a 4k monitor, you’ll want to use a tool like Camtasia that proves more control over resolution, export quality, and frame rate.
5 Simple ways to get better screen recordings
With a few simple adjustments and best practices, you can capture high-quality screen recordings every time.
Preparation is key
Especially for instructional videos, taking a moment before you hit record to plan will set your video up for success. Identify the key points you want to cover, and create a shot list if necessary to stay on track and organized. It can be as simple as a bulleted list, or you could write a script to help keep you on track.
Let Audiate write your script!
No more blank pages! Instantly generate amazing, customizable scripts in any length, tone, and style!
Get Audiate
Optimize your recording settings
Setting up your recording correctly can make all the difference in video quality. Making sure settings like the area you’re recording, frame rate, and audio inputs before you hit record will help your video look more professional. Here’s how to optimize these settings.
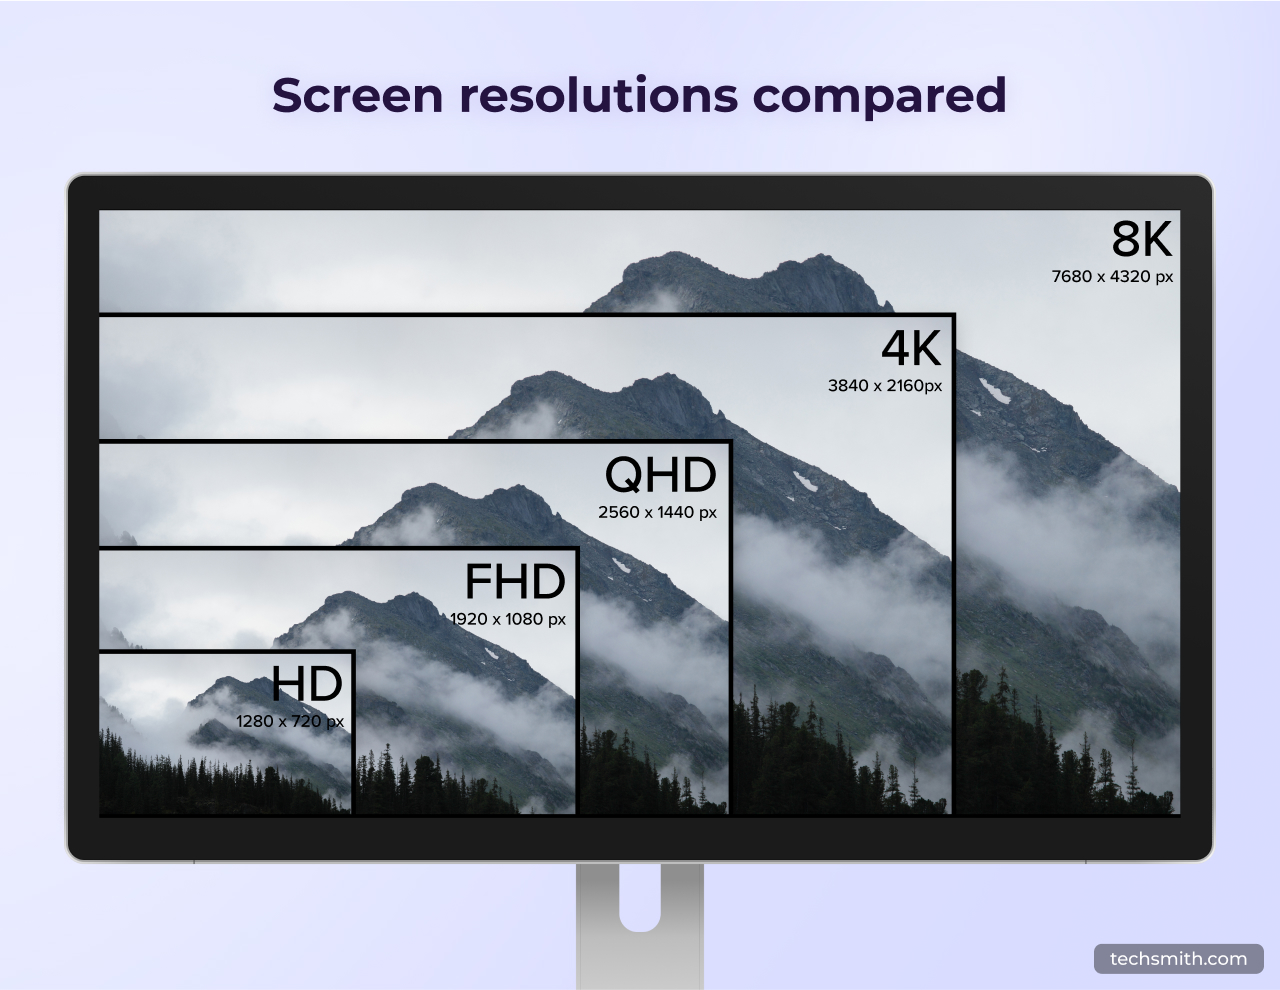
Resolution
Record at a resolution that matches your audience’s viewing preference. For most screen recordings, 1080p will help balance quality with file size. However, more viewers are watching content on 4k-capable devices.
If you’re recording on a large monitor or showing intricate detail, it’s worth using a tool like Camtasia that can record your screen in 4k.
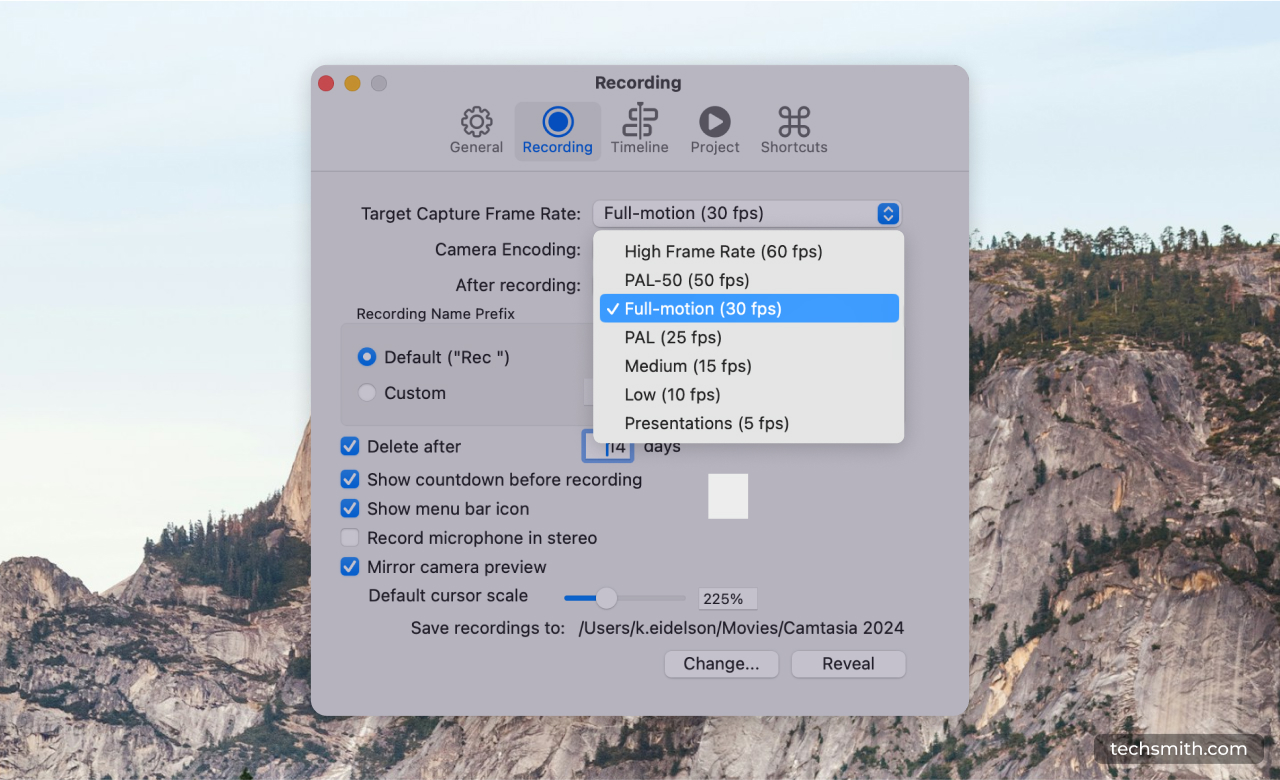
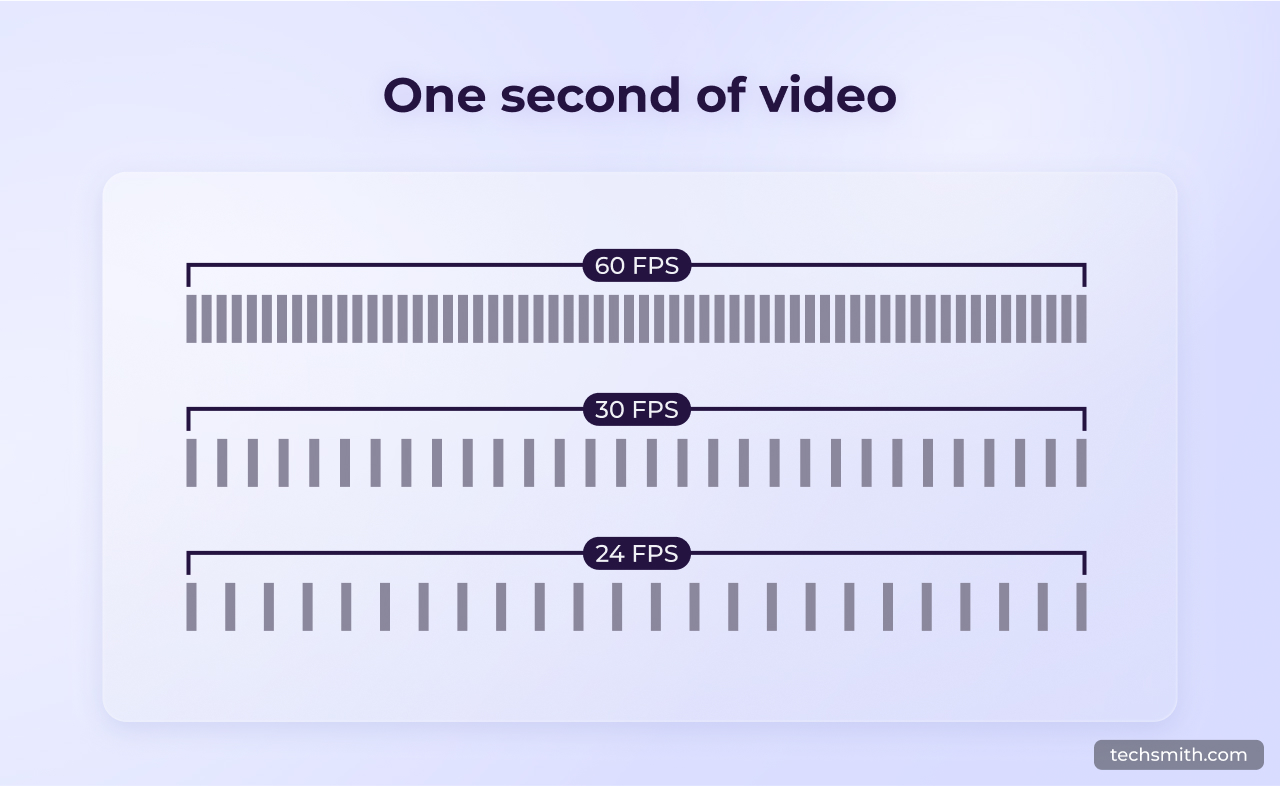
Frame rate
Frame rate, measured in frames per second (FPS), impacts the smoothness of your screen recording. For tutorials, software demonstrations, or presentations, 24-30 FPS is generally enough. If you’re recording fast-moving screen activity like video games, recording at 60 FPS or higher will help prevent choppy playback.
If you plan on adding slow-motion effects during the editing process, recording at 60 FPS or higher will prevent the slow-motion playback from appearing jittery.
Audio quality
Poor audio in your video can distract your videos and make it harder for them to engage with your content. Here’s a few simple ways to optimize your audio recording:
- Use an external microphone: Most computers have a built-in microphone, but they tend to deliver low-quality sound. Investing in an external microphone that is best for video can make a dramatic impact.
- Control background noise: Recording audio in a quiet environment will limit distracting background noise, but screen recorders like Snagit and Camtasia have built-in noise reduction features that are rare in built-in tools.
- Check audio levels: Inconsistent audio levels can distract or make your video harder to follow. Camtasia has extensive audio editing features like audio normalization, so you don’t have to export your audio to another tool to even out the volume.
Crystal-clear screen recording
Why settle for blurry screen content? Camtasia’s screen recorder captures everything at up to 4K!
Free Download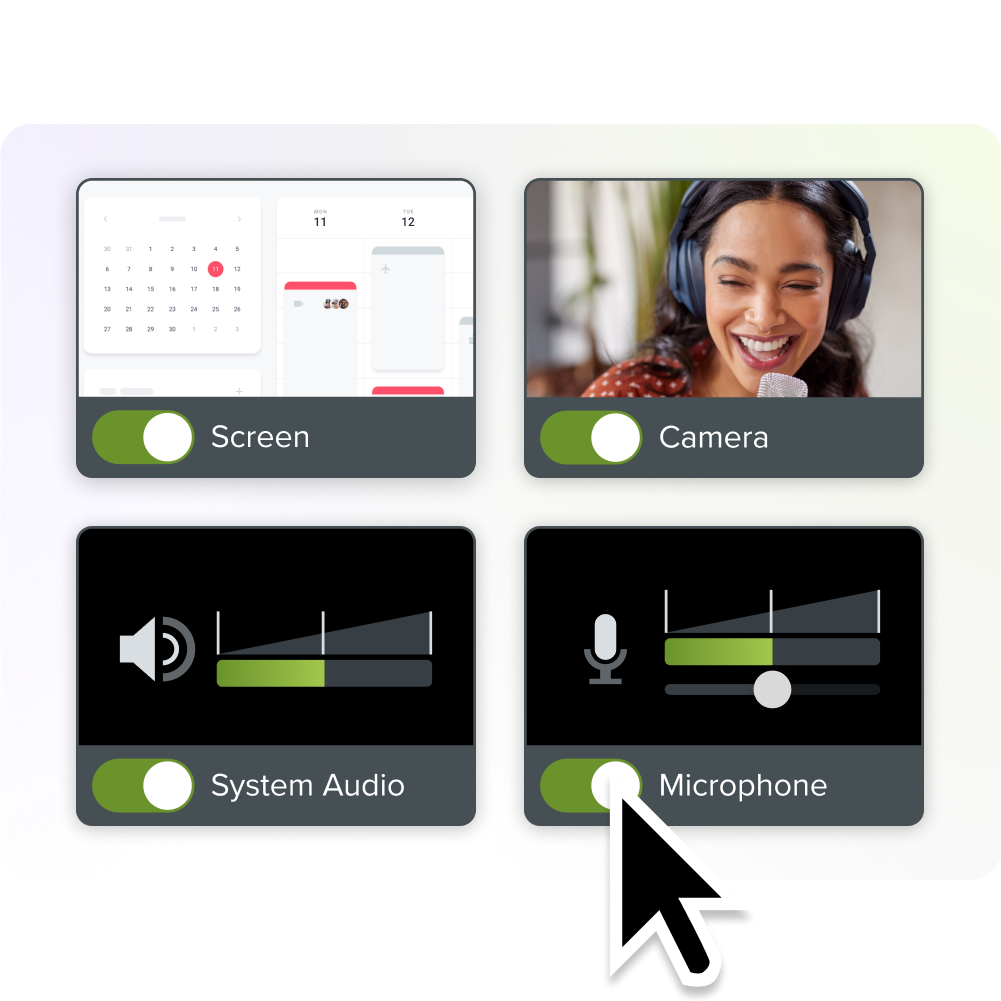
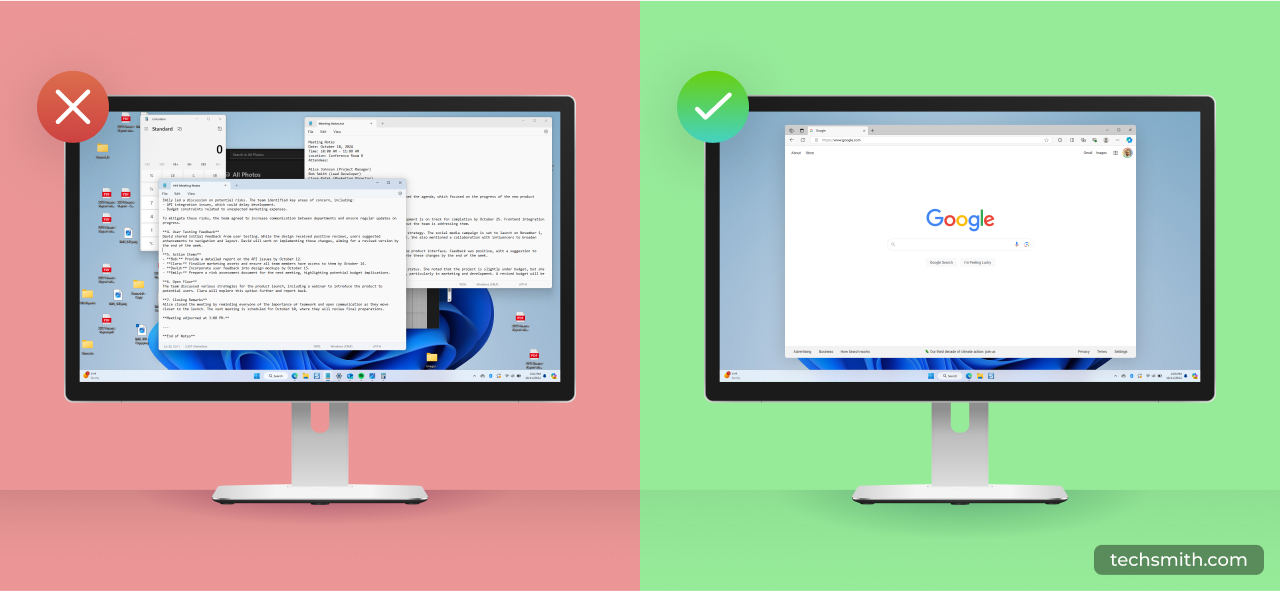
Limit screen clutter
Are people following the steps or are they checking out all those files hanging out on your desktop? Here’s how to tidy up your screen and why it makes a difference:
- Close unnecessary apps and windows: Background apps that aren’t relevant to your video are not only distracting, but they could slow down your computer while you’re recording or result in unexpected notifications and pop-ups.
- Clean up your desktop: Move any unnecessary files and icons into folders or temporarily hide them by right-clicking on the desktop and selecting “View” > “Show desktop icons” (Windows) or “Use Stacks” (macOS). This creates a cleaner, more focused viewing area.
- Turn off notifications: On Windows, you can enable “Focus Assist” mode, and on macOS, use “Do Not Disturb” to pause alerts while recording. This helps maintain a professional look and keeps viewers focused on the content and not on your latest Slack message.
- Limit browser tabs: If you’re recording browser-based content, keep only the necessary tabs open to limit distractions and prevent lagging.
- Only record the area you need: Using a tool like Camtasia to record your screen allows you to select the exact area of your screen you want to record, or you can crop the area within the editor. Your screen recording and camera video are recorded on separate tracks, which provides more flexibility and control over the final product.
Edit for clarity
Even the most carefully planned and executed screen recording will benefit from some thoughtful editing. Whether it’s removing awkward pauses or emphasizing key points with visual effects, editing can help make your video look more professional. Here are some small edits that will go a long way:
- Trim pauses and mistakes: No matter how well you prepare, there will always be parts of your recording that are better left on the cutting room floor. Long pauses, repeated information, or unnecessary steps can confuse your audience or make them lose interest.
- Add annotations: Annotations and callouts are critical for guiding your audience’s attention to the most important parts of your recording. Using a screen recorder like Camtasia makes it easy to add text callouts, highlights, and arrows to your screen recording to emphasize key points, clarify the steps of a process, or add additional context.
- Zoom in: If you’re working with a dense user interface with lots of detail, zooming in on important elements can make a big difference in how well your audience can follow steps. Camtasia’s Smart Focus feature automatically adds zooms and pans based on your cursor movements, saving you editing time.
- Add cursor effects: The cursor is the unsung hero of screen recordings. It plays a vital role in helping viewers know where to look. Screen recorders like Camtasia not only record your screen but also metadata. This enables you to change the size, shape, or path of your mouse cursor and add visual effects like click animations.
- Add transitions: For longer videos, use transitions to clearly segment different sections. Nothing too flashy though. We recommend simple transitions to maintain the focus on your content.
Editing transforms a raw screen recording into professional and highly effective content. With easy-to-use tools like Camtasia, you don’t have to be a professional video editor to get impressive results.
The easiest way to edit videos
Stop wasting time and discover how Camtasia makes creating incredible videos easier than ever.
Free Download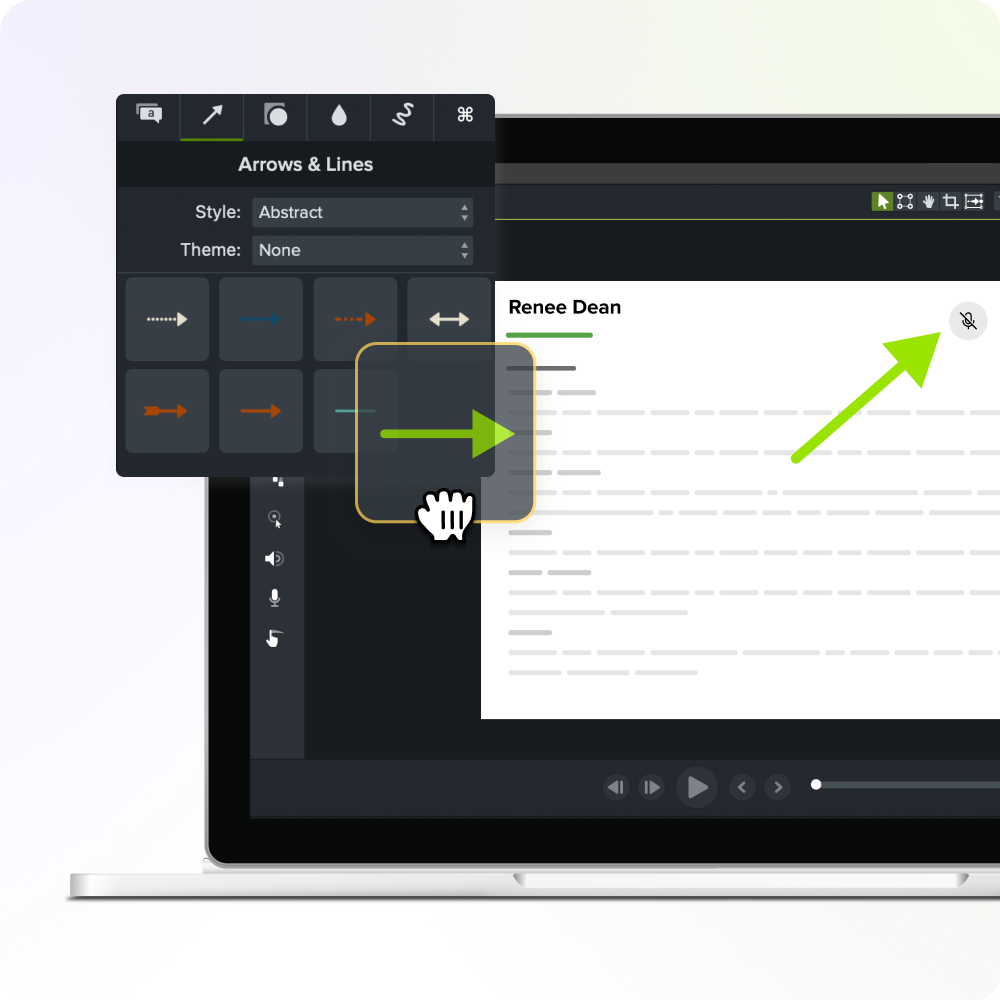
Practice and refine
Recording videos is a skill, and just like any skill, it gets better with practice. Over time, you’ll find that certain techniques work better than others, or shortcuts can speed up your process without sacrificing quality.
Share your recordings with colleagues or your audience and gather feedback. Understanding how others perceive your content can help you refine future recordings.
Both Camtasia and Snagit allow you to easily share your recordings for feedback, whether it’s through Screencast for real-time collaboration or directly exporting your video to cloud platforms like Google Drive. Use feedback as an opportunity to refine and grow.
With the right tools and resources, practice and refinement become much smoother. Snagit and Camtasia not only provide industry-leading software for screen recording and editing, but we also offer a full suite of tutorials, certifications, webinars, and world-class support to help you continue growing your skills.
Whether you’re refining your first video or pushing your creative boundaries with advanced techniques, Snagit and Camtasia are tools designed to grow with you every step of the way.
So, keep practicing, take advantage of the rich resources available, and watch your screen recording skills—and your videos—get better with each project.
Looking for professional screen recording software?
From simple screen captures to polished video editing, TechSmith has everything you need to create professional-quality content.
Learn More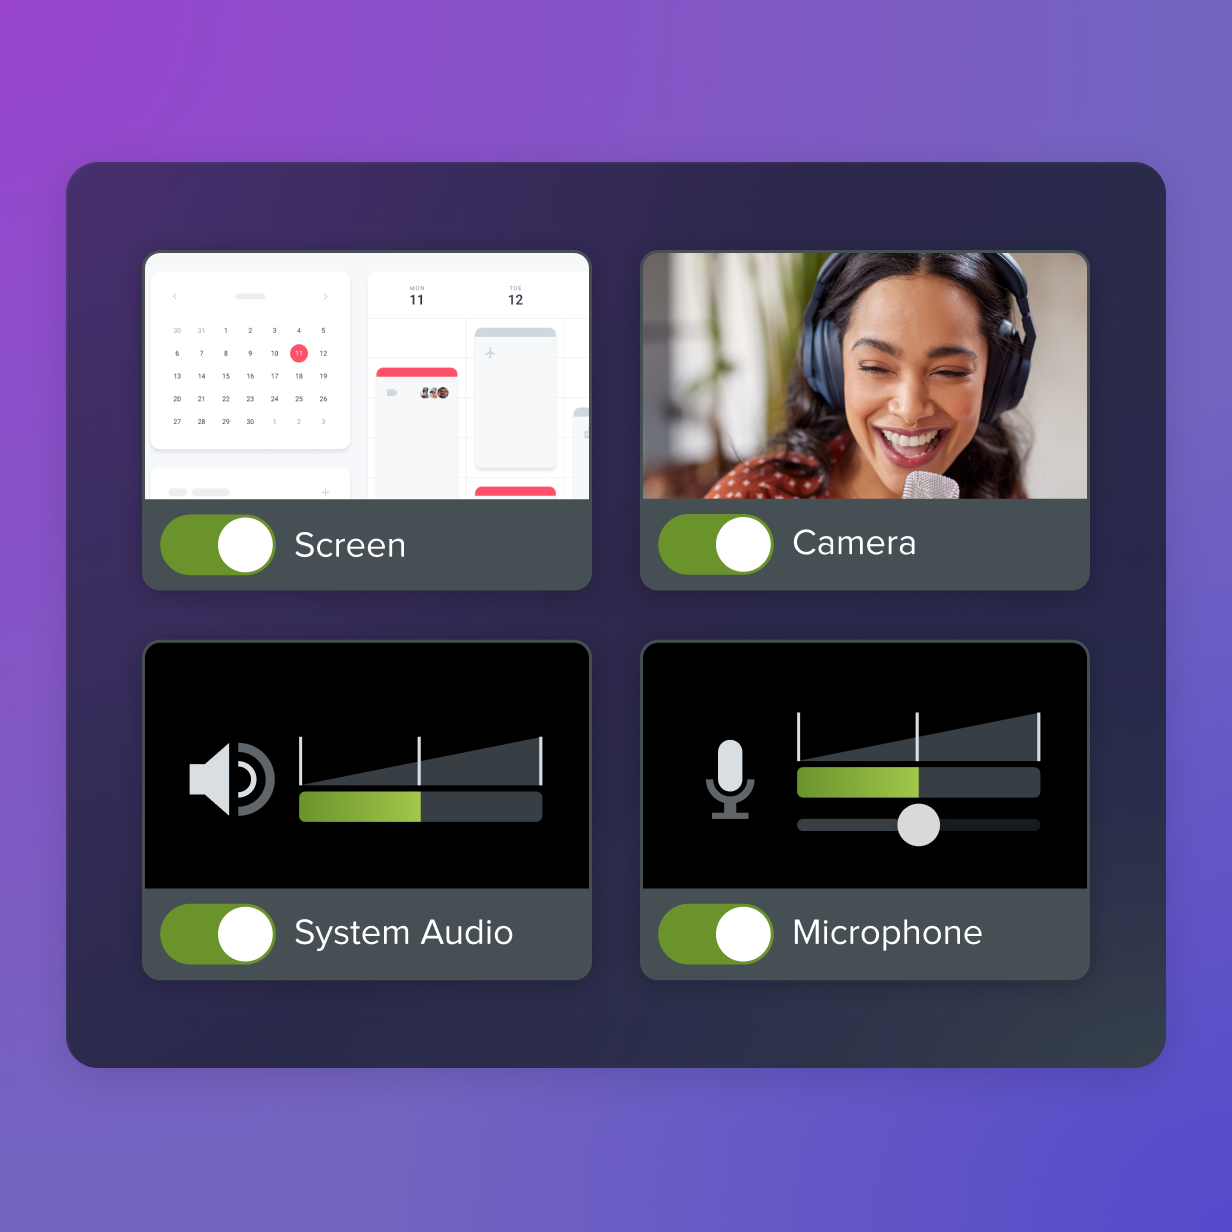
Frequently asked questions
Yes! Most modern devices, including smartphones, tablets, and computers, have built-in screen recording features. For instance, Windows has the Xbox Game Bar, macOS offers a built-in Screen Recorder, and iOS and Android have native screen recording options.
Ensure you’ve selected the correct audio source before recording to include audio in your screen recordings. You can choose between internal audio, microphone input, or both on most devices.
Screen recording is generally legal for personal use, but be mindful of privacy laws. Avoid recording private conversations or copyrighted material without permission.
Share