Microsoft PowerPoint (PPT) is generally considered to be little more than a tool for creating and giving live presentations. It can, however, be used to create great content, such as educational and instructional videos — all you have to do is add a voice over.
Knowing how to do a voice over presentation on PowerPoint is a brilliant way to transform a bunch of slides into a dynamic piece of professional content that can reach audiences far beyond the conference room. While PowerPoint comes with a built-in presentation recorder, it’s not without its limitations. But, there is a better way.
Tools like TechSmith’s Camtasia, ideal for screen recording and video editing, and TechSmith’s Audiate, designed for audio editing, make voiceover work a breeze. In this post, we’ll show you how to harness both of these tools for maximum impact.
The Easiest and Fastest Way to Record and Edit Voice Over for PowerPoint!
Audiate makes recording and editing your voice as simple as editing text in a document.
Try Audiate for freeHow to record voice over for PowerPoint
To add your voice to PowerPoint, you’ll need to start by recording it.
The first thing you’ll notice when you decide to record a voice over for your PowerPoint presentation is that PowerPoint has a built-in recorder.
If you want to reocred the entire slide show, just click the record presentation button and you’re good to go.
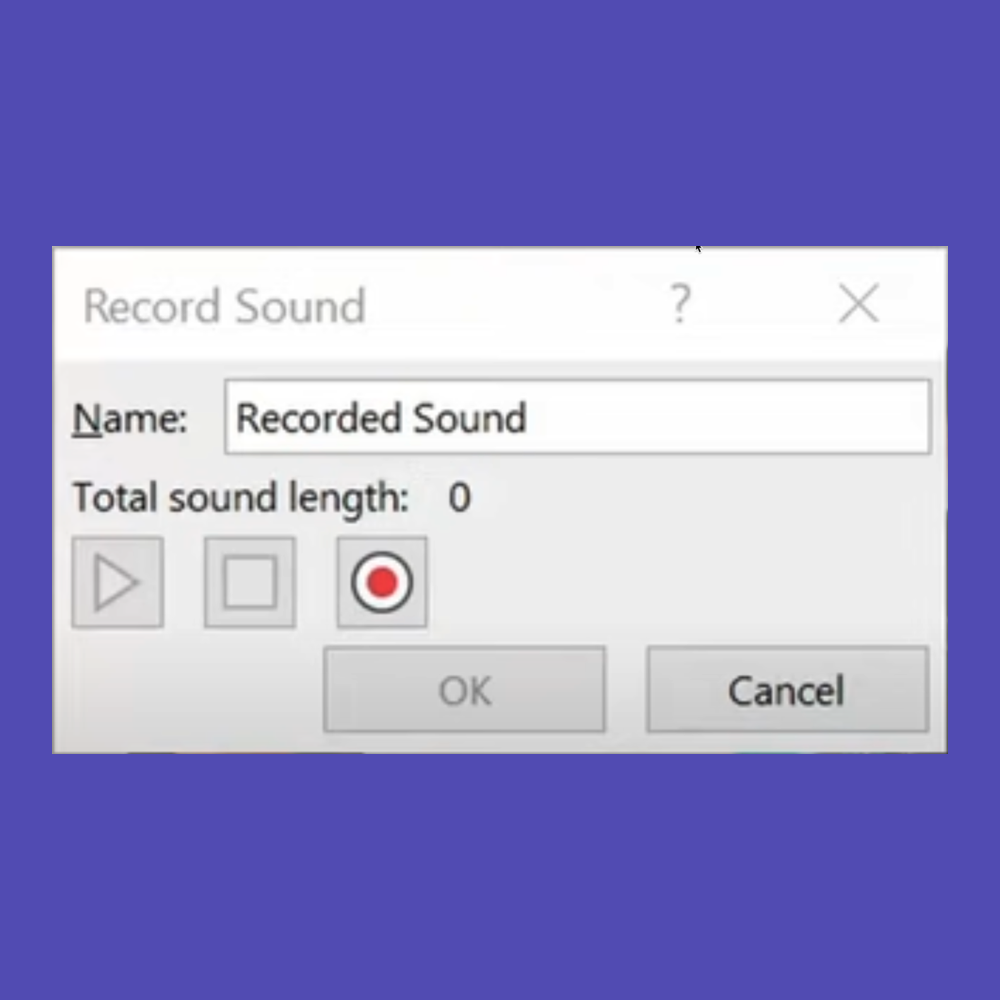
If you want to add audio directly into your presentation, click Audio > Record Sound from the Audio menu inside the Recording tab. This will let you record a simple voice over and add it directly to your presentation.

This will get the job done, but it’s not the best way to do it.
And you know what they say, “If a job’s worth doing, it’s worth doing right”.
If, for example, you want to make small edits to your recording at a later stage, you’re going to really regret using PowerPoint’s built-in recorder, as it doesn’t allow you to edit mistakes or verbal flubs.
With PowerPoint, you only get one take. That means you have to remember what you want to say, advance your slides, and do your best to avoid stumbling — just like if you were doing it in front of a live audience.
Quick-and-dirty recordings work in some cases, but for others — especially anything that will be consumed outside your company — you might want something a little more professional. Creating an on-demand recorded presentation will let you do exactly that.
Plus, when you record your slide show and audio file separately, you can ensure that your recordings are professional and more engaging.
How to record your voice with Audiate
Now, if you’re not going to use PowerPoint’s built-in recorder, what are you going to use? Well, this is where Audiate comes in…
Audiate is, without a doubt, one of the best tools you can use to record and edit a high-quality voice over. You’ll find out why in the following steps, but perhaps one of the coolest features of Audiate is that it allows you to edit audio recordings as if they were text files.
All you have to do is delete the words, sentences, and sounds you don’t want. We’ll tell you all about it shortly, but it’s really easy to use and integrates seamlessly with Camtasia. Best of all you can download a free trial for both Audiate and Camtasia, without giving up your credit card details — just click the links in this sentence!
Okay, so we told you that Audiate is easy to use. And when we say easy, we mean it’s almost ridiculously easy — and we’re going to prove it to you.
1. Start with a script
Whether you’ve created a new presentation or you’re recording one you’ve given a thousand times, writing a script will ensure you know what you want to say, exactly how and when you want to say it. It also helps you stay on topic and remember important points.
If you already have a slide deck, you can use that as the outline for your script. Then, just write up what you would say to your audience if you were presenting it live.
Of course, if you don’t want to write a full, word-for-word script, even a bulleted list of talking points is better than nothing at all. Trust us, a script will save you a ton of editing time later.
2. Record your audio
Gone are the days when audio recording and editing were reserved for professional audio producers, fraught with complex settings and overwhelming interfaces.
Audiate revolutionizes this process with its simplicity and user-friendliness. Its intuitive UI is designed for ease of use, allowing you to start recording your voice over in just a few seconds. To start, simply hit the Record button and start talking. Audiate will transcribe your audio in real-time, which means your words will appear on screen, as you speak.
Once you’re done recording, just click Stop, and Audiate will finish transcribing. This process not only makes recording a stress-free experience but also ensures that editing your voice over is super easy.
The Easiest and Fastest Way to Record and Edit Voice Over for PowerPoint!
Audiate makes recording and editing your voice as simple as editing text in a document.
Try Audiate for free3. Edit and export your recording
Everyone makes mistakes or hesitates when recording — even the guy who does all the voice overs for movie trailers. The beauty of Audiate lies in its ability to correct these mishaps. Because Audiate displays your spoken words as text, it eliminates the need to comb through audio waveforms.
Made a mistake? Just find the word or sentence, highlight it, and delete it. Audiate even offers the option to automatically remove common hesitations like “umms” and “uhhs” in just a few clicks.
Need to rearrange your content? Audiate lets you cut and paste words or entire sections as needed. Adding more audio is just as easy — simply hit Record, and your new audio will be added to the end of the existing file, ready to be cut and pasted wherever you need it to be.
If you plan to add captions to your video (which we recommend you do), be sure to go through the transcription and correct anything that Audiate may have misheard to ensure the text matches what you said.
That’s it, you have now successfully recorded and edited your voice over! All that’s left to do is click the Export button and save it as a .WAV file. You can also click File and Export Script, which will save your transcript as an .SRT file that Camtasia can use to add captions.
In the next section, we’ll show you how to add your edited audio to your video in Camtasia.
Pro tip: Edit your presentation recording in Camtasia
Camtasia is a powerful, but easy-to-use video editor. Even if you’ve never made a video before, you can quickly learn to create professional-quality content — here’s how:
Import your slides

With Camtasia, you can import PowerPoint slides and insert the audio afterward. No more recording your screen while you run through your slides.
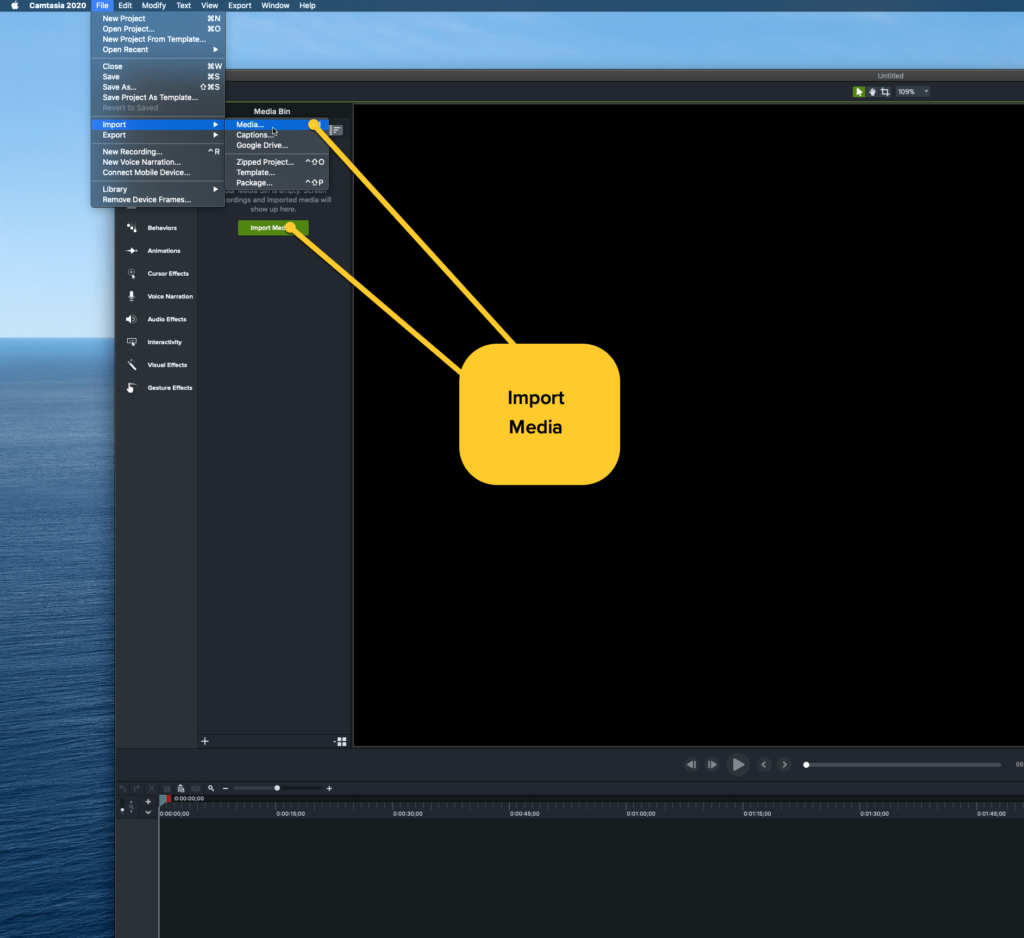
Just click File > Import > Media or, in the Media tab, click the Import Media button and navigate to select your PowerPoint files.
As it stands, Camtasia can’t import presentations made with Google Slides or Apple Keynote. However, if you created your deck in either of those applications, you can save your file as a PowerPoint presentation (.ppt file) and Camtasia can import that instead.
Once you’ve imported your slides, do the same thing for your audio recording.
Add your slides to the timeline

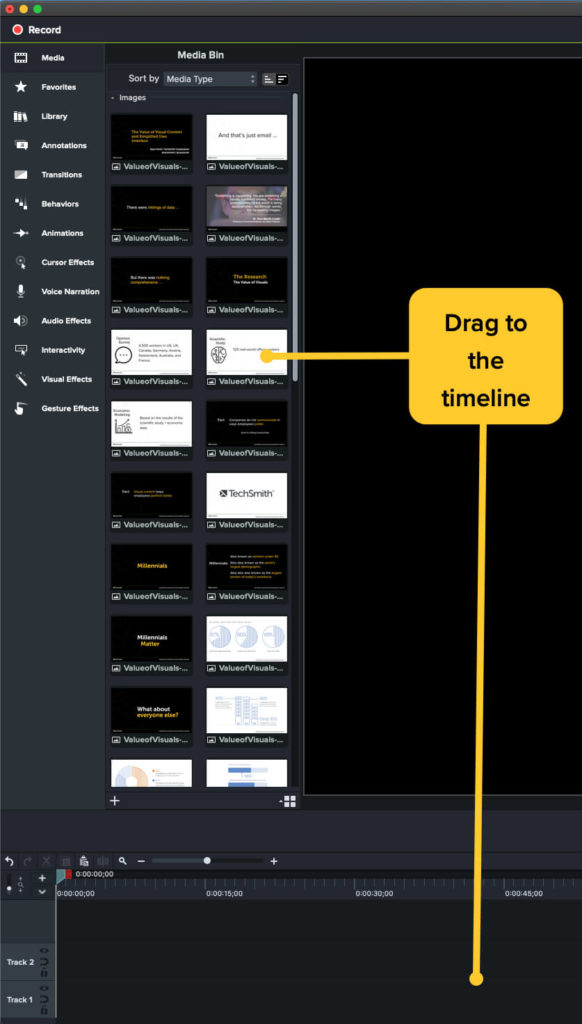
Once your slides and audio are in the Media Bin, drag the audio over to the Timeline. Then, simply add your slides to the Timeline as needed.
Now you can adjust the slide timing and the amount of time they’re visible to ensure they correlate with what’s being said in your voice over.
With everything in its right place, you can export and share your video with your audience, but there are a few more things you can do to ensure the audio is as good as it can possibly be…
Take your video a step further
Use Camtasia’s callouts and other features to add arrows, highlight important information, or otherwise enhance the video experience for your viewers. That’s something you definitely can’t do in PowerPoint.
When you’re ready to add your captions, click Modify and Add Captions to import your captions file. Drag it to the timeline and Camtasia will automatically put the captions in the right spot in your video.
When you’re satisfied that your video is done, you can save the file locally or upload it to any of Camtasia’s array of destinations, including YouTube, Google Drive, Vimeo, and TechSmith’s Screencast (to name a few).
Now your video really is ready to be shared with the world!
Just remember that if you ever need to edit or update your video, you can easily go back into Camtasia, replace whatever slides need changing, and import whatever new audio you’ve recorded. If you had recorded your presentation using PowerPoint, you’d have to start from scratch.
Improving Your Internal Communications
A guide to how visual content can help create a more collaborative and productive work environment.
Download now!
Why record voice overs for PowerPoint?
The shift to digital and remote working, learning, and collaboration has firmly taken root. From Zoom meetings to virtual classrooms, and even messaging platforms like Slack, remote communication has become a normal part of everyday life. This digital transition means that meetings, workshops, employee training, classroom lectures, and presentations are increasingly moving online.
In today’s digital world, delivering your presentation doesn’t always require being there in person. Instead, you have the freedom to rehearse, record, and edit your presentation in advance, ensuring it’s polished before anyone sees it. It also means that your audience can watch your presentation at a time that suits them.
While this is excellent for perfecting your presentation without the pressure of a live audience, adding a voice over to a recorded presentation can significantly amplify its impact. Imagine a live presentation without the human touch of a voice – it’s like having a deck of slides without the story. There’s a reason why they’re called TED Talks, not just TED Decks.
With your voice breathing life into your PowerPoint, what was once a standard presentation becomes an immersive experience. Whether it’s for an online class, a webinar, or a remote business meeting, your message will resonate more when it’s heard.
As we navigate a world that increasingly blends face-to-face and virtual interactions, the power of a well-narrated presentation can’t be underestimated. It’s about breaking down barriers to communication, reaching people wherever they are, and making sure your message isn’t just delivered but remembered.
The Easiest and Fastest Way to Record and Edit Voice Over for PowerPoint!
Audiate makes recording and editing your voice as simple as editing text in a document.
Try Audiate for freeRecorded PowerPoint presentations are more flexible
While live meetings and educational sessions have their place, they require everyone to be in the same place at the same time (even if the place is virtual). That’s fine if all your employees, students, or other audience members are in the same time zone.
But what if your company has employees all over the world? That 2 p.m. ET meeting at your company’s HQ will take place at midnight for your employees in Sydney, Australia.
Moreover, what about employees, students, or others who have to share technology? Or don’t always have access to high-speed internet? Or the privacy necessary to meet at the appointed time?
By offering your presentation asynchronously (which is just a fancy word for “on-demand”), you give people the flexibility to consume your content when it’s convenient or easier for them. Plus they can consume it at their own pace, they have more opportunities to absorb and understand the information.
That doesn’t mean that synchronous (just a fancy word for “live” or “in-person) meetings, training sessions, classes, etc. aren’t important or useful. It just means that providing your audience with more options gives your content more value.
Tips for getting great audio
Now we know you’re ready and raring to get started with your voice over, but we’d be remiss if if we didn’t give you a few pointers on how to record high-quality audio.
So, before you go, here are a few extra tips:
- Start with a script. You’ll speak more confidently and you’ll stay on point.
- Use a better mic. Your computer microphone will work in a pinch, but if you really want the best audio (or, if you plan to make more videos), invest in a decent USB microphone. Some of the best microphones for recording videos will probably cost a lot less than you think.
- Stay hydrated. Your voice sounds better when your vocal chords are nice and hydrated. So, be sure to keep water handy while you’re recording and take a sip when you need to. You can edit out that part later.
- Speak slowly and clearly. When people are nervous they tend to race through whatever they’re trying to say. So, remember to breathe, slow down, and enunciate.
The Easiest and Fastest Way to Record and Edit Voice Over for PowerPoint!
Audiate makes recording and editing your voice as simple as editing text in a document.
Try Audiate for freeFrequently Asked Questions
Not at all. With the right tools, you can easily add voice overs to PowerPoint slides and turn your presentation into an engaging educational or informational video!
Not much! A decent microphone and a quiet place to record will go a long way in ensuring your recording sounds great.
While PowerPoint’s built-in recorder works in a pinch, you’ll save your self a lot of time and effort by using a standalone audio recorder like TechSmith’s Audiate.
We highly recommend TechSmith Camtasia. It’s super easy to use and can import PowerPoint slides directly!


Share