Introduction
1. Record a Video with Snagit (3:07)
Steps to Record a Video
- In the Capture window, select the Video tab.
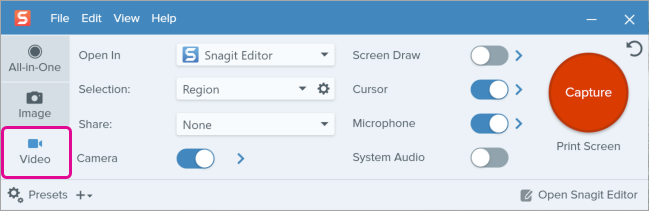
- On the Video tab, adjust the settings as needed, for example to record your microphone, camera, or cursor.

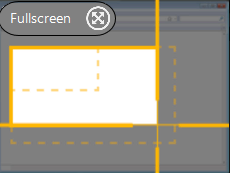
- The orange crosshairs appear. Click and drag to select the area to record on the screen or click the Fullscreen button to select the entire screen.
- The Video Recording toolbar appears.

- Click a button on the toolbar to turn the option on or off before or during recording:
- Camera: Record live video from the connected or built-in camera. Click the dropdown to select the camera device and Picture-in-Picture or Fullscreen webcam options.
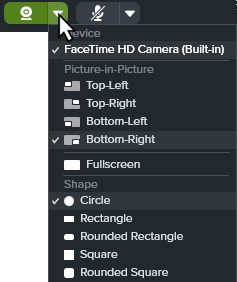
- Cursor: Record your cursor while screen recording. Click the dropdown to turn the cursor effects on or off.

- System Audio: Record the sound from your computer such as application alerts or the audio playing from your computer speakers.

- Microphone: Record the audio from your computer’s built-in microphone or from a connected USB microphone. Click the dropdown to select a device.

- To begin recording, click the Record button or press Shift+F9 (Windows) or Command+Shift+Space (Mac).

- To pause recording, click the Pause button or press Shift+F9 (Windows) or Control+Shift+Space (Mac).

- To stop the recording, click the Stop button or press Shift+F10 (Windows) or Control+Shift+V (Mac).

For more information and video options, see:
2. Edit a Snagit Video (1:22)
Select and cut out mistakes or unwanted parts, or trim the beginning or end of a video.
Steps to Edit a Video
- Drag the green Start handle on the timeline to the location where you want to start the cut.

- Drag the red End handle on the timeline to the location where you want to end the cut.
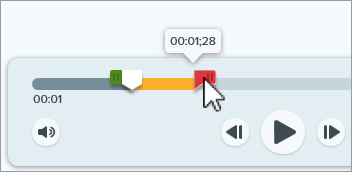
- To review the segment to be removed, drag the white playhead across the timeline.

- Click the Cut Out button.
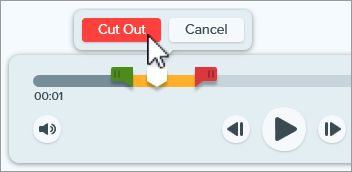
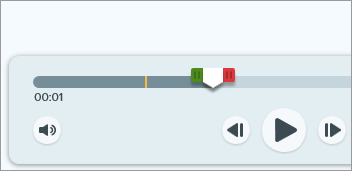
Snagit removes the selected section. A yellow line on the timeline indicates where the segment was removed.
3. Combine Snagit Videos (2:02)
Record multiple videos with Snagit, then combine them into a single video. For example:
- Record a video in segments rather than a single take.
- Record additional information missed in the first recording.
- Import and add a video or segment recorded by another person.
Steps to Combine Videos
- In the video playback toolbar, click Add Videos.

- In the Combine Videos dialog, click to select additional videos in the order you want to combine them.

- Click Combine Videos.
The combined video appears on the canvas to review, edit, and share. The original videos remain in the tray and/or library for future use. For more information, see Combine Videos.
4. Share or Save a Snagit Video (1:26)
Share directly to the app, hosting service, or file location of your choice.
Steps to Share or Save Your Video
- In Snagit Editor, click to select a video in the recent captures tray.
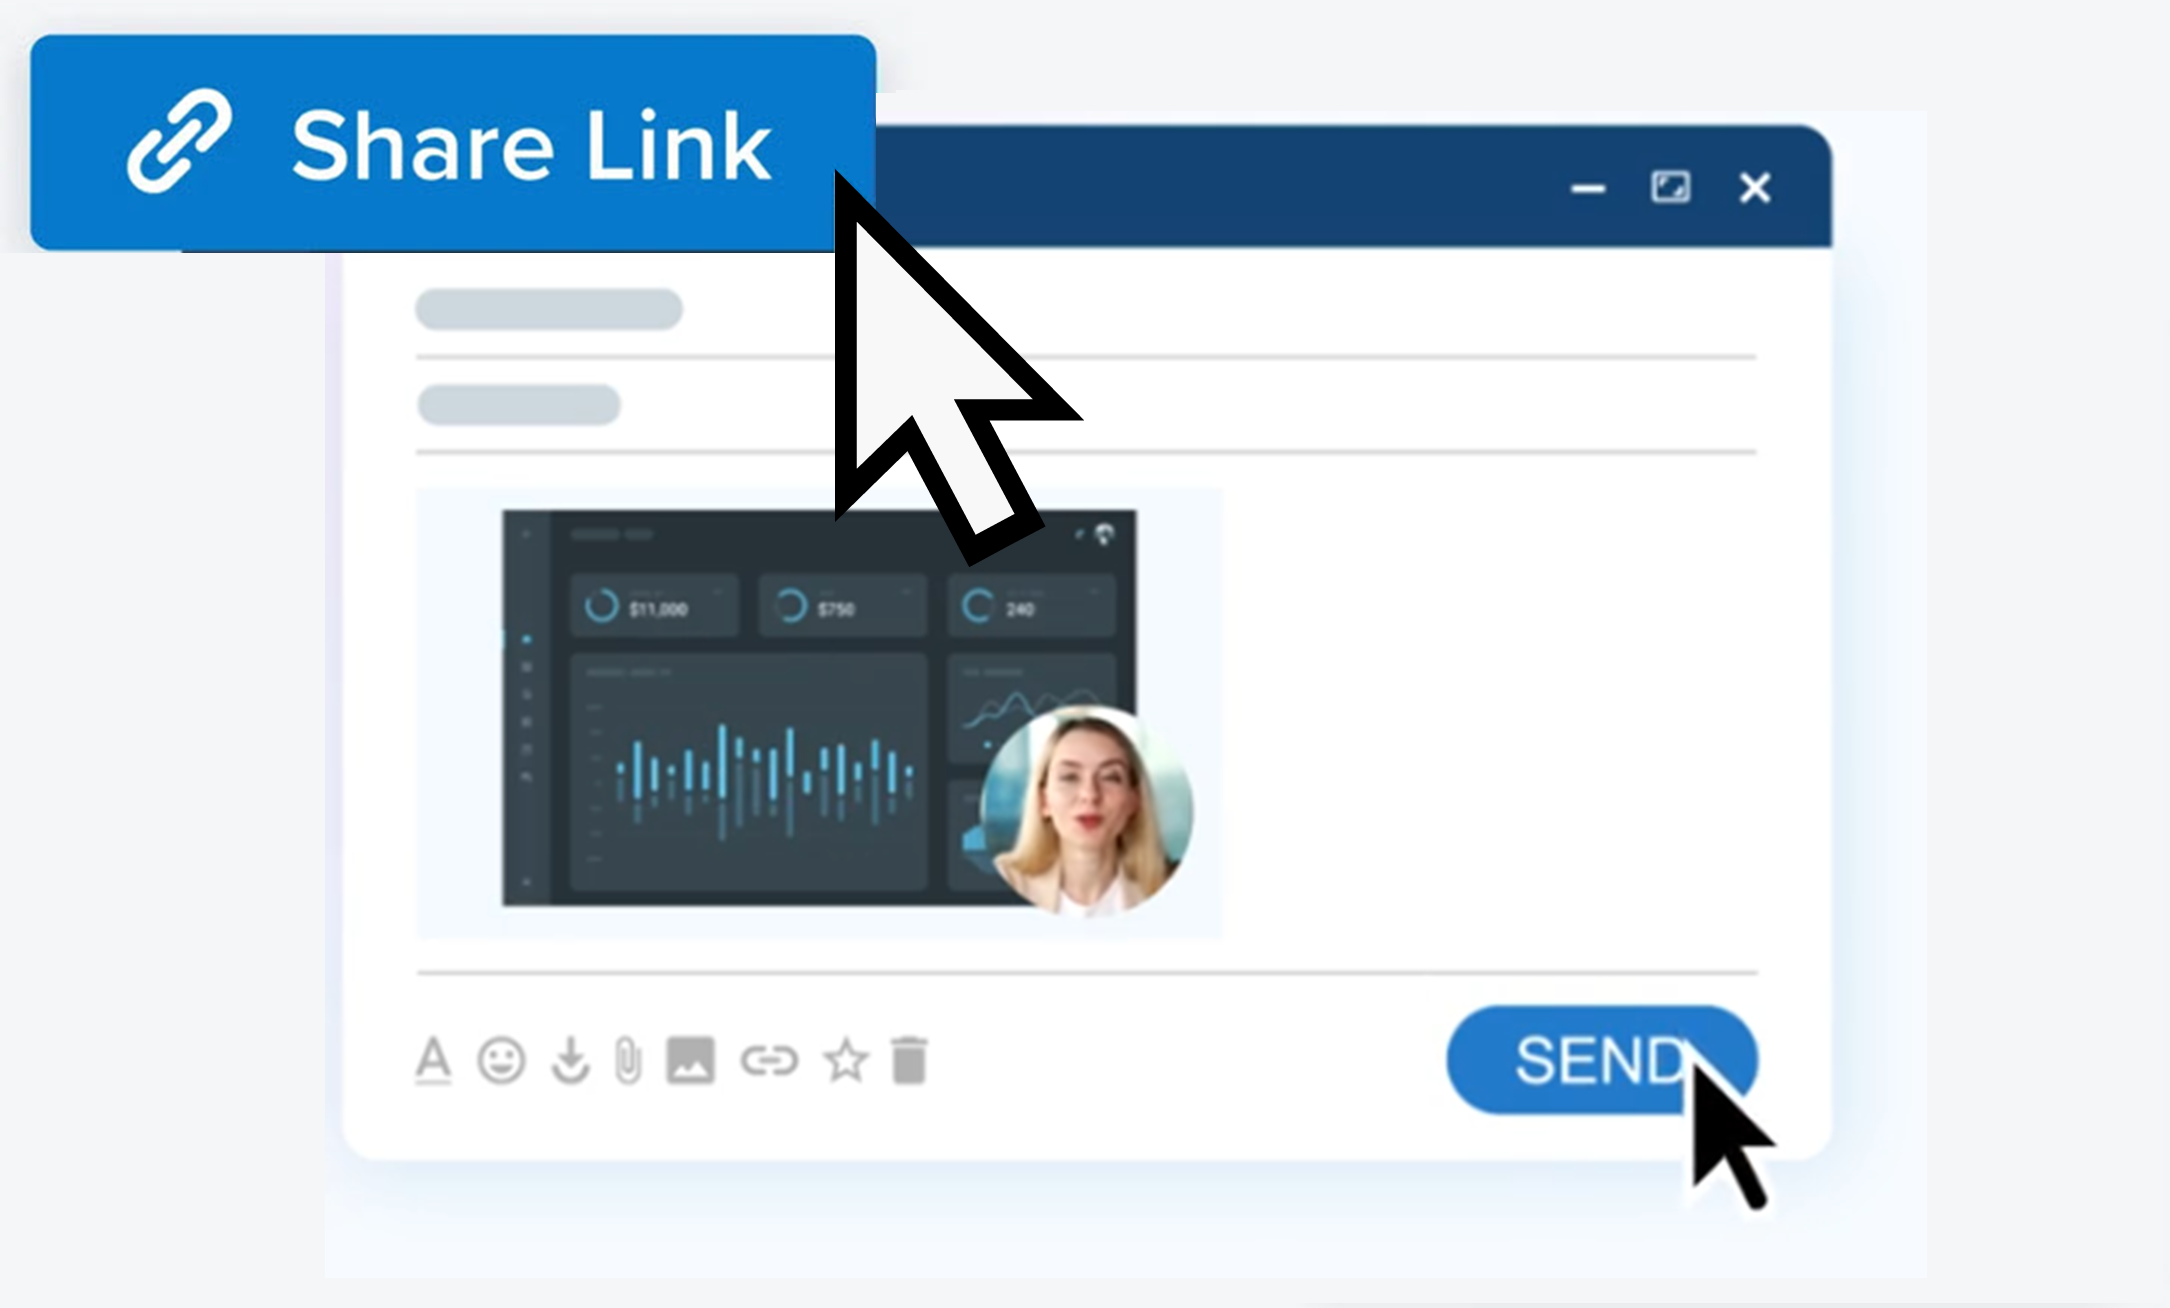
- Click the Share Link dropdown or Share dropdown and select a destination:
- File: Save an mp4 to your computer or network drive.
- Screencast: Upload your video to TechSmith’s online video sharing site with built-in conversations, and comments. Snagit automatically copies the link to your clipboard. Learn about Snagit + Screencast for workplace communications.
- Hosting platform or cloud destination: Select Google Drive, Dropbox, YouTube, or another destination to upload your video. Snagit automatically copies the link to your clipboard. See Share Captures.
Get Snagit
The best screen capture software for professionals
All Snagit Tutorials