Capture, Edit & Share an Image with Snagit

Learn how to use Snagit to easily grab a screenshot. Then edit and share the image to communicate your message clearly.

3d Snagit icon
 

In this tutorial:

  1. Capture Your Screen (1:13)
  2. Add Annotations (1:45)
  3. Add Effects and Remove Elements (1:25)
  4. Share Your Image Capture (2:22)

1. Capture Your Screen


Steps to Capture Your Screen

  1. In the Capture window, select the All-in-One tab and click the Capture button.
    All-in-One tab
  2. The orange crosshairs appear. Click and drag to select the desired area to capture.
  3. The All-in-One toolbar appears. Click the Image Capture button.
    Image capture button in the All-in-One toolbar

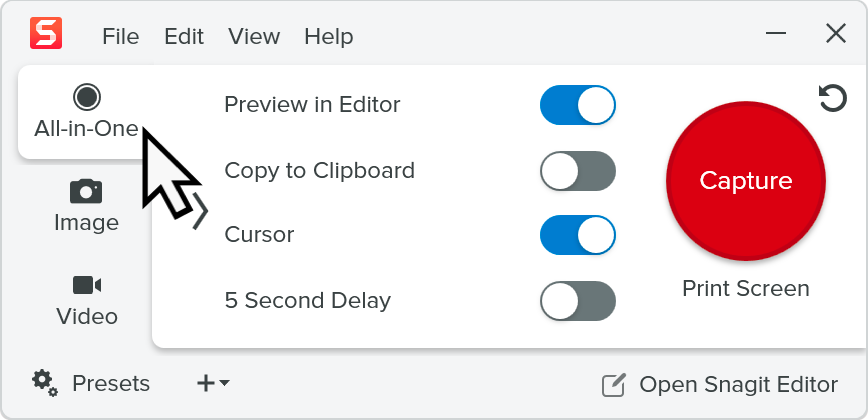
The capture opens in the Snagit Editor.

For more information and capture options, see:

2. Add Annotations


Add annotations such as step numbers and callouts to communicate your message clearly.

How to Use the Step Tool

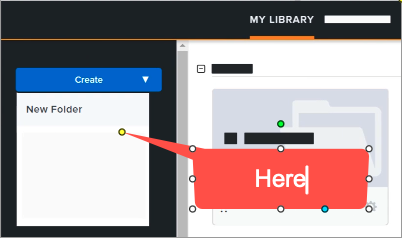
Identify parts of an image by adding ordered callouts as you point and click.

  1. Click the Step tool in the Snagit Editor toolbar, or select it from the More dropdown in the toolbar.
    Step tool
  2. Select a Quick Style or edit the tool properties to customize the tool.
  3. Click on the canvas to add the first number or letter.
    Click on the canvas to add the first step number or letter
  4. Click on the canvas to add additional steps sequentially.
    Continue clicking on the canvas to add more step numbers or letters sequentially
  5. To manually edit the value of a step, double-click to select the text, enter the desired alphanumeric value, then press Enter.
  6. When you are finished with the Step tool, click the Move tool to select, move, edit, or delete objects you added to your image.
    Move tool

For more information, including Step tool properties and tips, see Step Tool.

How to Use the Callout Tool

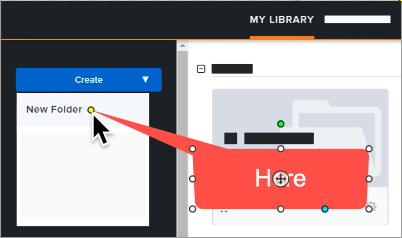
Point to a specific area of an image and add contextual information.

  1. Click the Callout tool in the Snagit Editor toolbar, or select it from the More dropdown in the toolbar.
    Callout tool
  2. Select a Quick Style or edit the tool properties to customize the tool.
  3. Click and drag on the canvas to draw the callout.
    Click and drag the crosshairs on the canvas to draw the callout
  4. Type text in the callout.
    Type text in the callout
  5. Click and drag the handle on the tail to point to a specific area in the image.
    Drag the handle at the end of the tail to reposition the callout tail
  6. When you are finished with the Callout tool, select the Move tool to select, move, edit, or delete objects you added to your image.
    Move tool

For more information, including Callout tool properties, see Callout Tool.

Tip: Explore more tools!

Click More in the toolbar to access additional tools or to customize the toolbar. To learn more about any of the tools in the toolbar, see Snagit Tools.

3. Add Effects and Remove Elements


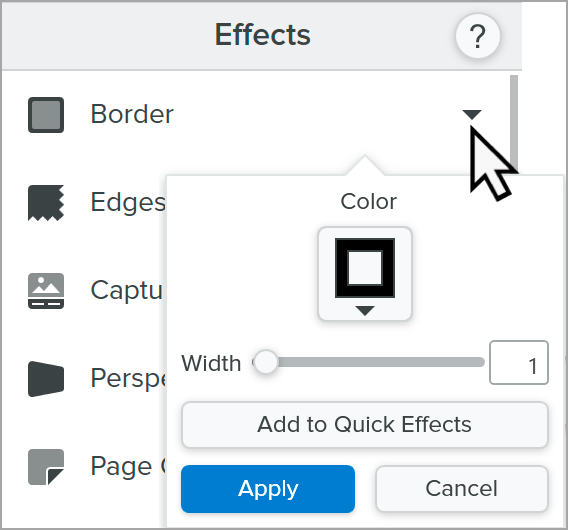
Add image enhancing effects such as borders or torn edges, or remove parts of the image with the Selection tool.

How to Add a Border Effect

Click the Effects button to open the Effects panel.
Effects button

  • On Windows: Click the Border dropdown, customize the settings, and click Apply.
    Border effect in Snagit Windows
  • On Mac: Click the Border effect to apply it. Click the Effect settings icon on Mac button to customize the settings.
    Effect dropdown on Mac

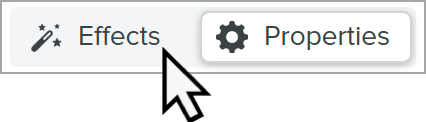
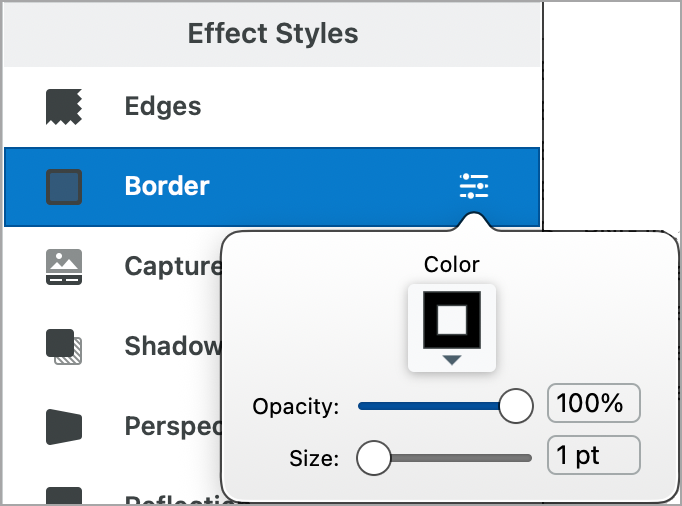
For more information, see Add Effects.

How to Remove Elements
  1. Click the Selection tool in the Snagit Editor toolbar.
    Selection tool
  2. In the Tool Properties, choose a selection shape: Rectangle, Ellipse, Polygon, or Freehand.
  3. For the Background Fill, select the Auto-Fill option.
  4. Click and drag to draw the selection on the canvas.
  5. Press Delete.

Snagit deletes the selected area from the image and automatically fills it with the same color as the surrounding area.

To learn more about selection options, for example to create a circular image or edit the text in a screenshot, see Selection Tool.

For more information about effects and other ways to edit your image, see Edit Captures.

4. Share Your Image Capture


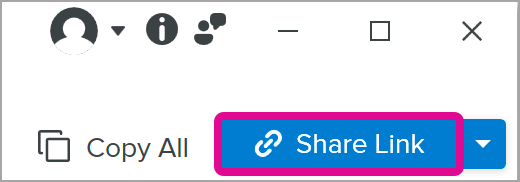
Get a link to share your image in an email or message to anyone, even if they don’t have a TechSmith account.

  1. In Snagit Editor, click the Share Link button.
    Share Link button
  2. Snagit uploads your capture to Screencast, TechSmith’s cloud-based solution for collaboration and feedback, and copies the link to your clipboard.
  3. Paste the link into an email or your preferred message platform.

For more information, see Share & Engage (Share Link).

Tip: Explore more ways to share!

Click Copy All to quickly copy then paste your image in another application.

Or click the Share Link dropdown to share the image directly to another application or to save the file to a specific location. See Share Captures.

Note: This tutorial is for Snagit version 2024. Previous versions may look or function differently.