









When you make videos — especially tutorial videos andinstructional videos — you will almost certainly need to record voice overs.
So how do you record voice overs that grab and keep your audience’s attention? And what AI tools can you use to make the process faster and easier?
In this article, we’ll cover what a voice over is, how to record your own, and share practical tips to help beginners get started.
A voice over is recorded speech that plays during a video to explain, guide, or add context to what viewers see on screen. (Note: this guide covers media voice over for video, not the Apple VoiceOver screen reader.)

Key Takeaways
- A voice over is recorded speech that plays during a video to explain, guide, or add context — making tutorials, training videos, and demos easier to follow.
- Good voice over comes down to four elements: clear audio, steady pacing, natural tone, and clear pronunciation.
- The basic recording workflow is: find a quiet space, write a script, do a test recording, record, edit, and import your audio into Camtasia Editor.
- Captions and transcription make your video accessible to more people, including those who watch without sound.
What is a voice over?
Voice overs are often confused with narration, and while the two are similar, they are not the same. Narration describes all the on-screen action and typically tells a story based on what is happening — it is most common in entertainment. Voice overs are broader and are used more often in instructional and educational videos to explain or clarify what viewers need to know.
Is there a difference between voiceover and voice over? Both spellings are widely accepted. While some style guides prefer the single word voiceover, voice over is the more commonly searched term online
Why is a good voice over important for your video?
Some might think the audio portion of a video is less important than the visuals, but that’s not true.
While the on-screen elements are what make something a video, it’s often the voice over that helps people truly understand what’s being shown. Muddy, muffled, or garbled audio frustrates viewers — and for people who are blind or have low vision, clear audio isn’t just helpful, it’s essential.
High-quality audio is essential for keeping an audience engaged and ensuring they receive the information they need.
Instant lifelike AI voice over
No voice over? No problem. Camtasia Audiate generates a natural-sounding voice over right from your script.
Instant lifelike AI voice over
No voice over? No problem. Audiate generates incredibly life-like voice over right from your script!
Get Audiate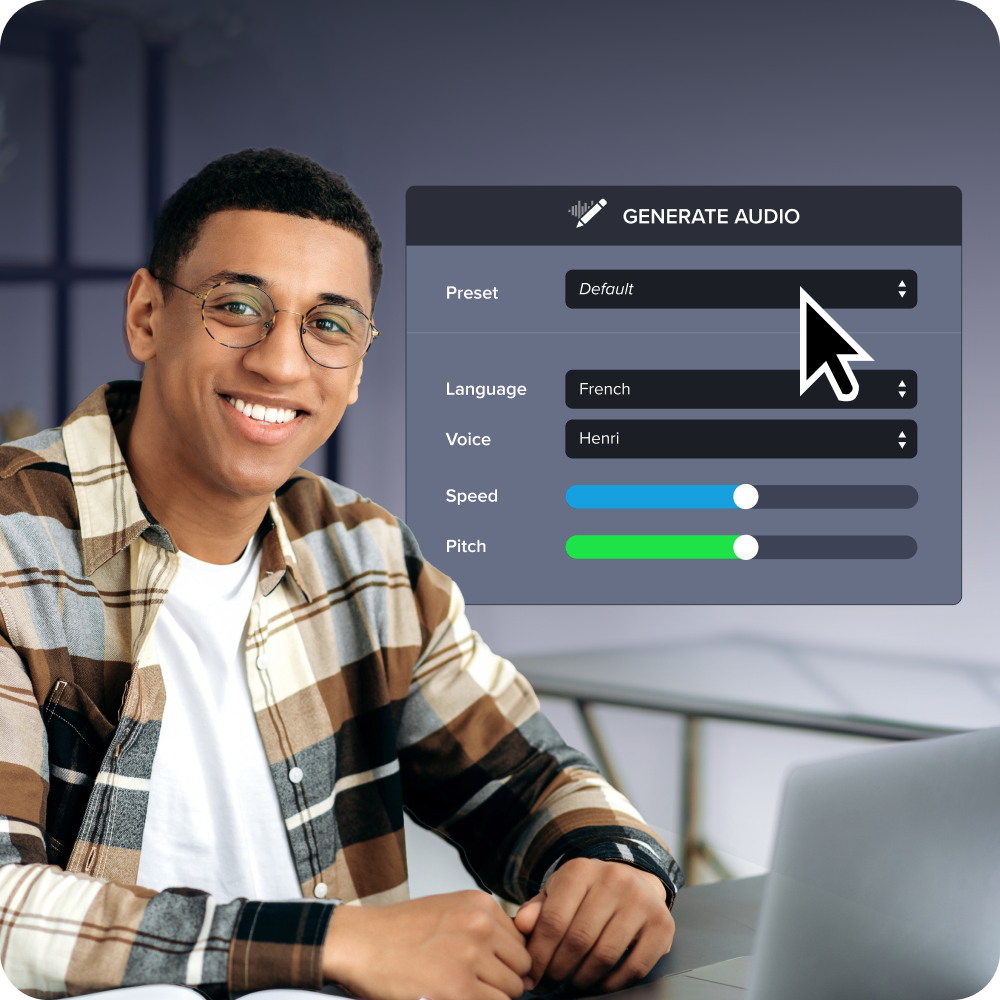
The essential elements of a good voice over
You do not need a broadcast-quality voice to record a great voice over. With the right setup and a little practice, almost anyone can produce clear, professional-sounding audio. The key is to focus on four core elements:
- Audio clarity and volume
- Pacing
- Vocal tone and inflection
- Diction
1. Audio clarity and volume
The clarity of your voice and speaking at a comfortable volume are the most essential parts of great audio.
If your recording sounds fuzzy or muddy, your audience will struggle to absorb the information — or simply switch off. Either way, they miss your message, and you miss an opportunity to share your knowledge.
If the volume is too low, people will have trouble hearing you. Too loud, and you risk distortion. There is a sweet spot for getting it just right, which we cover in the recording steps below.
2. Pacing
Ever talk with someone so excited about a story that they rush through it and you can’t remember a word they said? Or someone who drones on so slowly you struggle to stay awake?
That is pacing, and it matters. Too fast and your audience won’t follow. Too slow and they’ll tune out.
The best voice overs have a natural, deliberate pace. That is why you should always write a script — and practice it — before you start recording. Pacing also includes knowing when to pause, either for effect or to give listeners a moment to absorb what you just said.
3. Vocal tone and inflection
Vocal tone and inflection are about speaking naturally and pleasantly. You want to sound friendly and engaged — but not so upbeat that you come across as fake.
No one wants to sound like a game show host — artificially enthusiastic and hard to take seriously. But a flat, monotone delivery is just as off-putting. Aim for the middle: warm, clear, and conversational.
4. Pronounce and enunciate clearly
The final element of great voice over work is ensuring that you pronounce each word correctly and speak clearly enough to be understood. Avoid mumbling, but don’t shout or over-enunciate, either.
Be mindful of your regional accent (yes, we all have them) as they relate to your audience. While it’s perfectly acceptable to “warsh” your hands in Missouri or have a great “idear” in New England, those pronunciations may confuse people from other locations.
Don’t worry, though. No one expects you to sound like a professional voice actor. The best thing you can do is speak naturally and clearly — the rest will follow with practice.
How to record a voice over
1. Preparing to record
Not all videos need a lot of preparation. Quick screencasts or fast demos for a colleague can be done on the fly. But for videos where you want a more polished result or need to cover more ground, a little preparation goes a long way.
Find a quiet place to work
You can create a great voice-recording space with minimal effort and expense.
You want a space that’s free from distracting noises and where you are unlikely to be interrupted. Most decent microphones pick up even faint ambient sounds, and those sounds will make it into your recording.
Nowhere is going to be completely silent, so find the best place you can — even if that means thinking outside the box.
Some people find that their car (engine off) is the quietest option available. It might not be the ideal setup, but if all you need to do is speak into a microphone, you might be surprised by the results.
Choose a microphone
You need a decent microphone — but you don’t need to spend a lot. We have a full guide to the best microphones for recording video if you want to go deeper.
What we will say here: avoid recording on your laptop’s built-in microphone if you can. Built-in mics are fine for Zoom calls, but even a low-cost external microphone will produce noticeably better results for voice over work.
A decent USB microphone costs $50–$150 and is well worth the investment if you plan to record regularly. If you’re not ready for that yet, even the earbuds that came with your smartphone will capture better sound than your computer’s built-in mic.
If you do use an external mic, consider adding a pop filter. They are inexpensive and help reduce the distracting plosive sounds caused by hard consonants like “p” and “b.”
Choose your audio software
Good audio editing software is essential for polishing your recordings. Camtasia Audiate is purpose-built for voice over work — and it goes beyond a standard audio editor.
Camtasia Audiate uses text-based editing, which means you edit your voice over like a document rather than hunting through a sound wave. Spot a hesitation, an “umm,” or a mistake — just highlight it and hit backspace.
2. Write a script
Writing a script is probably the single most important thing you can do to ensure your voice over sounds professional. Nothing ruins a good voice over faster than a lot of “uhms” and “ahs” as you try to remember what you wanted to say.
A good script includes everything you intend to say, word for word. Writing it out before you record helps you stay on track and cover everything without drifting into unrelated territory.
Don’t want to write a script from scratch? You don’t have to. Audiate’s Generate Script feature lets you enter a prompt and generates the script for you. Edit it to your liking, and you’re ready to record — no blank page required.
3. Do a test recording
Before you record your voice over for real, run a test recording first. This confirms your equipment is working correctly and your audio levels are where they need to be.
Even if nothing has changed from the last time you did a voice over, run a test first. Nothing is worse than jumping straight into the recording, only to finish and find that something wasn’t set up properly.
You don’t need to record the entire script for your test recording, but a few paragraphs will give you enough to ensure that the audio is clear and doesn’t include any stray or ambient noises.
Pro tip: Listen back to your test recording on headphones, not your computer speakers. Headphones are much better at revealing unclear audio, feedback, or background noise. Since many of your viewers will also watch via headphones, this is the most accurate way to check what they will actually hear.
Microphone placement
Mic placement makes a bigger difference than most people expect. Too close and you’ll pick up mouth noise and air puffs. Too far away and your voice will sound distant and roomy.
Ideally, place the microphone about six to eight inches from your mouth, and slightly below your chin. If you’re using an LAV (clip-on mic), make sure it’s about six to eight inches below your mouth.
You should also be mindful of the surface where you place your mic. Some microphone stands are prone to picking up noise from the desk or table they’re on, so be sure to listen for those sounds in your test recording.
Check your volume levels
Getting the volume level right for your audio ensures it’s easily heard without distortion. If the volume is too low, your audience will have trouble hearing you. If it’s too high, you risk garbled audio or blowing out your audience’s eardrums
While you can always make a video louder and adjust levels in editing, starting with the best possible audio level as you record is your best bet.
- Audio levels are measured in decibels (dB).
- In audio editing, 0dB is actually the maximum you want to achieve. It sounds weird, but trust us.
- Usually, your ideal audio level is between -10 dB and -20 dB. Your audio should peak around -6 dB.
- Never go above 0dB, as your audio will distort or “clip.”
Most audio recording software will have indicators that let you know when your audio is at risk of clipping due to excessive volume.
In Camtasia Editor, the waveform appears on the left and the level indicator on the right. A healthy recording peaks at just under -6 dB and stays well within an acceptable range.
Instant lifelike AI voice over
No voice over? No problem. Camtasia Audiate generates a natural-sounding voice over right from your script.
4. Record your voice over
Once you’re satisfied with your microphone placement and audio levels, you’re ready to record. With Camtasia Audiate, it’s as simple as clicking the record button and speaking.
As you record, keep these tips in mind:
- Speak slowly and clearly: Enunciate each word, but don’t concentrate on it to such an extent that you sound robotic.
- Consider your tone: You want to sound pleasant, but not overjoyed or overly excited. Smiling while you read your script can help you sound happier and more natural.
- Don’t stop: If you make a mistake, you don’t have to start over — you can always fix it when you edit. Just go back a sentence or two in your script and start again. With Audiate, you’ll be able to see and edit your voice over’s text, so you can easily go back and fix any mistakes when you’re done.
- Take breaks: If a section is giving you trouble, pause and take a break. Rewrite anything that feels awkward, then try again.
- Practice makes perfect: As with anything, voice overs get easier the more you do them. Don’t give up if it’s not perfect the first time!
Instant lifelike AI voice over
No voice over? No problem. Audiate generates incredibly life-like voice over right from your script!
Get Audiate
5. Edit your audio
When you finish recording, it’s time to edit. Even a clean take will need some tidying — at minimum, trim the beginning and end to remove dead space.
Audiate makes this process straightforward. For a full walkthrough, see the Audiate editing tutorial.
With traditional audio software, you have to hunt through your recording to find your mistakes and edit them individually. Traditional audio editing can be time-consuming, especially if you’re hunting through waveforms to find and fix mistakes.
Traditional audio software only displays your recording as an audio waveform, making it much more difficult to edit.
Camtasia Audiate takes a different approach: your recording is transcribed automatically, so you edit by reading the text. Spot a mistake, highlight it, hit backspace. No waveform hunting required.
You can still use the waveform view in Camtasia Audiate if you prefer — but most people find the text view faster and less intimidating.
Before you start making cuts, listen to the full recording from start to finish. On that first pass, focus on the big picture: does it sound how you hoped? Is the pacing right? Are there any unclear words, long silences, or awkward pauses?
Take notes as you listen, then go back and make your edits. When cutting silences, remember that pauses are not always a problem — a natural pause gives listeners a moment to process what they just heard.
6. Import your audio into your video editor
In Camtasia Editor, importing audio takes just a couple of clicks. With Audiate, your edited audio syncs directly to your Camtasia Editor timeline, making the handoff even smoother. You might also want to check out this post on syncing audio and video in Camtasia.
From there, Camtasia Editor gives you everything you need to finish your video — add music, trim footage, crop frames, and more.
If you can edit a doc, you can edit a video
Stop dreading the timeline. Camtasia Audiate transcribes your recording so you can edit your video just by editing the text.
Add captions and audio transcription
A large portion of your audience will watch with headphones — but a significant number will also watch without sound. Captions make your content accessible to both groups and to viewers who rely on text to understand spoken information.
With most audio tools, adding captions means sending your audio to a transcription service and waiting for a timestamped file to come back. Audiate skips that step entirely. Transcription happens automatically as you record, complete with timestamps ready to use as captions. Once you have finished editing, export your transcript as an SRT caption file and import it directly into Camtasia Editor.
Additional resources:
- Ways to Enhance Video With Simple, Effective Edits
- 5 Best AI Video Generator Tools
- Best AI Video Editors: 5 Options Compared
FAQs
What is a voice over?
A voice over is recorded speech that plays during a video to explain, guide, or add context to what viewers see. It is common in tutorials, training videos, demos, and other educational content. A good voice over helps people follow along and understand the message more clearly.
What is the difference between voice over and narration?
Voice over and narration are closely related but not the same thing. Narration describes all the on-screen action and typically tells a story based on what is happening — it is most common in entertainment. Voice over is broader: it can include commentary, instructions, or explanations that supplement what is shown on screen, without necessarily telling a continuous story.
If you can edit a doc, you can edit a video
Stop fearing the timeline. Camtasia Audiate transcribes your recording so you can edit your video just by editing the text.
Free Download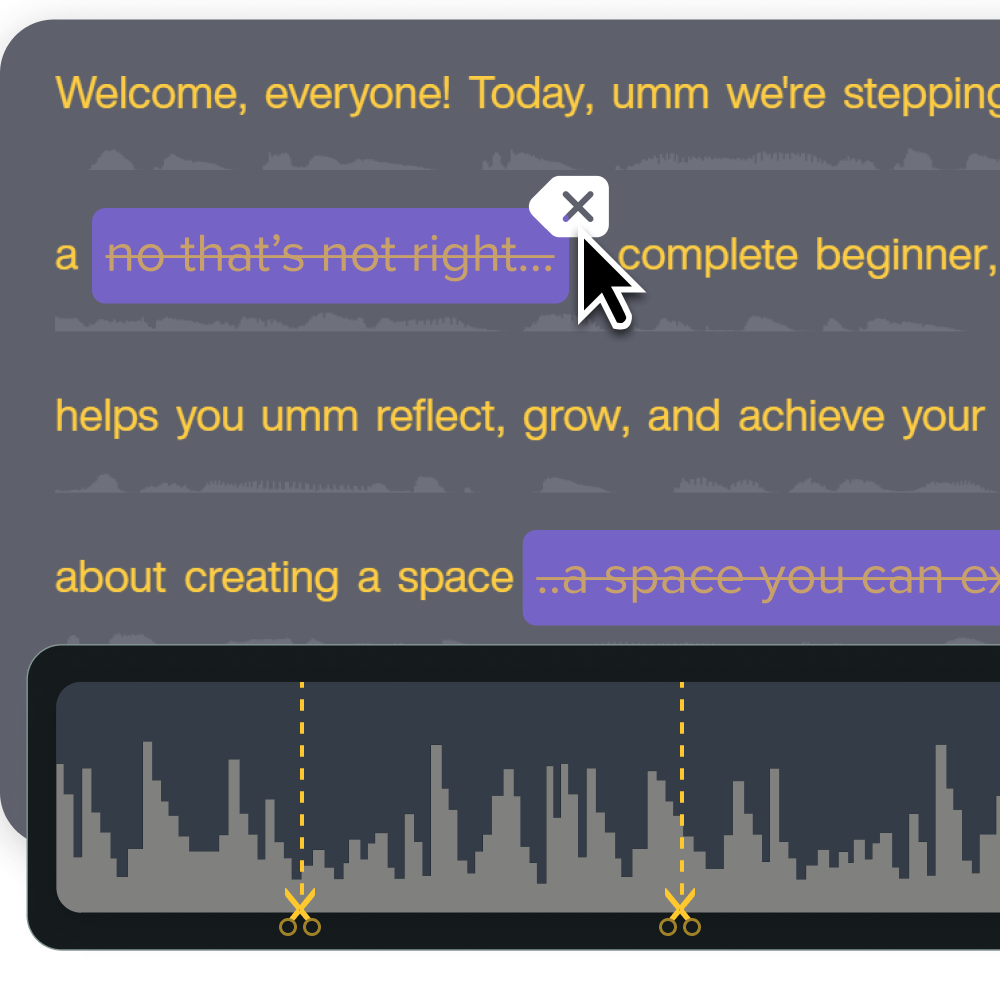
How do I make my voice over sound clearer?
Start by recording in the quietest space you can find and use an external microphone if possible. Write a script, do a short test recording, and listen back on headphones before you record the full take. Clear speech, steady pacing, and a little editing afterward will make a noticeable difference.
What audio levels should I watch when recording?
Your goal is audio that is easy to hear without distortion. Keep your recording level between -10 dB and -20 dB, with peaks around -6 dB. Never go above 0 dB — that is where clipping and distortion occur.
Why should I add captions and transcription to a voice over video?
Captions help people follow your video when they cannot hear the audio or choose not to play sound. They also make your content accessible to viewers who rely on text to understand spoken information. Camtasia Audiate automatically generates a timestamped transcript that you can export as an SRT caption file and import directly into Camtasia Editor — no manual transcription needed.
Share