


Step-by-step instructions are often the easiest way to help guide a person to complete a specific task successfully, especially if it is complex or involves several steps. Visual instructions pair those actions with screenshots, GIFs, videos, diagrams, or annotations so people can see what to do at each stage.
With the help of step-by-step guides, teams can collaborate effectively and achieve repeatable success.
They also come in handy for training new employees, providing reinforcement training, and helping to document and share knowledge within an organization.
In this guide, we’ll look at some of the best ways businesses can implement and create step-by-step instructions for internal and external communications.
Let’s get started!
Key Takeaways
- Clear structure, readable visuals, and easy sharing help people use your instructions faster.
- Visual instructions combine written steps with screenshots, GIFs, videos, or other visuals to make a process easier to follow.
- They work well for onboarding, software adoption, knowledge sharing, and process documentation.
- A simple creation flow is to name the task, define responsibilities, choose the right steps, document each step with visuals, and test the process.
Let’s get started!
Common Uses for Step-by-Step Visual Instructions
The beauty of step-by-step instructions is that there isn’t a limit to how they can be used, as their fundamental purpose is to break down a process into bite-sized directions. They can even be used as extra material to provide further context to instructional videos.
It doesn’t matter what process you’re trying to explain, step-by-step instructions can be useful for sharing knowledge with your colleagues, employees, and customers.
Let’s take a look at some of the most popular and practical uses of step-by-step instructions.
Create how-to guides in seconds with Snagit
Document any internal process as you do it. Step capture organizes the screenshots, numbers, and steps into a clear, shareable visual.
Learn More
1. Employee onboarding
No matter how excited someone might be to start a new job, there’s always a lot to take in when you move to a new company. Getting to know your new colleagues, adapting to a new work environment, and becoming familiar with new processes, can be overwhelming for even the most experienced employees.
Moreover, when someone joins an organization, they need to learn how to perform various tasks as quickly as possible. By providing step-by-step instructions, organizations can make the onboarding process smoother and more efficient for new staff members, which will help them integrate quickly into the company culture.
2. Customer onboarding
First impressions are everything, which is why it’s important to ensure that a customer’s first interaction with a product is flawless. To do this, you need to ensure that customers know how to use your product from the start.
This is where the step-by-step instructions come in! Providing clear directions on how to set up and use a product or service can help customers get started quickly and easily.
While step-by-step instructions for end-users might seem like a “nice-to-have” to some, they can have an impact on increasing customer satisfaction and loyalty in the long run.
3. Promoting software adoption
Not everybody likes change, and it can be difficult to encourage and train an entire workforce to use new software. However, by shortening the learning curve, step-by-step guides make it easier for staff to fully understand the functionality of new software and the value they’ll gain from using it.
By showcasing key features in a way that’s clear and easy to understand, organizations can help users get the most out of the software to realize its full potential.
Annotate and edit screenshots with Snagit
Professional mark-up tools and powerful features make it easy to create helpful images.
Try it Free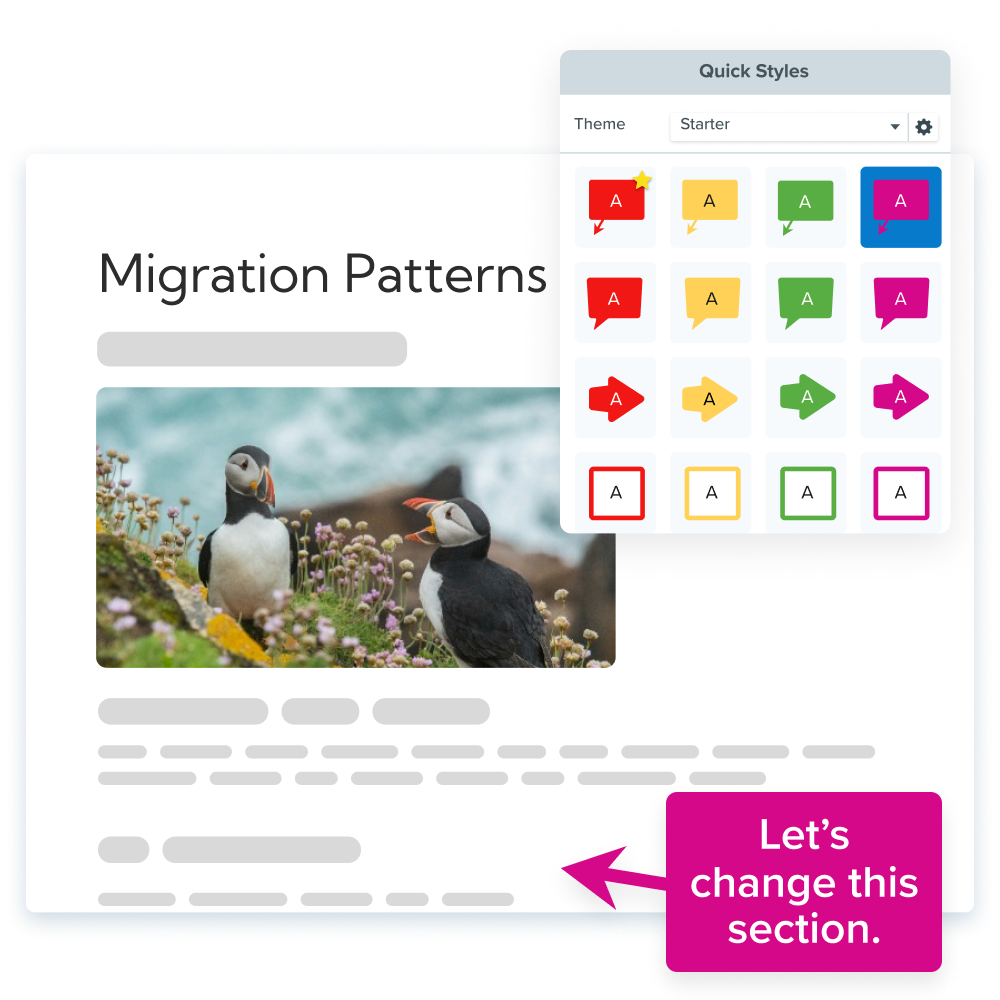
4. Improve knowledge sharing
Sharing knowledge is essential to the success of all organizations since it helps improve collaboration, efficiency, and overall success. While there’s more than one way a company can share knowledge, step-by-step guides cater to everyone’s understanding and comprehension levels.
Whether the step-by-step directions are provided via a text document, a video tutorial, or even a series of screenshots these instructions play a vital role in sharing knowledge between teams and colleagues.
Clear and detailed instructions allow organizations to document their processes and procedures. This ensures consistency in the way work is performed, reduces errors, and improves the overall quality and efficiency of a team’s output.
@techsmith_snagit No one likes repeat questions. 🙅♀️ #corporate #corporatetiktok #snagit ♬ Sunrise – Official Sound Studio
How to create instructions using visuals and screenshots
1. Name the process or task
Add a title to your document and save the file under an appropriate name in your knowledge base to make it easy for employees to find the instructions.
2. Establish the individuals responsible for the process
Define your target audience, and delegate tasks to certain staff members to ensure everyone is aligned on each other’s responsibilities.
For complex and long-term processes, such as how to apply for time off, it can still be useful to include the names and contact details of relevant people in the document. This way, it is less likely that employees will waste time contacting the wrong people.
3. Decide which steps to include
Next, identify the most ideal steps for completing a task, process, or project. This step might require some input from members of staff who may be more familiar with — and better equipped to complete — certain objectives. This ensures your manual will be as user-friendly as possible.
You might also take this opportunity to consult managers and decide which steps do and don’t need to be mentioned. While it’s important to give detailed instructions, it’s just as important to be concise.
4. Document the steps with all the details required
Now it’s time to write down each instruction and explain the details for each one. This presents a great opportunity to use visual elements, such as diagrams, flowcharts, videos, screenshots, and even GIFs, all of which can help boost comprehension.
With tools like Snagit, you can turn video clips into animated GIFs, which are a great way to split a video into small, digestible snippets.
GIFs can also be used for relaying information when a screenshot isn’t quite enough but a video would be overkill.
You can also turn video clips into animated GIFs and add step numbers to a screenshot to show step-by-step processes.
However, if a screenshot is all you need to make your instructions clearer, take one with Camtasia Snagit!
Snagit has editing features such as the step tool that lets you add step numbers to a screenshot to show step-by-step processes.
With Snagit, you can quickly add callouts, text boxes, and arrows to your captures to add more clarity to your screenshots.
5. Put the process into practice
Once you’ve finalized the step-by-step instructions, it’s time to put them into practice! Now’s your chance to test your instructions with the individuals or teams responsible for overseeing or completing a process.
After implementing a new process, it’s important to assess the effectiveness and success of the process and the instructions used to complete it. You should also welcome and listen to feedback from staff.
As with most things, there’s always room for improvement, so update and refine processes and step-by-step instructions to maximize your team’s efficiency and output over time.
Why visual step-by-step instructions help your business
There are many different ways a business can be transformed by simply implementing better knowledge sharing through the use of step-by-step tutorials – and all of them are good!
So let’s take a look at some of the ways directions can optimize your business:
1. Time-saving
A Coveo report found that the average employee spends 3.6 hours daily searching for information — an increase of one hour more from last year’s report.
However, with clear and concise instructions readily available, employees can save time by solving issues themselves.
Source: Coveo.
2. Cost saving
Time spent fixing problems that could be solved with good knowledge sharing is money wasted!
The International Data Corporation estimates the average enterprise wastes $2.5 to $3.5 million per year due to ineffective knowledge systems.
Source: Medium.
3. Better collaboration
Having specific instructions on how to complete a project can also support better collaboration between teams. Without clear direction, it can be all too easy for people to lose track of who’s responsible for what task and the project’s end goal. Such confusion can lead to a fall in productivity, missed deadlines, and a lower quality of work.
Documentation will help eliminate any confusion surrounding a project and act as a guide that employees can refer back to if they ever lose sight of their responsibilities to the project.
4. Better process documentation
A report by Panapto found that employees lose an average of five hours per week “waiting to get in touch with people that have the unique knowledge they need.”
When managing a large or growing team, it’s in a business’s best interests to provide staff with the best possible documentation for completing standard processes and operations. That means including clear, concise, and easy-to-follow instructions.
This key documentation, often referred to as standard operating procedures (or SOPs), is crucial for ensuring staff knows exactly how to complete a task.
Source: Panopto.
5. Better quality control
Having clear and well-thought-out SOPs will help guarantee a consistent level of quality and output among employees. Without it, every team member could take a different route to complete the same task, but with mixed results.
With step-by-step instructions, every employee will know the standard way to complete a task and, more importantly, will know exactly what the result should look like.
5 Tips for clear step-by-step visual instructions
Now that you know the basics to creating clear and concise step-by-step instructions, there are a few other things to keep in mind to ensure you’re providing the best possible directions for your team.
By following these tips, you’ll be able to create step-by-step instructions that are tailored to the specific needs of your organization, which will drive long-term growth and success.
1. Get organized
Chances are you will create a how-to document for multiple processes, not just one. This will leave you with a lot of documents to manage. The solution? Organization.
While having a large knowledge base is great for collaboration and productivity, you need to be incredibly organized to ensure that every set of instructions is accessible to every employee.
This means storing all your guides on one platform and having logical categories with a series of sub-divisions. You’ll also want to ensure that each set of instructions is well-labeled so that your staff can search easily.
2. Make your instructions easy to read
It might go without saying, but it’s imperative that all your instructions are easy to read and understand. While this isn’t usually a problem for shorter how-to guides, it can be easy to get lost in longer and more complex processes.
While the structure of your instructions is key to ensuring they’re easy to follow, using visual aids can also help convey complex ideas.
Consider simplifying images and screenshots. With Snagit’s simplify tool, you can replace text and distracting visual elements in an image with simplified objects. This will make instructions easier to understand and execute.
3. Give some context to your reader
People learn best when they’re shown (rather than told) how to do something, which is why contextual guidance can be much more effective than simply outlining features.
For example, create instructions that help the reader solve a specific problem or reach a goal. So rather than telling someone how to do something, try demonstrating it through your instructions and encourage the reader to follow along in real time.
This approach will make the instructions much more engaging and will help end-users navigate a tool’s features to complete complex tasks easily.
4. Use quality media
If you decide to use visual media, such as images and videos, in your step-by-step instructions, you have to make sure it’s good quality.
While that doesn’t mean you need to hire a film crew to create an employee training video, you should, at least, ensure the picture and sound quality aren’t distracting your audience.
You also don’t need advanced equipment, as the built-in webcam and microphone on your computer are probably good enough to create videos, screencasts, and other visuals.sts, and other visuals.
5. Make your instructions easy to share
It’s important to remember how busy people are, and when it comes to figuring out how to do something, not everyone will have the time to download and read a large PDF document or presentation.
For this reason, it’s important to ensure that you present your instructions in a visual format that’s easy to share and access.
If you’re using Snagit, you can instantly generate a Screencast link to your content where viewers can leave comments or ask questions. Screencast also makes it easy to organize your images and videos into collections for easy access.
FAQs
What are visual instructions?
Visual instructions are directions that combine written steps with visuals such as screenshots, GIFs, videos, diagrams, or flowcharts. They break a process into smaller actions and add context so people can see what to do. That makes complex tasks easier to understand, follow, and repeat.
How do you create instructions using visuals?
Start by naming the task and defining who is responsible for the process. Then decide which steps to include, document each step with the details people need, and add the right visuals such as screenshots, annotations, or short GIFs. After that, test the process with the people who will use it and update the instructions based on feedback.
Why is it important to use visuals in instructions?
Visuals help people understand a process faster because they can see each action instead of only reading about it. They are especially useful for onboarding, software adoption, knowledge sharing, and process documentation. Clear visuals can also reduce confusion, improve consistency, and make instructions easier to share across teams.
What visuals work best in step-by-step instructions?
Screenshots work well when a single image is enough to show what someone needs to do. GIFs are helpful when a screenshot is not quite enough but a full video would be more than you need. Diagrams, flowcharts, and videos can also add clarity when a process needs more explanation or context.
Share