5 Mistakes You Need to Avoid When Adding Video To Online Learning

Header- 5 Mistakes to Avoid

With so many options, choosing and rolling out video tools for online learning can present a challenge. But selecting the right ones can be a great way to help professors or staff add engaging elements for students and improve learning.

If you’re in charge of onboarding faculty to a new program or getting them to adopt a new tool, it can be even tricker. 

But it doesn’t have to be difficult. 

There are definitely wrong ways to select and incorporate video into online courses, but to help make your life and your staff’s lives easier, we’ve broken down the five big mistakes to avoid when adding video to your online learning. 

That way, you’ll be able to successfully get faculty to adopt your new video tools and engage their students.

Here are the mistakes you’ll want to avoid (and tips on how to fix them):

1. Not making content accessible

Online learning needs to be accessible to every student, regardless of their needs or abilities. As such, it’s imperative that you choose a video tool with accessibility features that all students can easily use. While some may offer captions or other features that technically meet basic ADA requirements, look out for those that lack any of the following:

  • Easy, web-based caption editing with built-in compliance checker
  • In-house human captioning workflows
  • Third-party import and export options
  • Integrated third-party human captioning
  • Audio description support
  • Accessible student viewing and interaction

Additionally, your users shouldn’t have to be accessibility experts to create ADA-compliant content. Accessibility features should also be easy for faculty to use and integrate into video lessons. ADA guidelines undergo changes and updates, so it’s important that the platform you choose is prepared to adapt and support you through any transitions.

Solution: Find a platform with established accessibility workflows, up-to-date captioning features, and a reputation for staying ahead of the accessibility curve.

2. Not being able to create or edit engaging content

If a tool doesn’t allow faculty to easily create and edit engaging content, it won’t be much help for students or staff alike.

The same goes for tools that have the capability of creating engaging content, but are confusing or complicated to use. 

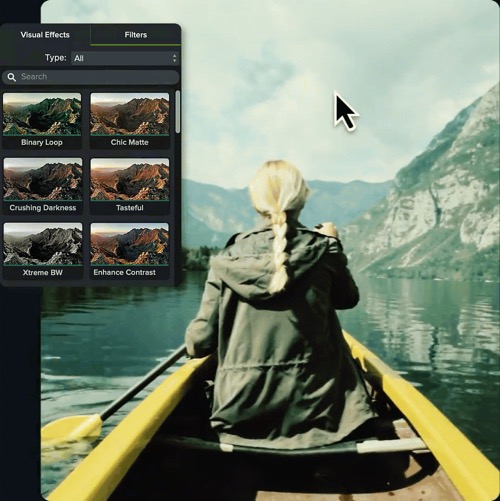
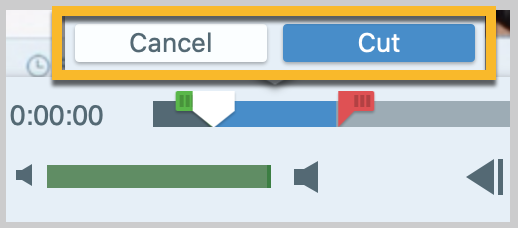
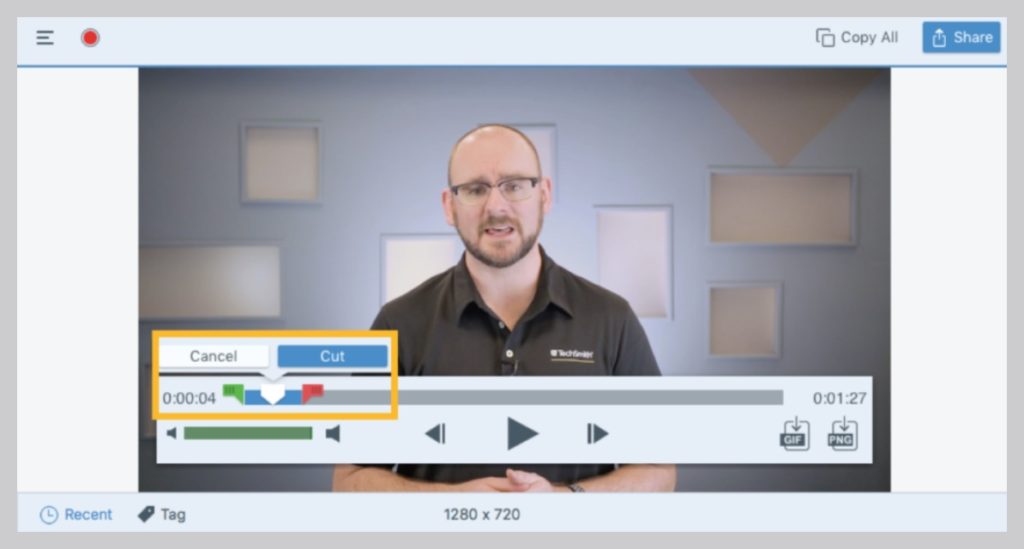
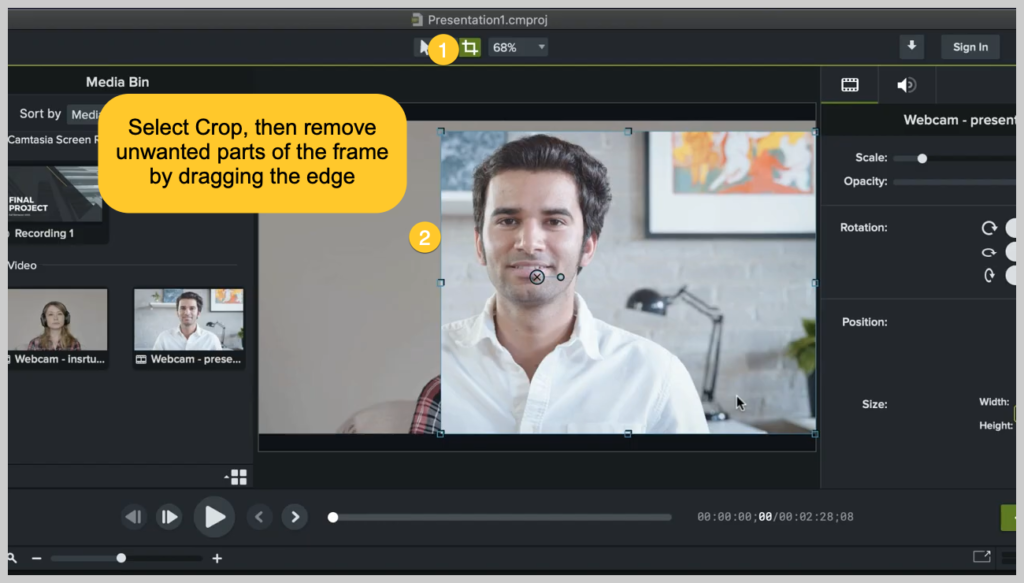
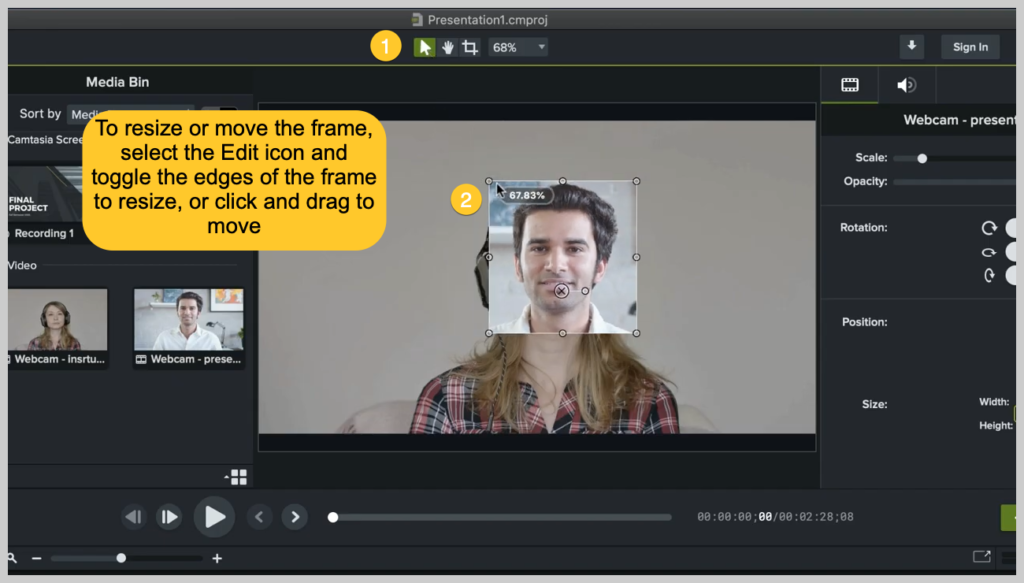
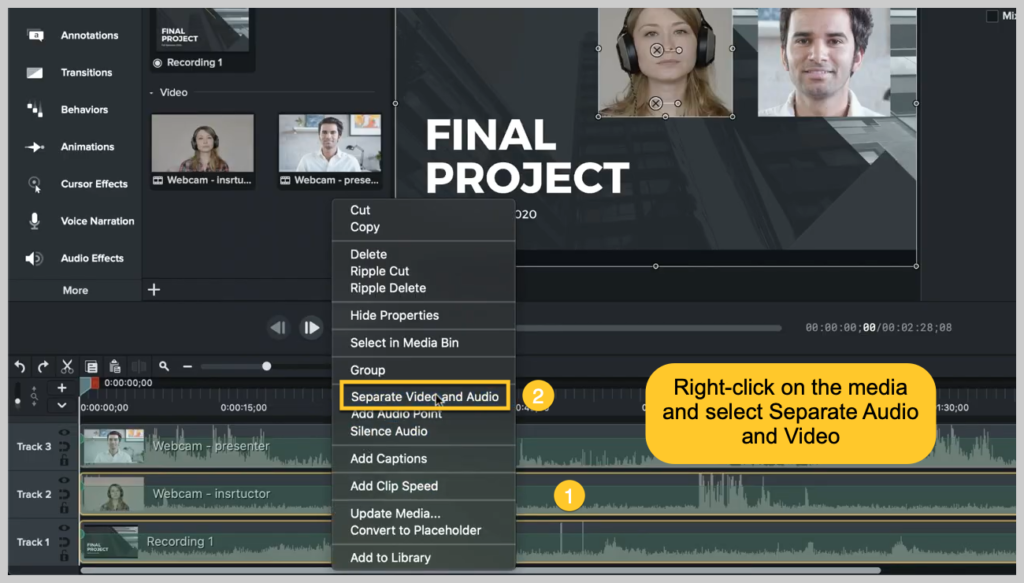
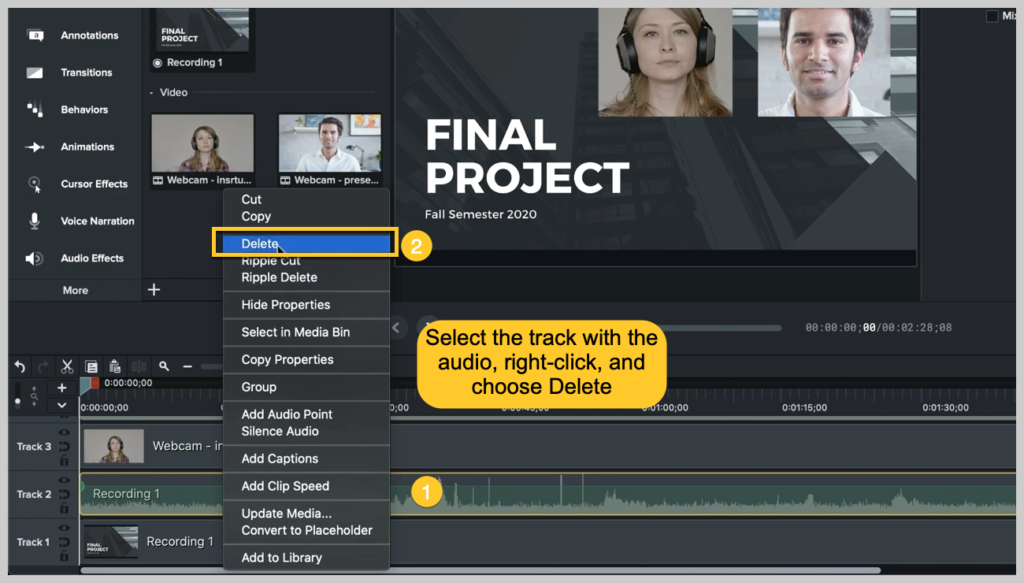
Creating video content for online learning should be as easy as a few clicks, and editing that content should be as easy as dragging and dropping it onto a timeline. Your faculty and staff have enough to worry about without the added stress of complicated processes or poorly designed user interfaces. Tools should be intuitive and easy to learn. 

Solution: Choose a tool that offers easy-to-use tools for adding engaging elements to videos, such as effects, in-video quizzing, and more. 

Learn more about editing videos with Camtasia.

3. Not properly training faculty

Once you’ve selected a reputable company that meets your support, price, feature, and accessibility needs, it’s time to roll out the tool.

Even though the video platform should already be as user-friendly as possible, you’re still going to need to offer training and support to be able to use its full potential.

Faculty or staff will likely have a variety of reactions to new changes, ranging from excited or optimistic to unenthused or doubtful. If insufficient training is provided — or worse, none at all — you’re setting up faculty to fail. Changes should be easy to adopt, and the benefits of making them should be clear.

You can help ease staff’s concerns by providing them with the necessary training and tools for success. 

Solution: While you may need to provide some in-person or live training sessions, consider making the bulk of your onboarding content via training videos! That way, staff can rewatch the training as many times as they need and walk through the steps at their own paces. Make sure a resource is available for questions, though!

If you’re in charge of the training content, consider using the same video platform as the one you’re rolling out to make the videos. That way, you’ll be able to experience firsthand the challenges your faculty may encounter while learning the new tools. 

You can read more about how to make a great training video here.

Easily Create Great Training Videos

Camtasia makes it fast and easy to create professional-looking training videos — no pro skills required! Download a free trial and get started today!

Download

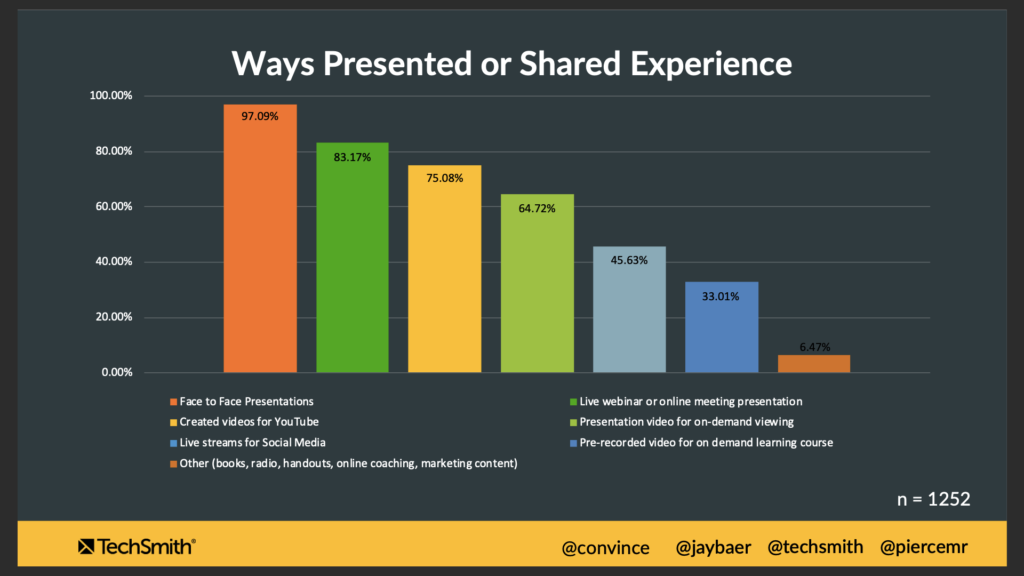
4. Only using synchronous video

One of the biggest mistakes your organization can make when creating content with your new tool is only utilizing synchronous video rather than incorporating asynchronous options.

This is the reason you want an online video tool in the first place. 

Synchronous video is where the communications happen in real time, with all parties engaged simultaneously. An example of synchronous video is a live lecture or video chat. While these real-time discussions can be valuable, they also have several limitations. 

When you only use synchronous video, you may present challenges to students who:

  • Live in a different time zone
  • Work in a noisy or distracting environment
  • Have poor internet connection
  • Don’t always have access to technology or share technology with others
  • Sometimes struggle to keep pace with live lectures
  • Otherwise can’t attend live sessions or experience barriers to live participation and discussion

Asynchronous (or on-demand) video learning content doesn’t try to replicate the in-person classroom experience, but instead leverages the unique advantages of the online environment to meet — or sometimes exceed — the in-person environment.

Solution: Encourage staff to use asynchronous video options! One great example is posting lectures online. That way, students watch the videos on their own schedule, consuming as much or as little of the content at a time as they can. Students can go back and rewatch or review content as needed.

Asynchronous videos can even be enhanced with features such as embedded quizzes for extra engagement. Synchronous learning doesn’t have to be completely eliminated, but mixing it up a little can really help students who face challenges with remote learning keep pace.

Read more: Synchronous vs. Asynchronous Communication

Integrate Zoom with TechSmith Knowmia

Knowmia has Zoom integration features that make posting lectures or recorded meetings a breeze. Request a demo today!

Download

5. Choosing the wrong company

When your organization decides to search for an education video tool, prioritize selecting an experienced, reliable company that can help walk you through the rollout process. 

Avoid companies that fall into any of the following categories:

A company or tool that isn’t easy to use

While some companies may have more features, that doesn’t necessarily make them better than others. 

In fact, overly complex video tools can actually deter staff from using them or even wanting to create videos in the first place. Instructors are already busy, and they don’t have the time or energy to learn all the bells and whistles of a complicated video tool. 

Solution: Search for a product that’s easy to use and that faculty can quickly adapt to. Find a company that can integrate with the tools you already use, such as Zoom or your organization’s LMS. 

That way, faculty can continue the workflow they are already familiar with and increase the efficacy of their tools and teaching methods.

A new or inexperienced company

While newer companies might be the cool new players in online learning, they likely don’t have the experience to truly understand the varying needs and requirements to best serve faculty and students in the online learning space. 

Plus, newer companies or smaller startups likely don’t  have the capability to support you or their platform on a long-term basis. 

As these companies grow and develop, they’re more likely to undergo server downtime and maintenance. This will interfere with your ability to record videos, and may prevent students from accessing material when they need it. 

Additionally, these companies are more likely to have plans for selling the tool or platform, and that transition can spark unnecessary stress for faculty and students. 

Luckily, innovation and creative solutions aren’t exclusive to new companies or platforms. The best companies continue to innovate long after they can be considered “new.”

Solution: Select an established, experienced company with a solid reputation from other institutions that have worked with the tool for multiple years and have a track record of providing new and creative solutions to the ever-evolving online learning environment.

Learn more about how TechSmith supports education

A company with limited or poor support

Beware of companies who offer little customer support and onboarding assistance. You’ll save yourself the headache of trying to learn a new tool and help onboard others all by yourself if you select a company with personalized, easily accessible support.

In addition to being high-quality, customer support should come at no extra cost. A company with fewer support services might have a smaller price tag, but it won’t be worth the enormous costs of your time, energy, and frustration when trying to roll out a platform with little or no help.

Solution: Only consider companies who don’t charge extra for support and who ensure that your account will have a dedicated customer success representative to help walk you through any questions or concerns you may have. They should be able to help get you up and running with your new platform without a ton of hassle.

Learn more about TechSmith’s support and user community.

A company with hidden fees

Stay away from video tools and platforms that charge extra for ongoing costs. Unpredictable or additional fees — such as incremental bandwidth and storage — are difficult to budget for, make pricing a challenge to understand, and create unneeded hassle. 

Imagine how your costs would have skyrocketed when everyone had to make the switch to online learning last spring. It would have been nearly impossible to budget for that unexpected and sudden increase in usage of the platform, bandwidth, and storage. 

Solution: Select a company that clearly states their prices up front and includes all the services and features you need, without hidden costs or unexpected hits to your budget. 

A company that doesn’t have the tools to measure success

How will you know if rolling out a video tool for education was successful if the company you use doesn’t offer any tools to measure student progress? It’s going to be very difficult to convince stakeholders of a platform’s value without concrete data. 

Solution: Choose a company or tool that can measure student success and engagement, including grades, video watch times, and more.

Learn more about how to measure your video success.

Make an informed choice

There you have it! With the right tools and training, you’ll easily be able to help faculty or staff incorporate videos into their online learning.

What’s most important is that you focus on your staff’s needs and choose a tool that will set them up for success.

Now that you’re armed with what NOT to do when rolling out videos, you’ll be a pro in no time. TechSmith Academy has some great tips for educational video creation here.

Go out there and help your staff educate!

Looking to roll out video for your online lessons? Learn more about TechSmith education solutions.

Kara Swanson

Marketing Content Specialist at TechSmith. I know way more about tea than any human being ever should.

Why You Should Repurpose Your Video to Amplify Reach with Amy Woods

Why You Should Repurpose Your Video to Amplify Reach with Amy Woods

How can repurposing your videos help you reach more people?

It takes a lot of time and effort to create a great video. But once you’ve published it, do you stop there and move on to creating your next video? Or do you see how much bang you can get for your buck by finding new ways to bring that video to a wider audience?

Repurposing your video, or any content you create, is a fantastic way to help more people find and engage with your content. Amy Woods is the Founder of niche creative agency Content 10x, and a content repurposing expert. She helps content creators and businesses grow their audience by maximizing their return on the content they create.

In this post, Amy reveals her tips and advice on how you can repurpose effectively. She explains what you can do to make the most of your videos and help each video you create reach a wider audience.

You can watch the video on this topic at the top of this post, to listen to the podcast episode, hit play below, or read on for more…

What is content repurposing?

Content repurposing is a strategy to help your content go further. It involves taking a core piece of content and creating multiple new pieces of content from it. Take videos, for example. You could create one long video to post on YouTube, then edit it into small segments for sharing on social media channels.

Amy believes that, to repurpose your content correctly, you need to take a creative look at your core content and highlight different angles to create new points of interest.

She stresses that content repurposing shouldn’t be confused with reposting.

“Repurposing is not copying and pasting, or just reposting the same things.”

Repurposing should be platform-specific. This means being aware of the nuances between each platform and editing your content accordingly. Even though social media platforms and YouTube both support video content, each platform feature uses different aspect ratios so you should edit repurposed videos to meet the individual platform requirements.

Why you should repurpose your videos

Repurposing maximizes your content’s reach. If your goal is to help as many people as possible or get your video in front of a wide audience, then repurposing can help you achieve this.

Amy has helped her clients grow their audience and business by repurposing their core content onto a range of platforms. She states how it’s important to consider alternative platforms and expand into new formats, for example, creating podcasts from videos.

If you repurpose videos into podcasts, you can reach an entirely new audience” – Amy Woods

Creating content in a completely new medium means that you can access an audience that previously was unavailable to you, and reach your goals faster.

How to repurpose your videos

Some content is much easier to repurpose than others. Videos are great for content repurposing because they’re a versatile medium.

If your video includes audio and speech, it has a lot of repurposing potential. For example, you could:

  • Write a blog post inspired by the video
  • Turn the audio into a podcast
  • Create graphics or take screenshots of the video to share on social media
  • Share quotes or thoughts inspired by the topic on social media
  • Edit the video into short teaser videos and share them on social media

You could generate many pieces of content, in multiple formats, from your original video. Sharing these across multiple platforms is one way to get a wider reach, but Amy also notes that you might not want to share it all at once.

Amy’s top tip is to take an evergreen approach to repurposing. By removing time-sensitive elements, you can repurpose your video across multiple platforms for longer.

“The repurposed content can go on, not just for the week or the month afterwards, but it can be in your treasure trove, your vault of great content, and you can bring out tips and snippets, and all sorts of value in the months and years to come.”

If your video is time-sensitive, it will lose value quickly. But if your content is evergreen, and doesn’t mention times like “last week,” or “next month,” then it can continue to provide value until the information needs updating.

The best type of video to repurpose

Depending on your video, some assets will be easier to create than others. This is why Amy advocates “segmenting” your video content. This way, it becomes easier to repurpose almost any type of video.

To truly make the most of repurposing, you should think about how you’re going to repurpose your video before your record it. Amy suggests planning defined segments that can be easily pulled out and made into shorter videos for other platforms.

“Think about having the same three killer questions that you always ask your guest or the same quick-fire round. When you repurpose that video content, you could always use that same segment to create a one-minute Instagram teaser, for example.”

If you’re creating instructional videos or sharing your thoughts in a thought-leadership-style video, then consider how you could structure your video to pull out segments. List videos, for example ‘5 Questions You Need To Ask Before You Make a Video’, are easy to repurpose because you can pull out just one question and answer. These short, standalone videos are still valuable and helpful for your audience, without requiring you to create a brand-new piece of content.

“You don't need a massive budget to start creating videos” – Amy Woods

How to build a content repurposing process

One of the key factors in effectively repurposing is to develop a system that works for you. This way, you can ensure that you’re consistently getting the maximum amount out of your content, and not missing any elements out.

Amy’s repurposing method relies on a set structure for her episodic content. She knows how hard it can be to repurpose when you’re excited to create the next new video, but she stresses how a process helps keep her on track.

“Make a rule with yourself that you have to take everything off that process checklist before you allow yourself to go on and create the next piece.”

You could use a project management tool (Amy uses Trello) to track your progress and solidify a structure that works for you. But Amy also points out that repurposing can be a very big job, so before you dive into creating a vast amount of repurposed content, she advises to work on consistency first.

“Try not to do everything. Just try to be consistent. […] Don’t try and take on too much. Build habits first, build the process that you’re going to follow, and make that habitual.”

Start by choosing one element to repurpose from your video. You could set a goal to create three teaser videos from every video you create and share them on social media. Once this becomes a regular habit, you can add in another part to the process, and repeat.

Amy’s final thoughts

When it comes to any kind of content strategy, Amy believes that it’s a long game. But by reinvesting in your own efforts, and staying consistent with your repurposing approach, you’ll start to see growth.

She left us with these final words of wisdom:

“Really think about why you are creating the content in the first place. Don’t be so quick to go and create the next piece of content if you haven’t got the most out of each piece of content that you’ve already created. […] Just take it one step at a time, and you’ll see the results.”

If you’re ready to pick up the camera and start creating videos, we can help. Learn how to write a video script, start storyboarding, make a screen recording and more at the TechSmith Academy.

For more expert advice and tips visit TechSmith Academy on YouTube or listen to the Podcast.

Matt Pierce

Matt Pierce is a Learning & Video Ambassador at TechSmith. In this role speaks and teaches about video creation and visual communication. A graduate of Indiana University he has ten years of experience working in learning and development with a focus on visual instruction. He has directly managed the training, user assistance, video, and other teams for TechSmith. Teach him something @piercemr

How to Record Lectures: 3 Methods for Online Learning Success

record lectures hero graphic

Even before the COVID-19 pandemic forced most K12 and higher education institutions to switch to fully online learning, the virtual education space was growing and thriving.

But for some instructors, there are still questions about how to best record lectures and other instructions to ensure student access and success.

For example, is it better to pre-record lectures or will students better learn in a Zoom or other online meeting environment?

What tools are available for recording lectures? Will they be difficult to learn?

How can I be sure I’m providing the best solution for my students?

Don’t worry! Whether you’re new to the online learning space or a verified virtual veteran, this guide to recording lectures will answer those questions and a lot more.

Here’s what you’ll learn:

Why Zoom and other live meeting apps may not be the best way to engage and instruct.

Why on-demand learning can help students learn more effectively.

Three methods for recording class lectures (no matter how much time you have to do it).

Tips for ensuring your recorded lectures are engaging and effective.

To Zoom or not to Zoom

After schools and universities suddenly went to remote-only instruction, many instructors who had never taught online classes were forced to reimagine how to deliver quality education to their students.

Naturally, many tried to recreate the live classroom environment using online meeting tools, such as Zoom, Microsoft Teams, or other similar applications. 

You might hear this type of learning referred to as “synchronous” learning. Really, that’s just a fancy word for live, real-time teaching.

In this scenario, students and teachers have to be in the same (virtual) space at the same time. Everyone sits on the same video call and listens as the instructor lectures. The instructor can share their screen and share additional files or links in the chat, but that’s typically the extent of the interaction.

This type of learning tries to mimic or recreate the face-to-face learning experience in online spaces. 

But here’s the problem: trying to recreate the traditional learning experience online doesn’t always work. In fact, it can actually do more harm than good.

Live online courses limit important aspects of learning, forcing all students to learn at the same pace, without the flexibility to consume course content when and how they can. Students and faculty can experience mental fatigue from the pressure of trying to process highly compressed live video. 

And, because everyone is expected to be available at the same time, students in different time zones, those who may not always have access to high-speed internet, or those who must share technology resources with others in their households are at an immediate disadvantage.

Luckily, there’s a better way. 

How to record your lectures

When you record your lectures and upload them for your students to view, students can watch the videos in their own time, consuming as much of the content at a time as they can. And, they can go back and rewatch or review content as needed.

You might hear of this referred to as “asynchronous” learning, but that’s really just a fancy way to say “on-demand.”

Lecture recordings also allow students to better interact with course content through conversations with their peers, quizzes embedded directly in the course videos, and more. Instead of just listening, they can participate.

Meanwhile, instructors can measure student engagement with the content through quiz results and video analytics (such as who watched and for how long, etc.) Plus, by assigning points to watching videos, instructors can give more incentive to watch and pay attention.

And, because the course is more interactive, personable, and connected, students are better motivated. The flexibility to review content on their own schedule and at their own pace reduces stress and better accommodates different learning needs.

Plus, no matter the size of your audience, the content scales to meet your and your students’ needs. And, because learners consume the content when and how it’s right for them, there are no restrictions on time zones or geographic locations.

That doesn’t mean that live sessions aren’t appropriate at times, but leveraging the advantages of on-demand learning complements live interactions to extend the value of course content.

Three methods to record lectures

If you’ve never recorded and shared a lecture, or if you’re still new to online learning, it can be intimidating. You want to deliver quality instruction, and you want your students to succeed. But, how do you know you’re giving them what they need?

First, know that there’s no one right way to record your lecture. But, there are a number of best practices and tips we can share to make your (and your students’) experience great.

For the purposes of this article, recording and sharing your lectures will center around TechSmith Knowmia Pro.

Knowmia Pro allows educators to engage students no matter where they are by allowing them to:

  1. Easily create and share media.
  2. Discuss lessons and content.
  3. Make learning videos accessible.
  4. Humanize online learning.

Method 1: The quick and dirty

Many people think a recorded lecture has to be super-professional, polished, and rehearsed to be effective.

Honestly, that couldn’t be further from the truth. In fact, research shows that students actually engage better with lecture recordings that are less formal.

The quick and dirty method is as easy as it sounds. Open your slide deck if you have one, turn on your webcam, grab your mic, and record on the fly. 

It helps to have a script (or at least an outline of what you want to say), but your slides can help guide you if necessary.

Open Knowmia Pro and click the Launch Capture button to begin your recorded lecture.

Just open Knowmia Pro and choose Launch Capture. 

The Capture button in the TechSmith Capture window.

Click “Capture” in the dialogue box that opens.

Use the crosshairs to select whether you want to record your entire screen or just a region.

Choose your webcam and microphone.

Start recording!

It’s that simple!

When you’re done, you can trim out sections of the video you want to remove (such as time at the beginning and end where you may be making preparations to start your lecture or finishing up recording tasks).

Pros: 

  1. Leverages content you’ve already created.
  2. Fastest and easiest way to record and share your lectures.
  3. Doesn’t require any video or audio editing.
  4. Best way to start if you’re new to online learning.

Cons:

  1. Doesn’t necessarily showcase the inherent benefits of on-demand learning.
  2. What you record is what you get, warts and all.
  3. No extras, such as quizzes or other ways to increase engagement.
  4. Not the best method for longer videos.

The easiest and fastest way to record and share lectures with anyone

Camtasia and Audiate make it easy to record and caption professional-quality videos

Try Camtasia Today
Camtasia icon

Method 2: The middle ground

In this method, your ultimate destination is still Knowmia Pro, but you’ll actually first assemble your video in TechSmith Camtasia and record and edit your narration using TechSmith Audiate

I won’t go into depth on both of those parts, but here you can find a great article about adding audio to your PowerPoint presentation.

You can also pull in other content, such as screenshots taken with TechSmith Snagit, or other images and video.

Once you’ve created and edited your video in Camtasia, you can share it directly to Knowmia Pro. Here, you can add quizzes if you want and share it with your students. 

Pros:

  1. Again, uses content you’ve already created.
  2. You can enhance your existing content with new images and video.
  3. Easier to edit pieces of the video later, rather than having to redo the whole thing.
  4. Still a fast and easy way to create online learning content.


Cons:

  1. Takes longer.
  2. Requires using other software apps to get the job done.
  3. Minor learning curve for video editing. (Trust me, Camtasia makes it SUPER easy.)

Method 3: The Full Monty

The third method goes all the way. Rather than importing your slides and walking through your PowerPoint presentation as if you were giving it to your audience, you’ll create new video content with custom images and/or video clips. Your slides become a guide for creating that content rather than the content itself.

Use live camera video, clips from other videos, screenshots and other images, and much more. Really, you can be as creative as you want to be.

Enhance the video with audio, images, or video from TechSmith Assets for Camtasia, or from other sources. Add callouts, behaviors, transitions, and more to improve the professional feel of your video.

Again, you’ll assemble and edit your video with Camtasia and share the final product to Knowmia Pro when it’s finished.

Any clips where you’ll be speaking on camera will require you to record your voiceover in Camtasia, but any voiceover that doesn’t show your face can be recorded and edited in Audiate. 

Though Camtasia is the creation tool, it’s Knowmia Pro that really lets your recorded lecture reach its full potential. Once again, you can add quizzes to the video after it’s uploaded to gauge students’ engagement and understanding of the content. 

Use Knowmia’s discussion features to let students ask questions of you or their peers, and facilitate useful discussions around the course content. 

Pros:

  1. Fully leverages the unique advantages of the online learning space.
  2. Easy to replace or edit pieces of the video as needed.
  3. Most polished and professional-looking option.
  4. May help students stay more engaged.

Cons:

  1. Takes the most time to get started.
  2. Requires familiarity with Camtasia features.

Tips for ensuring great recorded lectures

Tips for great recorded lectures. Text is repeated in paragraph below.

Regardless of which method you settle on, there are a number of things you can do to help ensure your videos are useful and interesting for your students.

Show your face

Students want to see their instructors’ faces. An image works in a pinch, but showing video of you speaking will go much further in helping your students connect with you and the course content. And, it may make them feel more comfortable approaching you with questions or concerns. 

Use a script

Creating a script for your video is one of the single most effective ways to ensure video success. Whether you’re recording your webcam on the fly or going all-in with a totally custom video, a script ensures you cover everything you intend to and keeps you on-topic. If you don’t create a full script, I highly recommend at least putting together a list of detailed bullet points.

Be human

Don’t worry about being a perfect presenter or processional voice over artist. Your students will engage better with you if they know there’s a real human — flaws and all — on the other side of the screen.

Speak naturally

Don’t worry about being overly formal with your speech. Talk to your students like you’d talk to them in the classroom. Again, it helps show your humanity, which helps with engagement and trust.

Good audio

A TechSmith study shows that good voice over audio is even more important than image quality when it comes to engagement and enjoyment of your video. Use a decent microphone (not your laptop mic).

Speak slowly and clearly.

Edit your verbal mistakes as appropriate. 

Accessibility

This is Knowmia’s not-so-secret power. Knowmia offers best-in-class automatic captioning for your videos so that students who are deaf or hard of hearing will still be able to consume your video’s content. And, it helps those who may need to consume your video with the sound off. 

If you used TechSmith Audiate to record your audio, you can export it as a text file to use as a video transcript as well. If you started with a script, your script can be the basis for your transcript.

Record your lectures. Your students will thank you!

No matter how you decide to do it, recording your lectures provides a more engaging, effective, and efficient way to deliver course content. And, you don’t have to be a video expert to do it.

With tools like Camtasia, Snagit, Audiate, and Knowmia Pro, TechSmith allows anyone to create professional-quality images and video — no pro skills required. 

The easiest and fastest way to record and share lectures with anyone

Camtasia and Audiate make it easy to record, edit, and caption your videos

Try Audiate for Free
audiate icon
Is it hard to record lectures for online education videos?

No! Recording your lectures can be very simple! Use a screen recording tool like TechSmith Knowmia Pro and you’ll be recording in just a few clicks!

What tools can I use to record lectures?

There are a number of tools available, but TechSmith Knowmia Pro works nearly seamlessly with TechSmith tools like Camtasia and Snagit for a complete online learning software suite.

Are live online classes better than recorded lectures?

No. In fact, many students will benefit from the added benefits of recorded lectures. Live sessions are useful for online learning, but trying to recreate the face-to-face experience in the online environment can sometimes do more harm than good.

Ryan Knott

Ryan Knott is a Marketing Content Strategist at TechSmith, where he creates content about easy, effective, and efficient video creation, editing, and tips and tricks, as well as audio editing for creators of all kinds. He/him.

Why You Need to Try an Audio-First Workflow for Your Videos

Why You Need to Try an Audio-First Workflow for Your Videos

There are many ways to build video tutorials, but how could an audio-first workflow optimize your process?

An audio-first workflow for visual content might sound awkward, but it’s one of our preferred methods for creating tutorial videos. By recording the audio first, you have more flexibility and opportunities to control the pace of your video.

Pace is incredibly important in a tutorial video. Your audience should have time to absorb the content without getting bored. An audio-first workflow allows you much more control over how quickly or slowly you move through each step.

In this post, we’re going to walk you through our audio-first workflow. Taking you from what to do before you record your audio to building your video.

This process can be used for screen recordings or camera video, however it’s important to note that matching pre-recorded audio to a moving mouth can be challenging. In this example, we’re going to use screen recordings and build the video using Camtasia

You can watch the video on this topic at the top of this post, to listen to the podcast episode, hit play below, or read on for more…

Why choose an audio-first workflow?

There are four main ways people create videos:

  • Livestream
  • Record audio and video at the same time
  • Record video first, then audio
  • Record audio first, then video

Each process has its unique benefits, but an audio-first workflow is a straightforward route to creating a neat, high-value video for your audience.

Livestreaming or recording off-the-cuff is good for engaging with your audience and bringing them the information quickly, but these videos can often be repetitive, longer, and provide less-value. While recording audio and video at the same time, and even video first, can present editing challenges that aren’t present in an audio-first workflow.

Whichever process you choose, knowing what you’re talking about is key, so it’s highly recommended to plan your video by creating a storyboard or writing a script. In fact, before you begin your audio-first workflow, we strongly recommend writing a script first.

The four-step audio-first workflow

1. Write a script

A script is a key part to recording a clear and useful video tutorial. Your script is basically a written plan that allows you to see what you need to create, and what parts of the process you need to show.

Your script will be the audio that gives your audience context about what they’re seeing on the screen.

The secret to a good script is to cut anything you don’t need. Storyboarding or scripting out your video is a great way to refine your content so that everything you include helps your audience towards their goal.

The secret to a good script is cut, cut, cut!

If you need help writing a script, you can find an outline template, scriptwriting advice, and more useful scriptwriting tools in the TechSmith Academy.

For this example, we’re going to use a simple script. Below is a sample script template we use at TechSmith. It’s structured using three columns. Each numbered row helps you keep track of where you are in your video, the ‘Action’ column tells you what visuals to record for that section, and the ‘Narration’ column is what audio you need to record.

Sample Script Template

2. Record the audio

Use your script to record the narration parts for your video. To make editing easier, pause between each sentence. You’ll know when to pause if you use a script or a framework like the template above, which naturally breaks up the narration.

If you make a mistake when recording a line, or want to re-record, you can streamline your editing process by indicating the mistake with a spike on the waveform. You can do this by clapping or clicking twice.

Indicating a mistake with a spike on the waveform

This double spike is an indicator that you can use to quickly locate the part that you don’t want to use. You can then remove this part of the audio. However, do make sure to leave a pause either side of the remaining audio.

Once your audio file is correct, then you can begin to record the visuals.

3. Record the video

There are two ways you can record your video using an audio-first workflow, you can use the audio to help you record the video or you can use the script. If you have a script with action items, like the example template above, it’s recommended to use the script.

Remember that screen-recorded video can be very flexible in the editing stage. Your pace is less important when recording raw video than it is for audio, as it’s easier to speed up or slow down screen-recorded video.

Practice your recording first. Is there anything unexpected that you don’t want in your video, e.g. drop down menu answers? Can you complete each action in the way you need for your tutorial?

Once you’re ready to record, make sure you can see your script, and then go through the actions one at a time.

A top tip is to pause after every action just like when you were recording the audio. When you pause, move your mouse cursor to one side and consciously stop moving it. This will prevent any jumps if you need to trim in between actions and help create a more seamless video.

4. Edit your video

Using the script and your pre-recorded audio as a guide, you can edit each segment of your video one at a time, speeding up, slowing down, or trimming the video file to fit the audio.

You’ll need to consider how you want to order your instructions.

For example, do you want your audience to hear the instruction and then see it shown on the screen? Or do you want them to get both pieces of information as they happen?

What’s going to lead your audience down the path to most success?

If you’re guiding your audience through a complex process, they might need more time to digest each piece of information. Telling them and then showing them the instruction might be more appropriate. However, if your video is a simple workflow, it will make for a smoother and faster-paced tutorial to show and tell them at the same time.

For any video, but especially instructional content, it’s important to bear in mind how you’re helping your audience.

You can even use software like Camtasia to make further edits to your video for greater clarity and accessibility. For example, you can increase your cursor size so your audience can track your movements better or incorporate effects. Effects like Clip Speed can help your video maintain a quick pace in parts, which may have taken you longer to record.

An audio-first workflow allows you freedom when editing, and you can control your video’s pace easily.

While your videos might be more complex and dynamic than this example, the basic workflow remains the same. Make sure your audio is recorded and edited first, then create the video recording and make it fit your audio.

To learn more about screen recording, from learning the basics to brushing up on your skills, visit the TechSmith Academy.

For more expert advice and tips visit the TechSmith Academy on YouTube or listen to The Visual Lounge Podcast.

Matt Pierce

Matt Pierce is a Learning & Video Ambassador at TechSmith. In this role speaks and teaches about video creation and visual communication. A graduate of Indiana University he has ten years of experience working in learning and development with a focus on visual instruction. He has directly managed the training, user assistance, video, and other teams for TechSmith. Teach him something @piercemr

5 Secrets Every Online Course Creator Should Know With Emily Weiss

5 Secrets Every Online Course Creator Should Know With Emily Weiss

How do you create a successful online course?

Online courses are an increasingly popular type of training. They can be a great tool to communicate clear messages to people and help them develop new skills.

What’s great about online courses is that they can be as broad or specific as you want. So, no matter what your training goal is, there’s the possibility to create a course.

But with so many online courses available, how can you design one that’s successful? Emily Weiss, Head of Partner Marketing at Thinkific, has helped hundreds of course creators find what works (or doesn’t work) for them. In this post, she shares her secrets for creating effective online courses.

Whether you’re a course creator looking to level-up your skills or have never created one before, these five secrets can help you design a more successful online course.

You can watch the video on this topic at the top of this post, to listen to the podcast episode, hit play below, or read on for more…

What makes an online course successful?

Emily states that people buy an online course to complete a “transformation journey” from their current state to their desired state. If you need to learn a new skill to get that promotion at work, for example, you might invest in an online course to improve your skills and reach that promotion.

But she also notes that we seek out the easiest route to achieve our desired state; we look for “the path of least resistance”. When online courses help people reach their goals in a simple way, they’re more effective. This results in great success for course creators, as happy students mean more referrals, more clients, and more revenue.

In her time at Thinkific, Emily has discovered five secrets that help define “the path of least resistance” for online courses. 

Online course creation secret #1

Secret 1 - Sell before you create

If you’re creating a course, you first need to consider if there’s a demand for it. Online courses take a lot of time and effort, and if there’s no demand, it could be a waste of your time.

Emily’s first piece of advice is not to rely on your hunches, “take the time to prove market demand.”

One of the best ways to prove that there are people interested in your online course is to pre-sell it. Pre-selling generates buzz about your course before it exists. So, on launch day, plenty of people will be excited to start using it.

Pre-selling it also allows you to understand what your potential users want from your course and what problems they have that you can help solve.

“Knowing your audience can be super powerful for growing and building a business” – Emily Weiss

Emily shared a story about one of Thinkific’s online course creators who proved market demand for her course by simply conducting a survey.

“She said, ‘I’m thinking of creating a course – what is your single biggest professional challenge?’ And she saw one overwhelming theme. She said, ‘Okay, that’s where I’m going to focus my online course’. So, she built a one-page overview of her course, put her learning outcomes in there, and then set a presale price.”

People then pre-purchased her course for $500 – this course now sells for over $2,000. By taking the time to prove market demand, the creator knew exactly where to invest her time and effort in order to create an online course that people wanted to buy.

Emily notes that proving market demand doesn’t necessarily mean getting thousands of people to pre-purchase your course. It can simply be understanding if your audience is interested enough to invest.

“The starting point is to talk to your audience and make sure that they’re actually interested in what you’re about to create.”

If you don’t already have an audience, first work out who your ideal audience would be. Then start visiting the communities or forums where they are. As you build and communicate with your audience, you can find out what problems they have that your course can solve.

Emily’s final pre-course creation tip is to do some competitor research. It shows high market demand when someone is already very successful, so work out what makes you different, and don’t let it put you off.

Online course creation secret #2

Secret 2 - Repurpose first

How do you decide what content to include in your course? Emily’s advice is to take a look at your best performing content first.

If lots of people are getting value from a blog, YouTube video, or podcast that you’ve created, this is a good indicator of what can work in your online course. You can also save a lot of time and effort using existing content to create your course.

Emily encourages course creators to repurpose by expanding on their content. For example, if your blog details a topic’s ‘what’, your course can reveal the ‘how’. She also suggests reformatting content, like transforming an e-book into a more engaging, interactive learning experience or revisiting a topic through a new lens.

“Maybe you’ve written a blog post about SEO, and now you want to teach an SEO course. You can repurpose your basic principles through a new lens. So maybe you were talking about SEO for bloggers in your blog post, but now you’re going to talk about SEO for small businesses. You can create a new course all around that, applying the same principles.”

Of course, you can create new content too. But by starting with content that you’ve already created, you can streamline and speed up the process.

Online course creation secret #3

Secret 3 - 10X value with video

We’re big believers that video = value. But how does video content specifically bring greater value to an online course?

Video is an essential learning tool. It’s many people’s preferred learning method and is often more engaging and entertaining than written content.

Emily advises to start with a welcome video. This should be a short, 2-3 minute video introducing yourself and the online course topic. Then create course content videos, Emily suggests “the shorter they are, the better”.

“You want to get your message across and sometimes you need shorter videos to do it, so that your student can actually absorb the information. Usually, seven minutes is the sweet spot.”

However, Emily points out that you should prioritize delivering your message effectively and succinctly rather than video length. If you can communicate your learning points in four minutes, then don’t stretch out your videos.

On the other hand, if your videos are running too long, don’t be afraid to split them into shorter pieces of content.

The biggest challenge that course creators face, according to Emily, is confidence. Getting in front of the camera is challenging for many, and if you don’t have access to high-quality equipment, you might doubt your ability to provide good video content. But Emily pushes back on this idea.

“You can definitely be scrappy, people will forgive you if your video is not perfect, especially right now when everyone is having to turn on video for the first time and learn how to do this. People are super patient and willing to forgive if the content is good.”

Online course creation secret #4

Secret 4 - Community = Success

After the global pandemic drove people to use online courses, Emily noted that the biggest trend she saw was the need for community.

Having a community element in your learning environment means that learners feel more connected. Live video, forums, and chat functions can effectively establish relationships and this sense of community is often what keeps people coming back for more.

“Community is such an important part of an online learning experience right now” – Emily Weiss

In fact, Emily states that the underlying theme to all of Thinkific’s most successful course creators is their dedication to forming communities. Examples include, Facebook groups, platform-specific community features, in-app discussions, and comments on lessons.

One way to encourage communities within your course is to construct time-bound launches where a group starts the course simultaneously. You could make a private group for those new starters so they can connect and share their thoughts.

Emily suggests that it’s possible to grow your community to a point that it becomes self-sustaining. This means less work for you but also a better community experience for your learners.

Your community can get involved and answer the questions themselves, so that you as the host, or the leader don’t have to go in and answer every single question. […] The community and the learning experience aren’t separate, they become integrated.”

This leads into Emily’s final secret of successful online course creation: interaction.

Online course creation secret #5

Secret 5 - More interactive the better

Interactive experiences engage learners. Online training can be dry and hard to absorb for some learners, however by incorporating interactive material, it can make courses more enjoyable and therefore help leaners on their transformation journey.

Quizzes, surveys, assignments encourage students to reflect on their progress and reinforces their learning. Emily highlights that you shouldn’t always be telling your learners what they need to do. You also need to “give them the opportunity to execute.”

“We’ll see course graders actually say, ‘Don’t go watch the next video until you’ve written out your one-page marketing plan, or you’ve gone and put your film in your camera’, or whatever your action item is. It’s really important because that keeps your student engaged learning and moving forward and gives them the opportunity to apply what they’ve learned.”

With so many platforms developing new learning technologies, there are many different ways you can encourage students to interact. It could be with the content directly or with other learners in the community.

These interactions strengthen the learning experience and ultimately helps your learners complete their “transformation journey”. Emily believes that by using these five secrets you can create a “path of least resistance” for learners to achieve their goals and make your online course a success. At TechSmith, we’re passionate about helping you level-up your course creation skills. To get more helpful advice on planning, writing, and recording training content, visit the TechSmith Academy.

For more expert advice and tips visit TechSmith Academy on YouTube or listen to the Podcast.

Matt Pierce

Matt Pierce is a Learning & Video Ambassador at TechSmith. In this role speaks and teaches about video creation and visual communication. A graduate of Indiana University he has ten years of experience working in learning and development with a focus on visual instruction. He has directly managed the training, user assistance, video, and other teams for TechSmith. Teach him something @piercemr

10+ Gift Ideas You Need to Ask For This Year

10+ Gift Ideas You Need to Ask For This Year

Good tech isn’t just for Christmas.

TechSmith is proud to present the ultimate gift guide for the video creator, audio editor, or remote worker in your life.

If you want to level-up your video or audio production, or want to know what products the TechSmith team recommends to make truly great videos, then your Christmas has come early! The TechSmith team are sharing their top tech gifts, as well as their tips and ideas for communicating more successfully online.

This post reveals our top audio and video gift recommendations, including microphones, lighting, camera, headphones, and more. It also shares advice from members of the TechSmith team including Ryan Bort, Austin Norton, Dave Patton, Mike Kujansuu, Jessie O’Donnell, Rachael Parker, and Matt Pierce.

You can watch the video on this topic at the top of this post, to listen to the podcast episode, hit play below, or read on for more…

Top audio gifts

Microphones

Above all else, the first thing we recommend you invest in is good audio.

"Having a good microphone can reduce distractions" - Austin Norton

Poor-quality audio is the number one reason people stop watching or listening to a piece of content, so it’s worth investing in a good microphone.

Austin Norton is a TechSmith Project Manager, and he believes that while better audio is a no-brainer for anyone creating videos or audio content, it can also improve communication.

“Having good audio quality removes one less barrier of being a clear communicator. In my role, that’s super important. It’s always easier to listen to someone speaking when they have good audio quality. I want to make it as easier for me to communicate clearly.”

So, don’t underestimate the power of a good microphone. If you want to level up your video or audio content, then investing in a microphone really is the best place to start. It’ll mean less time and money spent on audio editing tools as well as better communication between you and your team or audience.

There are a variety of different microphone options out there, from USB desk mics to shotgun mics, and even lapel mics – which can be hooked up to a digital recorder for producing audio content on the go. Depending on your wants and needs, you’ll need to consider what microphone features are essential for you.

TechSmith recommends:

Headphones

There’s a lot to think about when choosing headphones, for example, what do you need practically? If you’re a runner, you’ll need ones that don’t easily fall out (or off). But if you use your headphones a lot, they’ll also need to be comfortable to wear for a long period.

Next, consider what you’ll be using them for. A video or audio editor will have very different headphone requirements to a casual podcast listener. With so many different types available, it’s possible to find a pair of headphones that should suit your intended needs.

Ryan Bort, TechSmith’s Brand Experience Coordinator, recommends AfterShokz bone conduction headphones. These sit outside the ear, allowing the user to still be present in their environment without compromising on sound quality. Here’s why Ryan loves them:

“If you go for a run, it’s safer to hear traffic or anything that might be going on around you. You’re aware of your environment, but I actually use them more in the office. I can hear conversations when we’re in the office, I can hear others talking and I can still jump into conversations.”

But Ryan also notes that it’s a good idea to have more than one pair if you’re using headphones a lot or have varying needs. For example, he uses a noise-cancelling pair when video editing as they help him to focus on the sound. And, while Bluetooth headphones are a popular choice, they run out of battery eventually! Avoid being caught short by having a back-up pair, that you can plug into your device if needed.

One point Ryan stresses is to be aware of ear safety when using headphones. It might be tempting to turn your favorite tune up louder but be aware of the long-lasting effects.

TechSmith recommends:

Audio editing software

If you’re a video or audio creator, you’ll know how time consuming the editing process can be. Mistakes happen all of the time and finding them in a large file can be like looking for a needle in a haystack – especially with audio files.

Audiate automatically transcribes audio and lets you use the transcription as a way of editing. Stuttered or said the wrong thing? Find your mistake in the transcription and delete what shouldn’t be there, just like editing a text document. Audiate then edits the audio file, based on your text changes. Matt Pierce calls it “a visual editor for audio”.

You can also remove background noise, echoes, and neaten up your audio files with ease. Austin recommends Audiate for this reason:

“It’s very, very user friendly. I don’t make a lot of videos, so for someone like me, it’s easy to edit your audio without having to like track waveforms and get into the really nitty gritty.”

You don’t need any prior audio-editing experience to make the most of Audiate so it’s perfect for any beginner.

TechSmith recommends: Audiate

Top video gifts

Lighting

An easy way to upgrade your appearance on camera is to invest in lighting.

LED lights are a great way to enhance your lighting game. They come with multiple options to adjust temperature, colors, brightness, and more. They’re also smaller than traditional box lights, portable, as many come with battery packs, and don’t require the extra expense of bulbs. A proper lighting setup is highly recommended if you want to produce better quality videos.

But if you’re working from home, consider how your lighting affects how you appear on camera. Can your team see you properly? Small changes like using a desk lamp and switching off your overhead light can make a big difference, and allow your team to connect with you, rather than your shadow.

TechSmith recommends: LED lights

Camera

An obvious way to improve your video quality is to use a camera fit for your needs. Cameras are one of the most expensive investments you can make in video production, but they’re worth it.

If you’re a beginner video creator, Matt Pierce, TechSmith’s Learning and Video Ambassador, advises to use what you have first. Whether it’s a webcam or a smartphone camera, getting comfortable with your existing technology and learning some video recording basics first can pay dividends if you do eventually decide to spring for a more professional option.

For recording the TechSmith livestreams and video podcasts, Matt uses the Sony Alpha a6400 Mirrorless Camera. While he believes better cameras give better results, it comes with the caveat of knowing how to work the more complex technology for those improved results. His advice for budding video creators is to:

“Focus on making good video, good content, and then up the quality of the video.”

TechSmith recommends: Sony Alpha a6400 Mirrorless Camera

Screen recording and video editing software

Training videos, video job aids, and video tutorials or instructions have been increasingly popular this year. Even if you’re not a video creator, you may have found yourself recording your screen in order to show a friend, family member, or colleague how to use a piece of software, in lieu of actually being with them.

Easy-to-use screen recording and video editing software can make a real difference to how you produce these types of videos, and how well they’re received. Mike Kujansuu is a Portfolio Marketing Manager at TechSmith, and he primarily uses Camtasia for creating clear and effective tutorial videos.

“You might have family members who get some new technology, computers or devices this holiday season. Give them a true gift by making a tutorial so that they can actually use it. Because if not, they may reach out to you again and again with different questions.”

They also open up so many possibilities for being creative! Mike suggests that if you haven’t seen your family or friends much this year, a great gift could be a holiday greeting video with pictures, images, and video, showing what you’ve been up to.

People often hesitate about investing in video editing software because it can take some work to understand how the program works. However Mike’s advice for any video creator (no matter how amateur) is to just start playing around with the software and features.

"A lot of time the biggest hurdle with creating videos is thinking that you can't do it" - Mike Kujansuu

Creative projects are a great way to take the pressure off and enjoy learning how to use the program. You can create tutorials, holiday videos, liven up a presentation with animations or moving images. For beginners, Mike advises to start with materials you already have, and find out how you can bring them to life through video.

TechSmith recommends: Camtasia

Top remote working gifts

Backgrounds

How can a background affect the way you work?

You might have seen more of your colleagues’ homes this year than ever before thanks to video conferencing technology, but does it affect the way they work – or even how you respond to them?

Dave Patton, TechSmith’s Media Coordinator, learned an interesting lesson when he first decided to use a simple Ikea room divider as his background.

“One of the benefits that I wasn’t really expecting is it actually helps me focus. Every morning I go through putting up the screen, aligning the camera, and getting ready. It helps me focus on my work and I’m not concerned about anything going on behind me.”

There are many benefits to having a background, whether you’re a video creator or do a lot of video calls. They can help establish more about your personality, create a professional image, remove distractions, and hide some of those working-from-home realities, like laundry baskets!

It’s important to consider if your background is suitable for your video content. For example, if you’re on a video call with your colleagues or creating an entertaining video, decorations and props can help to showcase your personality. However, if you’re presenting an informative webinar and need your audience to focus, a less distracting background might benefit you more. 

TechSmith recommends: Ikea room divider

Wellness

When you feel good, you work better. Looking after yourself can be one of the best ways to improve your videos so make sure you’re looking after yourself when you’re working remotely.

Rachael Parker, TechSmith’s Brand Experience Strategy Manager, noticed many changes in her working experience when she transitioned to working from home. One of which being that she started to drink much more water.

It’s important to take care of your voice no matter how you’re talking to your colleagues. Staying hydrated will put your voice under less strain, and makes it easier to record videos or audio material without having to take a break.

Another thing Rachael noticed was that she wasn’t as active at home. Many of us spend a lot of time sat at a desk, and Rachael wanted to make this more comfortable. So she invested in a Zyllion Shiatsu Back and Neck Massager.

“Sitting is really great or not great for your muscles, and it actually gives me headaches. This pillow was so very much worth it. It’s heated, so it’s pretty great. I can just sit there and relax while I’m on my meetings.”

TechSmith recommends: Zyllion Shiatsu Back and Neck Massager

To recap, here are TechSmith’s top tech gifts:

Don’t forget to treat yourself too! Level up your video and audio production skills for free at the TechSmith Academy account. Sign up to get access to courses, advice, and more.

Matt Pierce

Matt Pierce is a Learning & Video Ambassador at TechSmith. In this role speaks and teaches about video creation and visual communication. A graduate of Indiana University he has ten years of experience working in learning and development with a focus on visual instruction. He has directly managed the training, user assistance, video, and other teams for TechSmith. Teach him something @piercemr

How to Trim a Video Quickly and Easily

How to trim a video

When you make a video, you are constantly competing for people’s attention. Trimming the beginning or end of a video can help your video get the attention it deserves. 

Once you get people interested, the next goal is to keep them watching. Keeping the attention of your viewers is vital, and you can do this by cutting unnecessary content with the trimming tool.

Trimming is a fundamental part of editing videos and usually refers to taking off either part of the beginning or end of a video clip. Sometimes this is referred to as trimming the top or tail (beginning or end).

What is video trimming?

If you think back to the days when people shot with actual film, filmmakers would have to physically cut out parts of the film and reconnect the sections they wanted to keep. In today’s digital age, video trimming refers to the same concept — but without the scissors.

This process is important for a number of reasons:

  • Conciseness: Nobody enjoys watching long, drawn-out videos. By trimming your content, you’re ensuring the audience will stay engaged with your video.
  • Professionalism: A well-trimmed video showcases a higher degree of professionalism. It’s a clear sign that you’ve taken the time to refine and polish your content.
  • File Size: Shortening the length of a video can also reduce its file size, making it easier to upload, share, or store.
  • Storytelling: Sometimes, a scene or segment may not fit the narrative you’re trying to tell. Trimming allows you to ensure your content flows seamlessly so that the final video makes for one cohesive story.

Video trimming is a fine art (ask any Hollywood director!) that requires discipline, precision, and patience but if you can learn how to trim a video effectively, it will make a big difference to your videos. 

Edit your own videos like a Pro

Camtasia is the best screen recorder and video editor on the market. Create content your viewers actually watch.

Download now!
Camtasia user interface

Why Trim Videos?

Trimming is critical to making sure that your video starts quickly and you don’t lose your audience’s attention. 

The first five seconds of a video are where you draw your viewers in and convince them to stick around for everything you have to say. Strategic video trimming helps you cut out everything unnecessary, leaving just the content that’s going to keep your audience’s eyes glued to the screen.

If you’re following best practices when recording your video, you probably have the camera running before the action starts, which ensures you don’t miss any part of a shot that you might need later on. It’s also an opportunity to add a sound that allows you to sync your audio and video when editing.

trim video clap board

How is trimming different from splitting and cropping?

As we discussed above, trimming usually refers to taking off either part of the beginning or end of a video clip. Of course, there are other ways to edit your video beyond simply trimming the beginning and the end. Splitting and cropping are among the other most common techniques.

Splitting cuts a video clip into two parts. This editing trick comes in handy when you have a long video, need to remove mistakes, or want to place a transition between two sections. Splitting clips and working with them separately often makes editing a large video easier, as you don’t have to work with one huge clip.

On the other hand, cropping a video involves removing excess pixels around the edge of your footage. Crop mode is a non-destructive procedure, which means you can “uncrop” your video if you don’t like the changes you made.

Trimming, cropping, and splitting are all great techniques to have in your video editing tool belt.

Edit your own videos like a Pro

Camtasia is the best screen recorder and video editor on the market. Create content your viewers actually watch.

Download now!
Camtasia user interface

How to trim videos using Snagit

Using TechSmith’s Snagit is one of the easiest ways to trim a video — especially if all you want to remove is the beginning and end of a clip. Don’t believe us? Well, let us show you! Here’s a quick and easy guide that demonstrates the best ways to trim videos in just four steps: 

Step 1: Record or open a video in Snagit

If you’re capturing a screen recording, your video will automatically open in the Snagit Editor once you’re finished. 

However, if you want to edit an existing recording, you can open the file in the Snagit Editor by going to File in the toolbar, clicking Open File… and choosing the footage you want to trim.

Step 2: Select a portion of video to trim

With your video clip open, use the playhead in and out points to select the portion of the clip you’d like to trim.

trim video cancel cut

Step 3: Click cut to remove the selected portion

Next, click the Cut (or Trim) button to remove the selected portion of the video. Snagit will add a small yellow mark in the timeline to indicate where a portion of your video was cut.

Continue to select and cut portions of your video until you’re left with only the content you want to keep. If you accidentally trim too much footage, don’t panic! Just head to Edit in your toolbar and click Undo. 

Note: In some other programs you can use Delete, which will remove the portion entirely. 

trim video select cut

Step 4: Save your trimmed video

Finally, save your freshly trimmed clip. If you want to preserve your original clip, use the Save As… option and save the new clip under a file name that is different from the original.

trim video save as

How to trim videos using Camtasia

You can also use a more advanced video editor like TechSmith’s Camtasia to trim videos on your Mac or Windows computer. Camtasia, and some other video editors, make trimming video clips incredibly easy, but come with additional tools for more complex editing. 

For example, unlike Snagit, the video cutter in Camtasia allows you to trim the video and audio files separately. With Camtasia, you can also change the speed of a video, add captions to a video, and even make split screen videos

One of the best ways to trim videos with Camtasia is to hover over the edge of a clip, which will make the trimming cursor appear. But, here’s a more detailed breakdown of the process:

Step 1: Import or record a video and add it to the timeline

First you’ll need to add your video clip to Camtasia, which you can do by going to File > Import > Media. Then, with the clip in Camtasia you can click and drag it to your project timeline. 

If you recorded your video in Camtasia, it will be added to the clip bin automatically and you can drag it to the timeline.

The ultimate guide to making amazing videos

Watch our video and get great advice on how to start making videos, promotion, and more.

Watch more
techsmith logo

Step 2: Use editing tools to trim your clip

So, there are actually two ways for trimming in Camtasia, which we’ll label Method A and Method B:

Method A: In the editor, use the green and red playhead handles to select the portion of the clip you want to trim (similar to Snagit!).

trim video red green playhead screenshot

Then simply click the Cut to remove the selection.

trim video cut clip screenshot

Cut will remove the clip, but save it to your clipboard so you can paste it somewhere else if you wish.

Then click and drag the end of the clip to the point that you want to trim. Don’t worry if you trim too much — editing in Camtasia is non-destructive so you can always click and drag the end of the clip back out.

Method B: The second method is to split and then trim a clip.

To do this, move the playhead to the location from which you want to trim footage. Next, click the Split button to slice the clip in two.

Now you can delete the part you no longer need, or keep the clips and trim each one.


If you’d like to learn more about trimming, splitting, and other video editing techniques check out our Editing In-Depth tutorial video.

Edit your own videos like a Pro

Camtasia is the best screen recorder and video editor on the market. Create content your viewers actually watch.

Download now!
Camtasia user interface

Video trimming, the FAQs

How to trim a video on iPhone?

To trim a video on an iPhone, open the Photos app, select the video you want to trim and tap Edit, then drag the sliders at either end to select the footage you want to keep. Once you’ve selected the portion you want, tap Done to save your trimmed video.

How to trim a video on Android?

To trim a video on Android, open the Gallery or Photos app and select the video you want to trim. Then, tap on the Edit button to open the editing board before tapping Trim (which might be a scissors icon). Next, drag the sliders at the start and end points and click Save when you’re done.

How to trim a Youtube video?

To trim a YouTube video without re-uploading it, sign in to YouTube Studio, select Content, choose the video you want to edit and click Editor. Select the Trim feature, and a blue box will appear; adjust its sides to cover the part of the video you want to keep and click Save.
If you need to remove a specific section, select NEW CUT, and a red box will appear, which you can adjust to select the footage you want removed.

How to trim a video on Windows?

To trim a video on Windows, open the Photos app and select the video you want to trim, before clicking Edit & Create. Next, click Trim and adjust the start and end points using the sliders. For more advanced editing tools, check out TechSmith’s Snagit, which offers a range of features, beyond basic trimming.

How to trim a video on Mac?

To trim a video on a Mac, you can use the built-in QuickTime Player app. First, open the player, select your video, and then click Edit in the toolbar, and then Trim.
Next, drag the yellow handles to select the footage you want to keep, and then click Trim to finalize your edits. For a more advanced editing suite, you might consider using TechSmith’s Camtasia, which has plenty of advanced editing tools and features.

How to trim a video on Tiktok?

To trim a video on TikTok, start by uploading or recording your video in the app. Once your video is ready, you’ll see a Trim option on the right-hand side, tap it and then slide the beginning and end markers to select the portion of the video you want to keep. Once you’ve adjusted your video, you can upload it to TikTok.

Matt Pierce

Matt Pierce is a Learning & Video Ambassador at TechSmith. In this role speaks and teaches about video creation and visual communication. A graduate of Indiana University he has ten years of experience working in learning and development with a focus on visual instruction. He has directly managed the training, user assistance, video, and other teams for TechSmith. Teach him something @piercemr

5 Easy Steps to Make a YouTube Outro

youtube video outro

Even the best YouTube video is unfinished without a quality outro.

A YouTube video outro increases watch time on your channel and can even help you get more more subscribers, extend your reach, or drive more traffic to your website.

If you’ve never made an outro for your videos, it can be hard to know where to start. Keep reading to find out everything you need to know to create effective YouTube video outros that will keep viewers engaged with your content and coming back for more!

Here’s what you’ll learn:

Easily Create Your Own YouTube Video Outros

Camtasia makes it fast and easy to create custom YouTube outros — no pro skills required! Download a free trial and get started today!

Get started free!
Camtasia user interface

What is a YouTube outro?

A YouTube outro — sometimes called the end screen or end card — is the last part of your video after the main content is done.

It’s the perfect spot for a call to action. Whether you want to point viewers to similar videos from your channel, prompt them to like the video or subscribe to your channel, post a link to your website, or all of the above, an outro gives you one last chance to engage your audience and drive action that can help grow your channel.

You make videos, so obviously you want people to see them. That’s the first step. But make your secondary goal to leverage a YouTube outro to tell your viewers what to do next.

Creating a YouTube outro or end card designed to leverage YouTube’s end screen capabilities lets viewers easily click through to a strategic, relevant next destination of your choice.

There are four types of content you can use in your end screens on YouTube, called elements. They are:

  • Video or playlist: Link to a different individual video or a YouTube playlist of multiple videos.
  • Subscribe: Link to your own channel where a viewer can click to subscribe.
  • Channel: Link to a different YouTube channel.
  • Link to approved website: Link to a website outside of YouTube.

Note: for that last one, your site must be part of the YouTube partner program and can’t contain any content that might be considered offensive or dangerous, such as pornography or malware.

Examples of YouTube outros

There are a number of ways to leverage and combine the available elements for YouTube end screens. Below are some examples.

Screenshot of YouTube outro from Sean Cannell's channel.

In the example above, YouTube creator Sean Cannell of Think Media uses the subscribe element, and two playlist or video elements. He also uses the space to share his Facebook, Twitter, and Instagram handles (though that field is not clickable) and display his company logo. Check out this outro on his YouTube channel.

YouTube outro using the link to over video element.

In this next example, our own Andy Owen uses the video element to suggest other videos viewers might be interested in. You can view this particular outro on our YouTube channel.

Screenshot of YouTube outro from Sunny Lenarduzzi's channel

In this example, YouTube marketing expert Sunny Lenarduzzi uses two different video elements in her outro to point viewers to related content, and also a subscribe element. Like the first example, she also shares her handle for Instagram and Twitter in her outro, though that box is not clickable. Watch this outro on her YouTube channel.

Easily Create Your Own YouTube Video Outros

Camtasia makes it fast and easy to create custom YouTube outros — no pro skills required! Download a free trial and get started today!

Get started free!
Camtasia user interface

YouTube outro requirements

We covered the different types of elements available on YouTube, but what are the rules and requirements for YouTube end screens?

First, your video must be at least 25 seconds long to add elements to an end screen.

As for the length of your outro, you can have your end screen elements visible for five to 20 seconds. Remember, the longer they’re visible, the more time your audience has to react and actually take the action you want them to. This is especially true if you’re using more than one kind of element.

As you think through creating your own custom outro, be mindful of the sizes of the different elements as well. Below you can view the sizing, measured in pixels. This is assuming you use a 1920 x 1080 canvas.

Example showing element sizes in relation to a full 1920 x 1080 screen for a YouTube outro end screen.

Refer to these sizes as you build your outro to your video so that everything comes together smoothly when you overlay these elements within YouTube.

Best practices for YouTube outros

Don’t be afraid to be creative with your YouTube outro! It should reflect your brand, style, and tone of voice. But, as with anything, there are still a few best practices you should follow to ensure your end screen is as effective as possible..

1. Have a goal in mind

You should create an end screen that is relevant not only to the video, but also supports a specific goal — whether that’s a goal for the particular video, a series of videos, or your channel as a whole.

Goals may include increasing watch time for your channel, getting more subscribers, or driving traffic to an external site. Whatever your goal, make sure there’s a “why” behind your approach.

2. Keep it clean and simple

Don’t throw so many elements at your viewers that they can’t focus! Keep your end screen clean and simple to prevent unnecessary distractions and to make it easy for your viewers to focus on what’s important.

3. Use consistency to help build your brand

This is true not only for your YouTube outros, but for all of your YouTube content. Use consistent colors, logos, editing styles, etc. to help your audience recognize your brand and build trust.

4. Consider your channel holistically

Even if you’re just getting started on YouTube, you can begin thinking about what kind of channel you want to build. What do you want to be known for? What story are you trying to tell?

Think about your channel holistically rather than focusing solely on individual videos to strengthen your message and your brand.

You’ll also have more relevant, related content to point your viewer to after they’ve watched your video.

How to create a YouTube outro

Now you know what outros are, the essential elements, and the rules, and best practices — let’s get you creating your own!

You don’t need a fancy animating software or professional video skills to create outro templates. TechSmith Camtasia makes it incredibly easy to create all kinds of videos and video elements, and it’s the perfect solution for creating YouTube outros.

Follow these steps to create a 20-second video that you can save as a template for your YouTube outros. The steps will also work to create any length outro — simply adjust as necessary.

Step 1: Create a new video project and select your background  

First, open Camtasia and select New Project. The default size of your new project will be 1920 x 1080. If you wish to add this outro to a video that’s a different size, so be sure to resize your new project as appropriate.

Screenshot showing width, height, and color options in project settings in Camtasia.

Then, you can select a color for your background. If you’d prefer a motion backdrop to a static, solid colored backdrop, go to Library>Motion Backgrounds. There are additional options available through a subscription to TechSmith Assets for Camtasia as well.

Step 2: Add placeholder shapes and annotations to your template

Now that the backdrop is in place, simply add a few element placeholders. This will allow you to perfect the placement now, which will save time on YouTube and keep your outros consistent. I mocked mine up in Snagit, then dragged them onto the canvas.

Screenshot showing an outro in progress in Camtasia, with element templates overlaid on a motion background.

Note that when a viewer hovers over the subscribe element, there is a rectangle that will pop out. Keep that in mind if it will bother you when something near your subscribe button gets covered up, even momentarily.

See an example below.

Step 3: Save it as a template

Once you’ve created your outro template, produce your YouTube outro as its own MP4 video and be sure to save it. Now, you can reuse it time and again by simply importing it into Camtasia and dragging it to the end of your current video project.

Step 4: Upload your video to YouTube and add the end screen elements

Now that you have your outro built out and added to the end of one of your videos, upload it to YouTube and add your end screen elements in just a few simple steps.

Step 5: Publish your YouTube video and analyze the results

Publish your video! Be sure to schedule regular check-ins to monitor your video and channel analytics. Then, make any necessary tweaks to your strategy based on your data, and continue to watch the views roll in.

More reading

If you’d like to learn more about creating YouTube videos in general, check out How to Make a YouTube Video: The Ultimate Guide. And for more information about growing your YouTube channel specifically, check out our free TechSmith Academy course Video Promotion and Growing Your Audience, which features tips from several expert YouTube creators.

Frequently Asked Questions

What is a YouTube outro?

A YouTube outro — sometimes called the end screen or end card — is the last part of your video after the main content is done.
It’s the perfect spot for a call to action. Whether you want to point viewers to similar videos from your channel, prompt them to like the video or subscribe to your channel, post a link to your website, or all of the above, an outro gives you one last chance to engage your audience and drive action that can help grow your channel.

Why should I use a YouTube outro on my video?

A YouTube outro (or end screen) allows you to better engage viewers by adding a call to action. You can point them to other videos you’ve made, prompt them to subscribe to your channel, drive traffic to your website, and more.

Is it hard to make a YouTube end screen?

Nope! You can start creating YouTube outros or end cards right now with Camtasia.

What are the requirements for a YouTube outro?

Your video must be at least 25 seconds long to add a YouTube outro. You can have your outro elements visible for up to 20 seconds.

What types of things can I add to my YouTube outro?

There are four element types you can add. They are:
1. Video or playlist: Link to a different individual video or a YouTube playlist of multiple videos.
2. Subscribe: Link to your own channel where a viewer can click to subscribe.
3. Channel: Link to a different YouTube channel.
4. Link to approved website: Link to a website outside of YouTube.

What are the best practices for YouTube end screens?

1. Have a goal.
2. Keep it clean and simple.
3. Use consistency to help your brand.
4. Consider your channel hollistically.

Ryan Knott

Ryan Knott is a Marketing Content Strategist at TechSmith, where he creates content about easy, effective, and efficient video creation, editing, and tips and tricks, as well as audio editing for creators of all kinds. He/him.

How to Grow Skills and Identify Learning Needs with Phylise Banner

How to Grow Skills and Identify Learning Needs with Phylise Banner

What is a maturity matrix and how can it help you grow your skills?

Sometimes the most effective tools are the simplest. While a name like “maturity matrix” doesn’t necessarily sound that simple, Phylise Banner explains how easy they are to use, why they’re beneficial for exposing skills gaps, and how they can motivate you to take your skills to the next level.

Phylise Banner is an innovative Learning Experience Design Consultant. Her career spans experience in instructional design and online learning. She takes a practical approach to designing learning experiences and creates inventive ways to address learning needs.

In this post, Phylise addresses how you can approach developing your skills and what practical steps you can take to work through the process.

You can watch the video on this topic at the top of this post, to listen to the podcast episode, hit play below, or read on for more…

How to approach skills development

When you start a new job or begin developing a new skill, you’re often motivated to learn quickly and advance. But as your skills become more developed, it can be harder to continue progressing.

Often, people’s skills stagnate because they don’t know what steps to take next. While we can all agree that you don’t know what you don’t know, Phylise argues that by changing your mindset, you can create a pathway.

“Putting yourself in a mindset of somebody else who does know what you don’t know, you realize that there’s probably established practices out there that you can find out about.”

You might want to climb a mountain, for example, but it feels impossible. You’re not a mountain climber and you don’t even know where to start. However, by thinking what steps a mountain climber would take, you can break your goal down into manageable steps. These steps then become a roadmap to get you from where you are to the very top of that mountain.

Phylise designed a deceptively simple tool that can help anyone plot out their pathways to developing any skill. She calls it the ‘maturity matrix’.

What is a maturity matrix?

You might have heard or even used a skills matrix before. This is where you undertake a skills assessment or consider what skills you already have and the ones you’d like in future. But this doesn’t give you a roadmap to sufficiently grow your skills.

A maturity matrix helps you define steps for how to grow or ‘mature’ your skills. It’s a tool which encourages you to consider the spectrum of your skill, where you are on it, and what you can do to progress to the next level.

“Consider what the spectrum looks like. What’s ‘okay’, ‘good’, ‘better’, or ‘best’? What attributes would be classified as ‘best’? What would be classified as ‘good’? What’s ‘good enough’? If I drew all that out or documented that in some way, shape or form, how I could use that as a roadmap?”

A completed maturity matrix becomes a skills mentor, guiding you through the steps that you’ve plotted from A to B.

There’s no wrong approach to a maturity matrix. You can be as granular or as broad as you like, and, most importantly, there’s no failure.

“When creating a maturity matrix, failure does not matter”

The maturity matrix is all about empowering yourself to progress and Phylise strongly believes in designing supportive learning practices. The matrix steers away from failure and instead praises success.

How to design your own maturity matrix

A maturity matrix isn’t as complicated as the name suggests. In fact, to design your own, all you need to start with is a basic grid. It should be at least three columns wide and at least two rows deep.

Start with a basic grid for you Maturity Matrix

The first column is where you’ll put the skills you want to develop, in the example below “Understanding processes” and “Organization”. You can put as many skills as you want in this column. These can be career-related, project specific, for personal development, or any other skill that you’d like to progress in.

Maturity Matrix example

The first row is your maturity levels. There are many ways you can choose to express these, from numbering each level 1-5, to using the good, better, best spectrum, or being more creative. We’ve chosen “roll”, “crawl”, “walk”, “run”, and “fly”.

Each level should be a progression from the last one. This is what makes the maturity matrix a pathway as you can plot your development across the grid as your skills grow.

Showing Progression in your Maturity Matrix

Finally, you need to define what you need to be able to do in that skill that’s appropriate to each level. You might find the lower levels are easier to fill in, but as you start to think further into your skill’s potential you may find it more difficult.

Phylise’s top tip is to think about a person who’s mastered this skill and what elements you’d like to replicate. Use this to continue building your skill pathway.

“There is no reason not to use the things you admire. Because the things admire are the things you want you will aspire to.”

Phylise encourages everyone not to stop at what they consider ‘best’, but to think beyond that. Use your imagination to go further than the highest level. If best to you is climbing the highest mountain in your state, then better than best could be climbing the highest mountain in the U.S.!

“Imagine what could be beyond what we consider ‘best’ – that's where innovation happens.” – Phylise Banner

Who can use a maturity matrix?

A maturity matrix can be used by anyone for any skill. Personal, professional, individual or group, there are no limitations because you design it yourself.

While our example focused on self-development, you could use a maturity matrix in place of a performance evaluation for your team. You could work with members of your team to design a maturity matrix that you’re both happy with and plot their progress annually, monthly, or however you choose to do it.

Reviewing performance in this way is much more effective than simply stating whether they’ve reached their target or not. It gives actionable steps to ensure that your team member knows what they have to do to progress. It’s more motivating for them and holds you accountable to recognizing their development when they reach that next level.

You don’t have to limit this tool to use by individuals only, you can also use it to develop teams. Phylise believes that they can help teams reach a collective goal.

“As a team building exercise, it gives us that input, it helps us grow and gel around effective practices.”

By pulling together a maturity matrix that an entire team is on board with, everyone knows what stage of the project they’re at, and what they need to do in order to progress to the next step. It works the same way as an individual matrix, but it helps keep everyone on the same page and accountable for the team’s progress.

How a maturity matrix could work for you

Phylise’s maturity matrix can help you stay motivated to achieve your skills because you design your own pathway. You can consider your learning styles, comfort zone, and any other factors that can affect your development and create a process that’s going to work for you.

Her final words of advice for using a maturity matrix and your overall approach to learning and development are never to limit what you can achieve.

“Share your insight. Trust your instincts. And use your imagination in in this exercise. Incorporate your imagination into your work. You will go far with that.”

If you enjoyed this post and want practical help with achieving more, head over to the TechSmith Academy where we share lots of free resources that can aid your skills development.

For further expert advice and tips visit TechSmith Academy on YouTube or listen to the Podcast.

Matt Pierce

Matt Pierce is a Learning & Video Ambassador at TechSmith. In this role speaks and teaches about video creation and visual communication. A graduate of Indiana University he has ten years of experience working in learning and development with a focus on visual instruction. He has directly managed the training, user assistance, video, and other teams for TechSmith. Teach him something @piercemr

How To Overcome the Challenges of Communicating Digitally With Jay Baer

How To Overcome the Challenges of Communicating Digitally With Jay Baer

Digital communication can often straddle the space between problem and solution. For example…

Problem: You’re a live speaker, but all live events have been canceled.
Solution: Pivot to virtual speaking and utilize technologies and tools to continue your career in a new way.
Problem: You’re unsure about how to transition from live speaking to virtual speaking.
Solution: Get some advice from the experts (read on to find some!).

“Once you get over your historical bias to live events, there are a lot of ways that virtual events are actually better”

TechSmith collaborated with Jay Baer to find out more about how the transition from in-person to digital affected industries with a range of expertise.

In March, we surveyed people in industries, from leadership and coaching to equality and social change. In this episode of The Visual Lounge, TechSmith’s Learning and Video Ambassador Matt Pierce sits down with Jay to discuss the survey’s findings.

Jay has been in the digital marketing industry for nearly three decades and up until the beginning of 2020, spent a lot of time traveling, giving presentations, and speaking live at events across the globe. He’s the founder of Convince & Convert, a Hall of Fame keynote speaker and emcee, an award-winning podcaster, and an author of six books.

He shares his unique insights into the live to digital shift and gives his thoughts on how industries can continue to succeed in this new space.

To listen to the podcast episode, hit play below, or read on for more…

Why different industries started to lean into digital communication

Is there an industry that hasn’t been impacted by COVID-19?

A vast number of industries quickly adapted to survive the pandemic, from the education sector, to fitness and health, to sales and marketing. More people than ever have had to find new ways of doing their job, or face losing it entirely.

Jay knows this better than anyone. He watched the community of live speakers begin to find solutions as their industry shut down almost overnight. Jay recalls his last live public speaking event as the global pandemic continued to postpone and cancel live events worldwide.

“At first, it was like, ‘oh no, I no longer have a career’. And then it was, well, maybe we could figure out a way to make this work.”

We collaborated with Jay to extend a survey to the professional speaking community via the National Speaker’s Association Facebook group. We intended to discover how they expected the pandemic to impact their careers and how they could use digital communication to adapt their approach.

Why video is the first choice for digital communication

If you’re a live speaker, video is the obvious first choice for moving your career online. Not only is it the best fit, but there’s substantial technology already available to support this.

Graph Showing Ways Presented or Shared Experience

YouTube, webinars, and live streams are the perfect platforms for speakers. In fact, 75% of those surveyed had already created a video for YouTube, and 83% had presented a live webinar or at an online meeting.

Jay notes that he’s seen the most change on social media platforms. The number of live streams or short video posts on socials has skyrocketed since March, and Jay believes these are great for your development as a video presenter and creator – if you’re not afraid of the technology.

“This is a nice way to dimensionalize your expertise, just to create a two-minute video for LinkedIn or what have you. And there’s been more and more interest in that. Some people do it better than others. Some people do it very randomly, like a couple of times a year. And then there are lots of speakers who are doing daily videos…it just depends on your own embrace of technology or your fear of technology.”

The challenges with switching to video

There’s a lot of preparation involved in switching your career from an in-person one to a virtual one. Many live speakers’ concern was that they didn’t have the correct technology available to make the switch efficiently and felt unprepared for the change.

Jay firmly stresses that speakers already have the tools in their arsenal to make great videos. They have the speaking and communication skills necessary to create compelling content, and it’s possible to become very successful online recording videos just using your smartphone camera.

However, many speakers have turned to technologies to help produce great content or supply their services in innovative ways. Learning how to use tools like Zoom, Camtasia, and other software, or AV equipment such as lighting and cameras, is not an easy job but has become increasingly necessary.

To get comfortable virtually is like learning a language. Right? It’s like, okay, here’s the deal: from now on, you make zero dollars until you learn Portuguese. You might be like, I don’t want to learn Portuguese. It’s really, really hard to learn. But you’re like, well, I don’t make any money until I learn Portuguese. So, I better suck it up and figure it out. And that’s sort of the pattern that has occurred.”

Jay is convinced that anyone can learn to leverage these technologies. There are many tools available online to help you learn and, while figuring it all out might be complicated at first, the more comfortable you become, the easier it gets.

Record professional videos with Camtasia

Camtasia’s features make video recording and editing super easy

Download Free Trial
Camtasia user interface

How to connect with your audience digitally

One of the greatest challenges for those shifting to virtual communication is retaining the same level of connection.

Graph Showing the Biggest Challenge to Connecting with Audience Digitally

But interestingly, Jay suggests that there’s potential for more connection virtually than in-person.

He believes that the keyboard empowers your audience to be more vocal than ever before. Using simple tactics like polls or asking people to drop into the chat where they’re watching from gets them comfortable with their keyboard, so when it comes to Q&A time, people are more likely to ask a question.

This is a big difference to a live event, where people might find it too intimidating to raise their hand and ask a question in front of a hall of people. It also comes with the added bonus of the speaker being able to choose what questions to answer, based on their quality.

I can pick questions that I know are going to be valuable to people and I can sequence the questions in real time for maximum audience benefit.”

Some webinar or video conferencing software even adds the audience responses to the attendee record which you can return to at a later date. This can be great for collecting opportunities that you wouldn’t otherwise have access to in a live event.

Jay’s advice for video creators

Jay stresses that if you want to be a content creator, then the important thing is to create consistently excellent content.

There’s a fine point between creating great content and creating so much that your quality starts to suffer. Jay believes that you should focus on producing consistently high-quality content above all else and prioritize on over-delivering.

“Create content as often as you can, as long as it's awesome”

However, if your quality begins to drop, then it’s time to reconsider how often you’re creating content. Jay’s top piece of advice is to keep an eye on your analytics to see how your audience interact with your content. If some negative trends appear, it might be because you’re prioritizing quantity over quality.

A big problem Jay sees with content creators is their lack of patience. Creating video isn’t a get-rich-quick or a get-known-quick scheme. It can take years of content to build a following or get recognized, so Jay’s final piece of advice is to stick with it.

“There’s very, very few instant successes, especially with online content, as much competition as there is. So, what I like to say is, if you’re like, ‘Hey, I should start making videos?’, yes, you should. But if you’re not willing to stick this out for six months, you’re likely to be disappointed.”

If you’re using video to communicate or want to learn more about how you can level-up your digital skills, check out the courses and resources at the TechSmith Academy.

For more expert advice and tips visit TechSmith Academy on YouTube or listen to the Podcast.

Record professional videos with Camtasia

Camtasia’s features make video recording and editing super easy

Download Free Trial
Camtasia user interface

Matt Pierce

Matt Pierce is a Learning & Video Ambassador at TechSmith. In this role speaks and teaches about video creation and visual communication. A graduate of Indiana University he has ten years of experience working in learning and development with a focus on visual instruction. He has directly managed the training, user assistance, video, and other teams for TechSmith. Teach him something @piercemr

Why, When, and How of Simplified User Interfaces (SUI) with Anton Bollen

Why, When, & How of Simplified User Interfaces (SUI) with Anton Bollen

Can simplified user interfaces (SUI) revolutionize your visual instructions?

You may not have heard of simplified user interfaces (otherwise known as SUI) before, but there’s a good chance you’ll have seen them. Companies like Dropbox, Microsoft, Adobe, and Google use SUI graphics to help their audience navigate their software.

But what are SUI graphics, and how can they improve your users’ experience? Instructional content and SUI expert, Anton Bollen dives deep into the benefits of giving your screenshots the SUI treatment.

Anton started his career as an intern at TechSmith, and now he’s TechSmith’s European Customer and Market Strategist. He’s also a talented tutorial video creator thanks to his concise, clear nature and his eye for details.

In this post, Anton shares why you should consider SUI graphics over traditional screenshots, when’s the perfect opportunity to use them, and how to create effective SUI graphics.

You can watch the video on this topic at the top of this post, to listen to the podcast episode, hit play below, or read on for more…

What are simplified user interface (SUI) graphics?

Anton’s definition of simplified user interface graphics or simplified user interface (SUI) is that they’re a design treatment for screenshots. The design reduces contextually unimportant information to help the user focus on what’s necessary.

SUI graphics often replace less relevant information with simple shapes to direct the user’s eye to the key information. This means that a SUI screenshot is not an accurate software depiction but instead represents the software to guide users through specific instructions.

“For us, as content creators, it’s a fantastic technique to guide the attention of the learner or the viewer on what really matters.”

The clue is in the name – simplified user interfaces are all about instructing people better by simplifying. 

When to use SUI

SUI graphics are a key feature of instructional design and show clear pathways to completing a task. 

In the example below, there are two screenshots. The left-side image is an original screenshot, but the right-side image uses SUI graphics to remove irrelevant features. Both illustrate that the user must click ‘File’, then ‘Connect Mobile Device’, but which image communicates the instructions more clearly?

Example screenshot before and after removing irrelevant features

The right-side image reduced and removed the less relevant information, such as the different menu entries, hotkeys, and the main menu bar entries. This reduces the visual noise that a screenshot presents to a user and focuses only on the important parts.

There are many situations where it’s appropriate to use SUI graphics, for example, training, marketing, and user onboarding. Anton highlights general user onboarding as the perfect place to use SUI graphics because they clearly introduce new features.

“Very often, new features are documented or explained with simplified animation or graphics. They make perfect sense in that situation because the user is not familiar with all the details of that application or that feature.”

Why choose simplified user interfaces over screenshots

Anton believes that one of the most significant challenges learners face with screenshots is the amount of information.

A screenshot can very easily contain a lot of visual noise

Anton defines visual noise as less relevant information or distracting graphics. If the software is complex, it can be difficult to demonstrate exactly where the user needs to focus.

“New users were getting too caught on unnecessary details, which was taking away from their ability to just focus on the key message.”

As you become more familiar with software, you learn to filter out the parts you don’t use. However, a new interface’s design can overwhelm new users, as they aren’t sure what will or won’t be necessary to help complete their tasks. 

Some visual instructions add design tools such as arrows, boxes, or highlighted text to draw the user’s attention to where it needs to be. But SUI graphics remove the less important information, leaving behind only the essential parts.

According to Anton, one of the downsides to using SUI graphics is pushback from unreceptive users. He suggests that you should do some testing with your audience to learn whether they prefer SUI graphics or traditional screenshots before you begin creating them.

How simplified user interfaces can break down language barriers

Using screenshots is a fantastic way to help someone understand a piece of software. However, if that software is updated or translated into a different language, then the instructional content will need updating.

“Unfortunately, some companies counter this by reducing the number of visuals they use to document their services, which I really dislike. I think we are all visual people, and visuals really help with the learning and understanding of processes and information, so taking that away is not the solution.”

Anton is passionate about using SUI graphics for localizing your instructional content. He sees a lot of potential for optimizing translation workflows and expanding your reach into other markets using SUI graphics.

Anton stresses that by designing SUI graphics without any text and supplying text instructions in a caption, you can use these same graphics for any language you support. These are far easier to update and more versatile to use than a traditional screenshot.

How to create a simplified user interface graphic

Creating a SUI graphic takes more time than taking a simple screenshot, but there are ways to speed up and simplify the process.

There is software available to empower you with the tools to create great SUI graphics. We’re going to demonstrate how to create a SUI graphic using Snagit.

Screenshot for use in Snagit

First, you need to reduce the complexity of the screenshot. You can do this by removing elements that aren’t important. Anton suggests removing unnecessary hotkeys, plugin icons, and extra text.

To do this using Snagit, use the ‘Selection’ tool with ‘Background Fill’ set to ‘Auto-Fill’, draw a box around what you want to remove, and hit delete.

Example of using 'Background Fill' in Snagit

Next, Anton advises simplifying your screenshot. This is where you can blur out unnecessary menu items by choosing the ‘Simplify’ tool and turning on the ‘Auto Simplify’ feature.

You can change the colors and edit the simplification using the ‘Move’ tool to design your SUI graphic in a way that you’re happy with.

Example of blurred out information using Snagit

Simplifying your graphic is the most important part of this process. You need to carefully select what to keep and what to remove to create enough context for your users.

Without the right amount of context, users may get confused and struggle to effectively utilize your instructional content.

Context is key when creating any visual instructions, so it’s vital to leave in visual anchor points so the learner knows what they’re looking at. These could be stand-out buttons, color blocks, or visually dominant menu items. Keep these anchor points the same to help your users visually navigate your SUI graphic.

You should test your graphics by seeing if people can follow your instructions or if your SUI elements are interfering. Anton notes that one of the problems with SUI graphics is that they can work against simplifying the problem with too many distracting graphics.

How to take simplified user interfaces further

Anton states that it is possible to create SUI videos, but it requires much more work. The technology isn’t as advanced as it is for screenshots, so to create effective SUI videos, you need to create animations almost from scratch. 

He believes that SUI videos can be incredibly useful in guiding a user but advises ensuring that the return on investment is there before you take the time to develop them. Anton’s final words of advice are to weigh up the benefits of putting in the extra effort to create SUI graphics and what they could achieve for you.

“It’s going to look nicer, it’s going to make a better first impression, [SUI graphics] are going to be more successful, I don’t have to make as many updates, and I can maybe use them in more languages. You do have to think about it a little bit, but nevertheless, I think a lot of cases, it’s definitely worth it to go that extra small mile.”

From onboarding more effectively to limitlessly localizing, SUI’s benefits could be great for your audience. So, consider leveling-up your next screenshots with the SUI treatment. To learn more about creating better visual instructions, check out the range of courses and resources available at the TechSmith Academy.

Matt Pierce

Matt Pierce is a Learning & Video Ambassador at TechSmith. In this role speaks and teaches about video creation and visual communication. A graduate of Indiana University he has ten years of experience working in learning and development with a focus on visual instruction. He has directly managed the training, user assistance, video, and other teams for TechSmith. Teach him something @piercemr

How to Write Helpful Help Content with Michele Wiedemer

How To Write Helpful Help Content

What is help content?

You don’t have to be a technical writer to create content that helps people use your product. Your content needs to help your customers help themselves.

Customer education content helps customers to solve problems and perform the tasks they need. Providing this content is an essential ingredient for ensuring the success of your product with your customers.

There are ways to create effective help resources, and in this post, Michele Wiedemer shares her twenty years of knowledge for creating, evaluating, and improving your customer-facing help content.


You can watch the video on this topic at the top of this post, to listen to the podcast episode, hit play below, or read on for more…

What is customer education?

Customer education is helping an end-user be successful with your product. Michele creates helpful content that empowers users with the skills and motivation to use a product to complete a task.

Educating customers so that they can succeed is the core of any helpful content. But Michele knows that help content has the potential to be more than a quick-lookup document.

“I’m super interested in that intersection of helpful content and training. How can you have this baseline for other kinds of material, be it training or marketing or even during the sales process? How can you teach people what they need to know?”

Should everyone know how to write help content?

Written communication skills are important, and Michele breaks down the basics of improving these in her TechSmith Academy course, Writing Helpful Help.

But when it comes to help content, it’s essential to prioritize both how you write and who you’re writing for. Being empathetic to what the customer needs is how you’re going to create helpful content.

By designing and creating help content to serve only the end-user, it will be more effective. It needs to be a document or tool that they can process easily and ultimately learn from.

“That’s the one thing that I really want people to take from this, is being empathetic.”

The mistake people make when creating customer education content

Writing too much is a common error people make when creating their help content.

It might seem silly to cut an entire topic down to two sentences, but less is more with help content. Breaking things down and simplifying processes is the best way to ensure that your users can follow what your content is trying to teach them.

If you include too much information, it can be overwhelming for an end-user to find the answer to their question or learn a new process.

Michele’s advice is to be critical and selective about the information you include. Start by drawing out the key points and putting them in an order that’s easy to process. Then consider if you need any of the extra information you’ve collected. Perhaps you don’t need to include it at all.

It is much harder to create shorter content than it is to create longer content. However, Michele has one trick that helps her eliminate unnecessary information.

“One of the things that really helped me a lot is, once I started making tutorial videos, and doing my own narration, and I would read things out loud. And once you read things out loud you start realizing, wow, I don’t need that many words. I can say this way faster.”

How to decide what type of help content to create

Some examples of help content include training guides, instructional videos, tutorials, and even eLearning. Any content that helps a user achieve a task is customer education content, but how do you choose which type of content to create?

Michele’s best advice is to start by defining your goal. Before you make any content decisions, learn what you want your content to help users achieve first.

“If you get really clear about what you’re trying to accomplish, it can be easier to sort of figure out which is the right product that you need.”

Another great way to decide what type of content to create is to talk to the users. Find out what types of content they’d prefer to use or which content types would help them solve their problems. After all, customer education content is only helpful if the customers are utilizing it.

How to write help content

Once you know the high-level information, such as your goal, and your audience, you can begin to write your customer education content. Michele has a three-step process for creating her content and explains it in detail in her Writing Helpful Help TechSmith Academy course.

The first step is to decide what to write. This includes choosing the topic that you need to cover and everything you’re going to include. Michele recommends breaking the information down into “chunks” starting with the title.

The first chunk should be an action-based title relating to a problem or a pain-point that the user has. The next chunk is the “What’s in it for me?” statement, which tells readers what the content will help them achieve.

Other chunks include using landmarks to help users navigate the content, actionable steps, and screenshots or images that enhance the reader’s experience and simplify the process.

The second step is to make your content easy to read in a design sense. Your content needs to look good and be scannable. Users need to be able to find information quickly by scanning through the document.

You can help achieve this by using numbered lists, bullets, bold text where relevant, and visual markers such as images. These visuals help users locate what they need without getting bogged down in the text.

The third step is to make your content easy to find. Consider how users will locate your content and make it easy for them to get there.

If your reader can't find it, it might as well not exist

Whether that means optimizing it for search engines or giving it a clear title so it can stand out in a folder of other helpful documents, your help content won’t help anyone if they can’t access it easily.

If your platform allows you to, Michele advocates using categories to sort and display your help content. She stresses that you should organize your content to make logical sense so people know how to look for it.

Michele also recommends using hyperlinks to control that feeling of going down an informational rabbit hole. By putting hyperlinks into a document and clearly labeling them, users can move between information in a measured way to find out more.

“A really powerful way to use hyperlinks is to say, I’m only talking about this one thing right here, here are all these other things that are related.”

The importance of empathy in helpful help content

If you make good content, it's going to be good for the search engines and the humans who are reading it

Michele’s final thoughts are about what makes help content effective. Her words of advice are to make sure that you create help content from a place of empathy.

You don’t need to wow users with special, expensive software. That’s not what makes good helpful content. The most helpful help content uses software that gets the message across effectively, whether it’s a text document or a screen capture video.

And while it’s important to SEO your content to help search engines find it, and it can be beneficial to give the user more context using screenshots, all of these chunks should combine to create a helpful user experience.

So, when you create your help content, put yourself in the user’s shoes, and help your customers help themselves.

To find out more about creating better customer education content, check out Michele’s course, Writing Helpful Help, at the TechSmith Academy: https://academy.techsmith.com

Matt Pierce

Matt Pierce is a Learning & Video Ambassador at TechSmith. In this role speaks and teaches about video creation and visual communication. A graduate of Indiana University he has ten years of experience working in learning and development with a focus on visual instruction. He has directly managed the training, user assistance, video, and other teams for TechSmith. Teach him something @piercemr

How to Make a Split Screen Video (3 Simple Steps)

Split screen video

When you think of a split screen video, a lot of things can come to mind. 

One example I always think of is the opening scene of The Brady Bunch. 

What is a split screen video?

A split screen simply places more than one shot into the frame; whether it’s your subject or some b-roll, this effect can produce a wide range of results.

Even though you might not be creating a television intro, split screen is a great technique to show cause-and-effect or illustrate how one thing relates to another.  

There are many products and tools out there that can help you make a split screen video, but we prefer Camtasia. It has a simple timeline and canvas so that you can quickly make a split screen video with as many or as few items as you’d like. 

If you don’t already have Camtasia, click the button below to download a free trial.

Create your own split screen videos!

Looking to make your own split screen videos? Download a free trial of Camtasia and get started today!

Download

Now, I’ll walk you through the exact process used to create a split screen video with Camtasia.

Let’s get started.

Step 1: Import your video clips

The first thing you’ll want to do is load all of your video footage into Camtasia.

Personally, I like to drag and drop my clips from my computer right into Camtasia. But if you prefer, you can right-click the media bin and import your clips that way.

To import multiple clips, you can hold the CTRL button while clicking on each individual video to import them all at the same time.

I want my split screen to show three separate videos.

After importing, drag and drop the video clips you want to use from the media bin on to the project timeline. Use a separate track for each video clip.

Step 2: Crop, resize, and move

Next, You will need to resize, move, and crop your videos so that everything fits together nicely on a single screen.

Start with the media on the top track, so you can see the changes you make as you crop and resize. Think of the tracks like a stack of pictures; the preview pane will display the uppermost track.

Select Crop. Remove any unwanted parts of the frame by dragging the edge.

To resize or move the video frame, select the Edit icon and toggle the edges of the frame to resize, or click and drag to move.

Step 3: Edit audio

Once you’ve cropped, resized, and rearranged, the last thing you might need to edit is your audio. 

Your desired outcome will determine whether or not this step is necessary. For this example, I only want to use the audio from one of the videos, so I’ll delete it from the other two clips.

To remove audio from a clip in Camtasia, right-click on the media and select Separate Audio and Video.

Then, select the track with the audio, right-click, and choose Delete.

That’s pretty much it!  You can now make a split screen video with just a few steps. 

Bonus step: Produce and share

Don’t forget to produce and share your project. This will finalize your video file. You can upload the finished video to a hosting site, such as YouTube, Vimeo, or Screencast.com, or save it locally as an MP4.

For a great video walkthrough of this process, watch the tutorial below!

Ready to make your own split screen video? Download a free trial of Camtasia and get started today!

Allison Boatman

Allison Boatman is a member of the Marketing Team at TechSmith.
Follow her on Twitter @allisonboats

She can often be found aimlessly wandering around local craft stores.
Personal motto: "Work hard, stay humble."
Favorites: Alaskan Malamutes, Iceland, and 90's pop culture.

How To Get Over Your Fear And Press The Damn Button with Brian Fanzo

How To Get Over Your Fear And Press The Damn Button with Brian Fanzo

Is fear holding you back from realizing your full potential?

Video is one of the best ways to reach an audience, but it’s also one of the most intimidating content forms to create. If fear is holding you back, maybe you just need to “press the damn button.”

It’s not easy to get started with video. It might feel daunting to tackle new technology, platforms, and audiences, especially if you have high expectations (or believe that your audience does). But there are many reasons why that shouldn’t stop you from creating video content.

If anyone has the best advice for creating video, it’s a man with nearly 4,000 live video recordings under his belt. Brian Fanzo has been sharing live videos since 2013 and is an entrepreneur and keynote speaker. In this post, he shares the best lessons he’s learned to create video, from how to get started to how to keep evolving.

You can watch the video on this topic at the top of this post, to listen to the podcast episode, hit play below, or read on for more…

What does it mean to “press the button”?

The phrase pressing the button might originate from hitting the record button on a camera, but it doesn’t necessarily mean that that’s all it applies to.

Brian stressed that his signature phrase, “press the button” means embracing something that you want to do to better yourself or your businesses – and sharing that with the world.

This sharing part is the really vital component of pressing the button because without shouting about how great your work is, how will anyone know?

With so much information, news, and digital content online, if you don’t make a consistent effort to put your messages out into the world, they simply won’t get found.

Brian believes that it’s not enough to let your work do the talking for you anymore. He believes that if you’re doing great work, you need to press the button and get your messages out there.

Why create live video?

Of all the mediums, why should you put your efforts into creating video?

Brian believes that anyone can create video, and he stated that it can help you build relationships, collaborate, and improve your job security as you diversify your skills. 

He even thinks that it can take your brand to the next level. 

“My business and my personal life would not be where it is today if it wasn’t for video. And that’s someone that six years ago would have never done any video… I want great people that are doing great things to put their messages out, and I believe the number one most intimate, most personalized way to do that in any digital medium is video.”

How to record videos with confidence

How To Get Over Your Fear And Press The Damn Button with Brian Fanzo

Creating video isn’t for everyone and being in front of the camera can be extremely intimidating. However, the key to overcoming this isn’t necessarily to become comfortable as a video presenter, but instead, accept the discomfort.

Brian states that these two golden rules are the best way to become comfortable with the difficulties of creating video content.

1. Perfection is a fairy tale

It’s impossible to make a “perfect” video, which is especially important to remember when creating live video.

If your goal is to be perfect, you’ll never conquer the medium of video.

2. Control is an illusion

You can never control all of the variables. The only thing you can control is yourself and how you respond and adapt to the situation.

So, if you’ve never made a video before, don’t start creating a video with lots of variables. It’s not a realistic goal to create long-form videos with high production value just because that’s what your audience prefers. Especially if you’ve never made a video before. Start by creating a video you’re comfortable with first.

However, Brian stressed that it’s important to continue evolving.

“I think that idea of doing videos you’re comfortable with is great advice, but it doesn’t move us forward. What I actually believe is to try doing different forms of video, all different kinds, in ways that make you comfortable. And then lean into what works.”

The ‘Rule of Five’ 

When it comes to planning your speech, Brian’s top piece of advice is to plan, but plan loosely.

He uses a ‘Rule of Five’ ­– five phrases short enough to put on a sticky note, comprising of three things the audience needs to take away from the video, one relevant story, and one funny anecdote.  

While this might not work for everyone, discovering how you prefer to make videos will not only make you more comfortable creating them but can even streamline the process for future videos. 

How to adapt when video evolves

Whether it’s a new piece of equipment or a new platform, you have to be ready to adapt to change.

Brian calls his strategy of adapting the “push and pull” method. For example, if he starts using a new piece of camera equipment, he will see how it affects his existing setup. It might change how he has to produce his audio, so he then has to “push and pull” different factors to find the point at which his new equipment can achieve what he wants.

This open-minded, trial, and error approach is how Brian says the best video creators evolve their style.

“Those who become consistent with video, they realize that you’re going to change technology, change software, change gear, change your style, but it has to continually evolve. The key is figuring out how to set yourself up for success on the way each time.”

Why you should utilize different platforms

Every content creator needs to be strategic with the platforms they create for, even if their audience isn’t there.

Video is the number one vehicle for delivering trust, according to Brian. He believes that by paying attention to different social networks and digital platforms, you can access new ways of building, maintaining, or scaling trust. 

Brian said that developing social media platforms like TikTok and LinkedIn stories inspired him to create his business content differently because people who influence his audience could be on that platform.

The concept of being present across many platforms also builds into his mantra of “pressing the button” on new experiences and refining what format and style is right for you.

Why you should (or shouldn’t) find your niche

Brian’s final words of advice are to manage your audience’s expectations.

Once you’ve found what platform and video format works for you, you might consider niching down into a topic that suits you and your audience.

Although Brian thinks that doubling down into a niche is a great way to keep your audience engaged with your content, he is also the self-proclaimed “CEO Team No Niche”. He warns that you may confuse your audience by not having a niche, so it’s important to keep them engaged by showing who you are rather than what you do. 

Whichever team you choose, remember to be consistent. Create content within your niche or your personal brand to keep your audience coming back to your video content time and time again.

For more expert tips and advice, and to learn more about creating confident video content, visit the TechSmith Academy, YouTube or listen to the Podcast.

Record professional videos with Camtasia

Camtasia’s features make video recording and editing super easy

Download Free Trial
Camtasia user interface

Matt Pierce

Matt Pierce is a Learning & Video Ambassador at TechSmith. In this role speaks and teaches about video creation and visual communication. A graduate of Indiana University he has ten years of experience working in learning and development with a focus on visual instruction. He has directly managed the training, user assistance, video, and other teams for TechSmith. Teach him something @piercemr

Why Viewers Start (and Stop) Watching Videos

Please can you check the following for

With so much video content online, how do you get viewers to watch your videos? And once you’ve won that battle, how do you keep them watching to the end?

If you’ve ever seen watch rates plummet and wondered why, or if your videos are struggling to get traffic, brushing up on your video consumer behavior knowledge might help you find some solutions to your video-watching problems.

Here’s how understanding video-viewer behavior can help you create more attractive videos that keep people watching longer.

At TechSmith, we’ve been collecting data about why people stop and start watching YouTube videos for nearly a decade. We’ve used this information to create a free guide – “Video Viewer Habits, Trends, and Statistics You Need to Know,” to help you understand where viewers find value in a video, and what makes them go elsewhere. 

This study collected data regarding informational and instructional videos, but the information could apply to other video types. The findings from this study have helped us understand and provide information about how viewers consume video, from finding the right content to the factors that make them stop watching.

[You can watch the video on this topic at the top of this post, to listen to the podcast episode, hit play below, or read on for more…]

Before you find out how to stop making videos that viewers don’t finish, you need to have viewers. How do you get viewers? You have to help them find your videos.

How viewers find videos

Why Viewers Start and Stop Watching Videos

According to our study, most people (nearly half of those asked) find video content through a search engine. The majority of people find that when they have a problem or aren’t sure how to do something, their first instinct is to “Google it.”

However, if you’re a visual learner or are looking for something easier to digest in video format (for example, how to fix a sink), you might turn to a video website such as YouTube, first. 

It’s no secret that YouTube is the world’s second-largest search engine, and its owner, Google, will even return snippets of YouTube clips that could help answer your problem. 

Video content is very popular with online users, especially within the instructional and informational content space, but it means that there’s tough competition. 

The videos that a search engine will show viewers are mostly chosen dependent on the viewer’s search terms, search history, and how the videos have been search engine optimized. So, if you want your video to appear as an option, you must do keyword research to find the best search terms and optimize your video for them.

To put it simply: if viewers can find your video, there’s a much better chance of them watching it.

How viewers choose videos

Reasons for Watching Videos

In our study, over 60% of people said that their top reason for watching a video was because “The title and description were interesting/intriguing.”

Suppose you consider that the title and description are where SEO keywords appear. In that case, there’s a good chance that people found these videos interesting because the title and description had included the exact terms that they had searched for.

Titles and descriptions should make it obvious who the video is for and what problems it solves. For example, if you’ve made an instructional video about “how to make the best oat-milk cappuccino,” you need to include this information in the video title, thumbnail, and description. However, if you’ve named the same video using general terms, for example, “how to make coffee,” then at best, you might get some confused viewers, and at worst, no viewers at all. 

There is a lot of competition online, with over 500 hours of new video content uploaded to YouTube every minute. The more you can make your video relate to someone’s exact problem, the better chances you have of someone choosing to watch your video.

The second top reason for choosing a video was that “The video length was acceptable.” While “acceptable” is a subjective term, our study found that most viewers preferred their instructional video length between 3-4 minutes and 5-6 minutes long.

Preferred Length of Videos

It is important to note that these video lengths aren’t suitable for all videos. Depending on your content, you might need to create a far longer or shorter video to achieve the goal you’ve set for your instructional video.

Why viewers stop watching videos

Why Viewers Start and Stop Watching Videos

Once you’ve attracted viewers to your videos, how do you make sure they keep watching? First, you need to know why they stop.

The top reason viewers stop a video is that they weren’t getting the information they expected. 

Why Viewers Stop a Video

If you’re a viewer looking for how to make an oat-milk cappuccino, and the video you’ve chosen starts talking about how to make an almond-milk mocha, you’ll probably stop the video and return to your search to find a more relevant video. 

It’s important to be clear about what exactly is in your video, or else you may attract the wrong viewers who won’t find any value in your content and won’t stick around. While you might get an influx of initial viewers, the view rate will steeply decline once people realize that this isn’t the correct video for them.

The other common cause of stopping a video is competition for the viewer’s attention. Most people are now so busy they’re constantly being distracted, whether it’s by screen notifications, other people, or even a short attention span, so your video needs to work hard to keep the viewer’s attention for as long as possible.

The factors that keep viewers watching

Why Viewers Start and Stop Watching Videos

The two main reasons people keep watching a video are a genuine interest in a topic and relatable content.

If your video has been correctly search engine optimized, the viewers who find and watch your video should be genuinely interested in it. It’s the perfect match of keyword and SEO that’s where viewers will find value in your content, and that value will keep them engaged throughout the video.

If you can relate to your viewers’ needs and pain points, they’re more likely to continue to be interested in what you have to say. You don’t have to be the world’s best professional speaker, but if you can communicate clearly and effectively to another person, you’ll be more likable and relatable. 

While having a professional style in your video is also considered relevant, this doesn’t mean that your videos have to be Hollywood-quality. Your videos can still be professional and successful without being “perfect”. Professional could mean how you address your audience, even if you’re recording through your smartphone.

Investing in good quality technology will also help keep your viewers watching. Lousy quality audio is a big no-no, so invest in a microphone, and from there, you can invest in lights or a camera, but if you’re making screen recordings, we strongly advise investing in audio first.

The common elements that good instructional videos share

Our research study asked video viewers to send in examples of what they believed were good instructional or informational videos so we could research what common elements they all share. 

Why Viewers Start and Stop Watching Videos

It’s beneficial to know that these elements can make instructional or informational videos great for viewers. However, you don’t need to use all of these to make a successful video. Be selective when using these elements. Your videos will be more successful if you use features that work for your audience and only those that make sense for your video.

Why Viewers Start and Stop Watching Videos

Ultimately, a successful informational or instructional video is one that helps its audience achieve something. Think about what your audience needs by considering these final four things when creating your video.

Relevance is key

Your video must be relevant to your audience. If your video isn’t relevant to the viewer, they won’t start to watch it, let alone finish watching it.

Make it good enough

Informational and instructional videos don’t have to be perfect to help a viewer. They only have to help. As long as your video can do what you want it to do, then it’s successful.

Focus on audio and visuals

Video is all about audio and visual, so make sure that both are clear, engaging, and have a purposeful place in your video. Real-world context can be a great addition to your videos, but it’s unnecessary to shoot it on an impressive, expensive camera. If you want to include real-world footage, try shooting it on your smartphone or webcam first, and see if it works.

Connect with your audience 

Consider what your audience will and won’t want to see in your video. It’ll help you eliminate irrelevant content and keep your audience engaged throughout the video. By keeping your audience top of mind during the video creation process, you’re setting it up for success. 

How to know if your video is a success

Think about what you consider a successful viewing. Is it a viewer who watches 100% of the video? What about 90%? Is it a viewer who found the answer to their problem in your video, but only watched the first 5%?

You have to keep in mind that you’re not creating videos for yourself. You make videos to help your audience, and if that’s what they do, then the job is done! Vanity metrics might look impressive, but if you’ve helped someone achieve what they wanted, that’s what makes your video a success.

Learn more about video viewer preferences in our Video Viewer Habits guide, available as a free download. You can also discover how to create better videos that people won’t want to stop watching at the TechSmith Academy.

For more expert advice and tips visit TechSmith Academy on YouTube or listen to the Podcast.

Matt Pierce

Matt Pierce is a Learning & Video Ambassador at TechSmith. In this role speaks and teaches about video creation and visual communication. A graduate of Indiana University he has ten years of experience working in learning and development with a focus on visual instruction. He has directly managed the training, user assistance, video, and other teams for TechSmith. Teach him something @piercemr